
Key points:
- Default WordPress admin interfaces slow teams down with cluttered menus, unstructured content management, and generic layouts that require extensive training and support.
- Transform your workflow efficiency with organized dashboards, custom menus, and role-based permissions that match how your team actually works.
- Create professional client experiences through structured content management, branded interfaces, and customized login pages that reflect your agency’s standards.
Have you ever logged into WordPress and thought, “There has to be a better way to organize all this?”
The default WordPress admin dashboard works fine, but for anyone managing multiple sites or working with clients, going beyond basic settings creates a premium client experience that makes your work stand out.
The good news is WordPress offers customization options that most users never discover. From streamlining cluttered menus to creating branded login pages, the right admin customizations can transform WordPress from a basic content management system into a tailored platform that works exactly the way you need it to.
This guide breaks down the most useful WordPress admin customizations you can start using today, including:
- Cleaning up and reorganizing your dashboard for maximum efficiency.
- Creating intuitive content interfaces with custom fields.
- Designing a branded admin experience with custom colors and themes.
- Building professional login pages that impress clients.
Why customize your WordPress admin interface?
Here’s what a well-customized WordPress admin interface can do for your business:
Create a premium client experience
When clients log in to their WordPress site, they shouldn’t feel overwhelmed. A customized admin interface shows them exactly what they need – nothing more, nothing less. This means fewer support questions, happier clients, and a dashboard that reflects the quality of your work.
Boost team productivity
Managing multiple WordPress sites becomes much easier if your admin layouts stay consistent. When your team knows exactly where to find everything they need – no matter which site they’re working on – they’ll spend less time clicking around and more time getting things done. Plus, with custom dashboards tailored to each team member’s role, everyone can focus on what matters to them without wading through options they’ll never use.
Improve workflow efficiency
By organizing the admin interface around your actual workflow, you can eliminate unnecessary clicks and reduce the time spent hunting for features. This approach helps deliver projects faster and maintain them more efficiently, which is especially valuable when managing multiple WordPress installations.
Start customizing your WordPress admin dashboard in 4 steps
1. Basic dashboard and menu customization
The typical WordPress dashboard often looks like it needs a Marie Kondo intervention, packed with widgets and menu items that definitely don’t spark joy. But don’t worry – we’re about to clean things up and make your workspace more efficient.
Declutter your dashboard widgets
You’ve probably noticed that every WordPress installation comes with several default dashboard widgets. While they’re helpful for some users, they might not all be relevant to your work. Here’s how to take control:
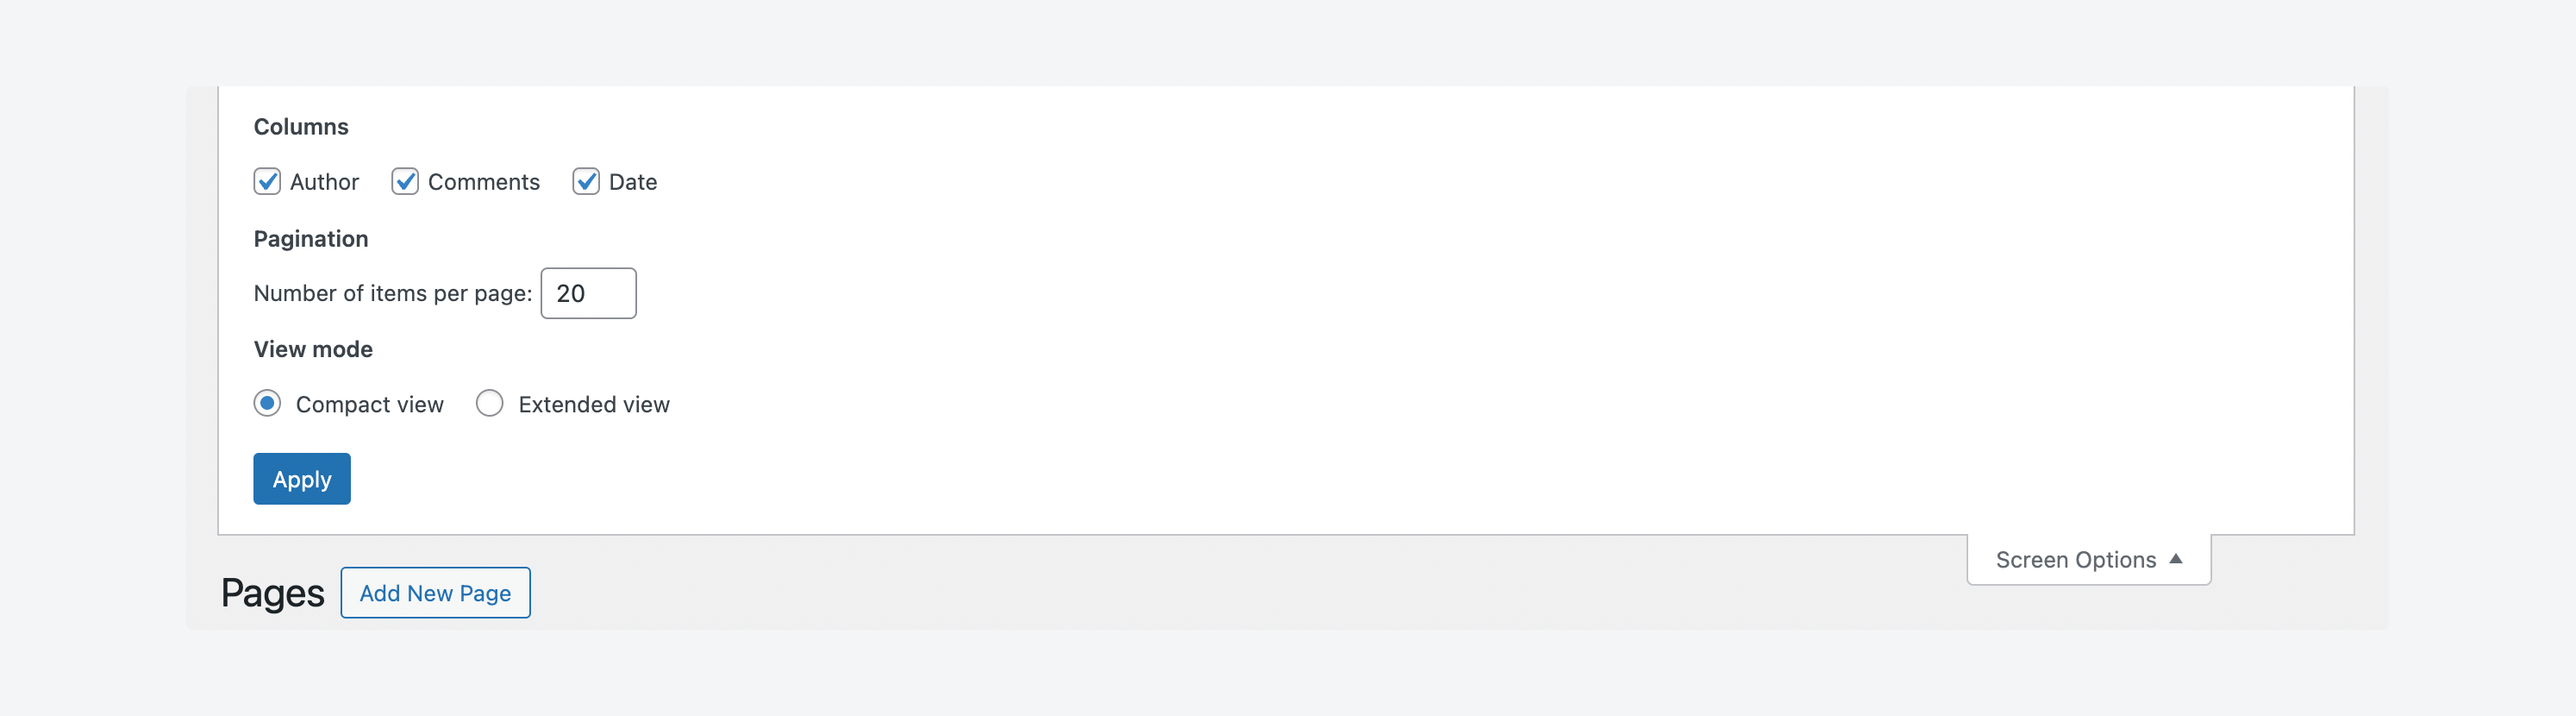
- Click the Screen Options tab at the top of your dashboard.

- Uncheck any screen elements you don’t need.

- Repeat this process in other admin areas like Posts, Pages, and Media.
Organize your admin menu
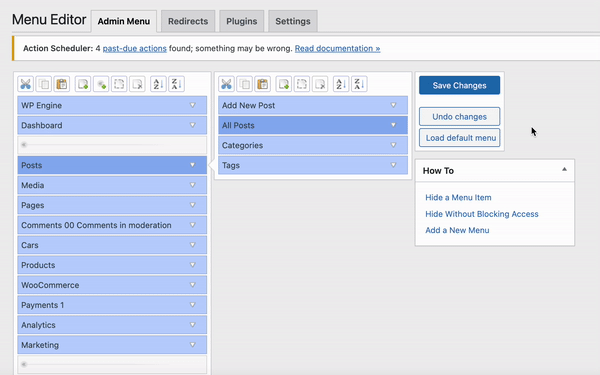
The admin menu is your navigation hub, so it should reflect how you actually work. While you can modify WordPress files directly, using Admin Menu Editor offers an easier solution. This tool lets you:
- Rename menu items: Navigate to Settings > Menu Editor and click any menu item you want to modify. Simply edit the “Menu Text” field with your preferred name and save your changes. This helps align WordPress terminology with your team’s language.
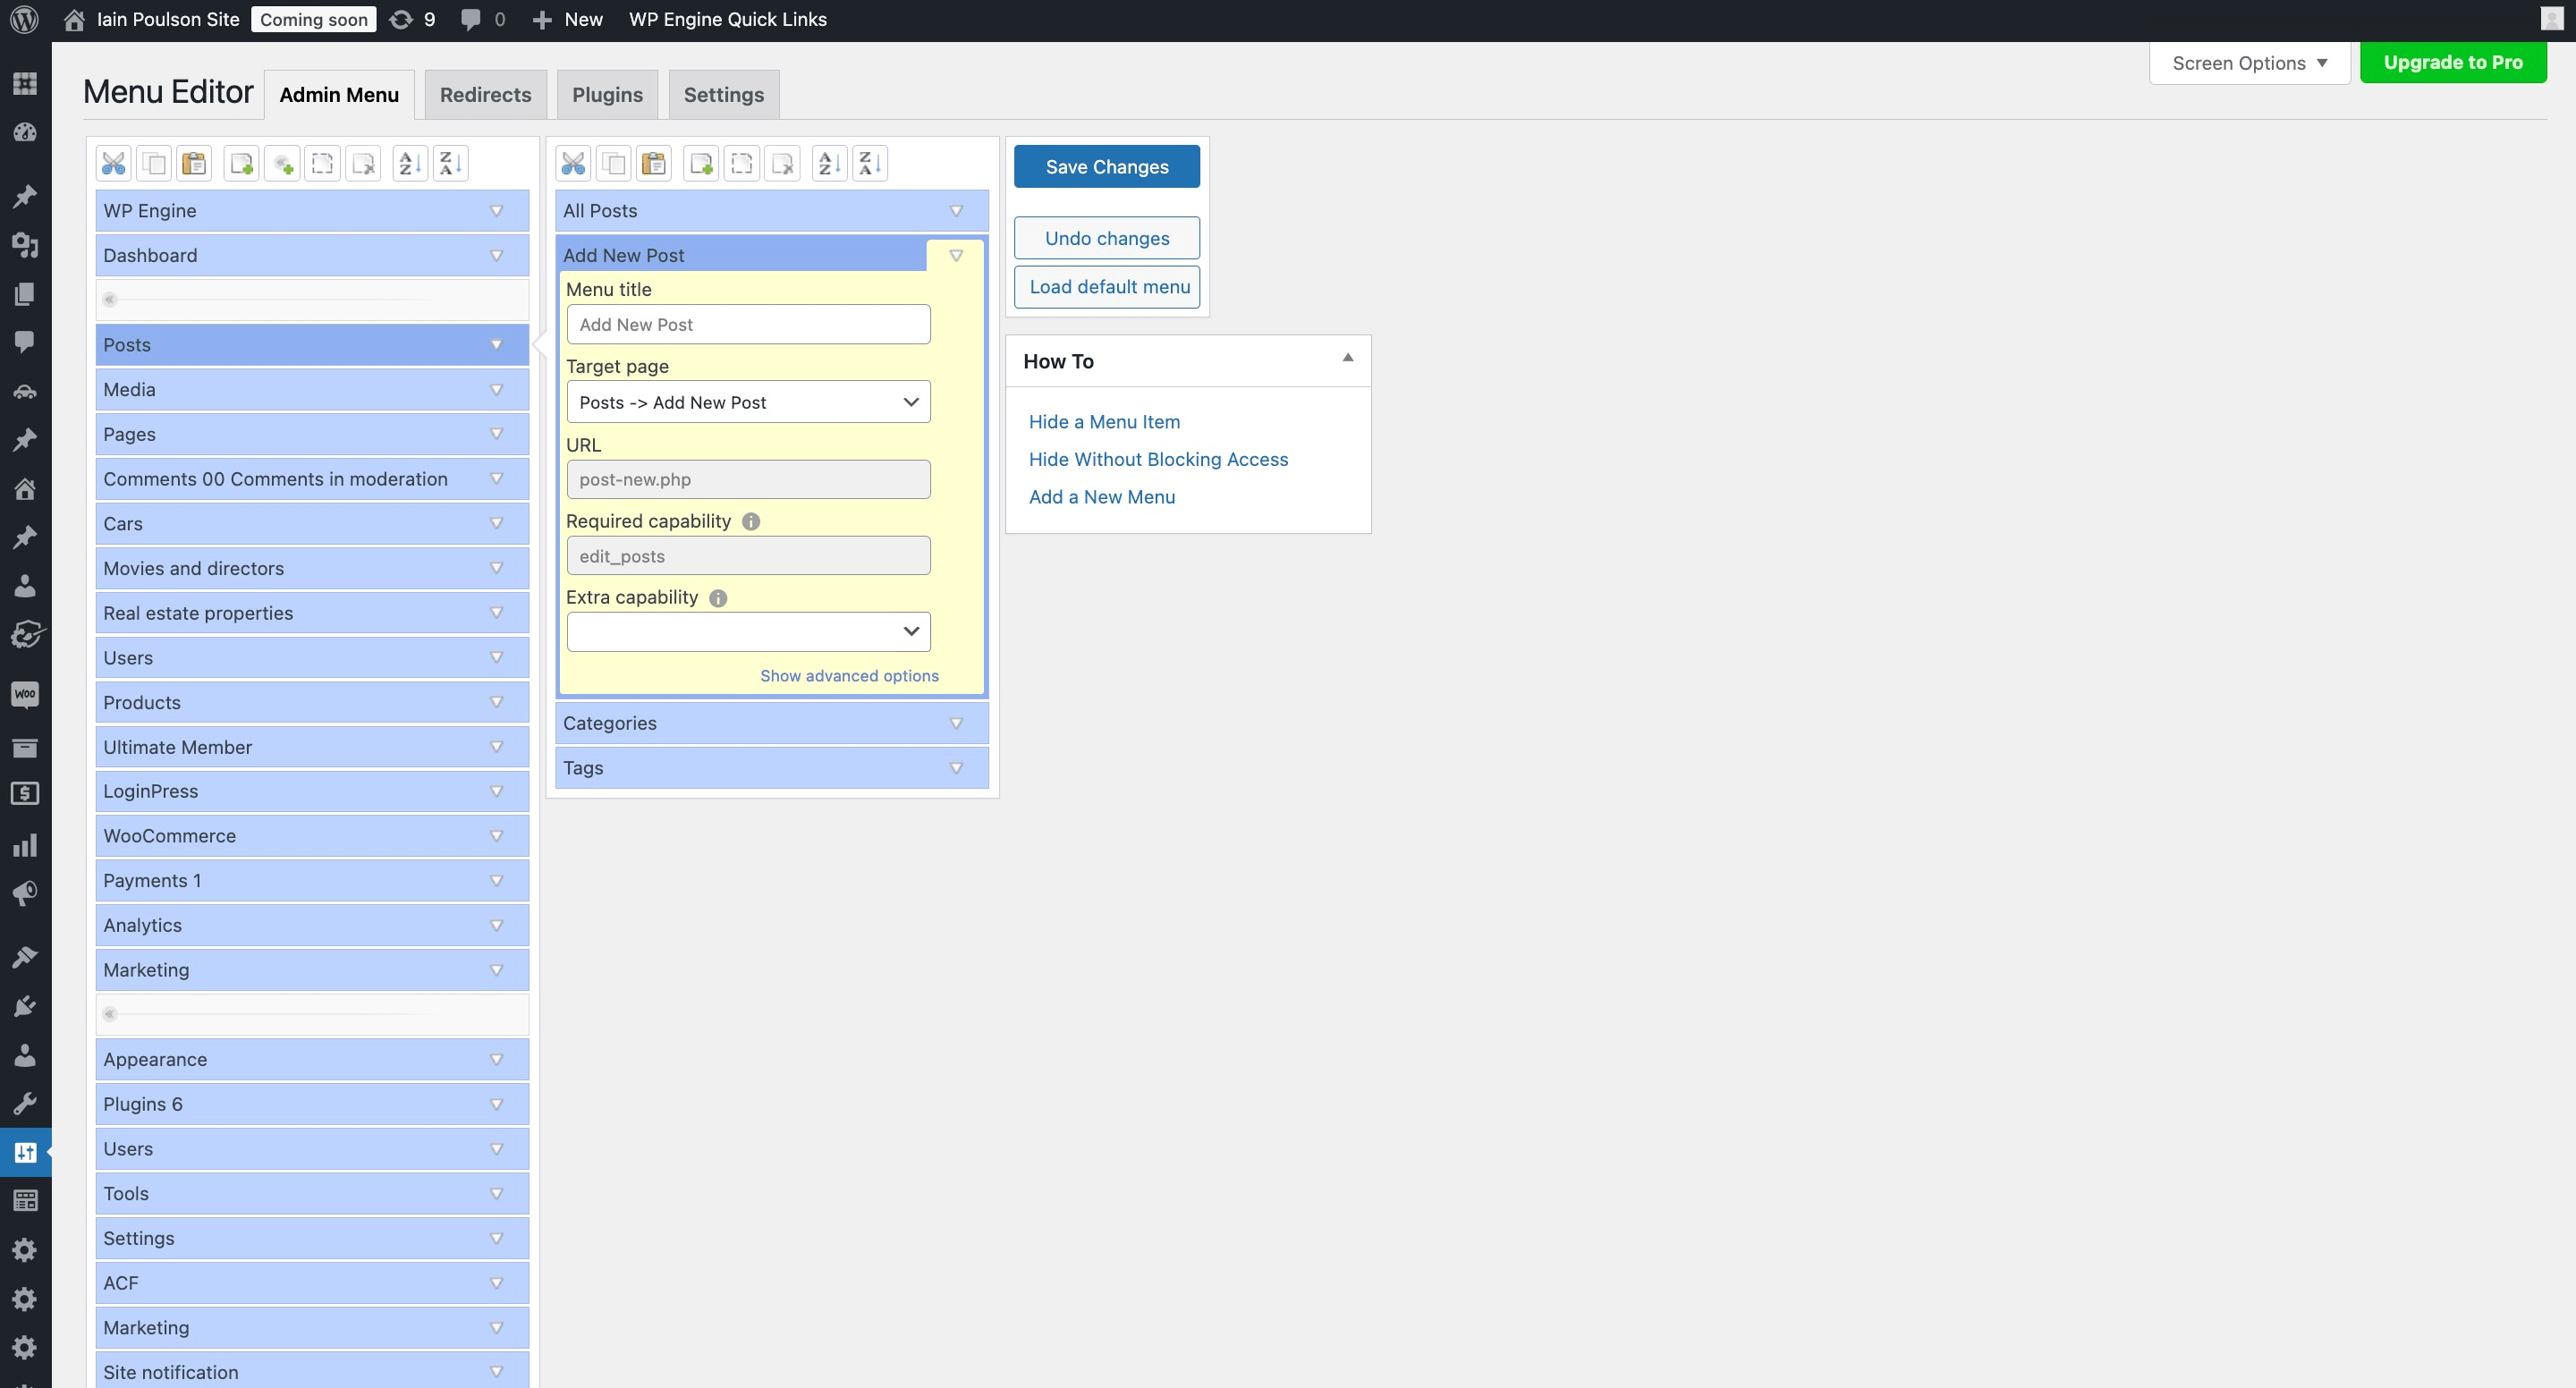
- Organize menu items with drag and drop: Admin Menu Editor provides a straightforward interface where you can reorder menus and submenus, move items between different menu levels, and relocate items to different sections.
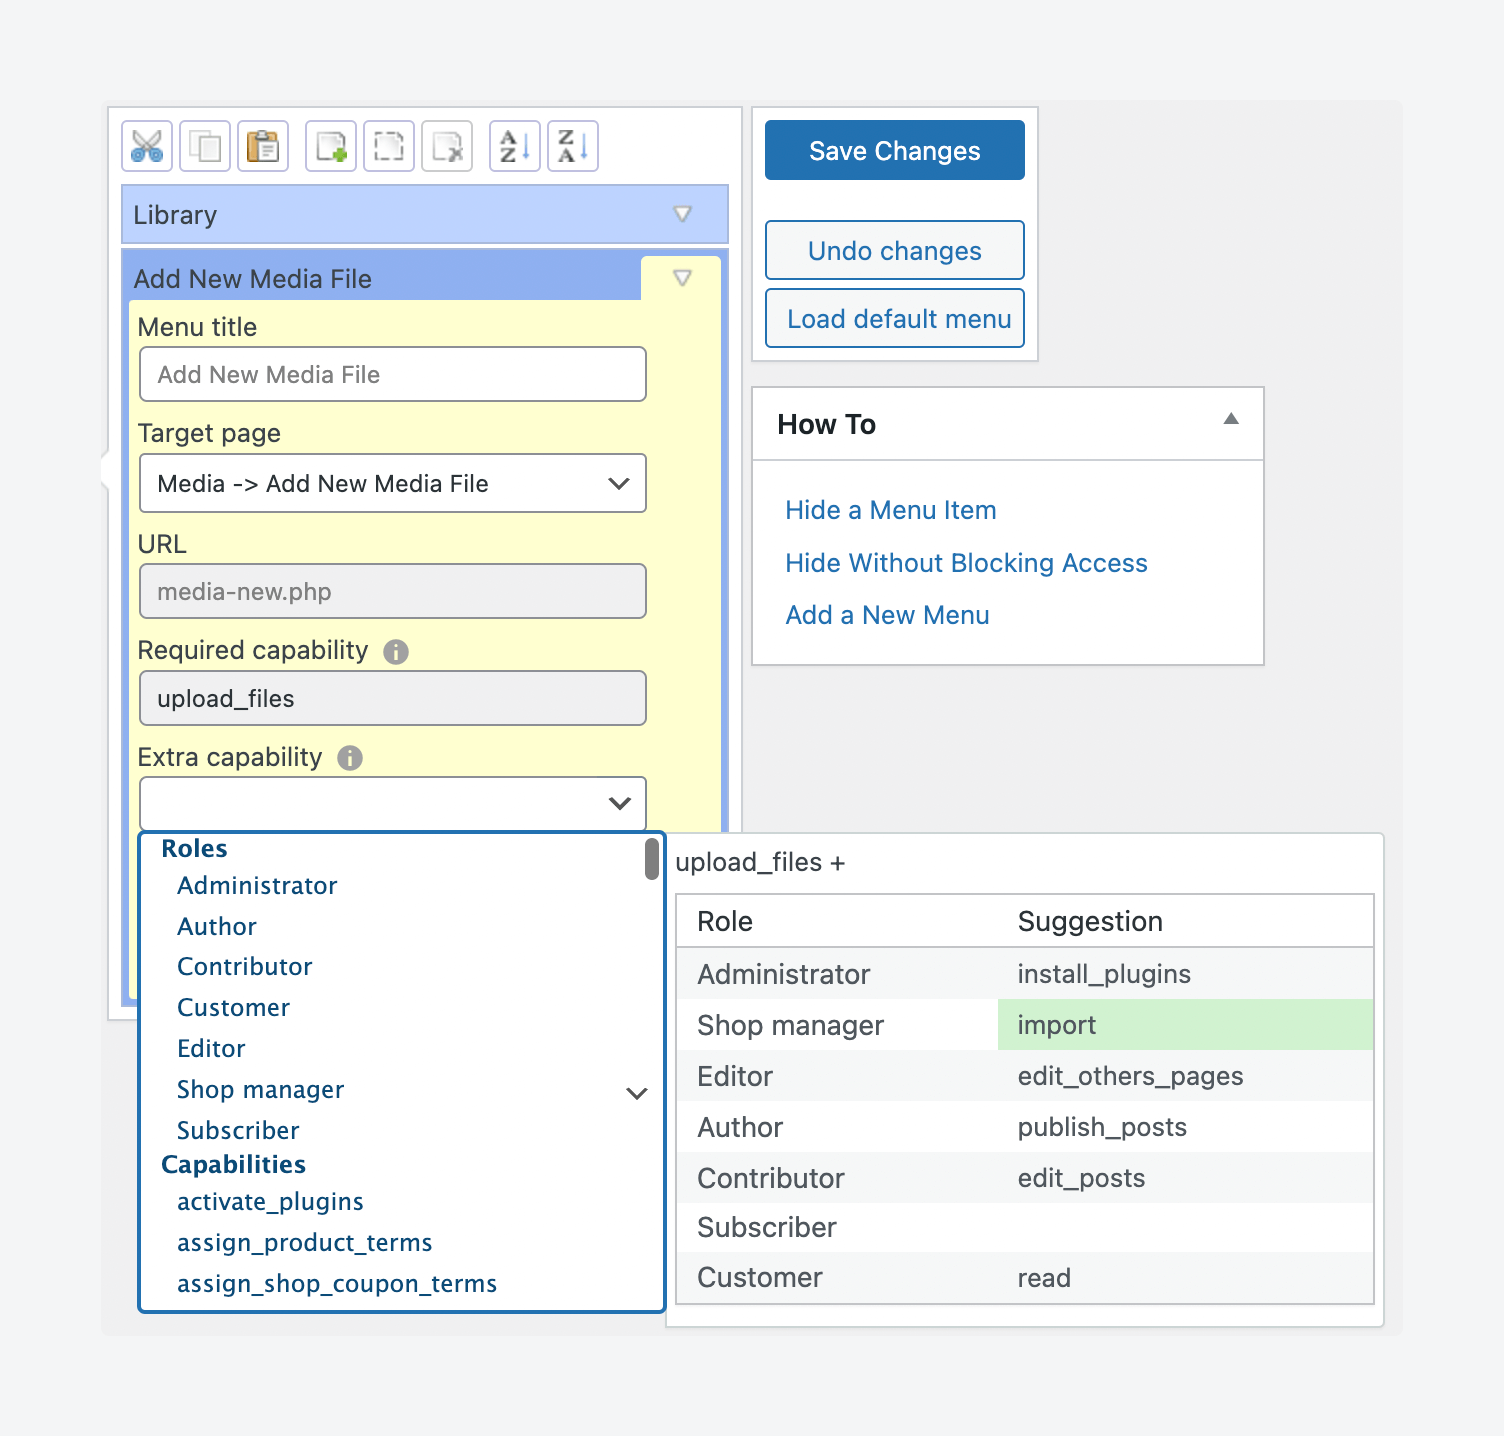
- Set up role-based restrictions: To restrict menu access, you’ll use WordPress capabilities, which are specific permissions that determine what users can and cannot do. For each menu item, set an extra capability that only authorized users have. Use the dropdown menu next to extra capability to see suggestions based on user roles. You can also hover over capabilities to preview which roles will have access (highlighted in green below).
Pro tip: When organizing your admin menu, you’ll often work with custom post types (like Properties, Events, or Team Members) alongside WordPress’s default menu items. These dedicated custom sections help organize different types of content in your admin, but the real power comes from combining them with custom fields to create structured data entry and organized admin views.
2. Create powerful admin interfaces with custom fields
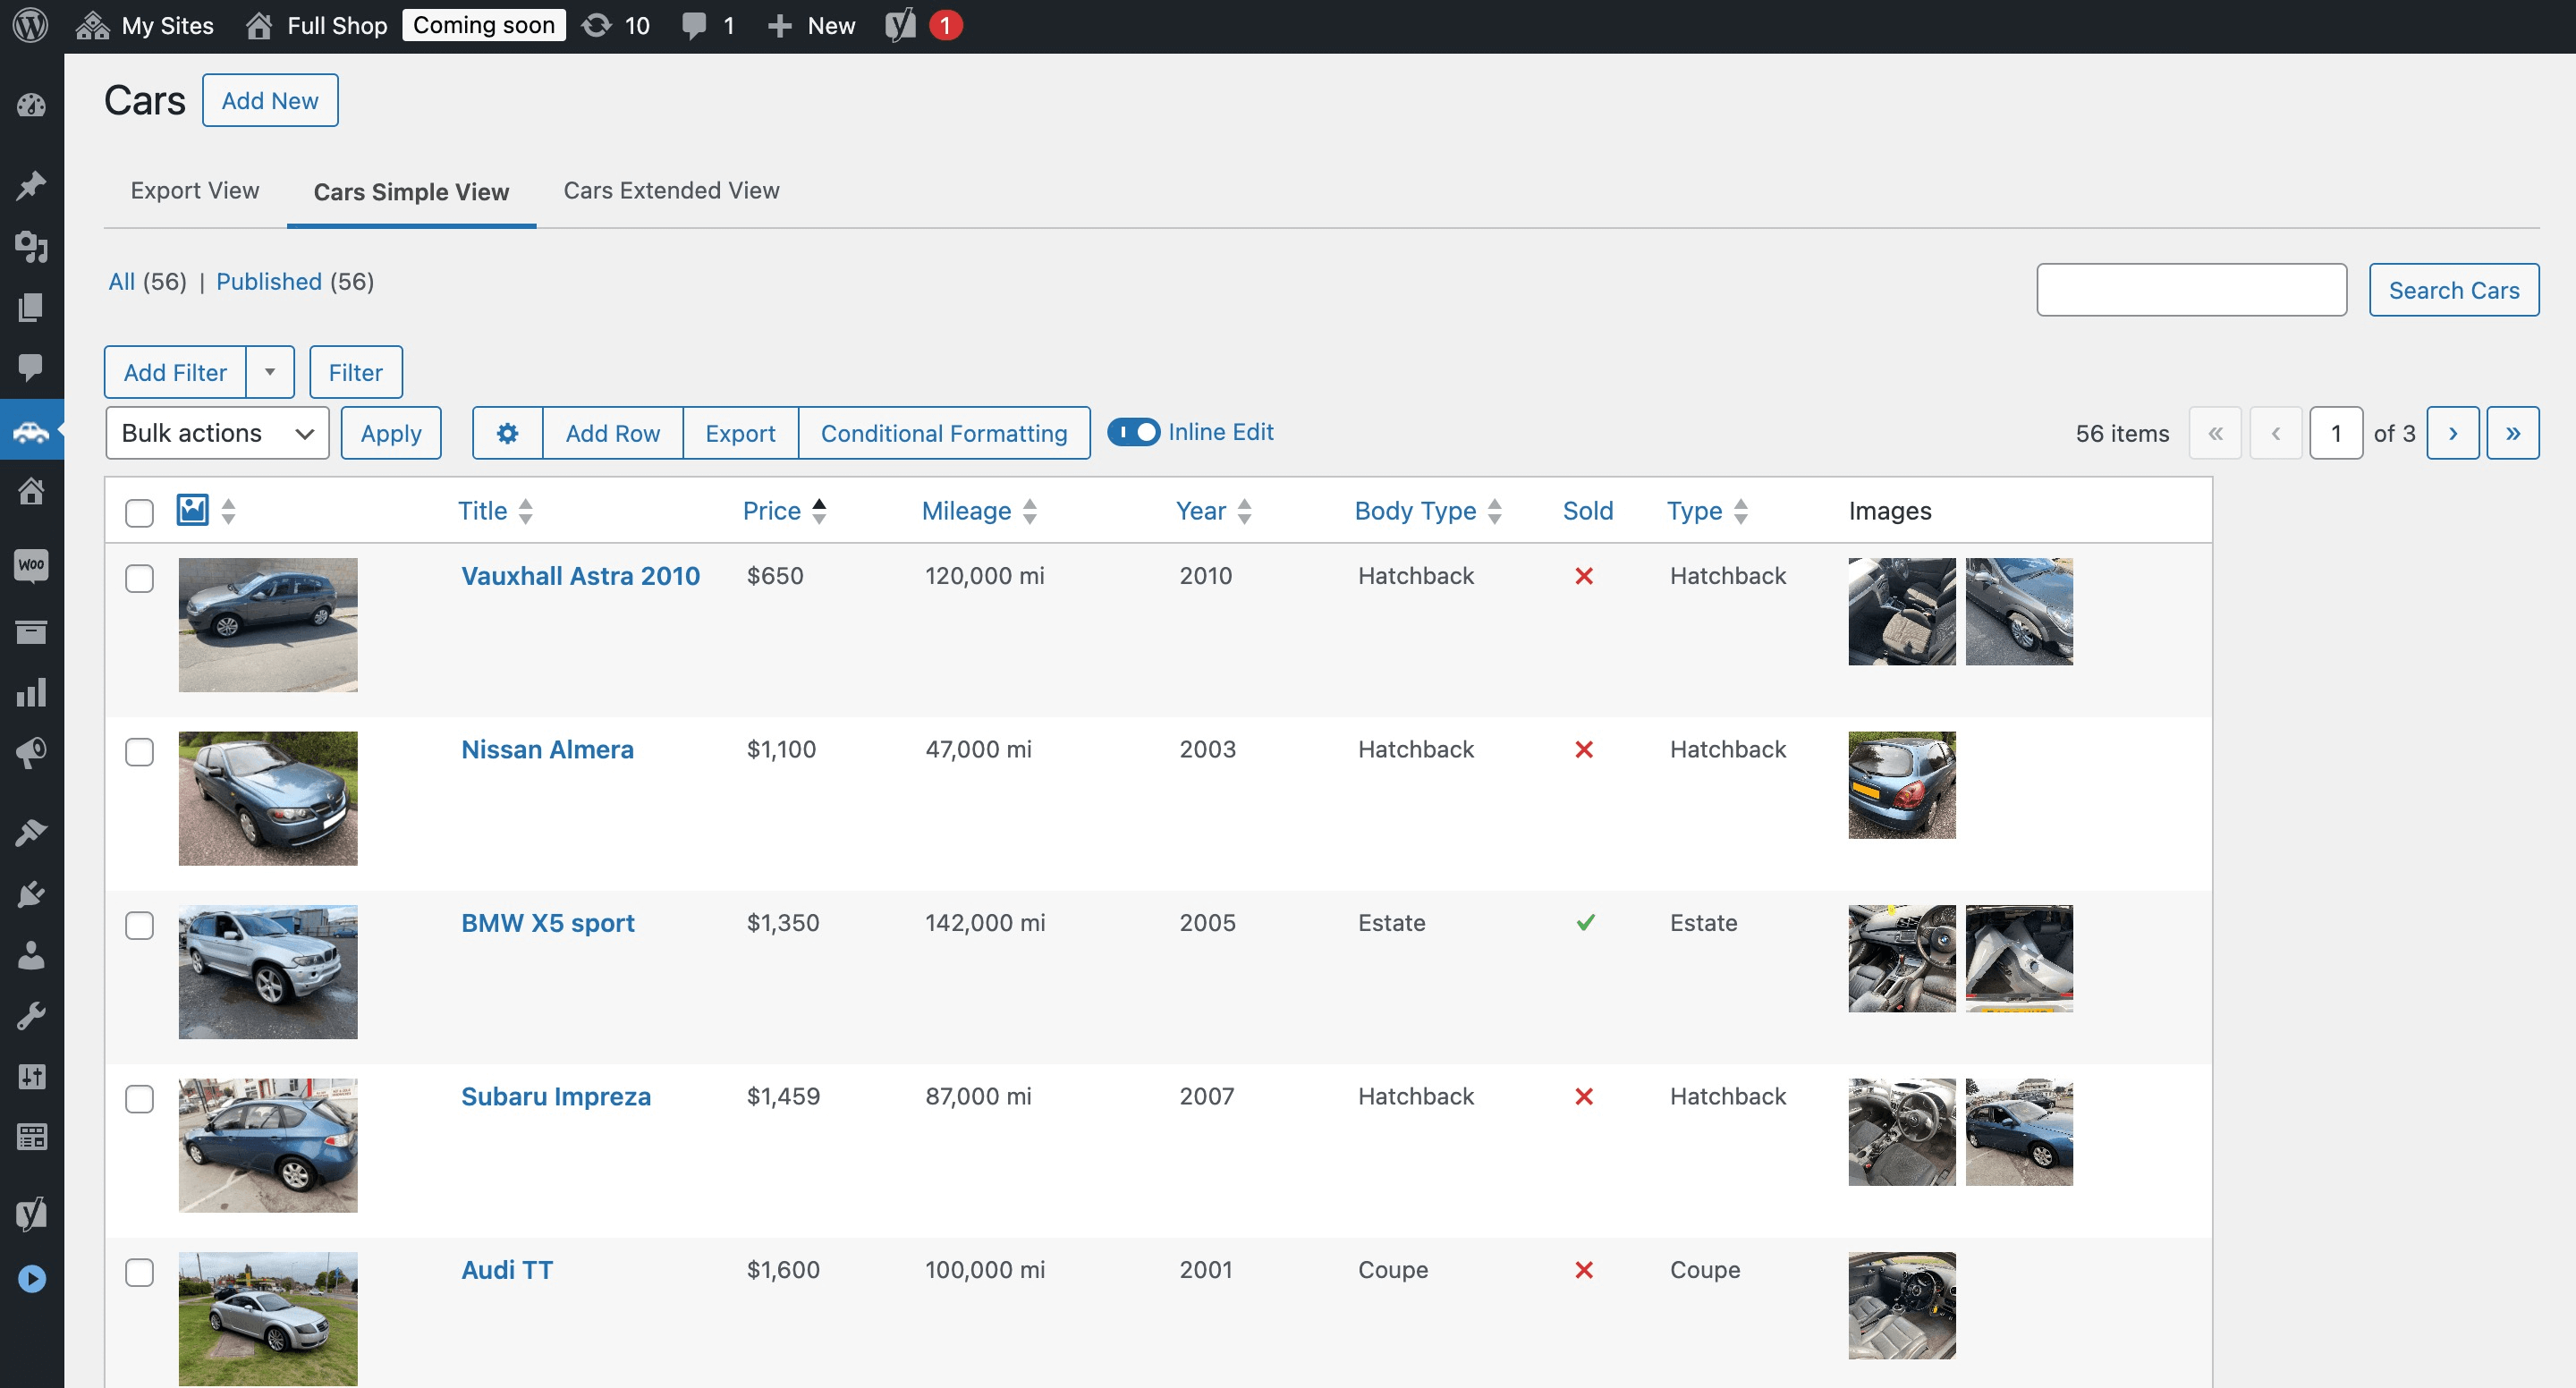
The default WordPress admin interface works great for basic blogging, but what about managing hundreds of real estate listings or an extensive eCommerce product catalog? The standard post editor wasn’t built for structured content like this.
Let’s look at a real example. Imagine managing a real estate website with over one hundred property listings. By default, WordPress only shows you the basics:
- Title
- Author
- Date
- Categories and Tags
As a property manager, you need quick access to essential details like property price, number of bedrooms, square footage, and current status (For Sale/Sold/Under Offer). This is where Advanced Custom Fields (ACF®) transforms your WordPress experience.
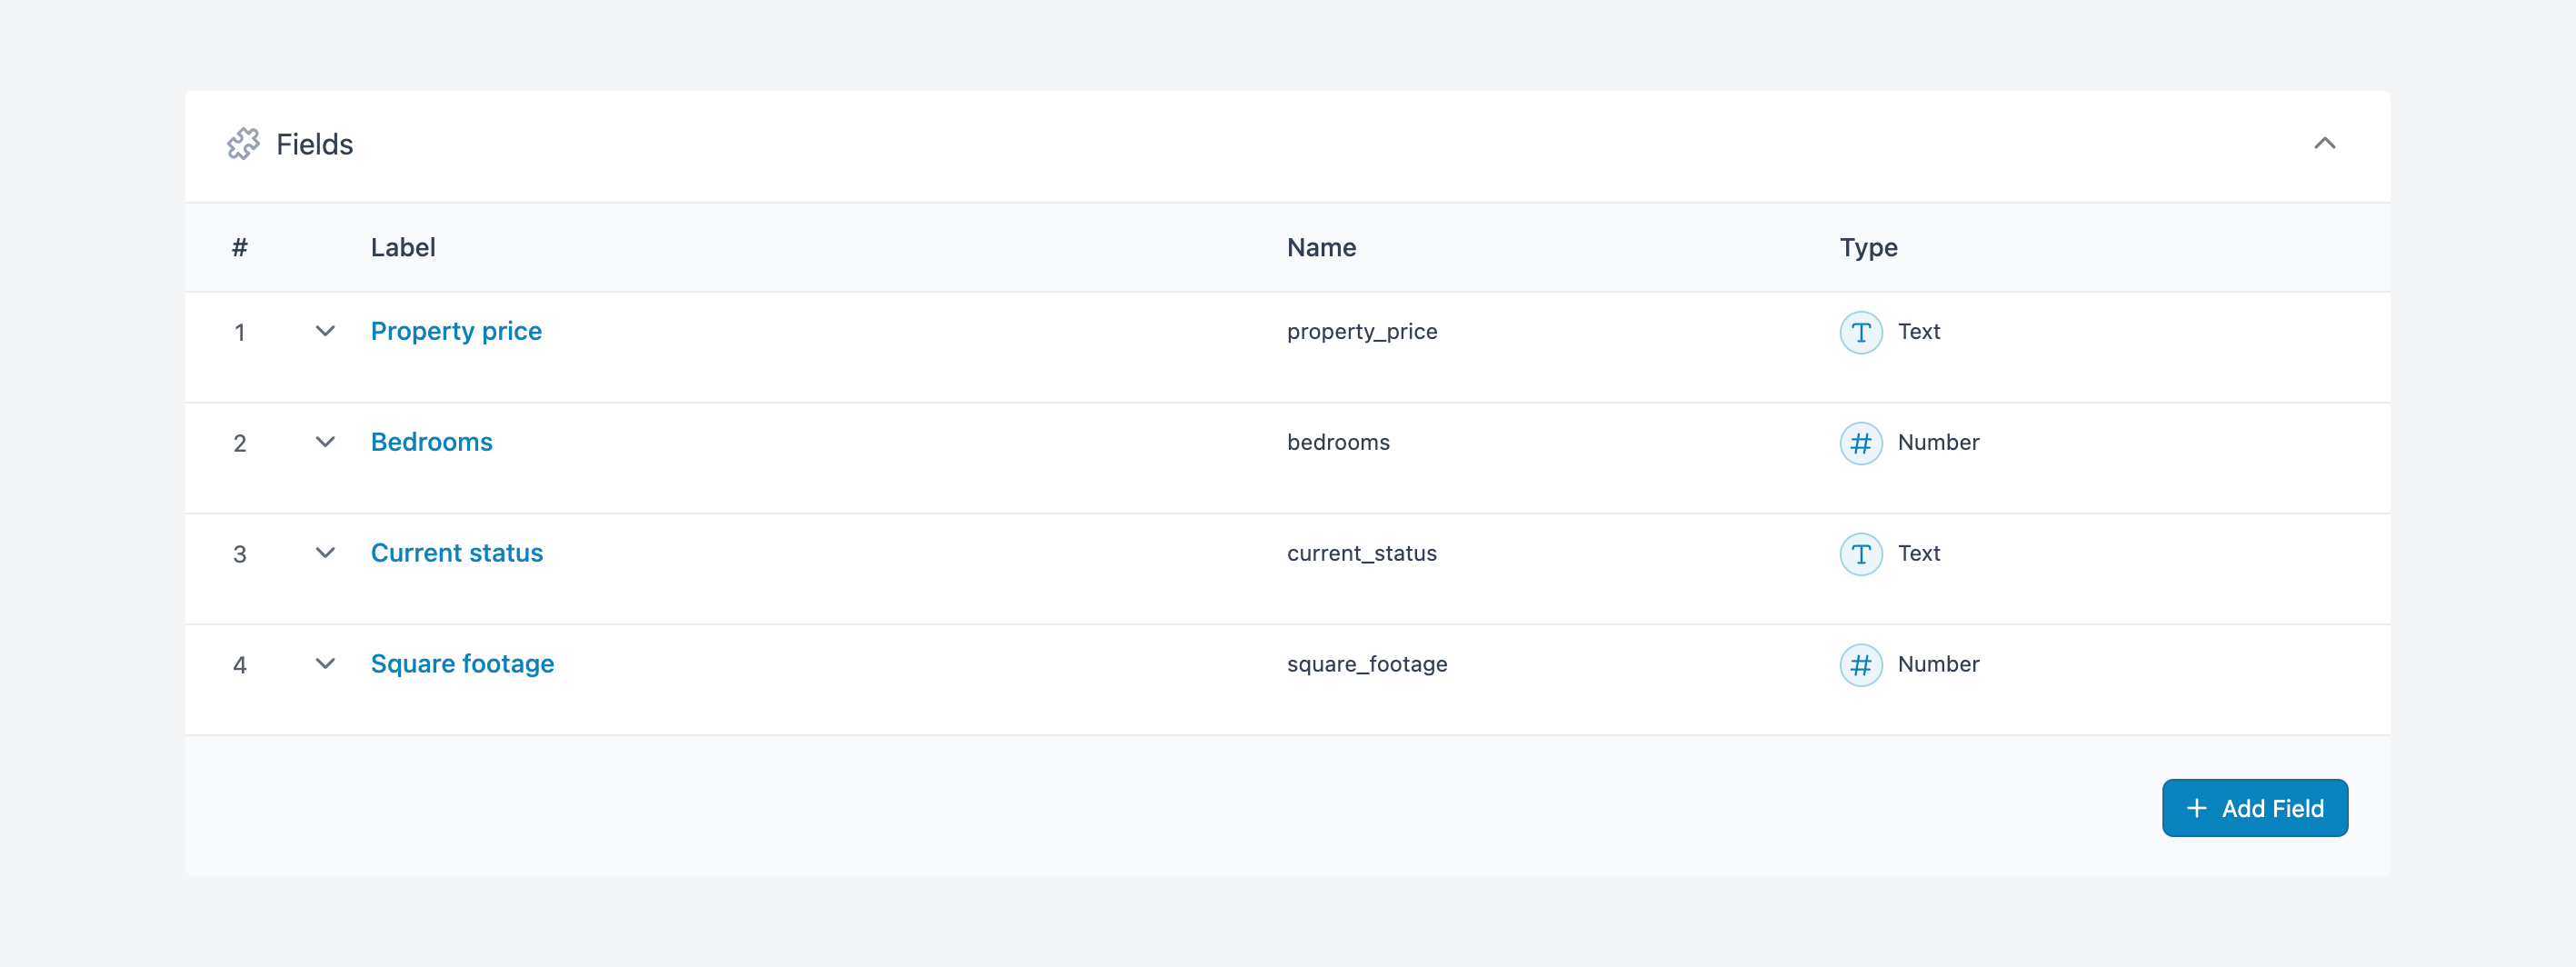
ACF lets you create structured data entry forms that ensure every property listing contains the exact information you need. You can validate important data like prices and measurements, plus enable advanced features like interactive maps, photo galleries, and relationship fields that connect properties to agents or neighborhoods.
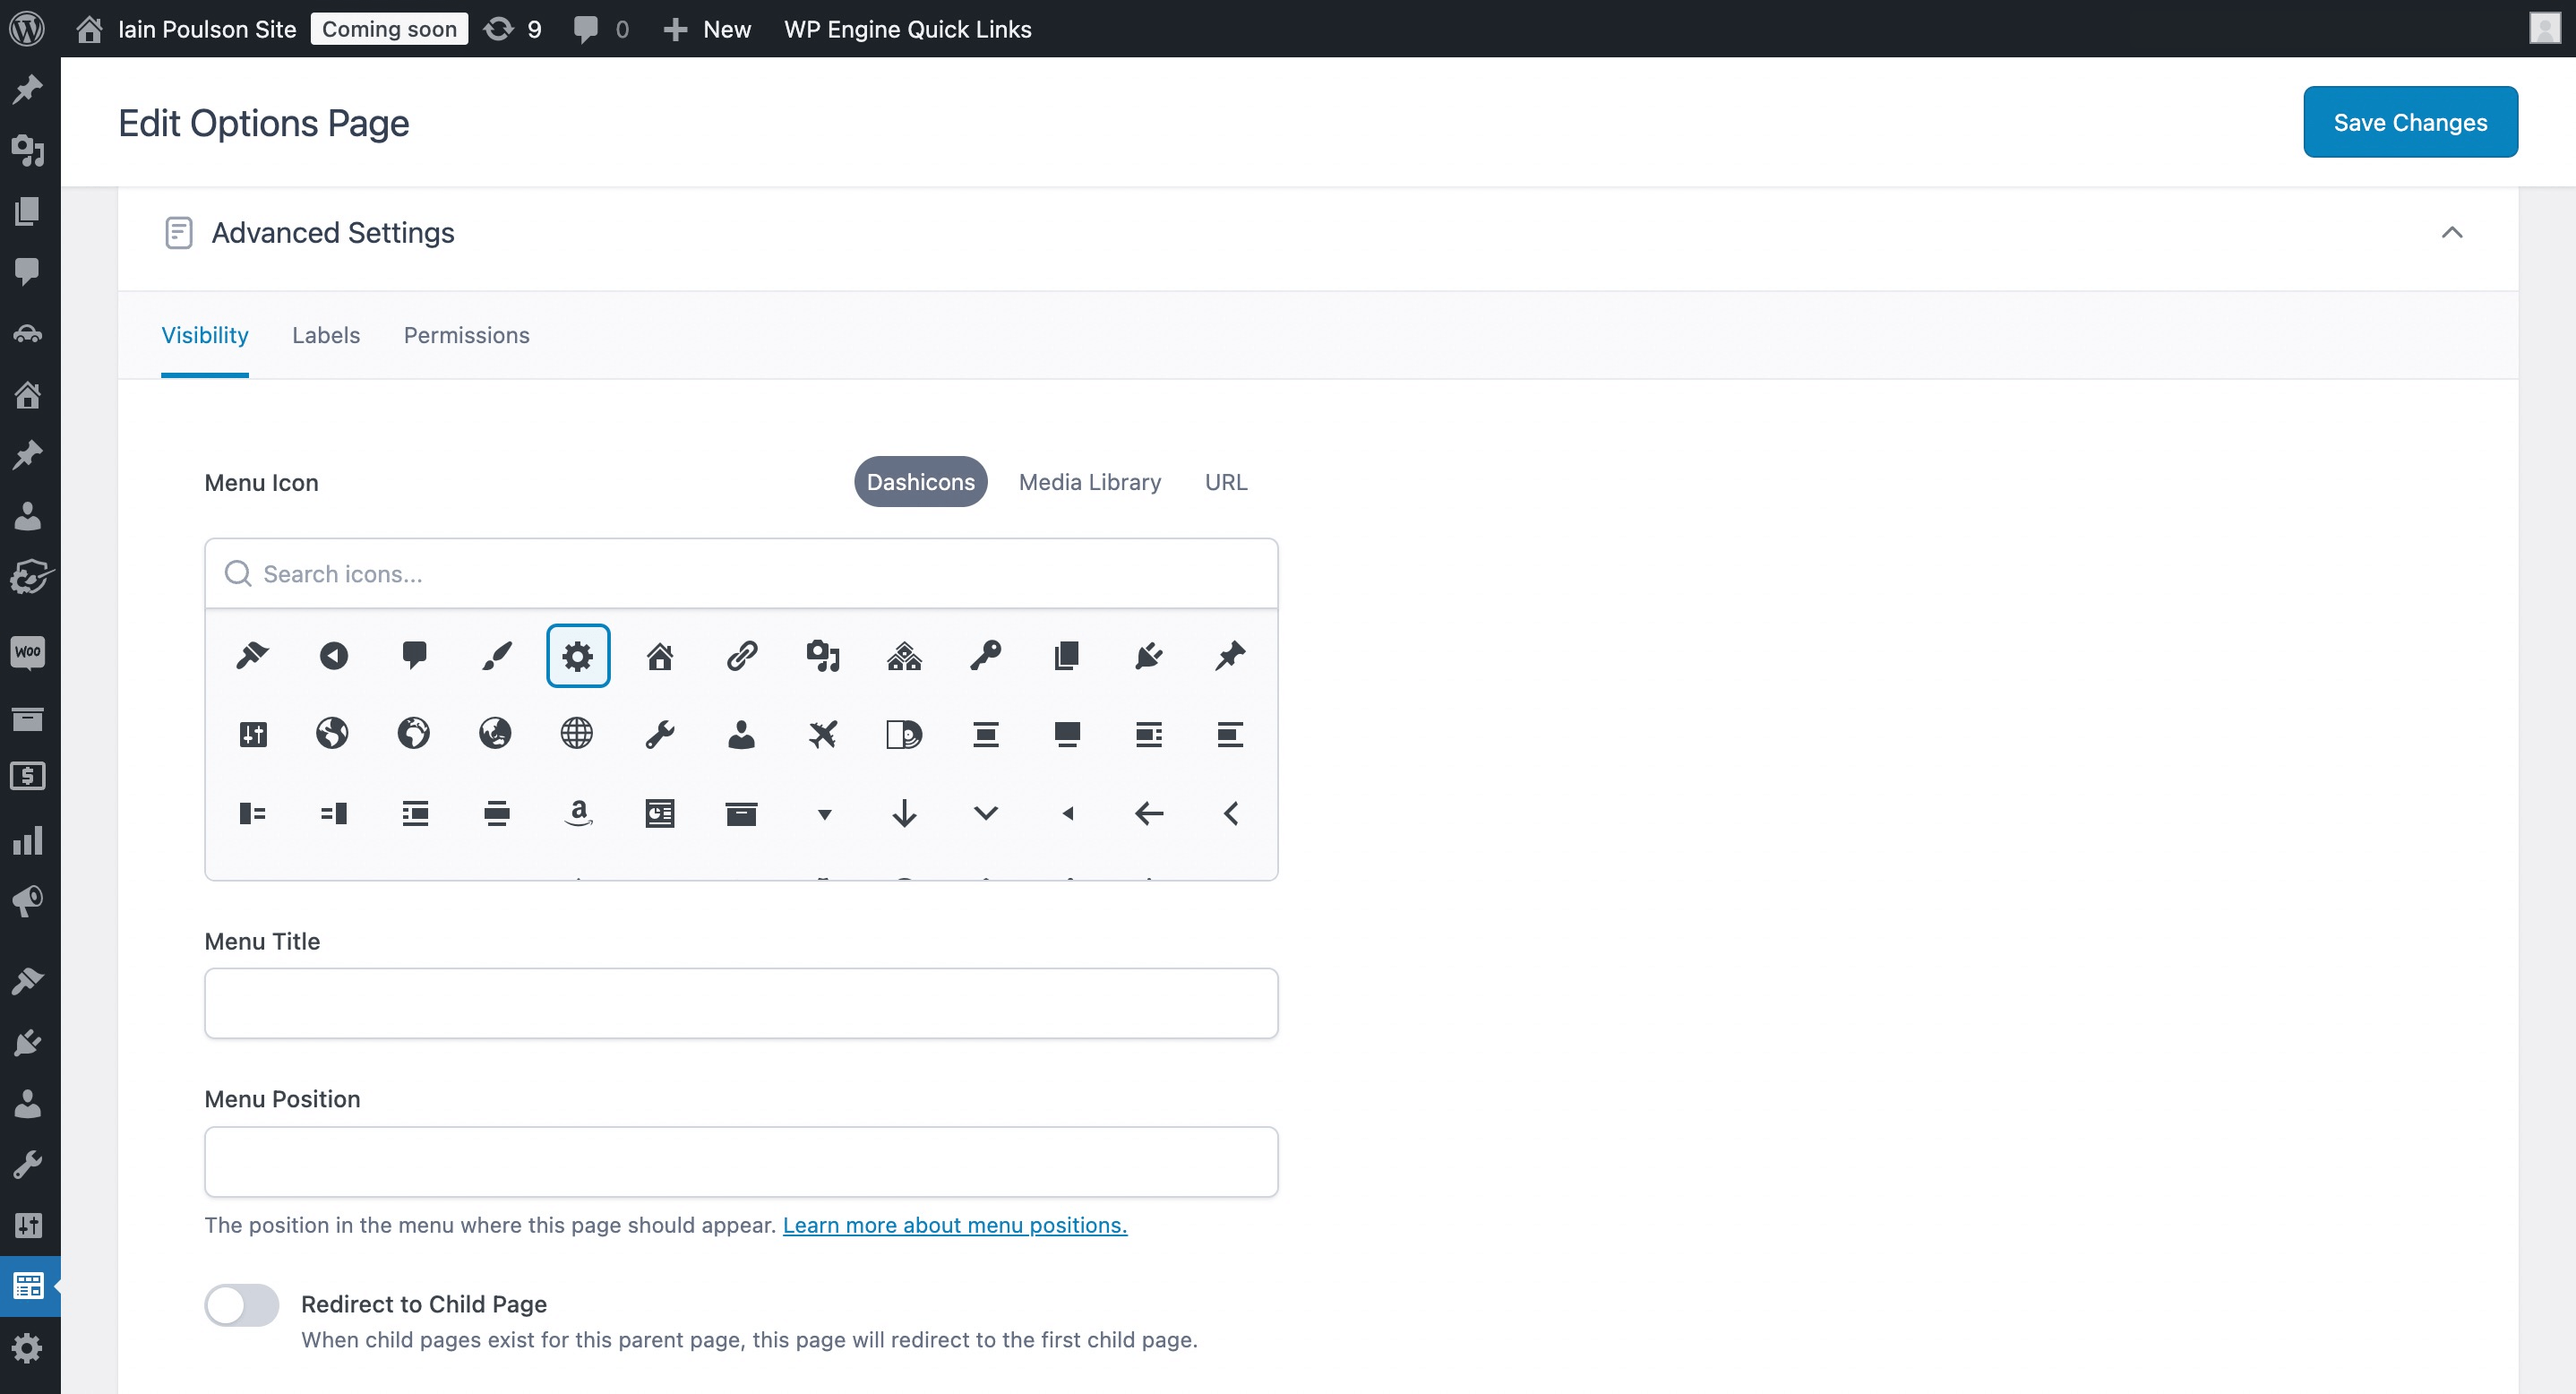
Pro tip: Beyond post-specific data, ACF PRO includes an Options Pages feature that provides a user-friendly interface for managing global site settings. Unlike regular fields that attach to specific posts, options page data is stored globally in the wp_options table, making it perfect for content that needs to appear across your entire site, like headers, footers, contact information, and social media links.
Here’s how to set up an Options page:
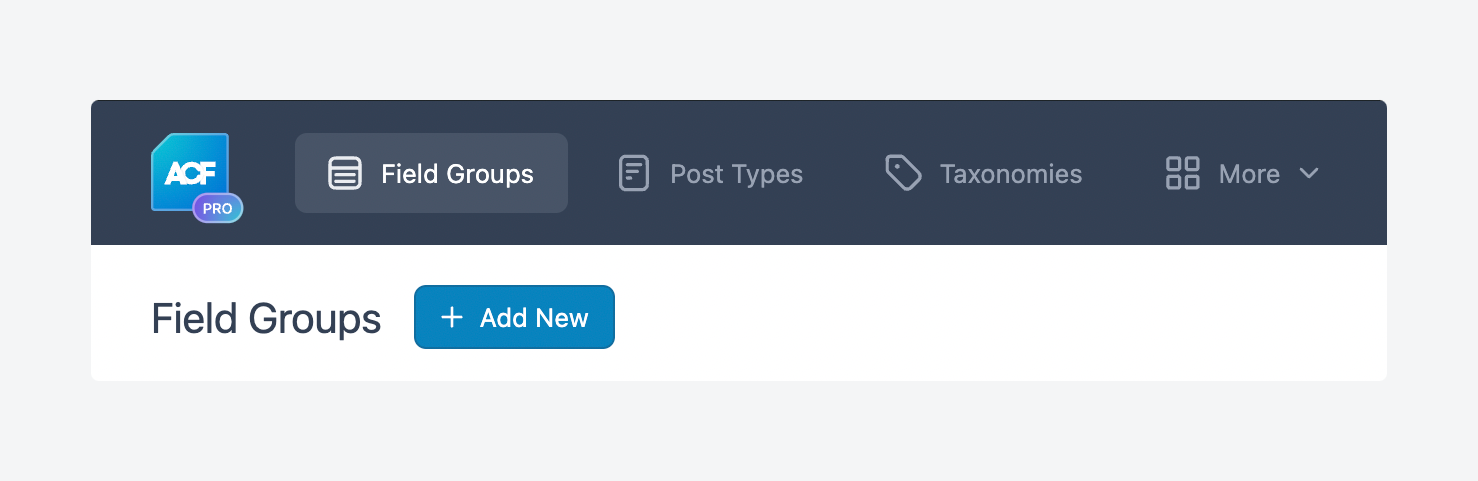
- Navigate to ACF > Options Pages.
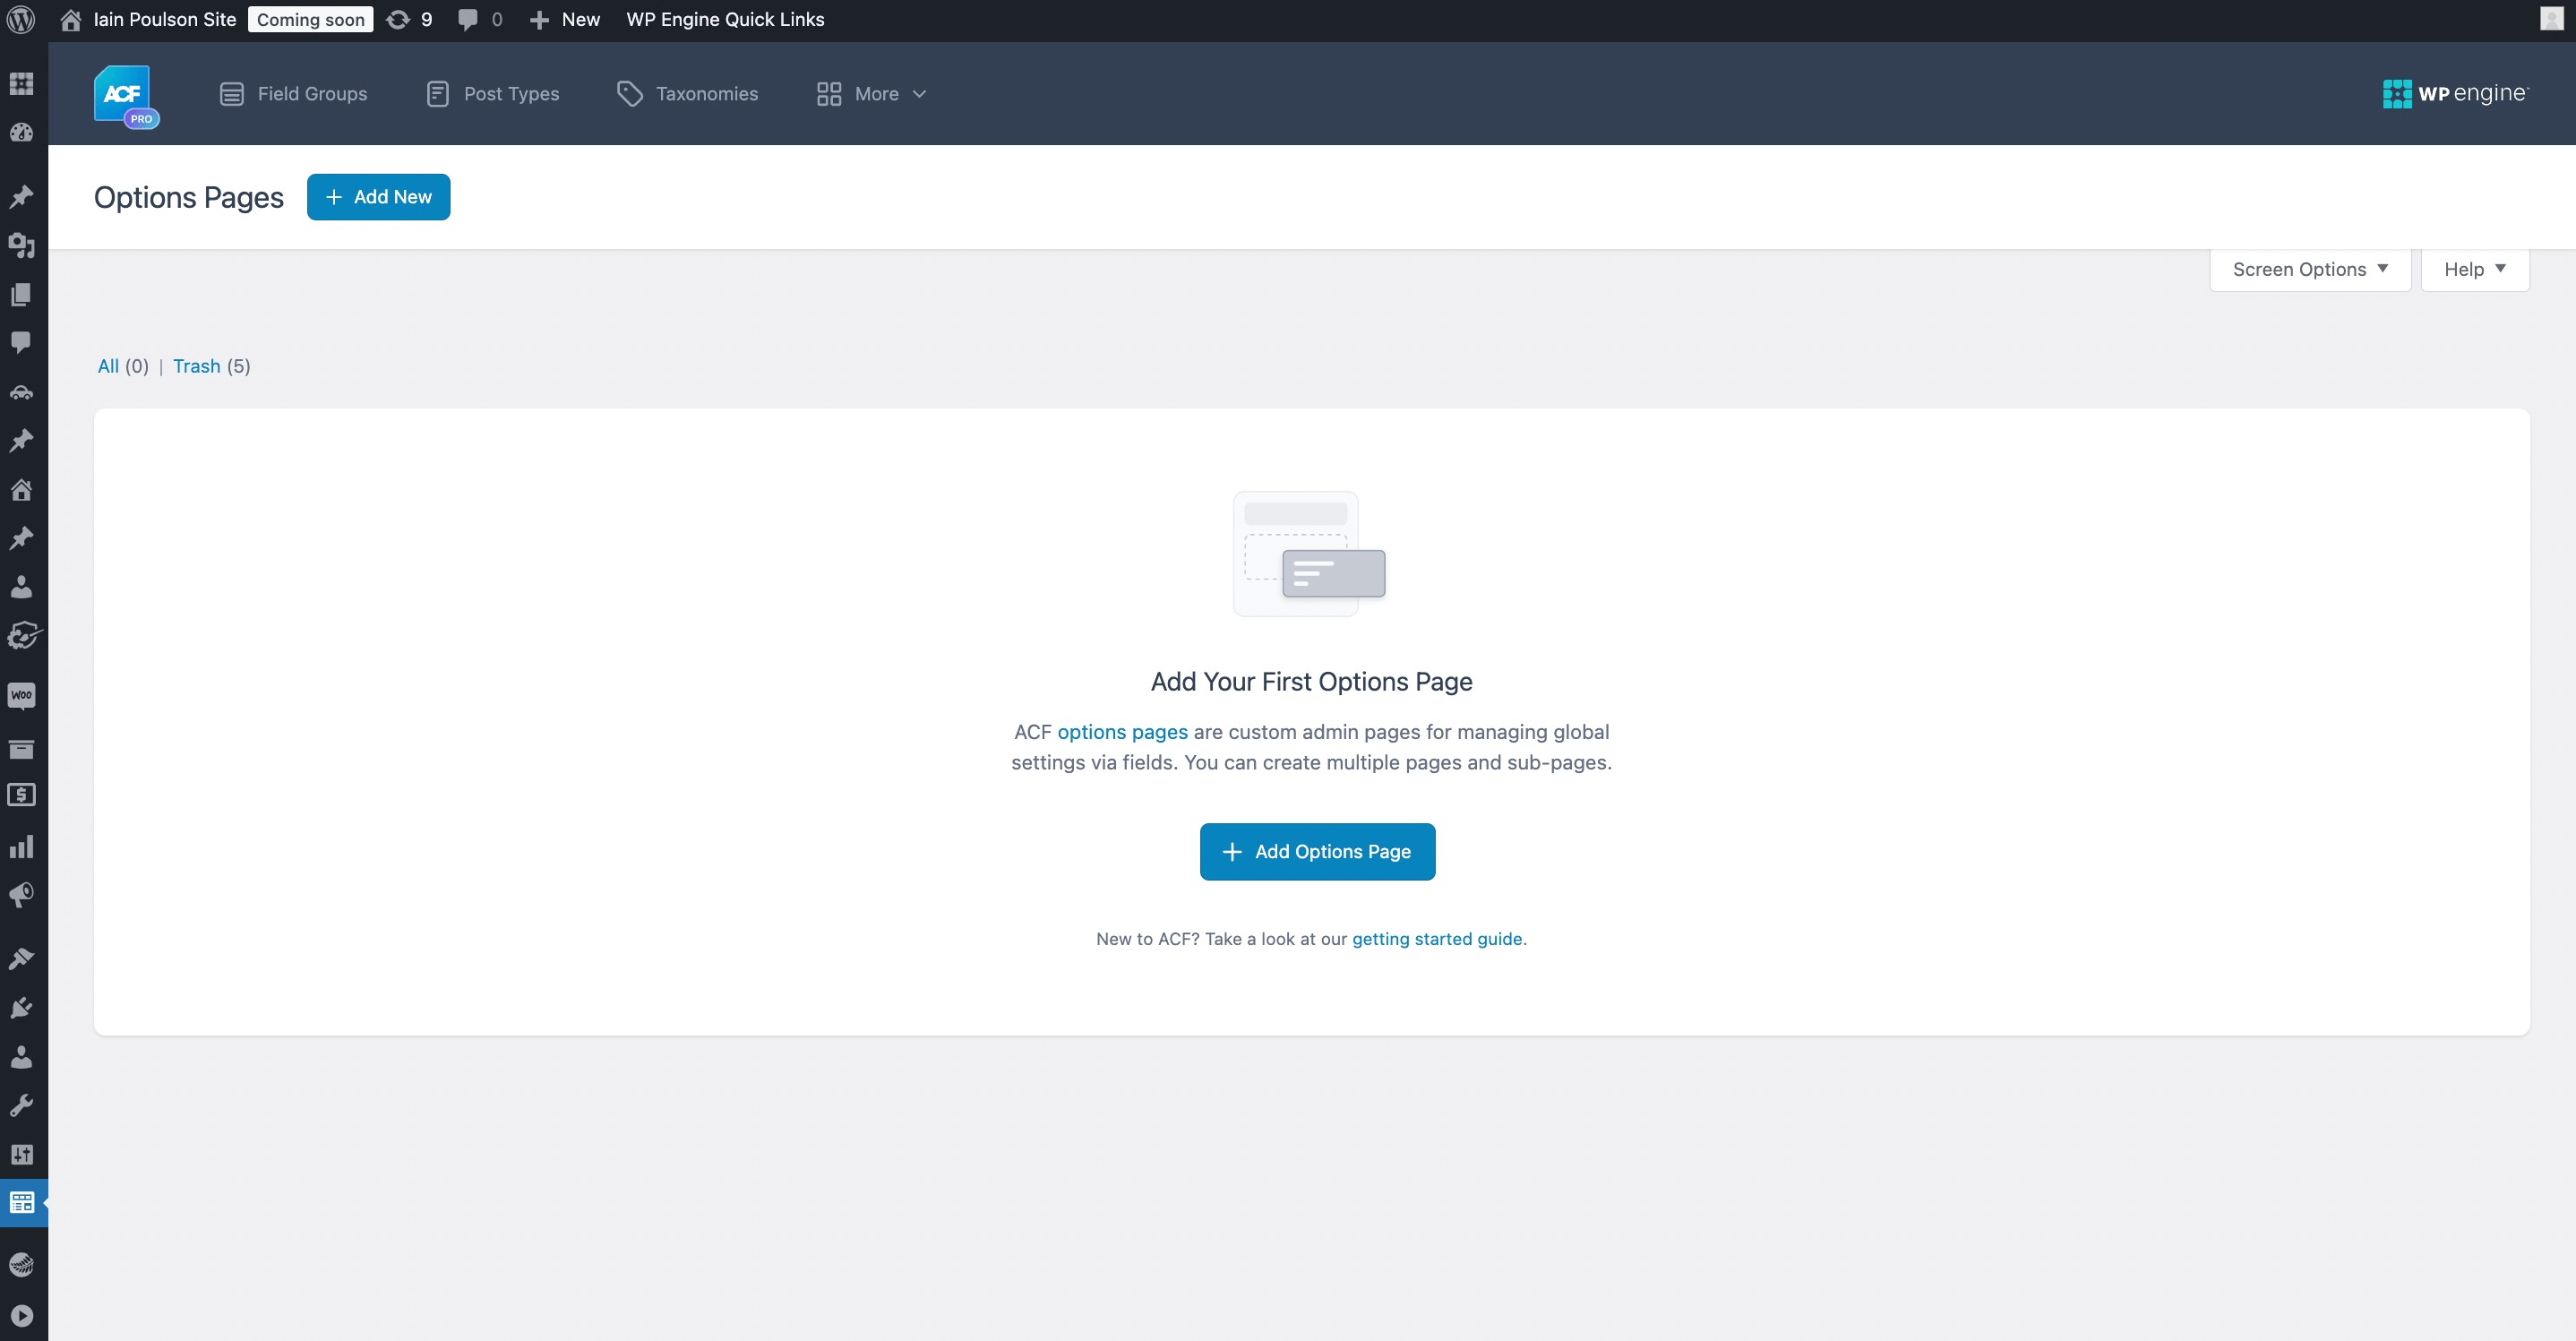
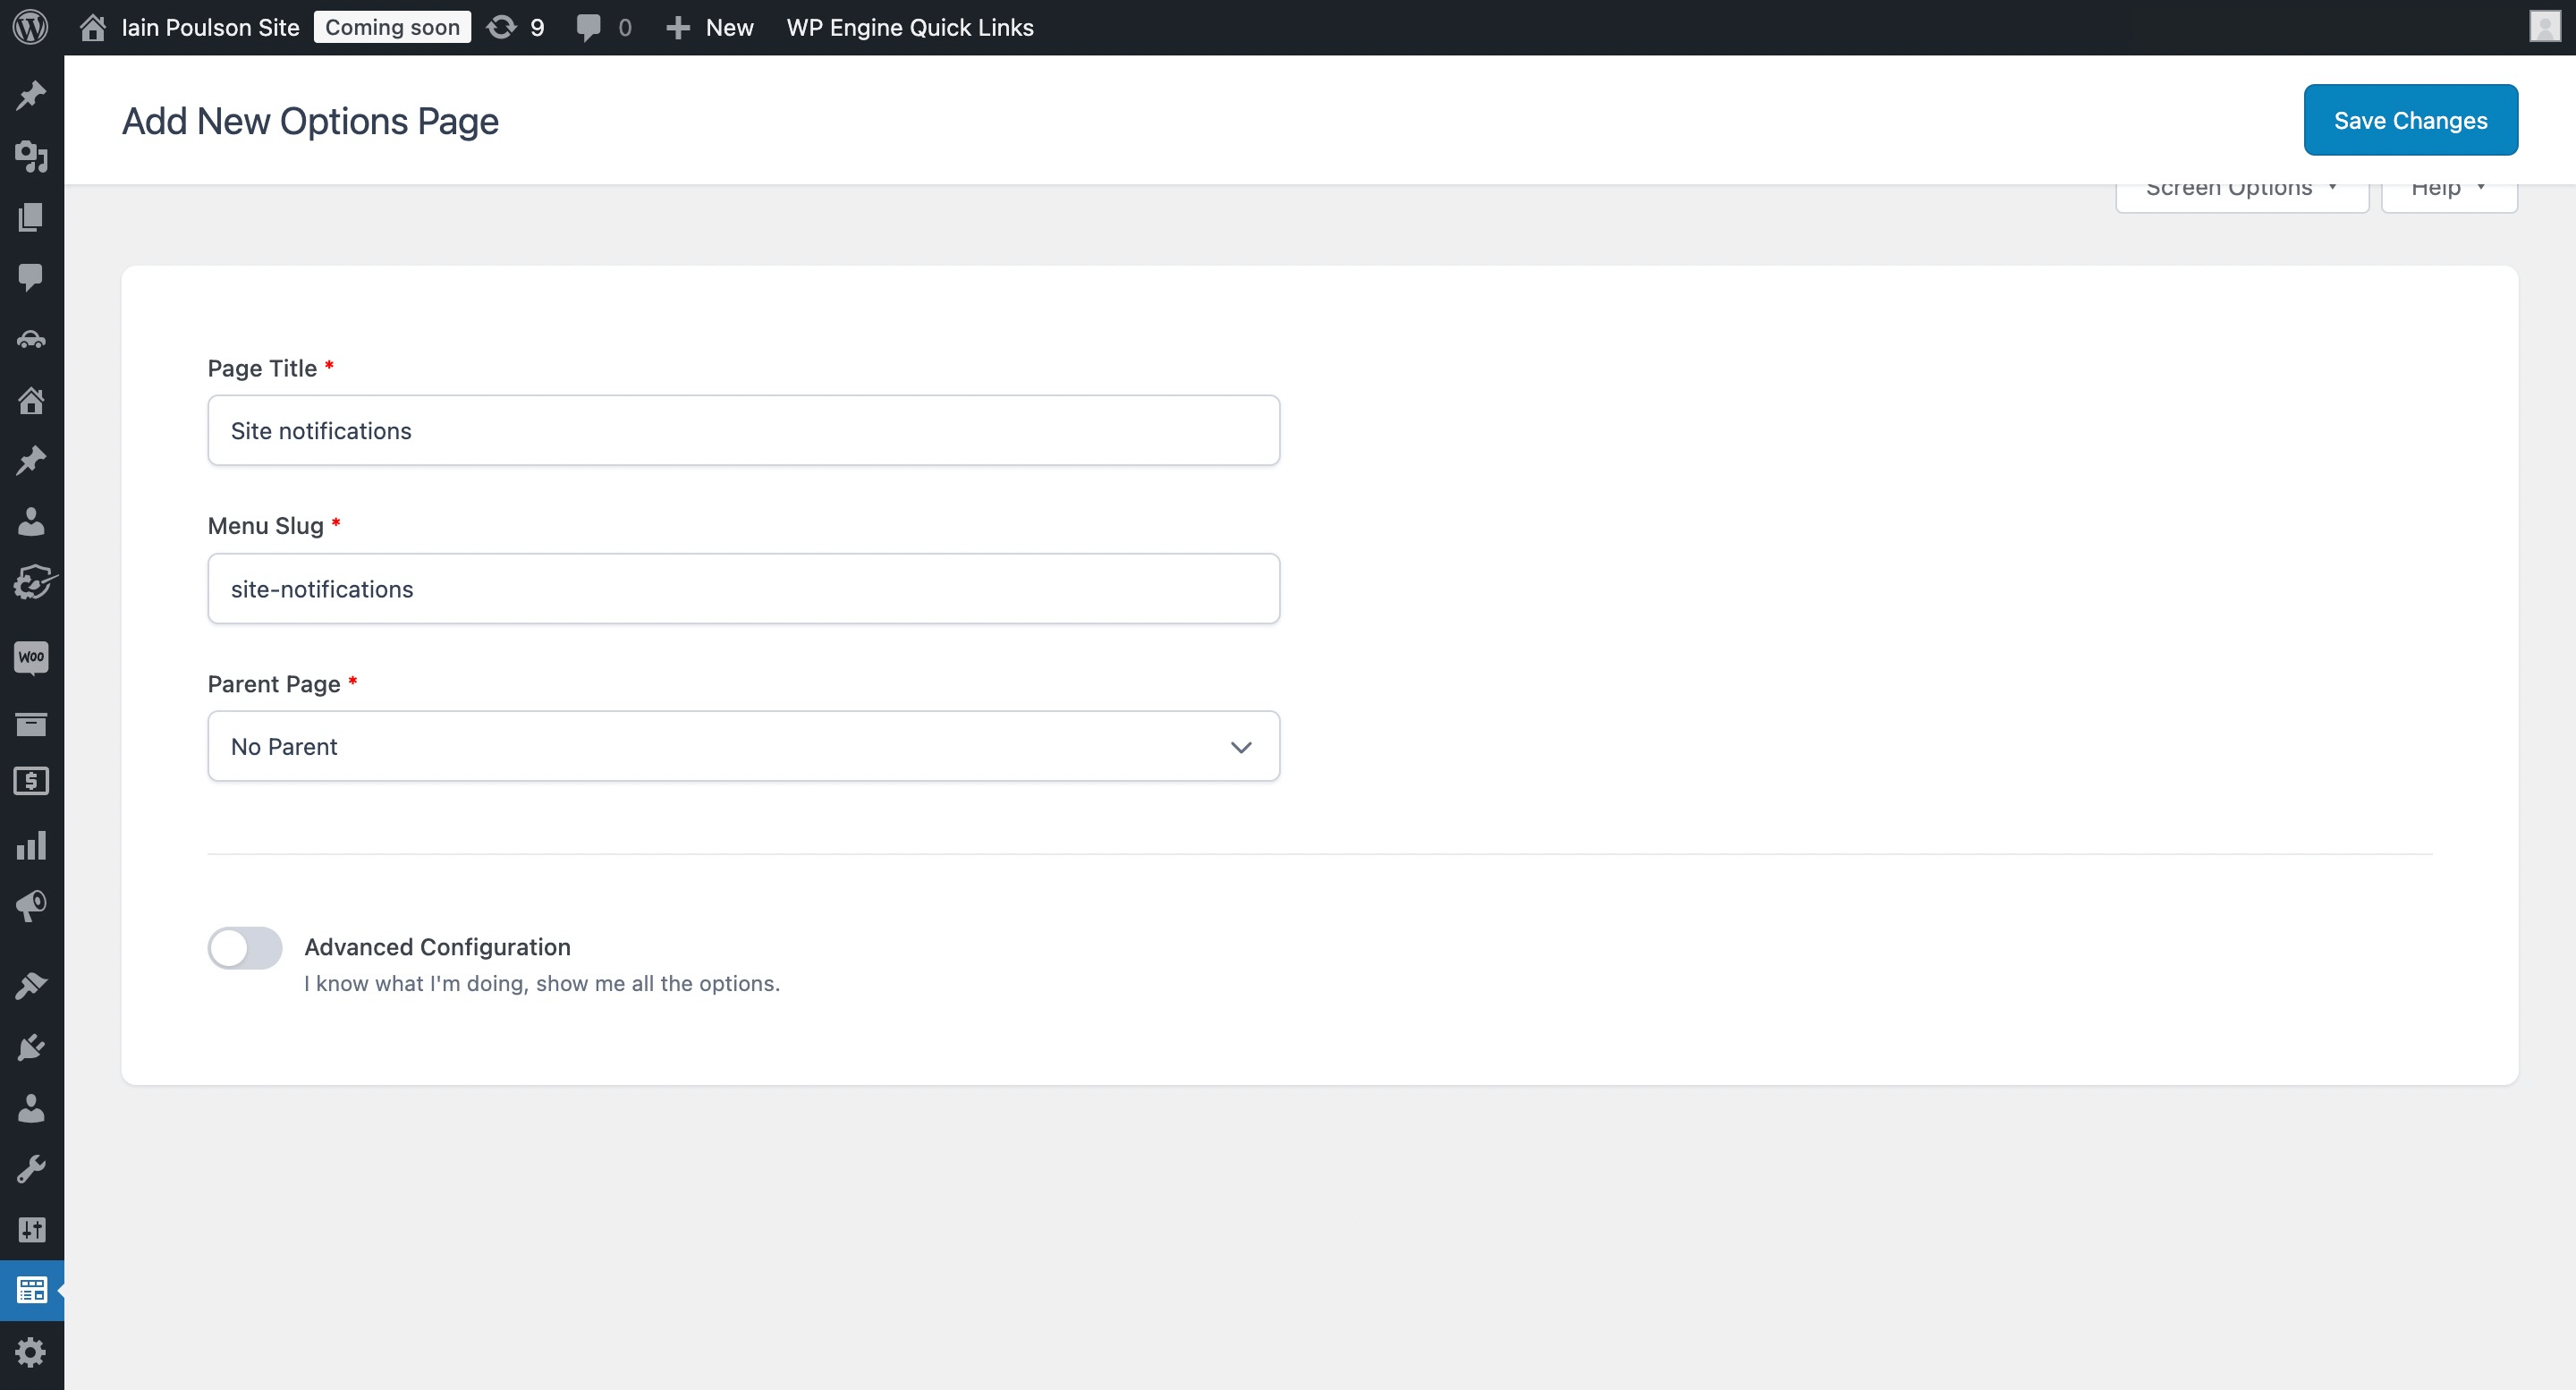
- Click Add New and fill in the fields.
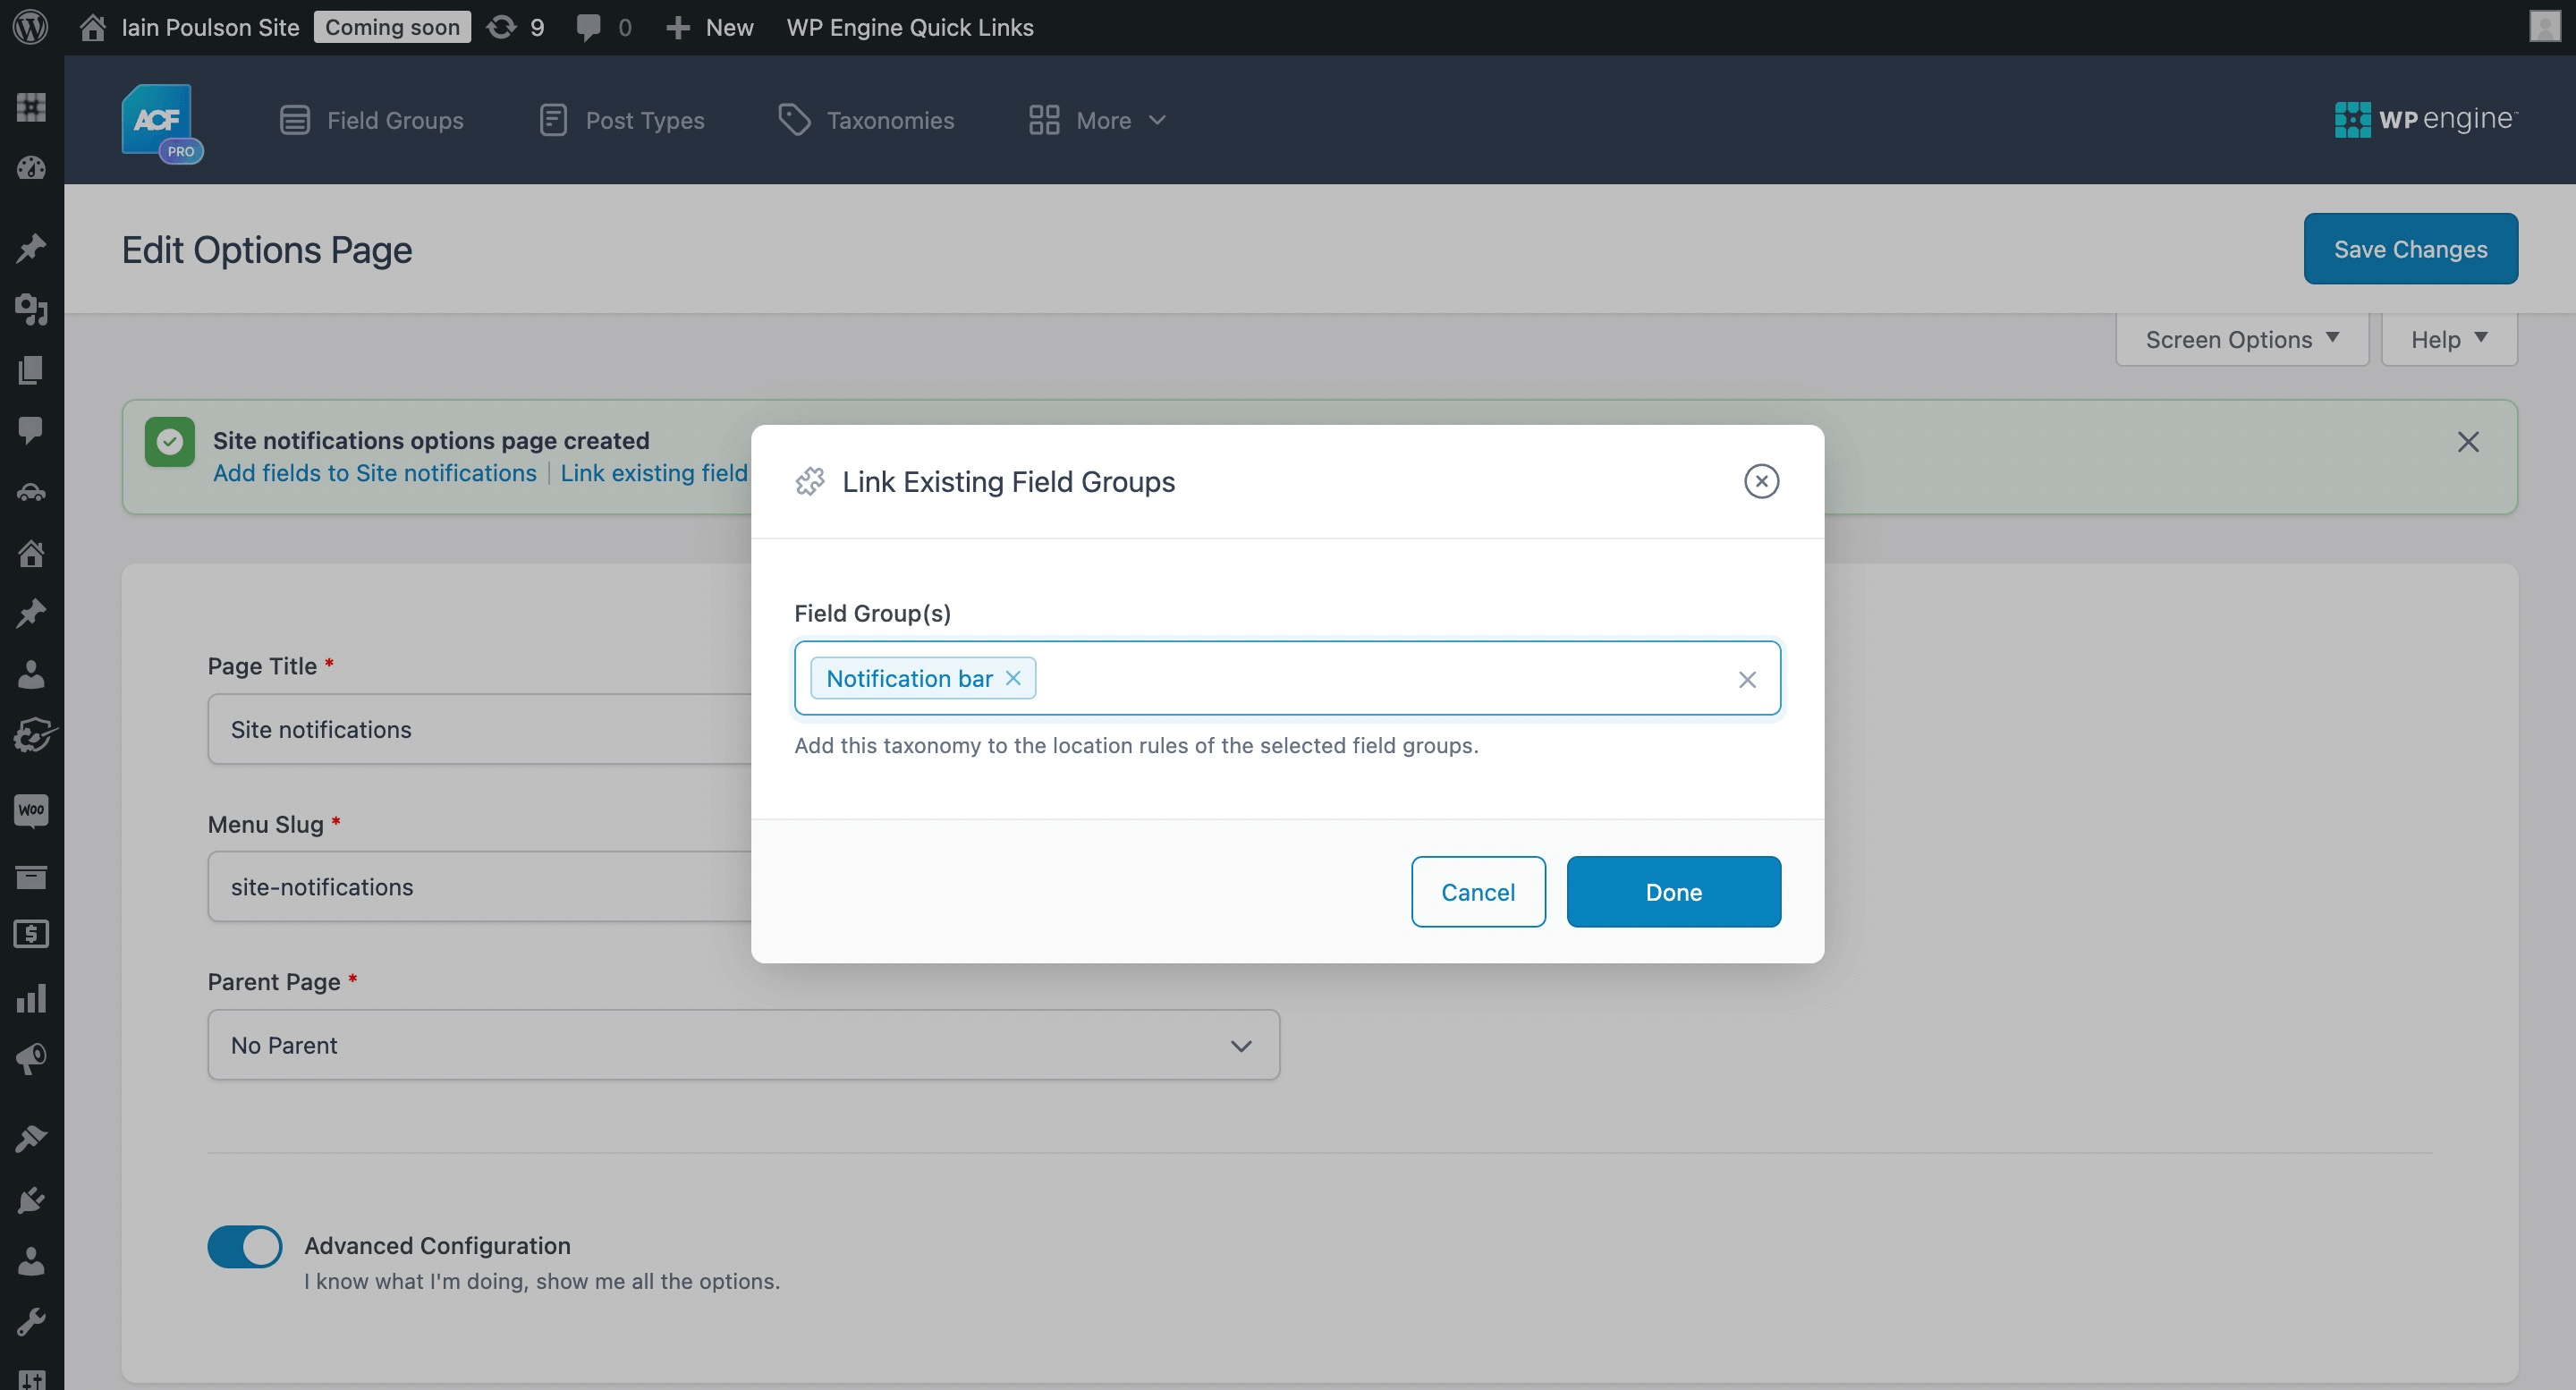
- After creating your Options page, you’ll see a Link Existing Field Groups link at the top. Click this link to select and use field groups you’ve previously created.
- Alternatively, if you haven’t created a field group, go to ACF > Field Groups and add a new field group.
- Create your desired fields.
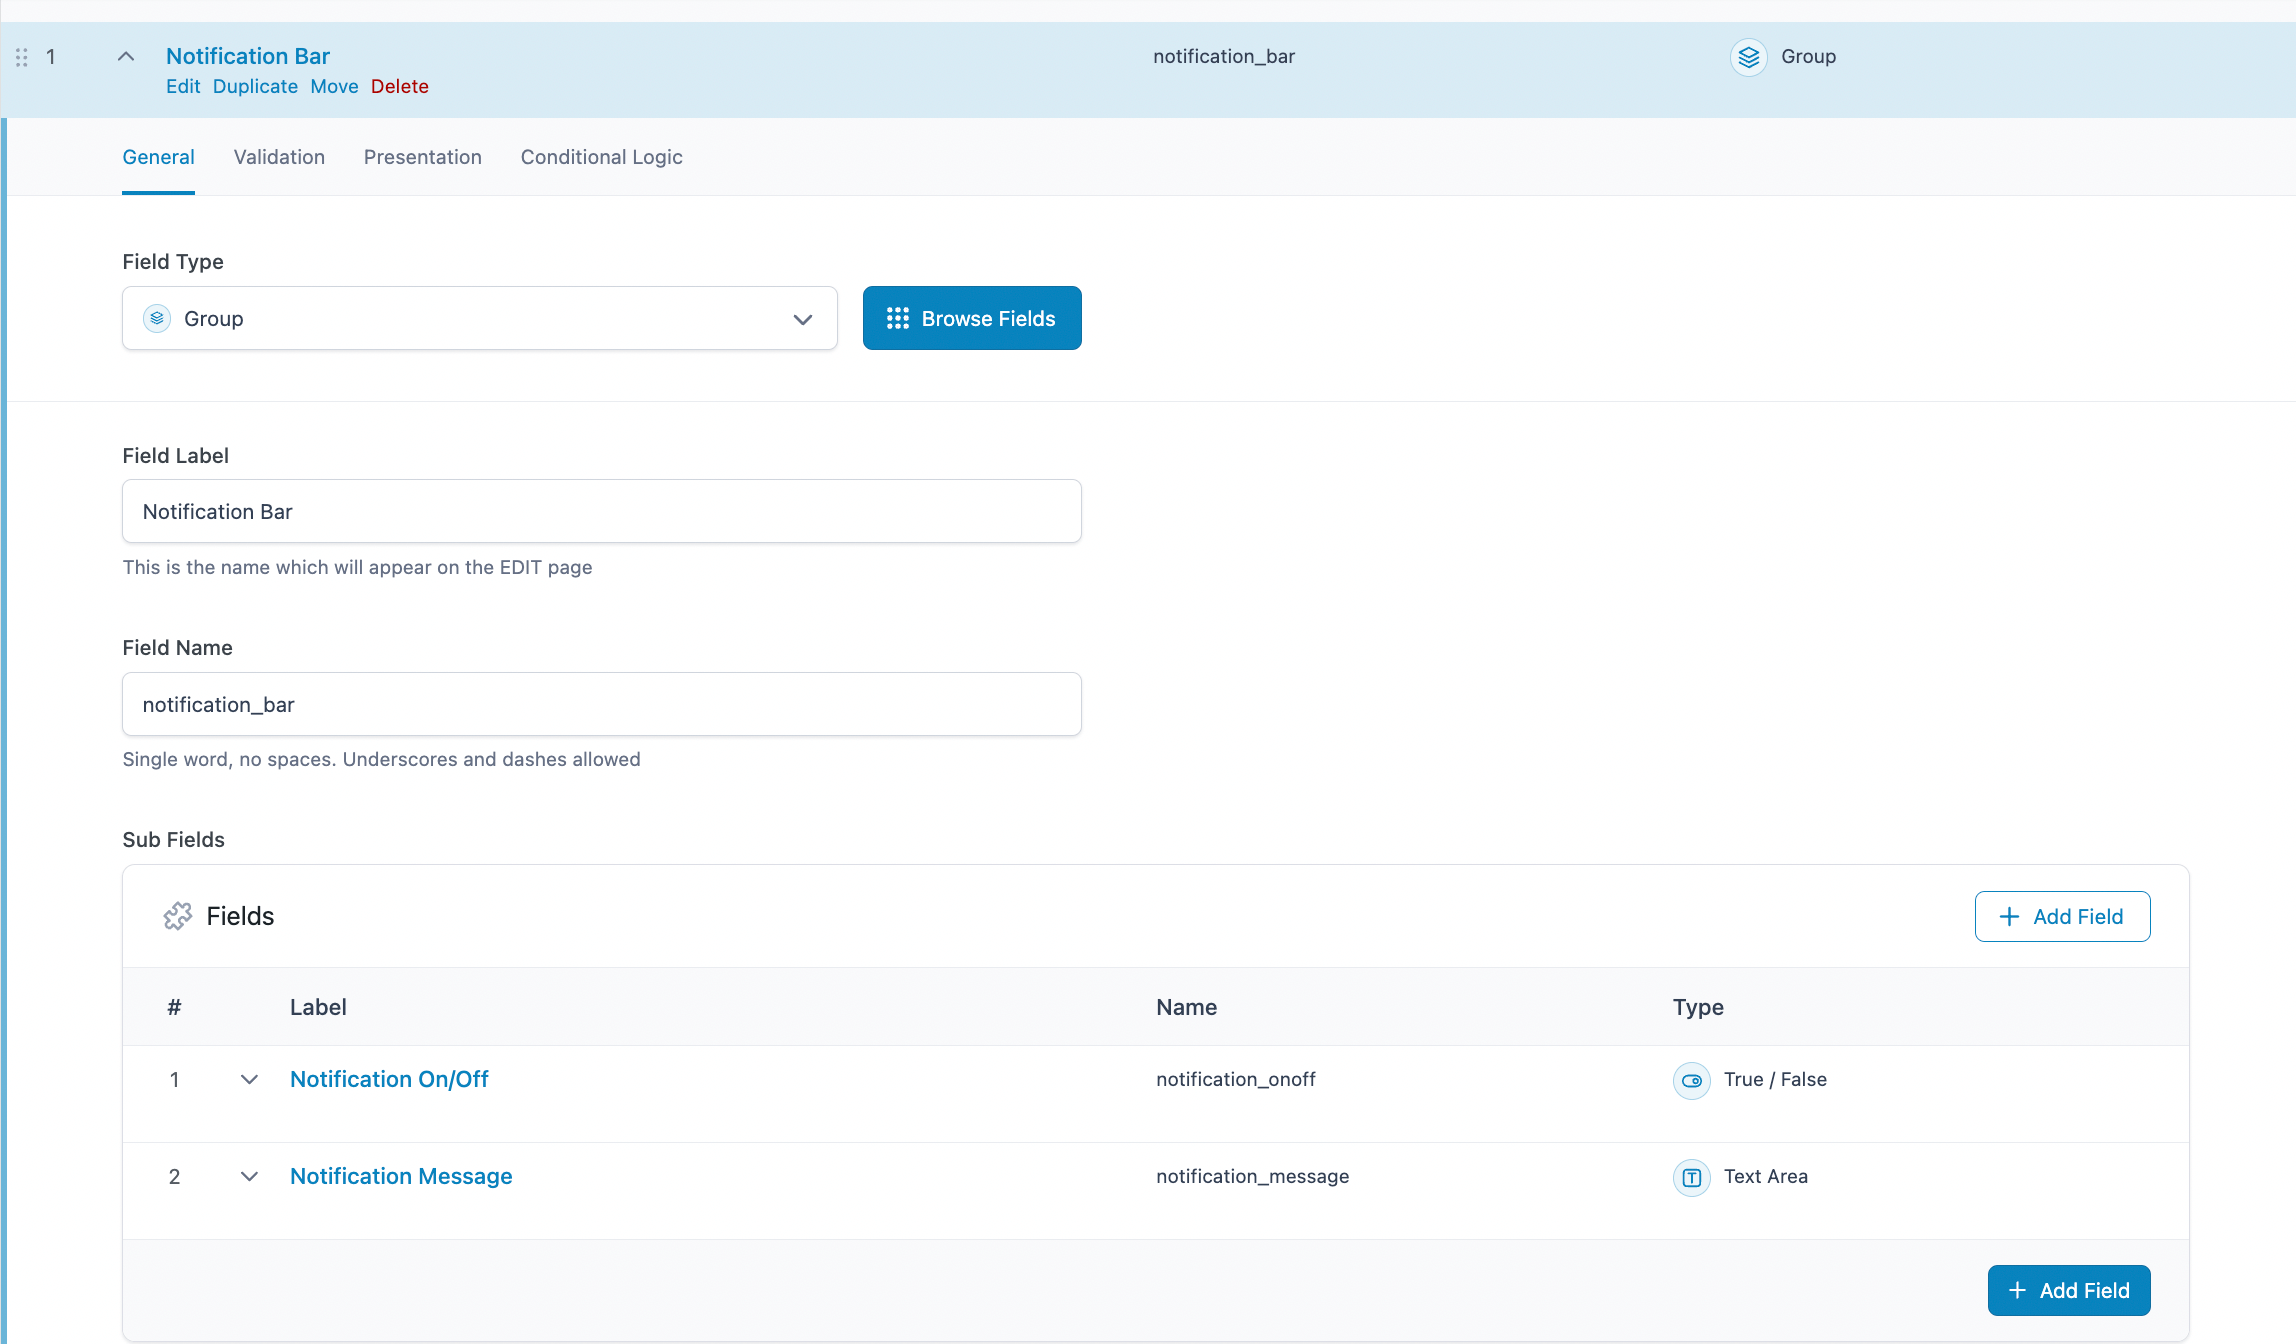
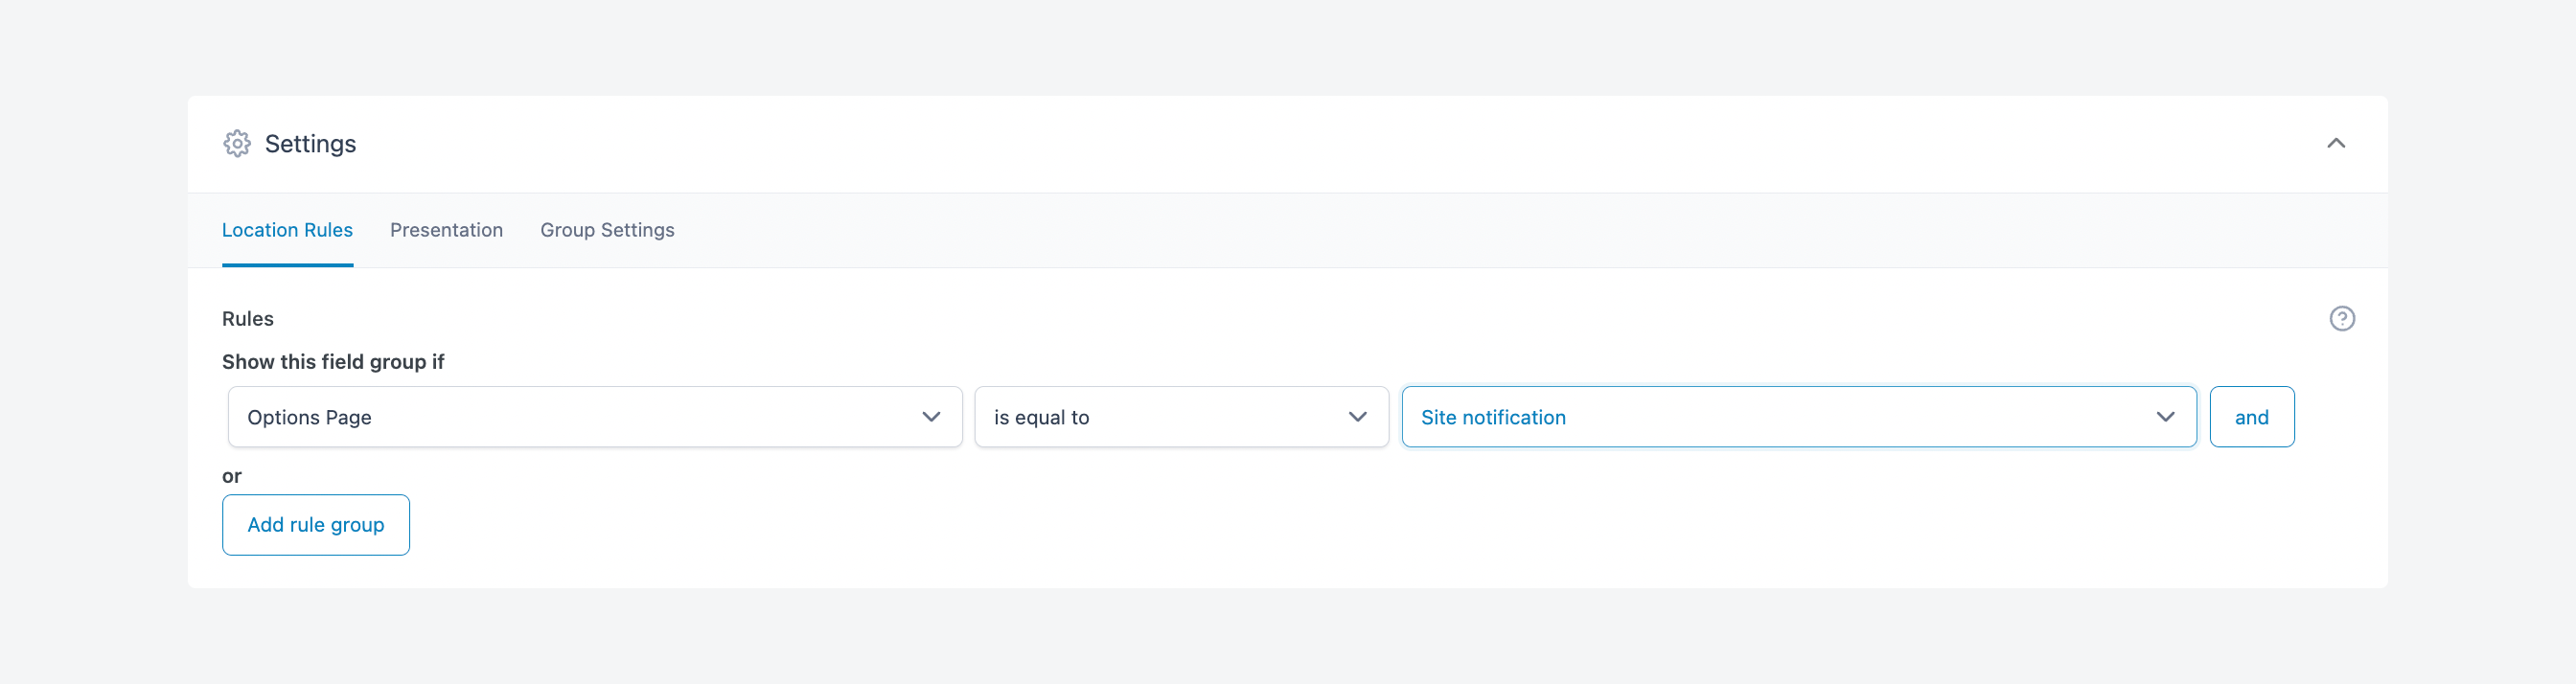
- Under Location Rules, set the rules to show this field group if Options Page is equal to Site notification (the Options page we previously created).
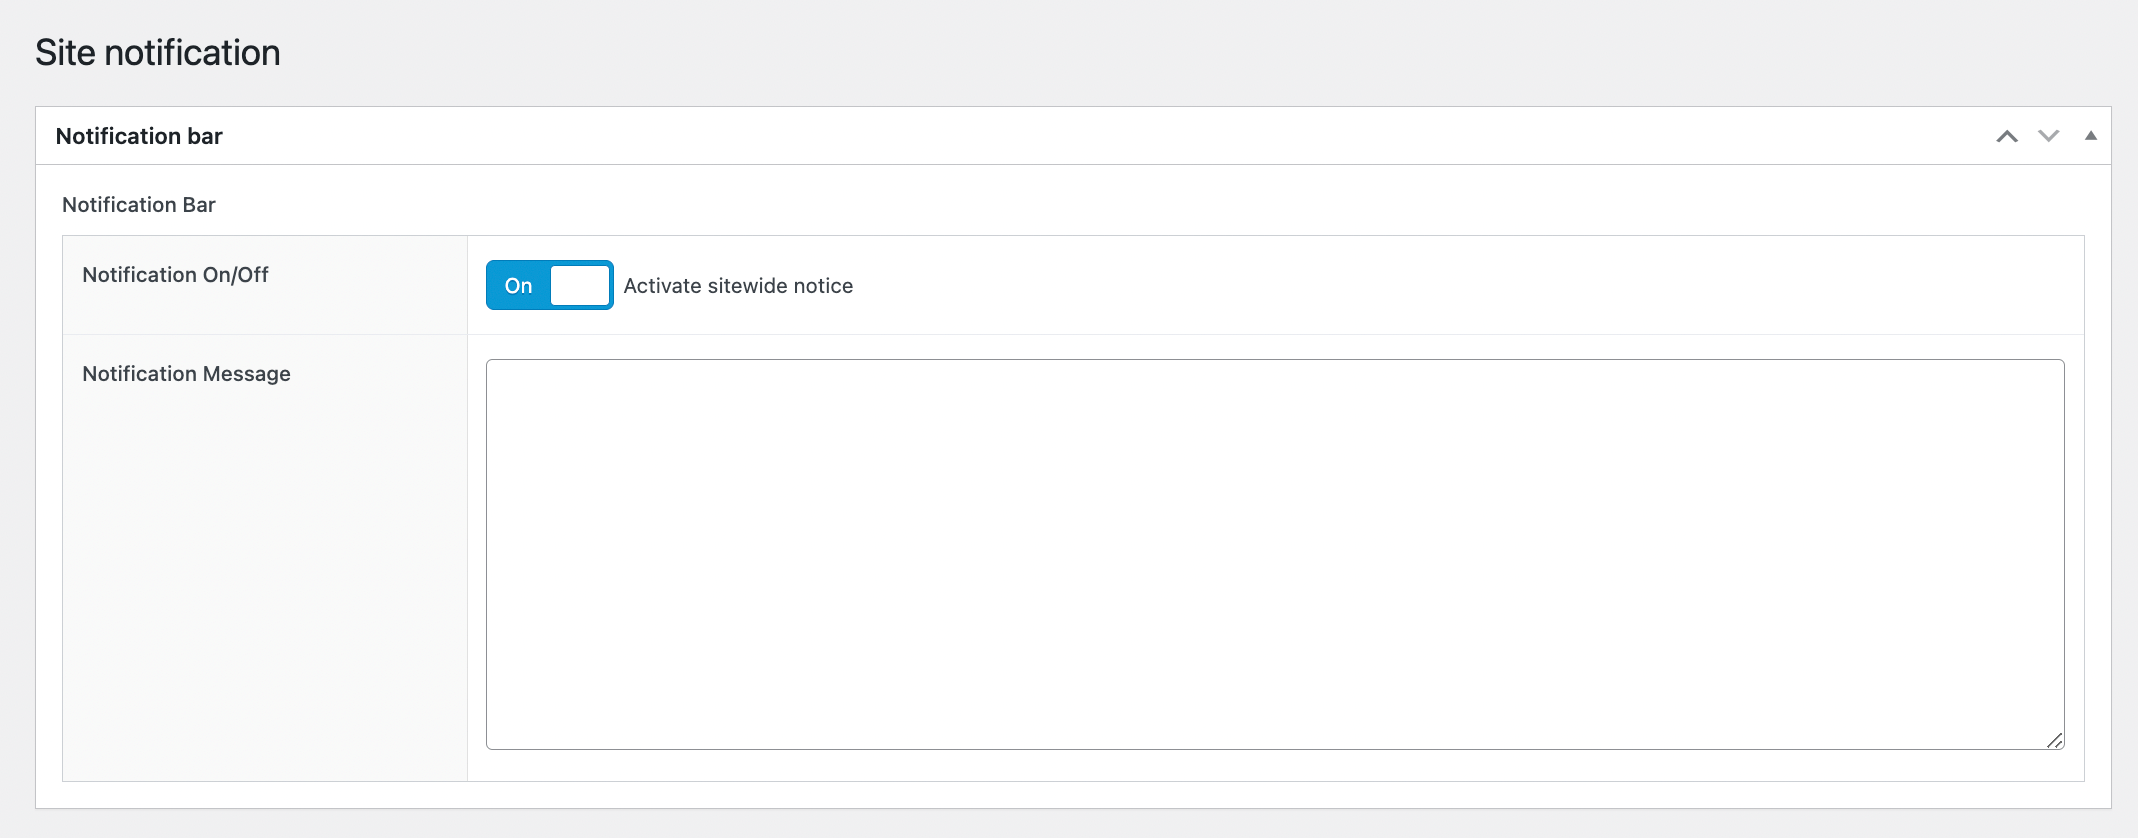
- After saving your changes, select your new Options page from your dashboard to see how it would appear to users.
- To edit your Options page, return to ACF > Options Pages and click on your page title. Here, you can modify the page title, menu slug, and parent page settings. Toggle Advanced Configuration for additional customization options like visibility and permissions.
Want to make your admin views even more powerful? Admin Columns works alongside ACF to display your custom fields right where you need them. This optional premium tool puts your custom field data directly in list views, enables sorting and filtering by any field, and even allows quick editing without opening individual posts.
These tools turn WordPress from a basic blogging platform into a professional content management system that:
- Saves time through efficient data management.
- Reduces errors with structured data entry.
- Creates an intuitive interface for your team.
- Delivers a professional experience for clients.
Supercharge Your Website With Premium Features Using ACF PRO
Speed up your workflow and unlock features to better develop websites using ACF Blocks and Options Pages, with the Flexible Content, Repeater, Clone, Gallery Fields & More.
3. Personalize your admin with color schemes and themes
Visual customization helps create a cohesive brand experience in your WordPress admin area. While WordPress includes several built-in color schemes, you can go further to match your brand’s visual identity.
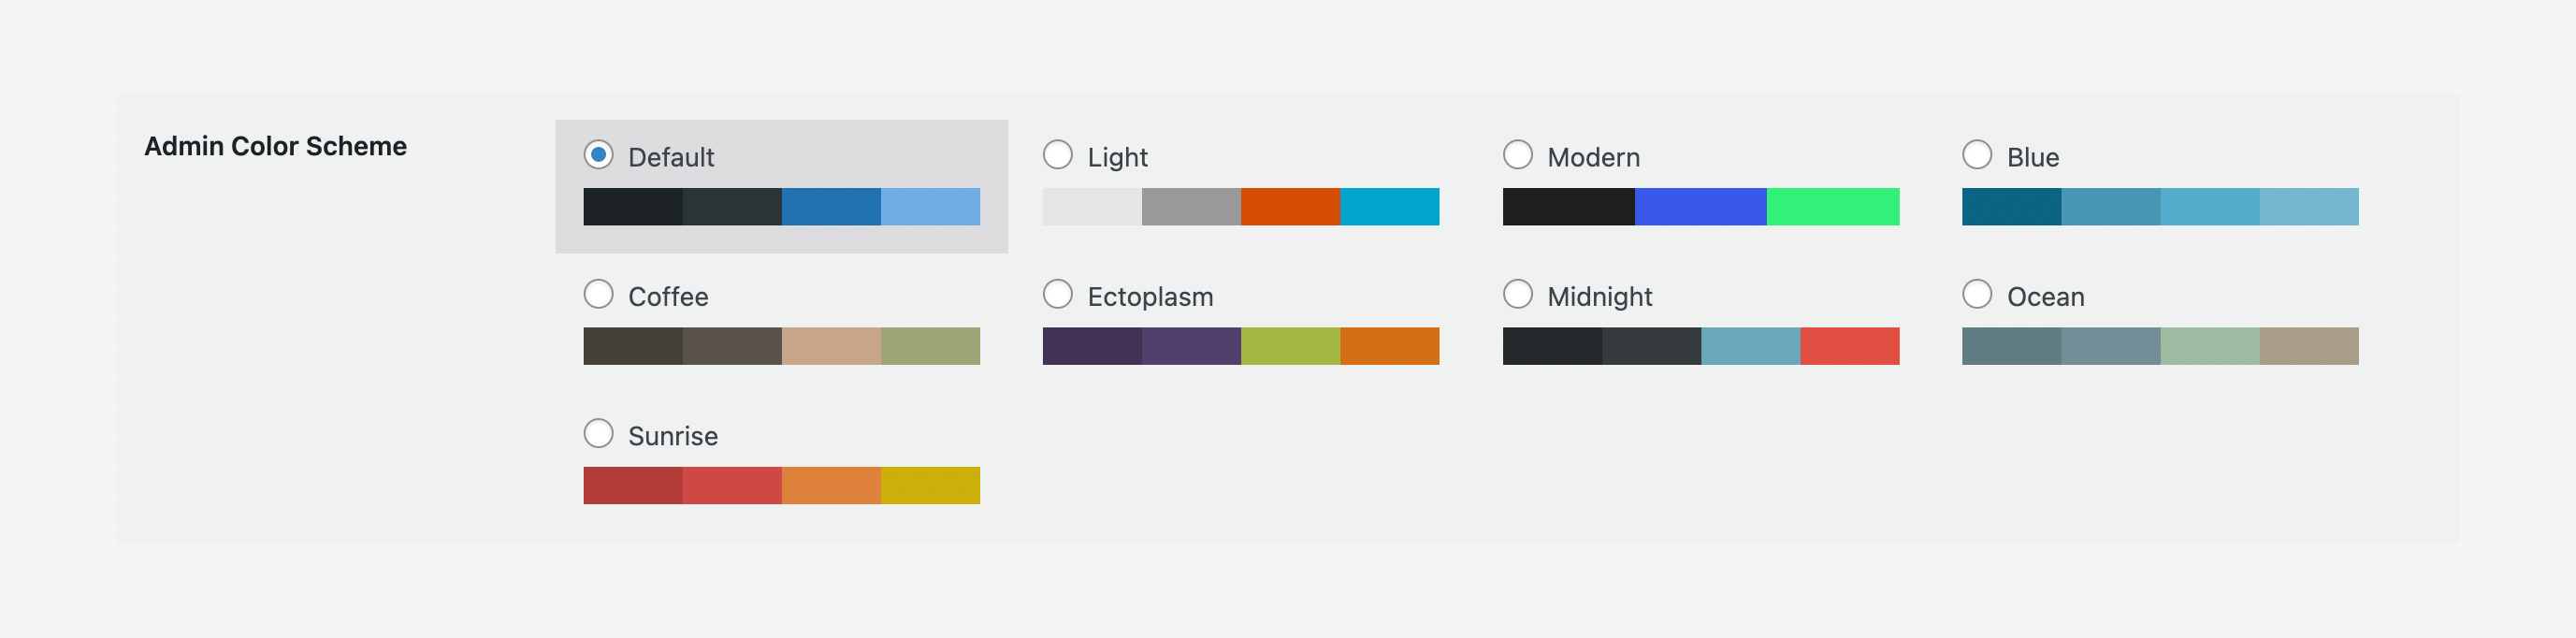
Built-in color schemes
Every WordPress installation comes with a selection of default color schemes. Access these by navigating to Users > Profile > Admin Color Scheme. These basic options can refresh your admin interface, but they’re limited to preset colors.
Custom color schemes
Want more than the standard palette? You can create custom color schemes in several ways:
- Plugins: Tools like the Admin Color Scheme plugin and WordPress Admin Colors were once popular options for color customization. However, it’s important to note that these plugins may no longer be actively maintained and may not work with recent WordPress versions.
- Theme packages: Complete theme packages available through the plugin directory like Slate offer comprehensive admin customization. However, similar to the plugins we mentioned, many of these themes in the WordPress directory haven’t been tested with the latest releases, which could lead to compatibility issues.
Creating your own color scheme
Given the maintenance status of existing plugins and themes, the most reliable approach is working with a developer to create a custom admin color scheme. This method ensures compatibility and gives you complete control over your admin appearance. The process involves:
- Adding your custom CSS to your theme (typically in a style.css file).
- Including the necessary PHP code in your functions.php file.
- Making the new scheme available in user profiles.
This approach might require more initial setup, but it provides a stable, branded experience that won’t break with WordPress updates.
4. Create custom login pages for a branded experience
The LoginPress plugin allows you to customize every aspect of your login page, including the logo, background color, text color, font size, button style, and more.
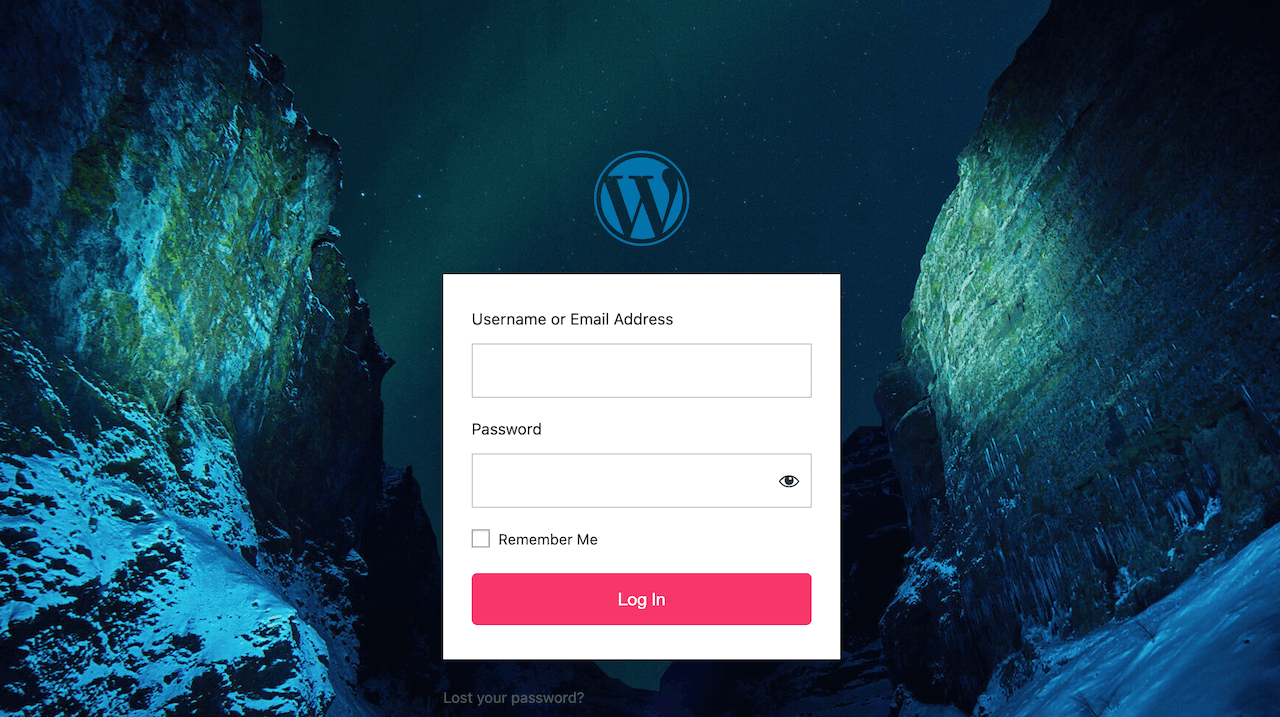
LoginPress comes with predesigned templates to get you started. Each template serves as a foundation that you can customize to match your brand identity. From these templates, you can fine-tune every visual element to align perfectly with your brand standards.
The plugin also makes it simple to transform the standard WordPress login experience. Start by implementing your custom logo and background imagery. Then, set up social login options for easier access and create branded welcome and error messages that maintain a consistent voice throughout the login process.
Beyond aesthetics, LoginPress includes essential security features like Google reCAPTCHA integration and customizable error messages. For developers needing precise control, the plugin supports custom CSS code to further enhance login forms and create exactly the right look and feel.
Implementation considerations and best practices
Before customizing your WordPress admin area, consider these best practices:
Security and maintenance: Start with trusted plugins from reputable sources – this isn’t an area where you want to cut corners. Plan ahead for WordPress core and plugin updates by documenting all your customizations and modifications. Keep regular backups of your site, and always test changes in a staging environment first.
Performance considerations: Watch your dashboard’s performance carefully. Monitor load speeds and server resource usage, especially when adding multiple plugins. Consider implementing caching where appropriate to keep your admin area running smoothly.
Documentation strategy: Create two sets of documentation to support your customized admin interface.
For clients, prepare clear user guides that cover basic troubleshooting steps and common tasks. This helps reduce support requests and empowers users to solve simple issues themselves.
For developers, maintain detailed records of configuration details, customization records, and update procedures. This documentation proves invaluable during updates or when handing off projects to other team members.
Take your WordPress admin dashboard to the next level
WordPress admin customization starts with simple changes like organizing your dashboard and streamlining menus. But as we’ve explored, you can go further with custom fields, branded interfaces, and professional login pages.
These customizations deliver real business benefits by transforming WordPress from a basic CMS into a powerful content management platform. Teams work more efficiently with organized interfaces. New users need less training when they see only the features they need. Clients make fewer support requests thanks to intuitive layouts. And every interaction reinforces your professional approach.
ACF takes this customization even further. You can create organized field groups for structured content management, build custom options pages for intuitive site controls, and deliver professional admin experiences that match exactly how your business works.
Ready to take your WordPress admin experience to the next level? Explore ACF and ACF PRO today to start building more professional, efficient WordPress sites.

For plugin support, please contact our support team directly, as comments aren't actively monitored.