
Key points:
- Fetching API data in WordPress can be done via custom code using the HTTP API or plugins like WPGetAPI, depending on your flexibility and complexity needs.
- You can store and display this data using Advanced Custom Fields (ACF®), enabling structured, dynamic content integration across your site.
- Prioritize security, caching, and long-term maintainability to ensure performant, scalable, and reliable API integrations.
WordPress sites frequently need to interact with other services – pulling in social media posts, processing payments, or displaying real-time information from external sources.
The question isn’t whether you need this functionality, but how to implement it without creating a maintenance nightmare.
You’ve got a couple of solid options. Sometimes WordPress’s native functions are all you need for a fast, lightweight integration. Other times, a well-built plugin can save you serious development time and offer features you wouldn’t want to reinvent.
Once you’ve retrieved your data, you’ll often need to store it strategically, and Advanced Custom Fields (ACF®) offers a particularly elegant solution for making external information searchable and manageable within WordPress itself.
Regardless of the method you use, the same principles apply: prioritize security, performance, and long-term maintainability over what seems fastest to implement today.
Here’s everything you need to know about fetching data from an API.
How to fetch data from an API in WordPress
To retrieve data from an external API resource in WordPress, you can use the built-in WordPress HTTP API, which is a set of functions designed to send HTTP requests and handle responses. It supports the four core methods: GET, POST, PUT, and DELETE.
We’ll cover two methods to use the API: retrieving data manually by writing custom code and using a plugin. For both, we’ll be using the Random User Generator API.
Method 1: Fetching data with custom code
This first method involves writing code that fetches and displays data from the API.
You have a lot of flexibility in how to display said data, including on your frontend by modifying your theme templates.
For this walkthrough, though, we’ll create an admin page on the backend that displays the response data, which we feel is useful when you’re just getting started and aren’t ready to output the data on the frontend:
- In a custom plugin or your child theme’s functions.php, create a custom menu item in the WordPress admin dashboard:
function api_data_fetcher_menu() {
    add_menu_page(
        'Random User Data',      // Page Title
        'Random User Data',      // Menu Title
        'manage_options',        // Capability
        'random-user-data',      // Menu Slug
        'random_user_data_page', // Function to display the page
        'dashicons-admin-users', // Icon
        80                       // Position
    );
}
add_action('admin_menu', 'api_data_fetcher_menu');- Next, add a function to fetch data from the API:
function fetch_random_user_data() {
    // API URL for Random User Generator
    $response = wp_remote_get('https://randomuser.me/api/');

    if (is_wp_error($response)) {
        return 'Failed to retrieve data from Random User Generator API.';
    }

    // Decode the JSON response
    $data = wp_remote_retrieve_body($response);

    return json_decode($data);
}- Finally, add a function to display the response data on the custom admin page:
function random_user_data_page() {
    ?>
    <div class="wrap">
        <h1>Random User Data</h1>
        <pre>
            <?php
            // Fetch and display the data
            $data = fetch_random_user_data();
            if (isset($data->results) && count($data->results) > 0) {
                // Display user info
                $user = $data->results[0]; // Get the first user from the array
                echo 'Name: ' . $user->name->first . ' ' . $user->name->last . '<br>';
                echo 'Gender: ' . $user->gender . '<br>';
                echo 'Email: ' . $user->email . '<br>';
                echo 'Location: ' . $user->location->city . ', ' . $user->location->country . '<br>';
                echo 'Phone: ' . $user->phone . '<br>';
                echo 'Nationality: ' . $user->nat . '<br>';
                echo 'Picture: <img src="' . $user->picture->large . '" alt="User Picture"><br>';
            } else {
                echo 'No user data available.';
            }
            ?>
        </pre>
    </div>
    <?php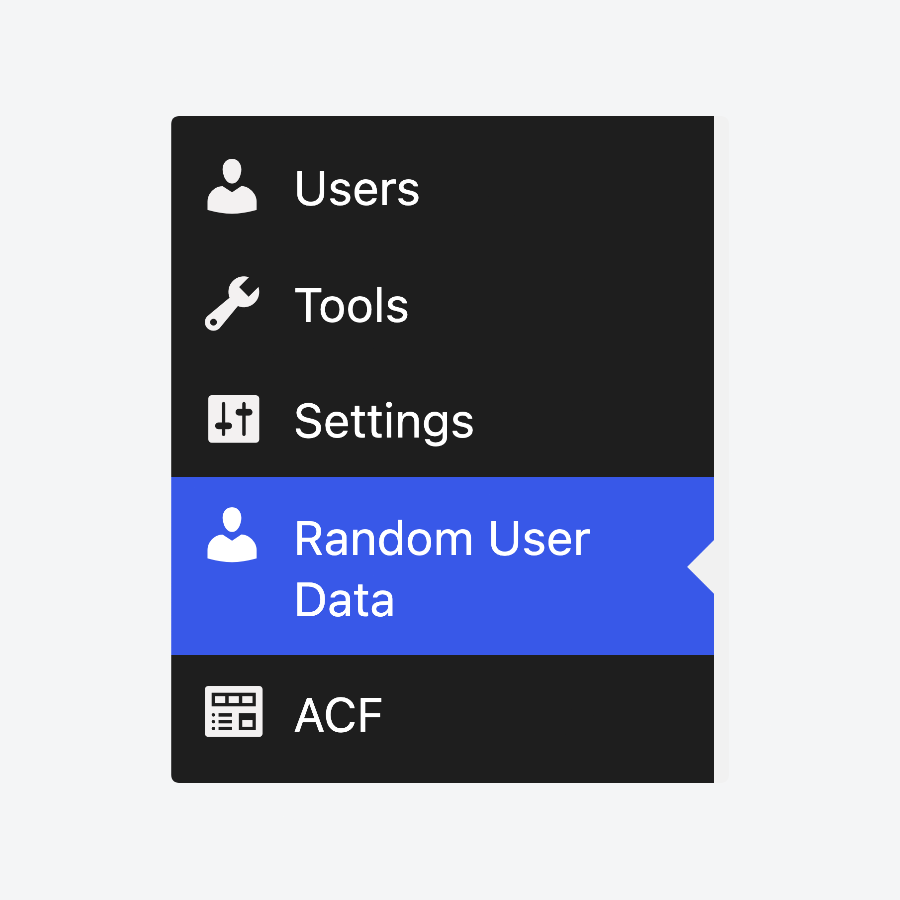
}- Load up the admin page by clicking the new option in the dashboard menu:
And you should see some data:

To display this data in a theme template instead, just remove the code that creates an admin page and replace it with a custom function to fetch and display random user data, using a function like fetch_random_user_data() for data retrieval and a custom function name (e.g., display_random_user_data()) for output. Then, call your custom display function in the appropriate template file (e.g., page.php) to show the data on the frontend.
Method 2: Fetching data using a plugin
Several WordPress plugins can fetch data from an API without custom code, but we’re going to focus on WPGetAPI for this walkthrough:
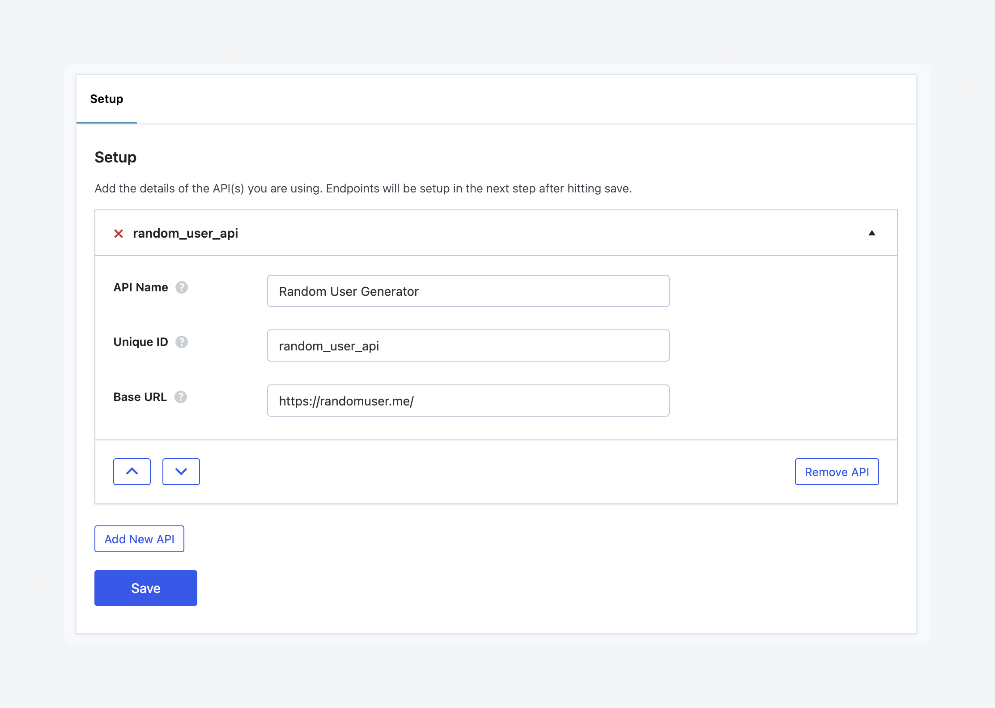
- With the plugin installed and activated, go to WPGetAPI > Setup from your admin dashboard.
- Enter the details for the API connection. The API Name and Unique ID can be whatever you want, while the Base URL should be available from the API docs.
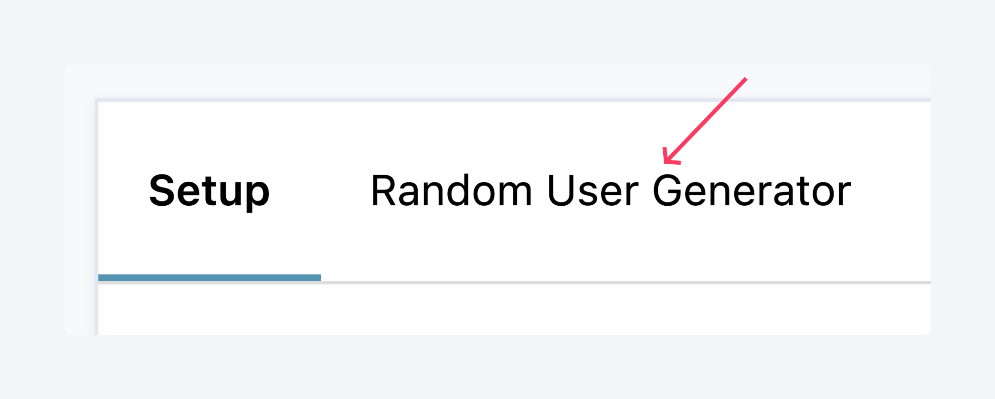
- Click the new tab that appears with your API’s name to open its advanced settings.
- Enter the details as needed. If you’re unsure, you can leave everything as is except for the unique ID (which can be whatever you want) and the endpoint (which should be available from the API docs).
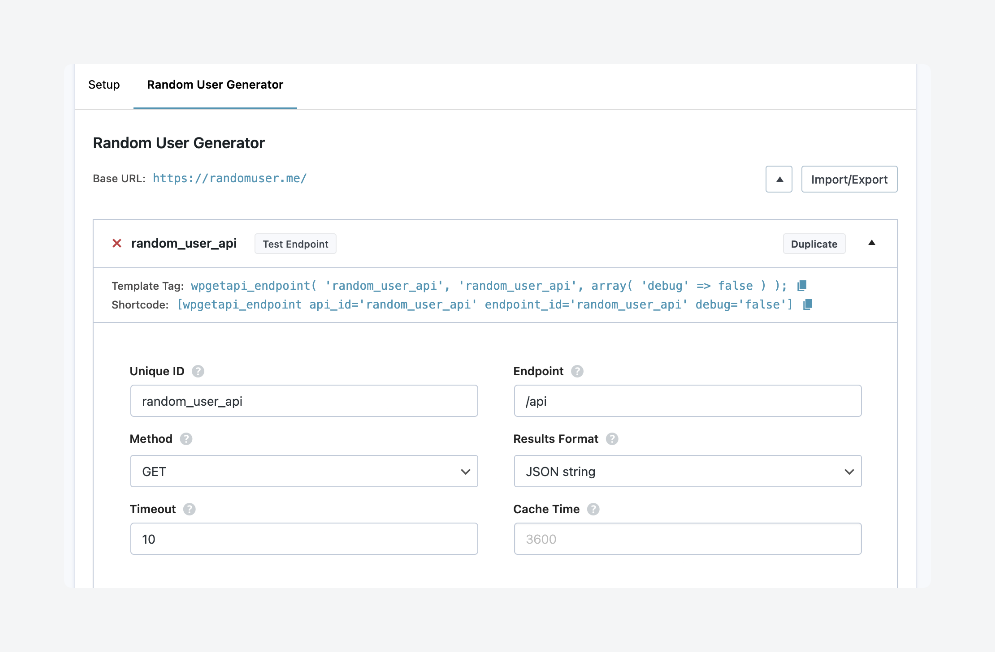
- Click Test Endpoint to verify that the connection is active. If it is, you should see a success message and some data fetched from the API:
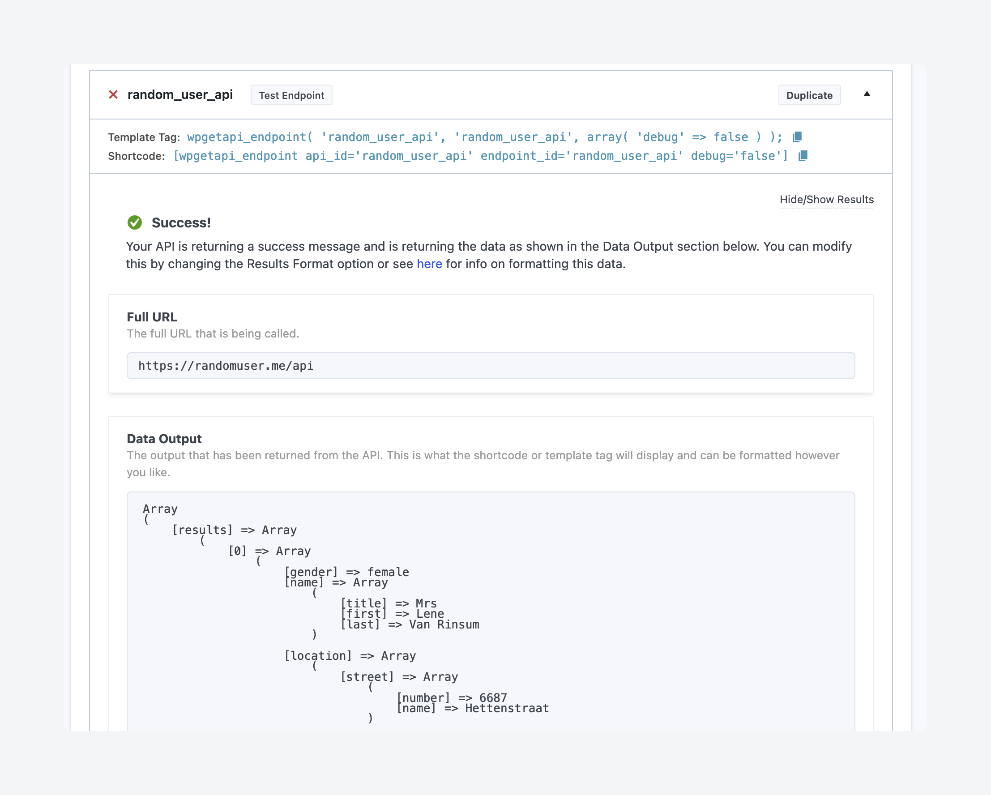
To output the data you fetch with WPGetAPI, you can use a shortcode or edit your theme templates to use its built-in functions, all available in its API docs.
How to work with APIs and Advanced Custom Fields
ACF allows you to create custom fields for posts, pages, and other content types, providing a structured way to store and display additional data.
For starters, the Show in REST API toggle lets you make custom fields, post types, and taxonomies available as REST API resources for other sites and services to access.
When working with APIs, you can use ACF to store and display data fetched from external sources. Using WordPress’s HTTP API’s wp_remote_get() function, you can retrieve data from external APIs and save it into ACF fields using update_field().
This allows you to dynamically populate content with data like product details, social media feeds, or real-time updates. ACF’s flexible field types, such as text, images, or repeater fields, further enable you to structure and display the API data in a way that fits your theme or site layout.
Supercharge Your Website With Premium Features Using ACF PRO
Speed up your workflow and unlock features to better develop websites using ACF Blocks and Options Pages, with the Flexible Content, Repeater, Clone, Gallery Fields & More.
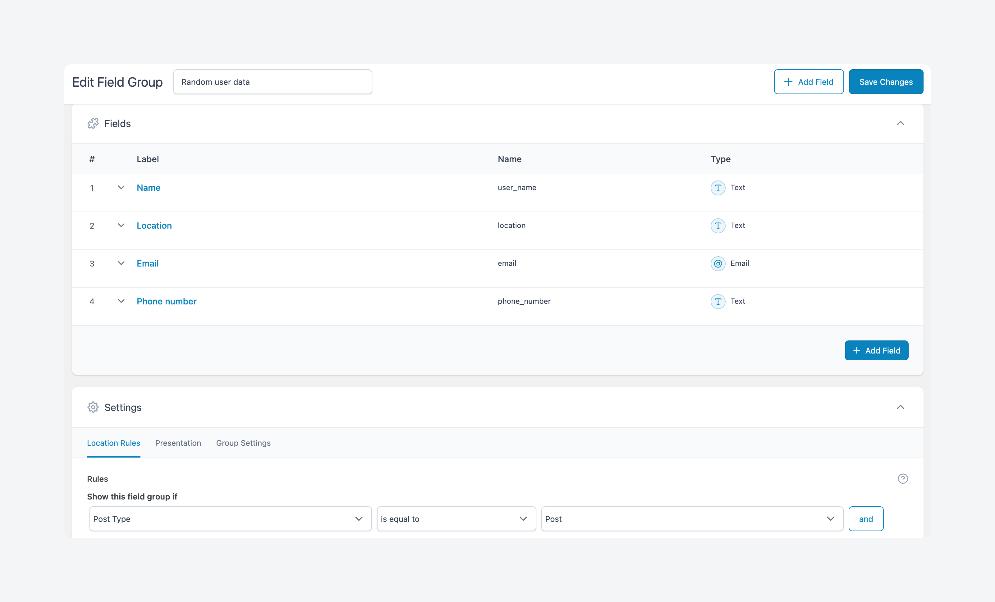
Let’s go over how to do this using both of the methods discussed above. We’ll save the user’s first and last names in a single field, along with their location, email address, and phone number. Here’s what the field group we’ll be working with looks like:
Method 1: Using custom code to fetch API data and update ACF fields
Here’s how to retrieve data from an API and save it to ACF fields using custom code:
- Define a function, which we’ll call
fetch_and_save_random_user_data()to fetch data from the Random User Generator API. - Call the API using
wp_remote_get()to fetch user data, and check for any errors in the response withis_wp_error(). If an error occurs, the function exits early:
$response = wp_remote_get('https://randomuser.me/api/');
if (is_wp_error($response)) {
    return; // Exit if there’s an error
}- Decode and extract the body of the response from JSON into a PHP object so the data is easier to work with:
$data = json_decode(wp_remote_retrieve_body($response));- Retrieve the first user in the results array to access their details:
$user = $data->results[0];- Update the ACF fields with this data:
$post_id = 1; // Replace with the ID of the post/page where you want to save the data

$user_name = $user->name->first . ' ' . $user->name->last; // Combine first and last name
update_field('user_name', $user_name, $post_id); // Save full name to user_name field
update_field('location', $user->location->city . ', ' . $user->location->country, $post_id); // Save location
update_field('email', $user->email, $post_id); // Save email
update_field('phone_number', $user->phone, $post_id); // Save phone number- Hook the
fetch_and_save_random_user_data()function to the wp action, ensuring it runs on every page load:
add_action('wp', 'fetch_and_save_random_user_data');- Visit the post with the ID specified in the code, and scroll down to see the data in your ACF fields below the editor:
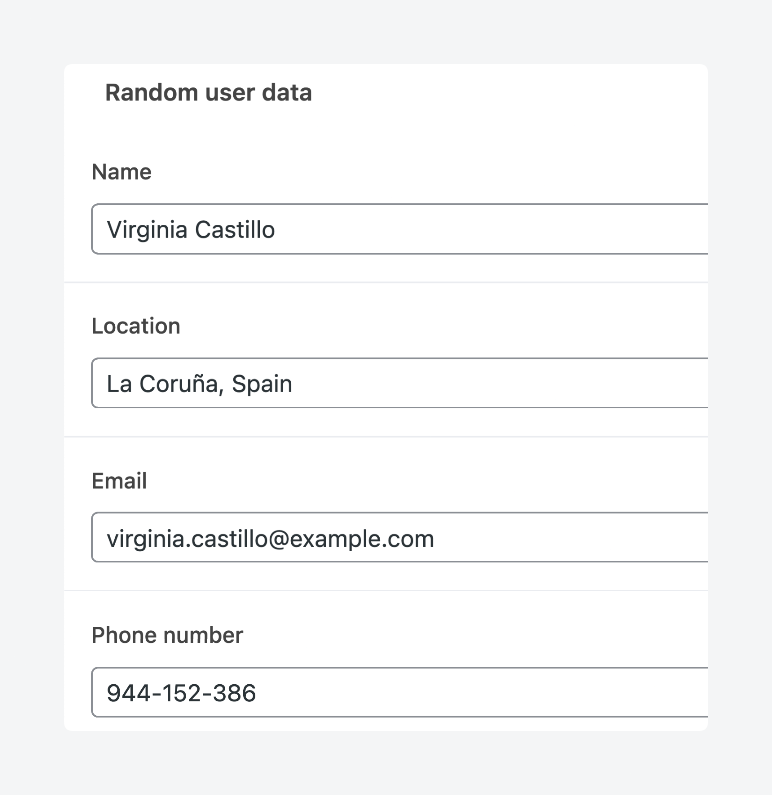
The code we’ve provided targets a specific post by its ID, but you can update multiple posts with different values by modifying the code to loop through a range of post IDs (e.g., using for or foreach) and use update_field() for each post, passing the corresponding post ID and unique data for each.
For example, the code below loops through post IDs 1 to 5:
for ($post_id = 1; $post_id <= 5; $post_id++)Method 2: Using plugins to fetch API data and update ACF fields
Curious about the WPGetAPI functions we teased earlier? If so, you’re in luck, because we’re going to demonstrate how to use them to fetch data and save it to ACF fields.
For this section, the code we’ll use is much simpler. It relies on the wpgetapi_endpoint() function, and it:
- Automatically populates ACF fields when you create new posts.
- Fetches data from the Random User API using your saved WPGetAPI endpoint.
- Updates four fields simultaneously – combining first and last names, formatting location data, and adding contact information.
- Only runs when needed – skips revisions, drafts, and posts that already have data.
- Includes a backup method if the primary API call fails.
Here’s the code:
function auto_populate_random_user($post_id) {
if (wp_is_post_revision($post_id) || get_post_type($post_id) !== 'post' || get_field('user_name', $post_id)) {
return;
}
$api_data = wpgetapi_endpoint('random_user_api') ?: wp_remote_retrieve_body(wp_remote_get('https://randomuser.me/api/'));
$user = json_decode($api_data, true)['results'][0] ?? null;
if ($user) {
update_field('user_name', $user['name']['first'] . ' ' . $user['name']['last'], $post_id);
update_field('location', $user['location']['city'] . ', ' . $user['location']['state'] . ', ' . $user['location']['country'], $post_id);
update_field('phone_number', $user['phone'], $post_id);
update_field('email', $user['email'], $post_id);
}
}
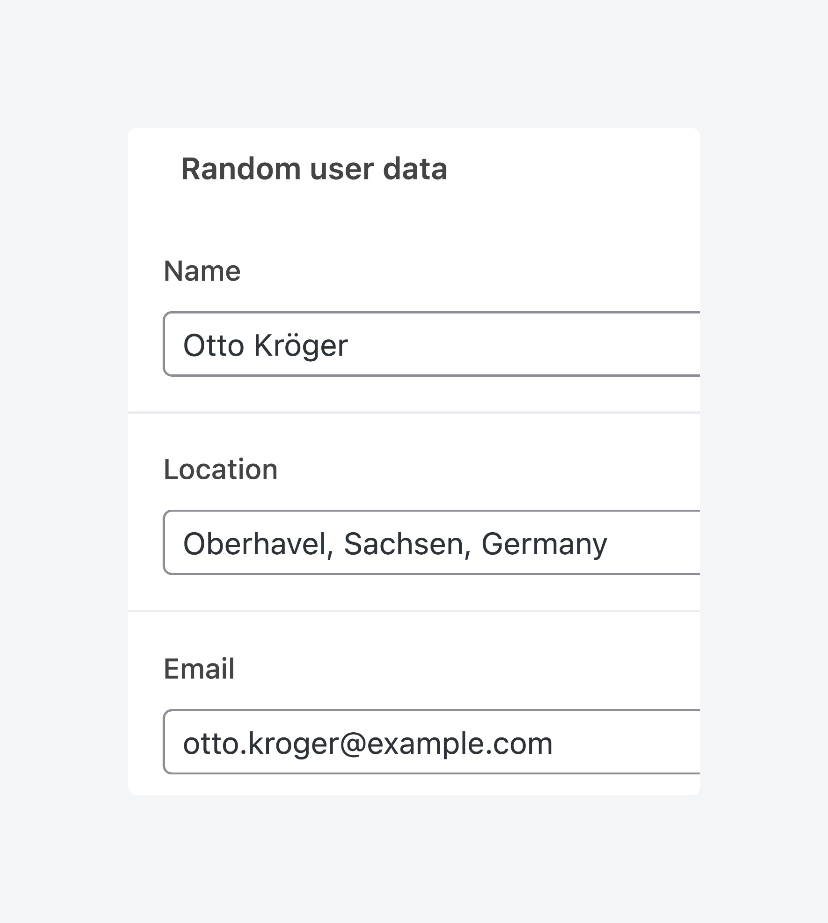
add_action('save_post', 'auto_populate_random_user');Just add it to your site, and you should see the fields populate with new data whenever you create a new post:
Best practices for optimizing API performance in WordPress
Fetching data from an API in WordPress requires a methodical approach to ensure efficient, secure, and error-free data retrieval:
- Cache API responses to enhance performance and reduce server load by storing data temporarily, minimizing the need for repeated calls to the same API endpoint.
- Use asynchronous requests to avoid blocking the main execution thread, ensuring your site remains responsive while waiting for external data.
- Respect API rate limits by implementing proper throttling to prevent exceeding request thresholds, avoiding service disruptions, and ensuring long-term access to external APIs.
- Validate API responses rigorously by checking data structure and essential fields, ensuring your code handles unexpected or malformed responses without breaking.
- Secure API interactions by using HTTPS and implementing authentication, protecting sensitive data during transmission, and preventing unauthorized access.
Transform your site with dynamic API data today
Integrating external APIs into your WordPress site opens up a world of possibilities for displaying dynamic, real-time content.
You can opt for custom code or use plugins like WPGetAPI, with the choice depending on your specific needs. Custom code offers total flexibility and control, while plugins provide a quick, user-friendly setup.
Regardless of your approach, ACF can elevate your API data workflow.
ACF makes handling external data more intuitive by offering structured field types for storing, organizing, and displaying content. Instead of dealing with raw API responses, you can create custom field groups tailored to your specific data – such as user profiles, product catalogs, or live feeds – and ensure smooth integration with your theme while maintaining consistent formatting across the site.
As you work with APIs, prioritize performance by using efficient caching, maintain security through proper authentication and data validation, and plan for scalability to manage increasing data volumes.
With these best practices in place, along with ACF’s powerful data management capabilities, you’ll establish a dynamic, scalable workflow.
If you haven’t explored ACF’s potential yet, now’s the time to see how it can transform your WordPress site.


For plugin support, please contact our support team directly, as comments aren't actively monitored.