
Key points:
- Bricks supports Advanced Custom Fields (ACF®) natively, making it easy to display dynamic content like text, images, and custom fields.
- Create templates, conditional layouts, and repeater loops using Bricks’ dynamic data and Query Loop Builder.
- ACF PRO unlocks advanced field types – get it to build more complex, flexible WordPress sites with Bricks.
Bricks Builder is a favorite in the WordPress community, thanks to its speed, flexibility, and modern design tools.
On its own, Bricks handles basic data well, but for more complex websites, Advanced Custom Fields (ACF®) adds the extra functionality many projects need.
Together, Bricks and ACF offer a powerful way to create dynamic, custom websites without writing code. In fact, according to our 2024 survey, the number of ACF users building with Bricks grew by 48% compared to the previous year – a clear sign of how well these tools work together.
We’ll walk through how to connect Bricks with ACF, show real-world examples, and offer guidance for both newcomers and experienced users looking to get the most out of this combination.
How Bricks Builder works with ACF
Bricks Builder includes native support for ACF, so integration works out of the box with no additional setup required.
Once ACF is installed and your custom fields are defined, Bricks automatically detects them and makes them available in its UI. This includes support for custom post types created through ACF or another plugin.
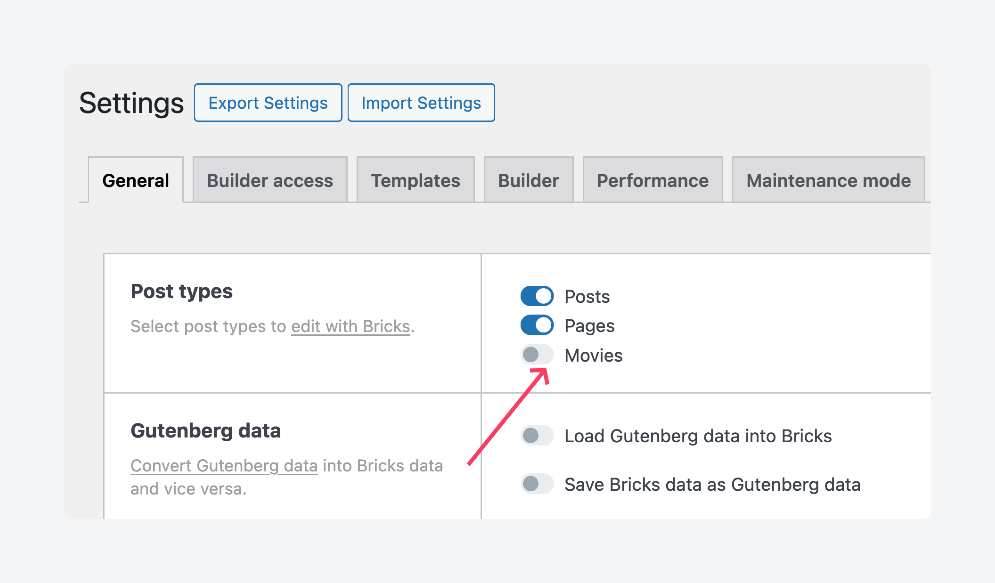
To enable Bricks editing for custom post types, navigate to Bricks > Settings > Post Types. For example, if you’ve registered a Movies post type using ACF, it will appear in this list.
Bricks supports ACF data in any element that allows dynamic content. You can insert ACF fields into headings, paragraphs, images, links, and other supported elements using Bricks’ dynamic data feature. Field groups appear automatically when editing relevant content types, making it easy to bind dynamic values to visual elements.
In more complex projects, you may occasionally encounter issues where fields don’t appear or update as expected. In these cases, clearing your site and builder cache resolves these problems.
Overall, though, the ACF-Bricks integration is stable, reliable, and efficient for dynamic site building.
Getting started with the Bricks Builder and ACF integration
Now, let’s walk through the basics of using ACF and Bricks.
We’ll show you how to output ACF field values directly in Bricks, and how to create templates that dynamically display content for custom post types.
Displaying ACF fields in Bricks Builder
Bricks Builder uses its dynamic content feature to display ACF field values directly within page elements. Before you begin, make sure you have an ACF field group set up and assigned to a post type or page that can be edited with Bricks.
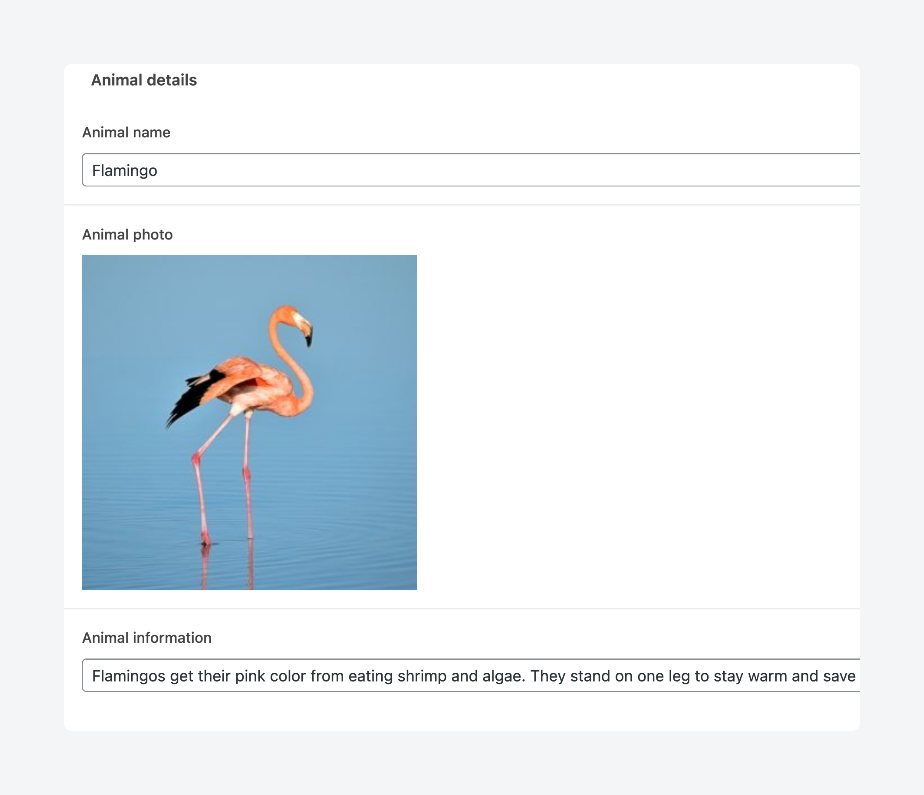
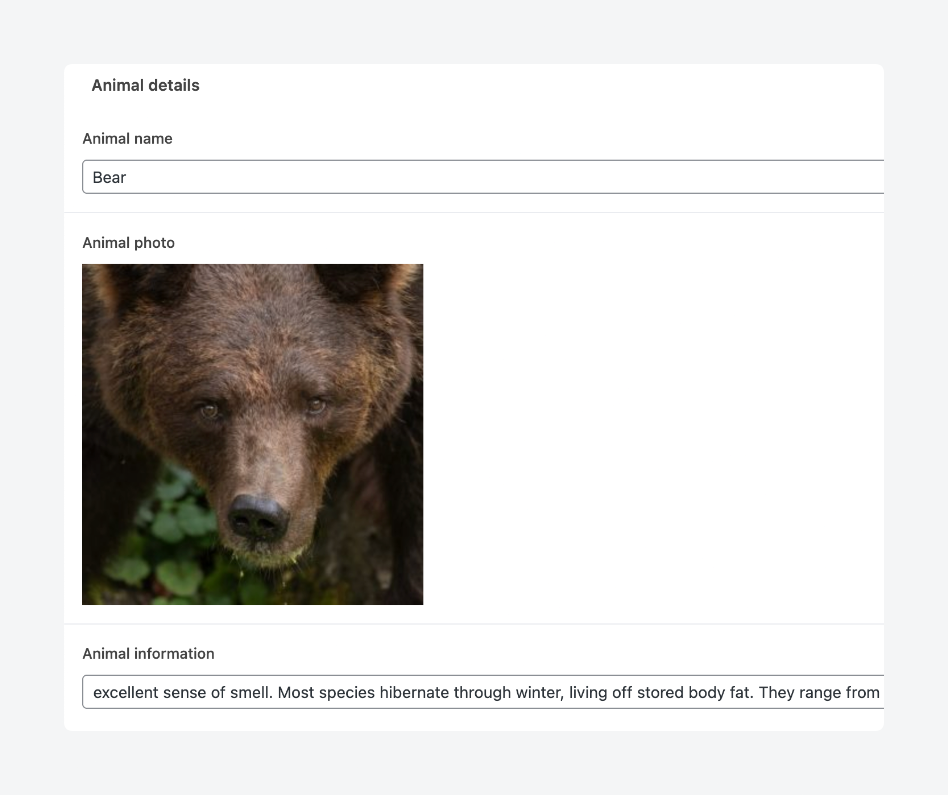
For this example, we’ll use a simple Animals field group containing three fields:
- Name – a text field
- Photo – an image field
- Information – another text field
To ensure the best compatibility when working with images in Bricks, it’s recommended to set the image field’s return format to Image Array. This provides the full image object, including the URL, alt text, caption, and dimensions – helping avoid common issues like missing or incomplete data when rendering images in dynamic elements.
Once your field group is created and attached to the relevant post type, you’re ready to start outputting those values visually in Bricks:
- Create a new post and fill in the ACF meta boxes.
- Click Edit with Bricks to open the builder.
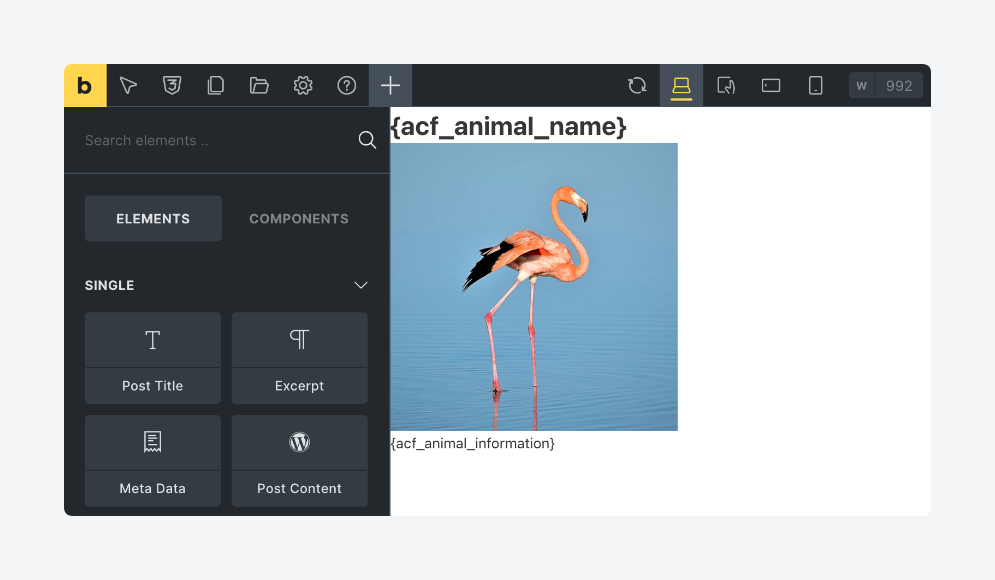
- Add the elements where you want to display ACF data. We’ll use a heading, image, and basic text for the structure.
- Go through each element and connect it to ACF data. To do this, select the element on the canvas, then, under its Content section on the left, click the lightning icon to use dynamic data. Here’s what that looks like for the heading element:

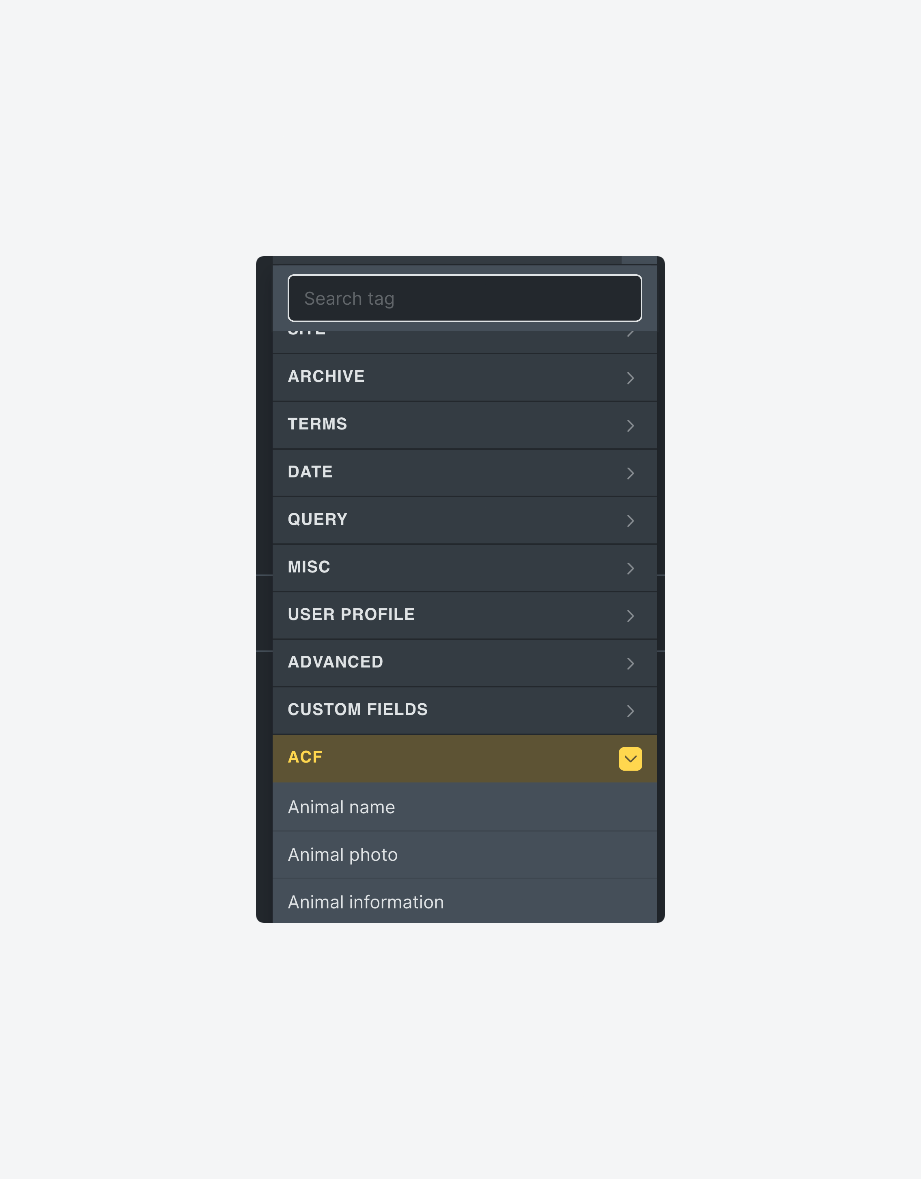
- Scroll down until you see the ACF section (not Advanced or Custom Fields, be careful!), then choose the field whose data you want to output in the element.
- After selecting the field, you might need to go back and delete the placeholder information, e.g., “I am a heading” for the heading element, and leave only what’s in the curly braces. Alternatively, you can add before and/or after text right inside the editor.

- Repeat this process for the other elements until you’ve connected each one to the corresponding ACF field.
Here’s what our canvas looks like when we complete step 7:
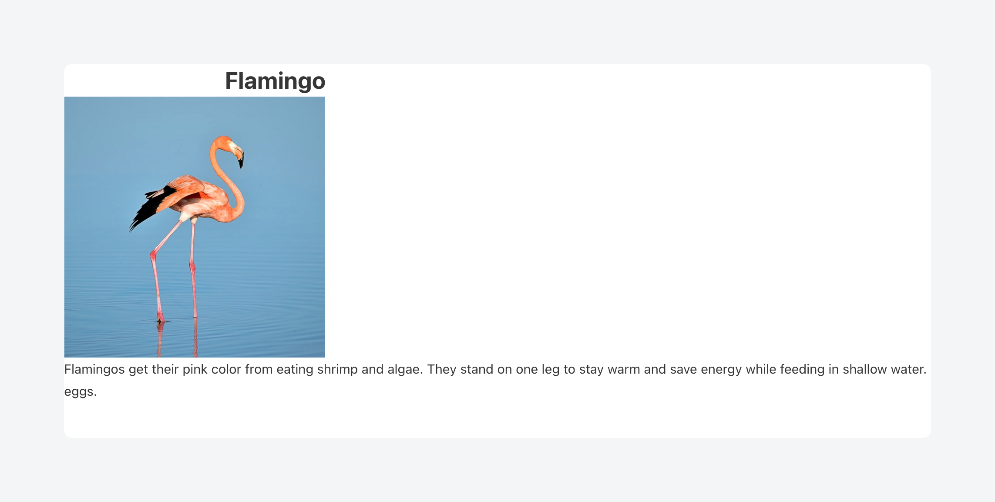
Here’s what it looks like on the frontend:
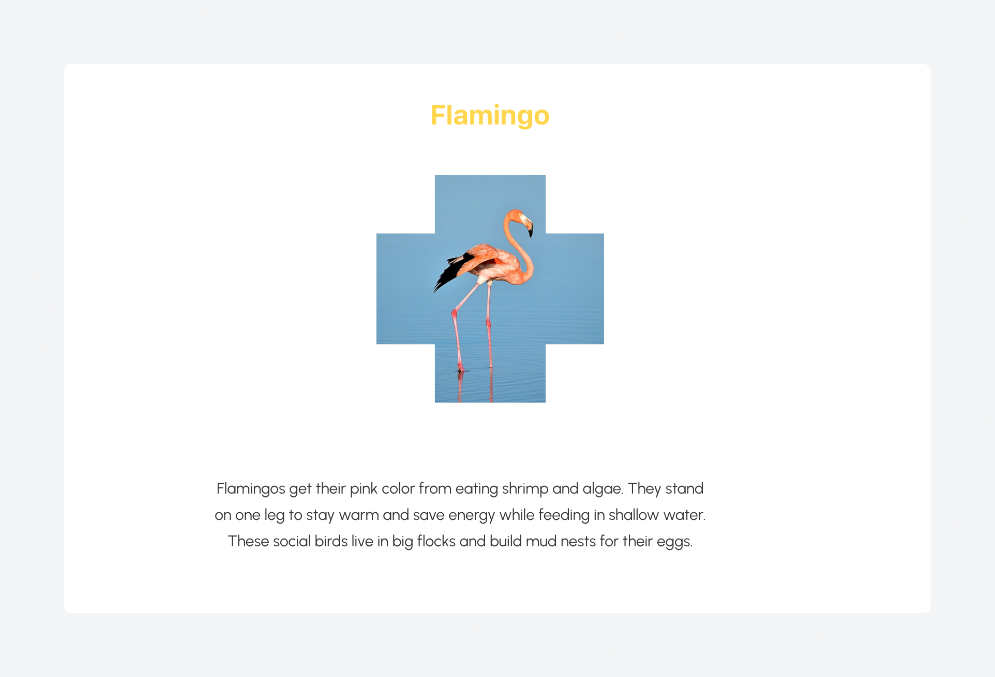
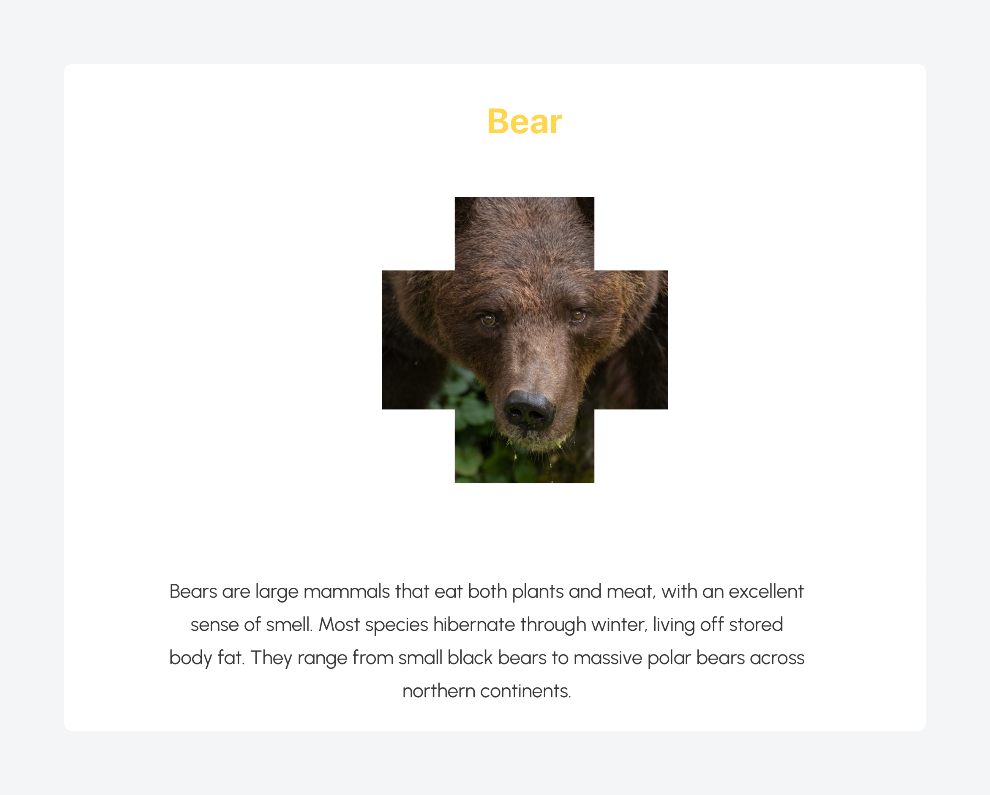
And here’s what it looks like with some light styling:
Creating templates for ACF custom post types with Bricks Builder
Bricks makes it easy to create reusable templates for custom post types, allowing you to design once and apply that layout across multiple posts. If you’ve already built a layout using Bricks – like in the previous section – you can quickly turn that design into a dynamic template.
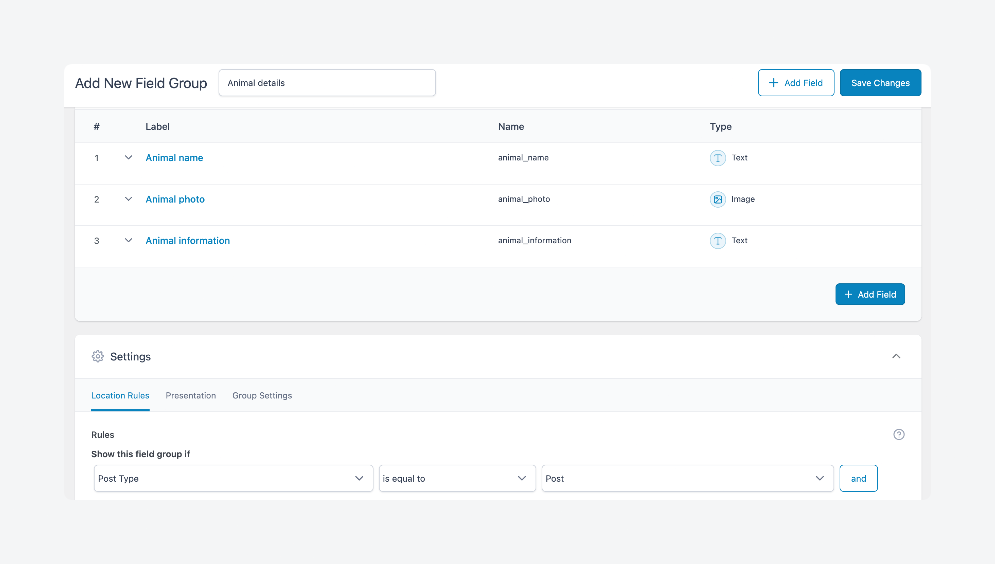
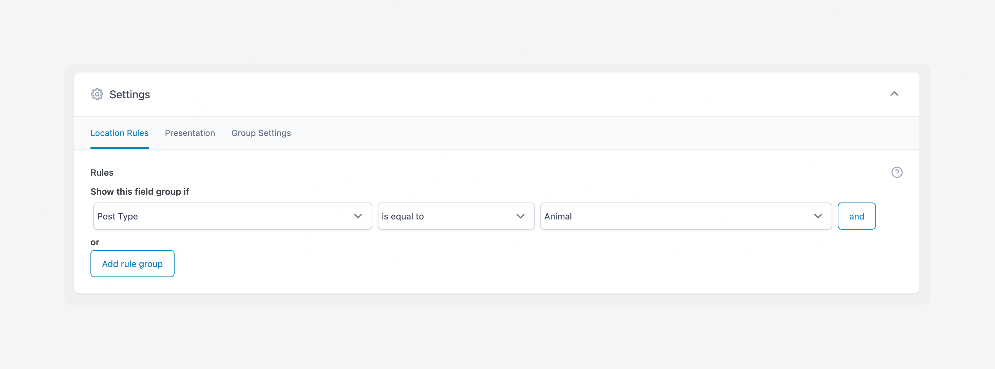
For this example, the starting point is a custom post type called Animals. If you haven’t already, create this post type using ACF. Then, update the location rules for your existing Animal Details field group so it displays when the post type is equal to Animal. This ensures that your custom fields (Name, Photo, and Information) appear on each Animal post.
With your field group linked to the custom post type, you’re ready to create a Bricks template that will pull in and display ACF data dynamically for every Animal post:
- Open a page or post you’ve edited with Bricks.
- From the menu at the top, click on Templates, which is the folder icon.
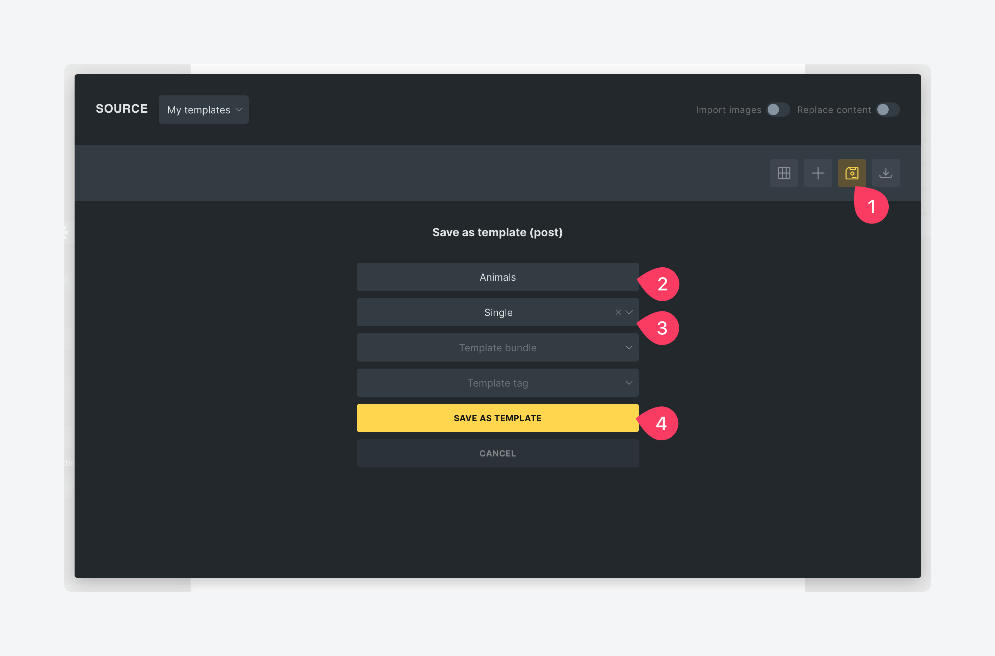
- Click the floppy disk icon to save it as a template.
- Give it a name, choose a template type (single should work), then click Save as Template.
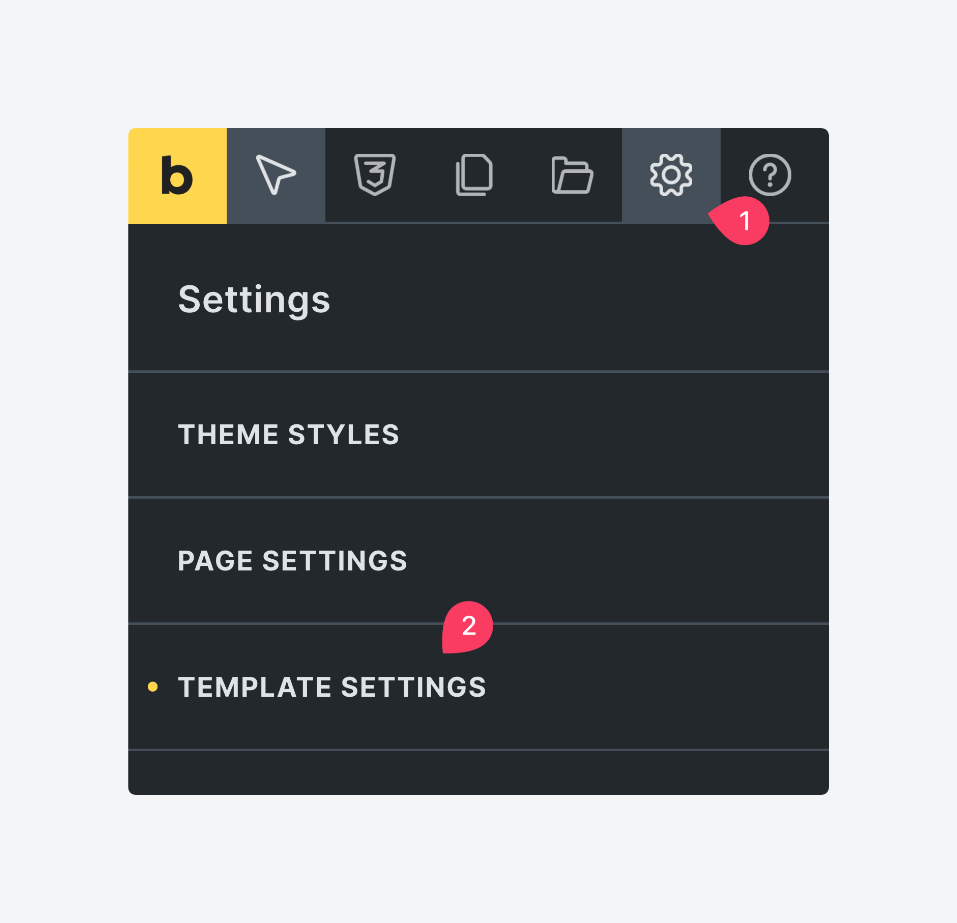
- When you’re back in the editor, open the settings by clicking the gear icon, then click Template Settings.
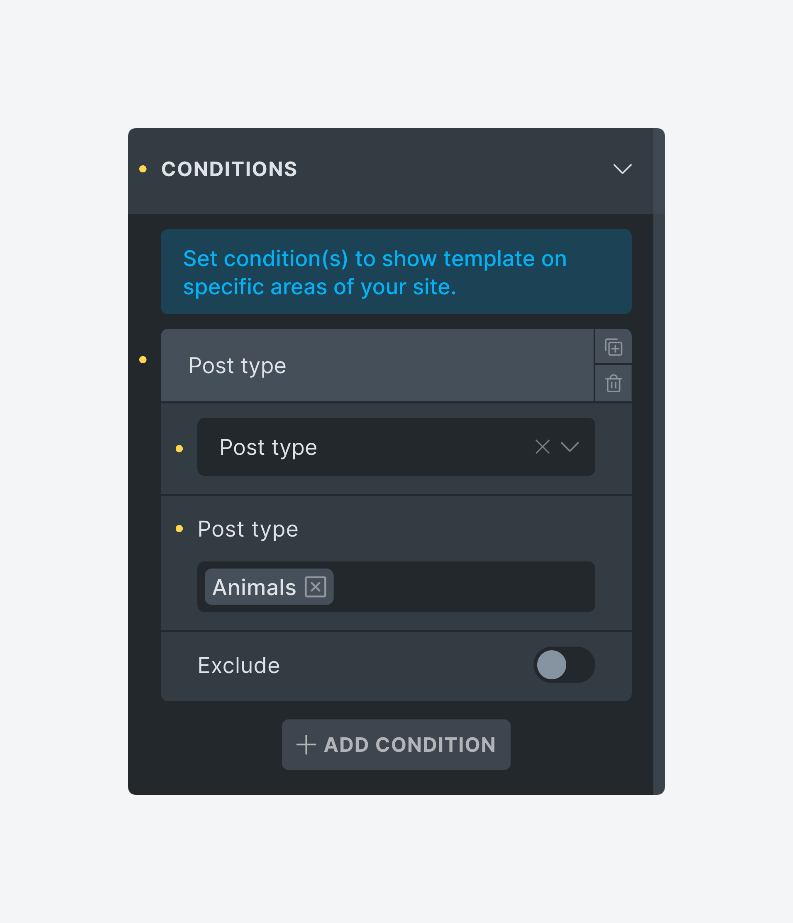
- Under conditions, create a new one that shows the template if the post type is your custom post type.
- Add a new animal via Animals > New Animal and fill in the ACF meta boxes.
- Publish and view the page on the frontend.
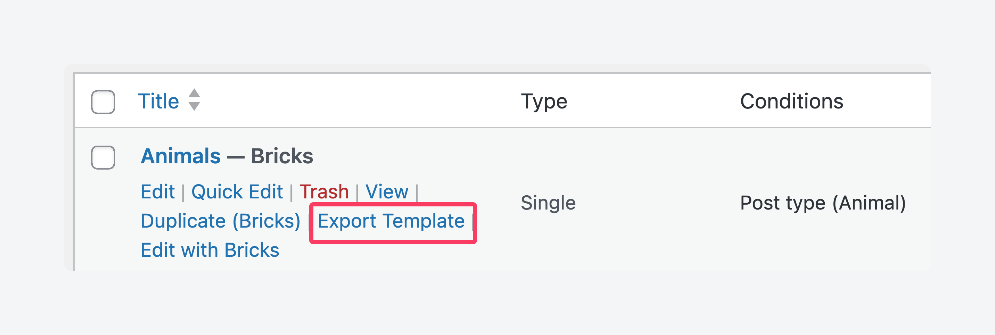
If you go to Bricks > Templates and hover over your template, you can even export it as JSON to reuse across other Bricks projects.
Supercharge Your Website With Premium Features Using ACF PRO
Speed up your workflow and unlock features to better develop websites using ACF Blocks and Options Pages, with the Flexible Content, Repeater, Clone, Gallery Fields & More.
Advanced use cases for the ACF and Bricks Builder integration
Now that you’ve learned the basics, it’s time to explore more advanced use cases for using Bricks with ACF. You’ll learn how to build conditional layouts based on field values and use Bricks’ Query Loop Builder to display complex, repeatable content – all with no custom code.
Creating conditional content with ACF and Bricks Builder
Bricks Builder includes robust conditional logic tools that let you control exactly when and where content appears based on ACF field values and other criteria. This is especially useful for showing or hiding sections based on whether a field is filled out, matches a specific value, or meets certain conditions.
Bricks supports a wide range of condition types, including:
- Post-related conditions, like post ID, post type, and taxonomy terms.
- User-related conditions, like logged-in status and user roles.
- Date/time conditions, like current date, post date, and custom comparisons.
- Field comparisons like is equal to, is not equal to, contains, does not contain, is empty, is not empty, is greater than/equal to, and is less than/equal to.
For this walkthrough, we’ll start by adding a new Animal Fact field to the existing Animal Details field group in ACF. Then, we’ll create a new section in the Bricks template specifically for displaying this fact.
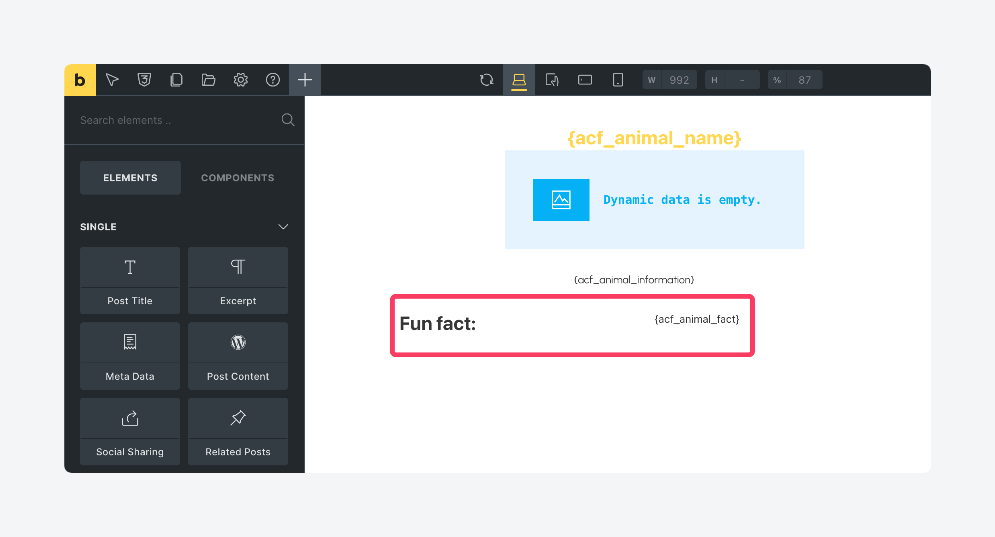
Using Bricks’ conditions panel, you’ll learn how to show this section only when the Animal Fact field has data, resulting in a layout that adapts to the content:
- Select the entire section in the canvas.
- Open its Conditions settings by clicking the toggle icon in the menu on the left.
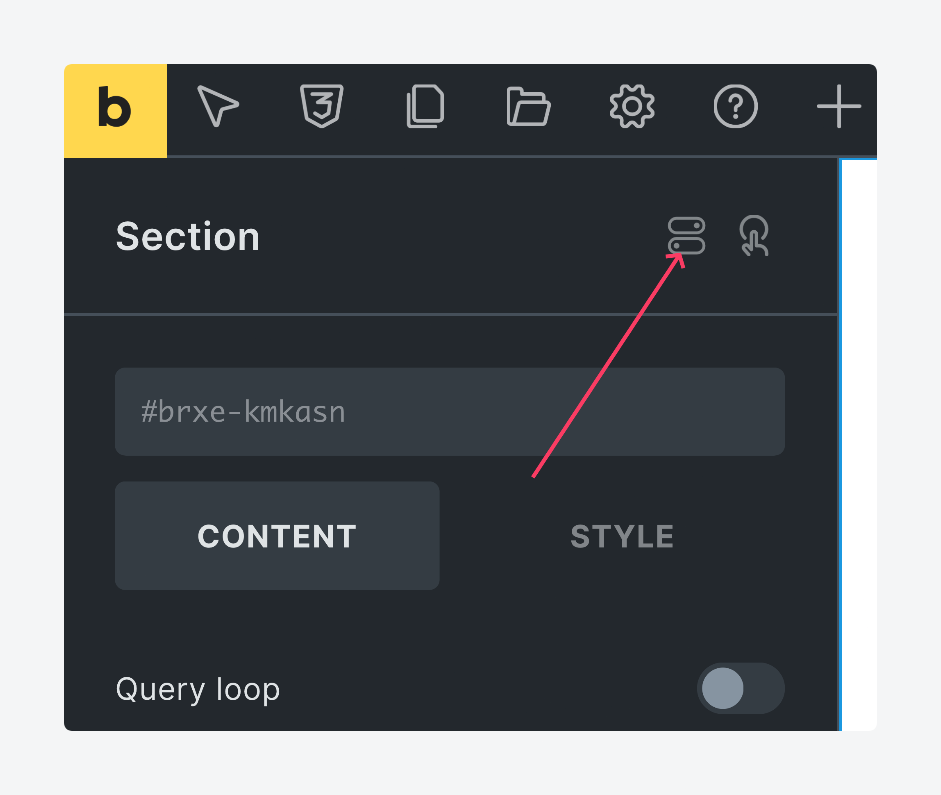
- Add a new condition triggered by the ACF field being filled in. Here’s what the setup should look like:
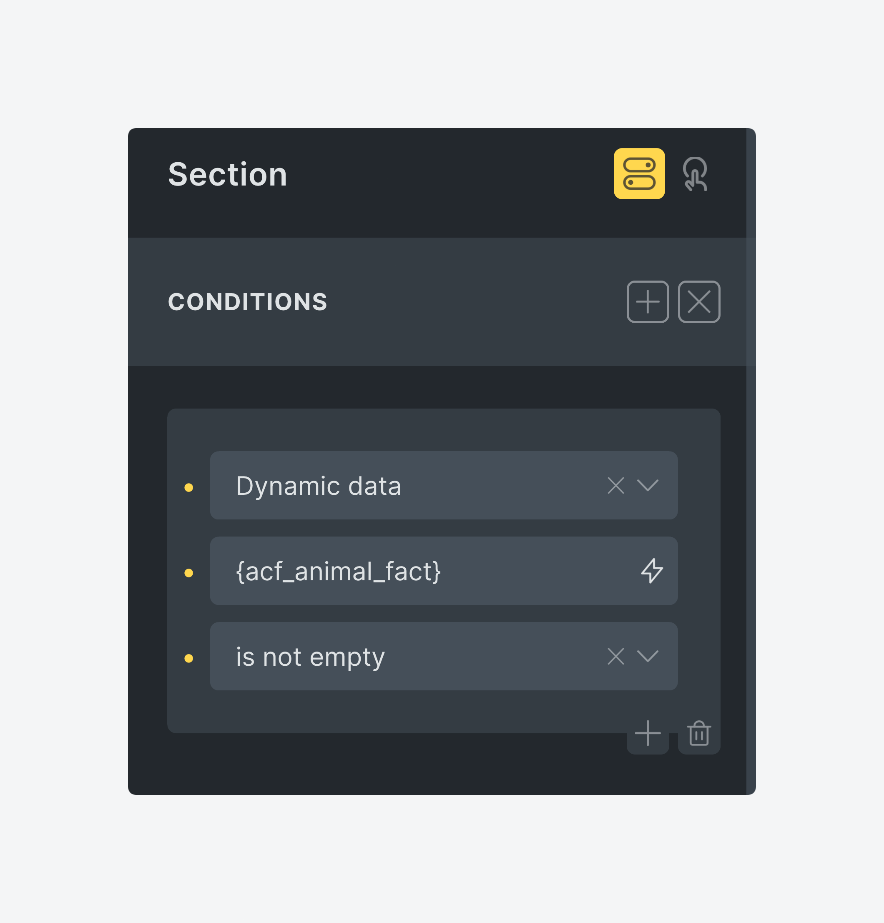
Now, if an animal post doesn’t have a fun fact entered, the entire section won’t show up at all on the frontend. But if a fact is provided, here’s what you’ll see:

Displaying ACF repeater fields with Bricks Builder
ACF PRO unlocks powerful field types like Repeater, Flexible Content, and Gallery, which are essential for building more advanced, content-rich websites. These fields are especially useful for handling structured, repeatable data – something standard custom fields can’t easily manage.
In this section, we’ll focus on the Repeater Field, using Bricks’ Query Loop Builder to output each item dynamically. This is a key use case for developers building custom layouts such as job boards, team listings, or FAQs – common search intent areas where ACF PRO shines.
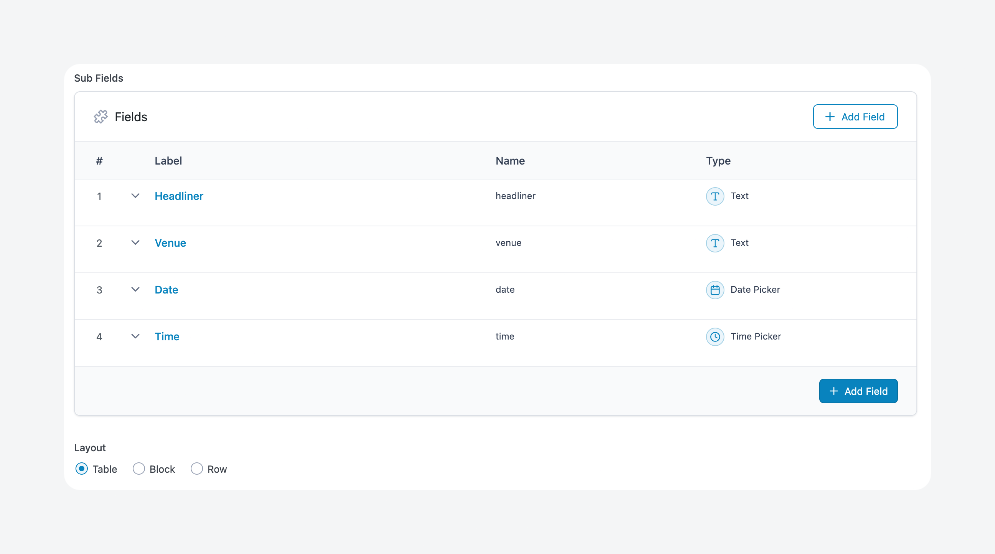
For our example, the starting point is an event details repeater field with the following sub-fields:
- Headliner
- Venue
- Date
- Time
Each event will be rendered as a repeated layout section inside a Bricks container.
Using the Query Loop Builder, you can easily loop through the repeater rows and output each field’s value, all without writing custom PHP or JavaScript:
- Create a new post and fill in as many event details as you need in the repeater sub-fields.
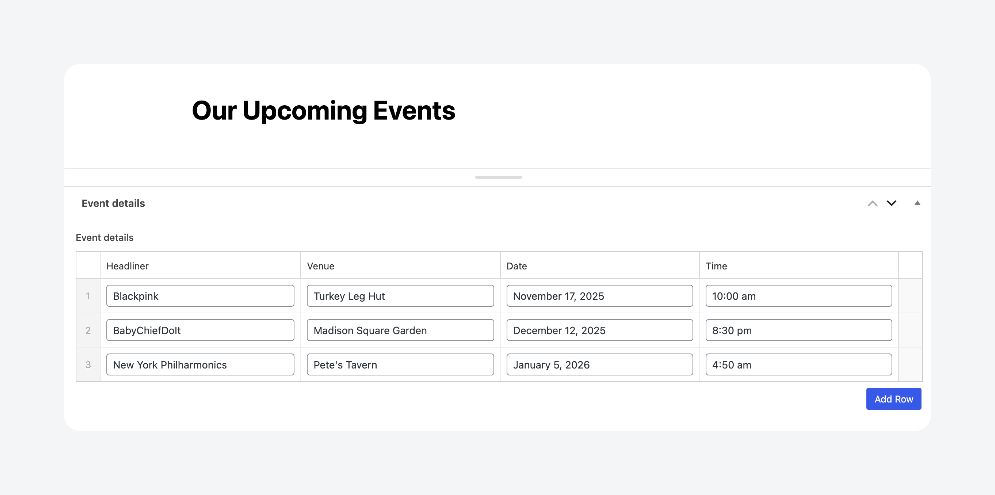
- Save the draft, then open it with Bricks.
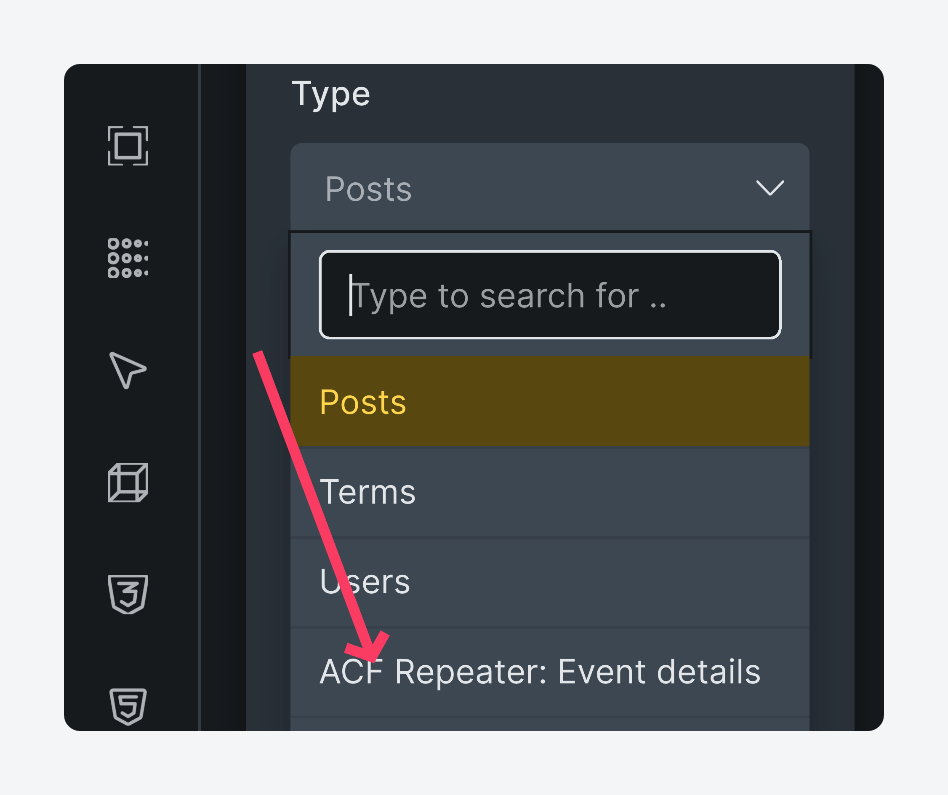
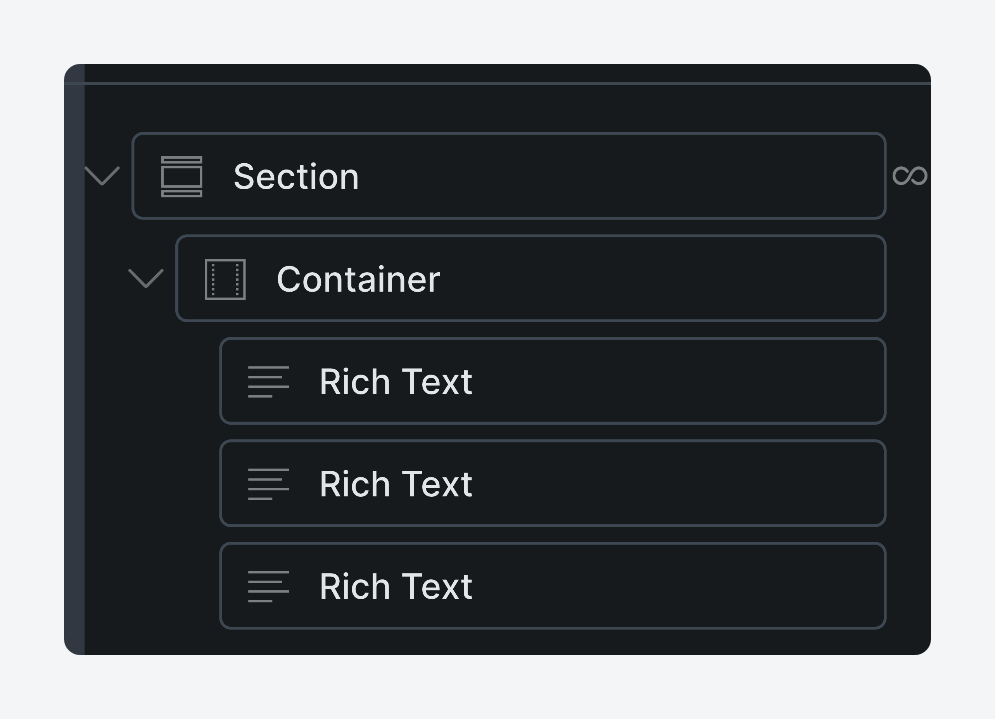
- Add a new section to your canvas, then toggle the Query Loop option on.
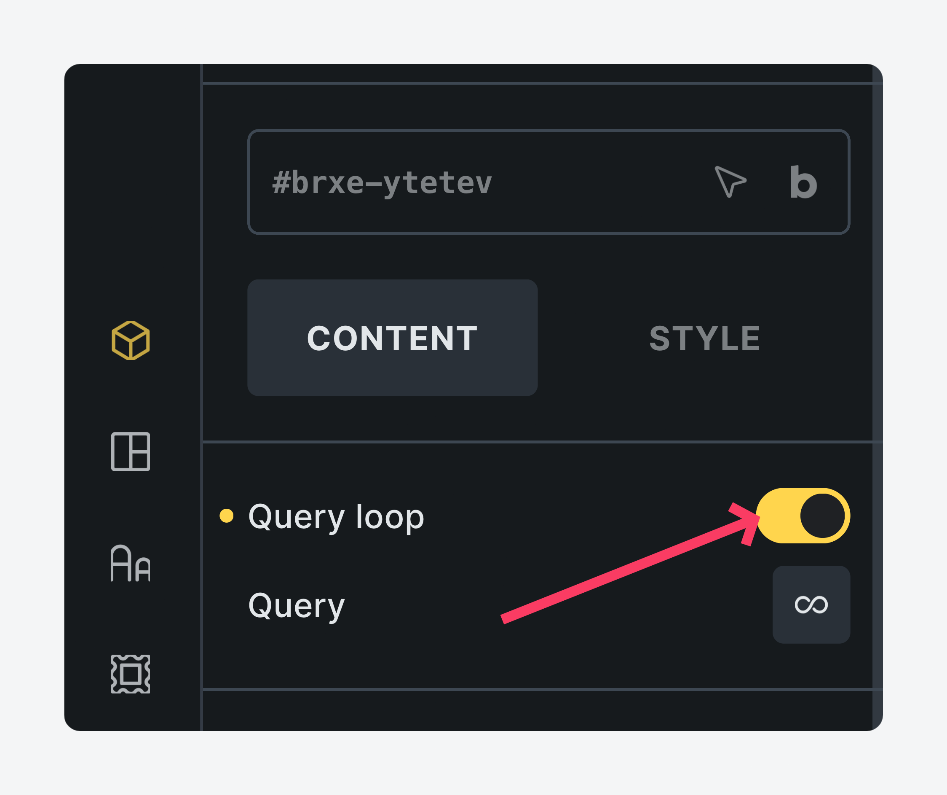
- Click the infinity sign under the toggle and, under Type, choose your ACF repeater field.
- Inside the section, start adding the elements you want to use to display your data. Since the repeater field we’re using here relies on text fields, we’ll use a Rich Text element for each field.
- To connect an element to your ACF field, click on it, then, under its Content tab, open the Visual tab, then click the lightning icon to access dynamic data options.
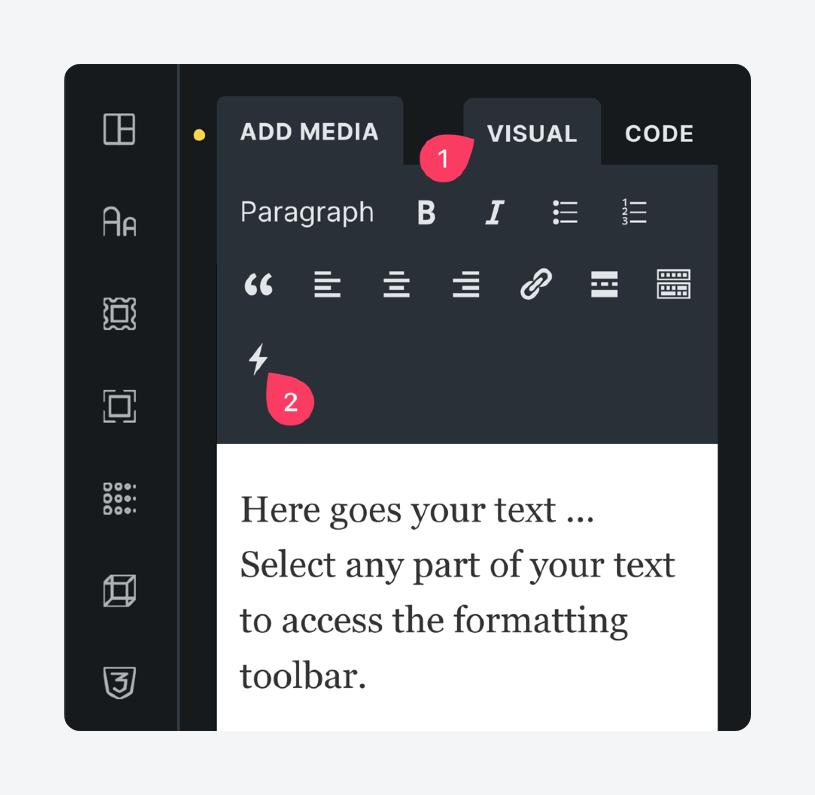
- From the dropdown menu, select your ACF repeater sub-field. It should be under ACF, not Custom fields.
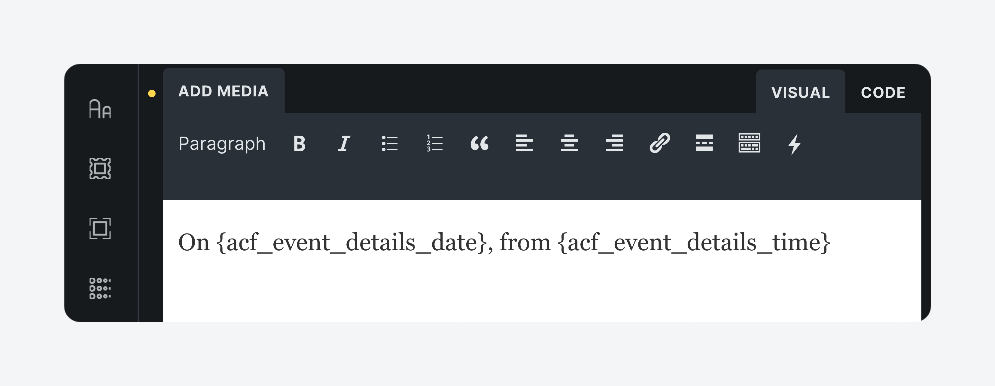
- Add before and after text around the dynamic data tag to give it some context. Here’s what we’re using for the date and time:
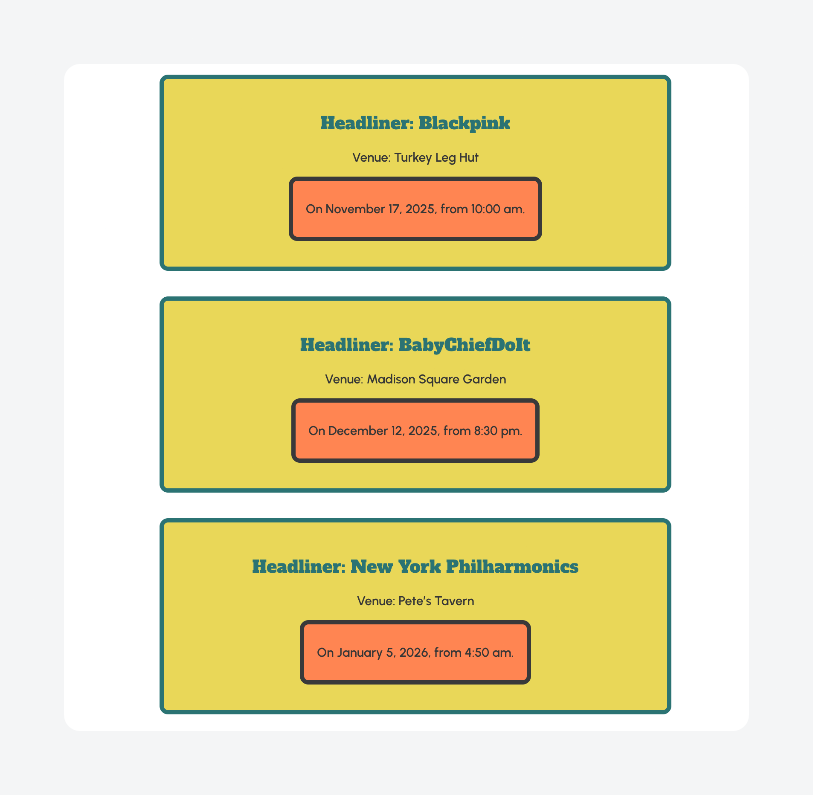
- Save the design and preview it on the frontend, where you should see your repeater field data.
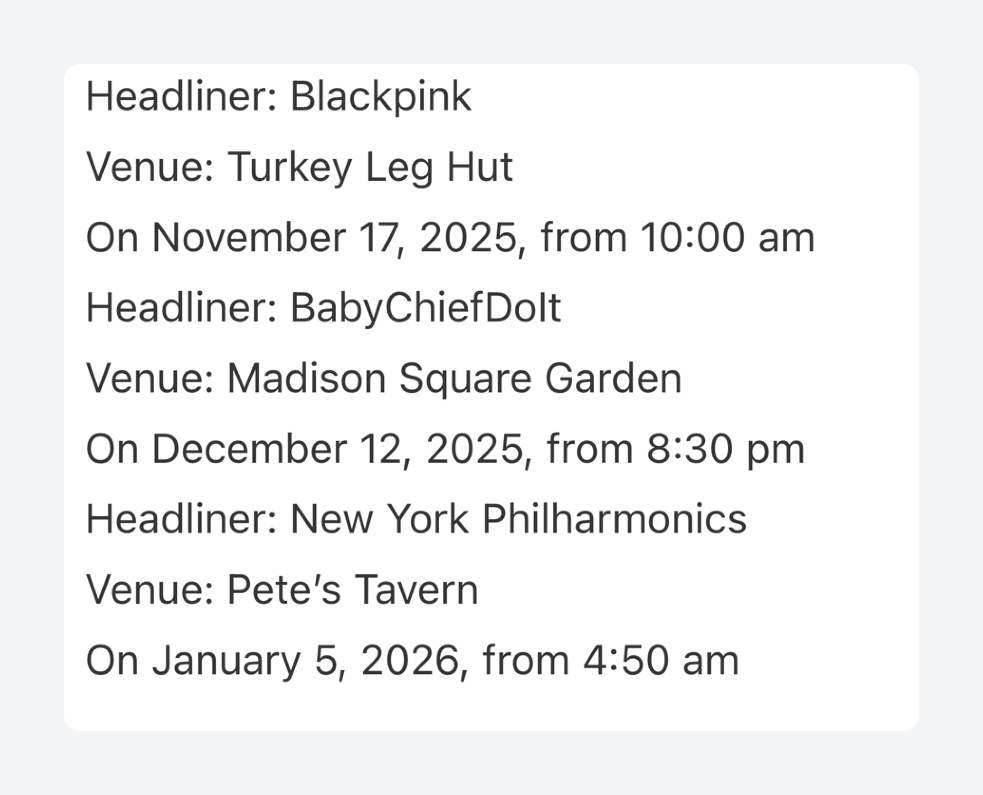
- This is what the structure for this looks like so far:
- Add some styling to each element as needed – we’ve done some border styling, typography, colors, and a couple of layout tweaks – and your content should be ready.
With this method, you can use Bricks to output repeater field data for various content types, such as job listings, team members, FAQs, testimonials, and course curricula.
Start building better sites with ACF and Bricks Builder
Bricks Builder and ACF make a powerful team for building dynamic WordPress websites without writing code.
Bricks supports ACF natively, allowing you to easily display custom field data – from simple text and images, all the way to more complex structures like repeater fields.
With support for simple use cases such as basic templates as well as advanced ones like conditional logic and looping through advanced field types, the integration is flexible enough to handle both straightforward and complex scenarios. If things don’t display as expected, clearing your cache will usually resolve the issue.Ready to unlock more powerful field types like Repeaters and Flexible Content Get ACF PRO and take your Bricks builds even further.


For plugin support, please contact our support team directly, as comments aren't actively monitored.