
Key points:
- WordPress’s extensive ecosystem and frequent updates can cause unexpected compatibility issues, making automated testing essential for maintaining site reliability.
- Developers can implement testing at various levels: unit tests for isolated functions, integration tests for combined components, and E2E tests for user workflows.
- Tools like PhpUnit, Playwright, Selenium, and GitHub Actions streamline automated testing, reducing manual QA effort and accelerating deployment cycles.
- Following best practices like using isolated environments, maintaining readable tests, and CI pipelines ensures robust and maintainable test suites.
- The choice of testing tools and strategies depends on project complexity, technical expertise, and the specific needs of the WordPress application.
WordPress’s flexibility is its greatest strength – and its biggest liability. With constant core updates, an endless plugin ecosystem, and custom themes stitched together by who-knows-who, breakage is almost guaranteed.
Automated testing is the only way to stay ahead, ensuring everything from minor updates to major overhauls won’t wreck your site. Layering unit, integration, and end-to-end tests let you catch failures early, before they turn into fire drills.
A well-structured testing pipeline cuts down manual QA, speeds up deployments, and keeps your workflow from devolving into endless patch-and-pray cycles.
Let’s look into the essential tools, setup strategies, and best practices to keep your WordPress environment stable.
5 key automated WordPress testing tools
These five automated tools will do the heavy lifting for you, catching bugs before they embarrass you in front of the whole internet.
1. PHPUnit
PHPUnit hooks directly into the official WordPress test suite, letting you write structured, repeatable tests that actually prove your code works – before your users find out it doesn’t.

It’s built for unit testing – isolating individual functions or classes – but it’s just as capable of handling integration tests by loading the full WordPress environment. That means you’re making sure your code interacts correctly with WordPress core, plugins, and themes in a real-world scenario rather than just testing in a sterile, theoretical sandbox.
2. Selenium
Selenium is the go-to tool for automated browser testing, making sure your WordPress site works where it counts – inside an actual web browser.
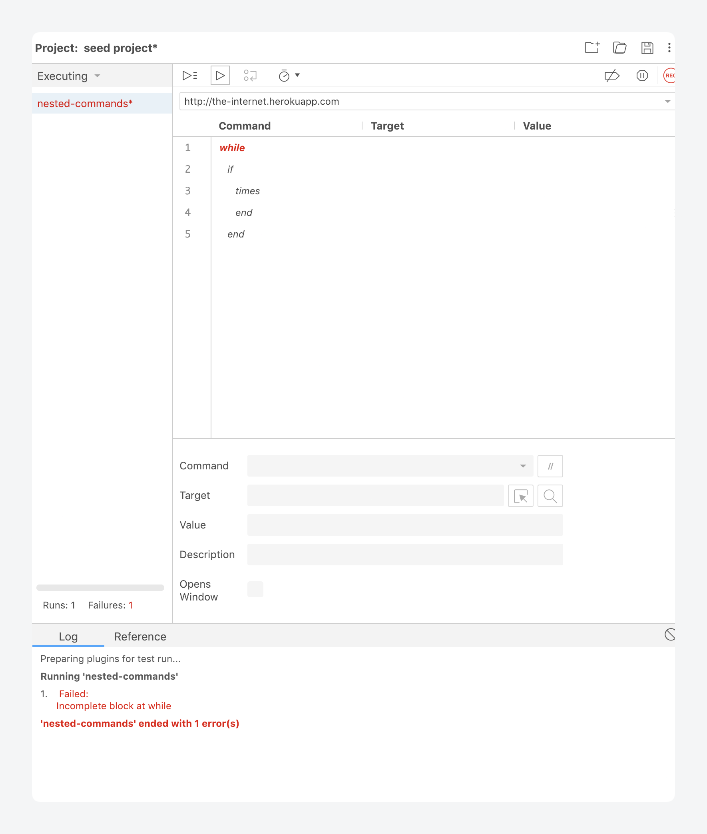
It tests how your site behaves in a real-world scenario by automating interactions like clicking buttons, filling out forms, and navigating between pages. It supports multiple browsers, including Chrome, Firefox, and Edge, so you’re not just testing in a bubble.
Its biggest strength is flexibility. Selenium can run tests on local environments, remote servers, or even in cloud-based testing platforms like BrowserStack or Sauce Labs.
It integrates with various programming languages, including Java, Python, and PHP, so you’re not locked into a specific tech stack. It also works with frameworks like PHPUnit, meaning you can combine unit, integration, and end-to-end testing in one workflow.
3. Playwright
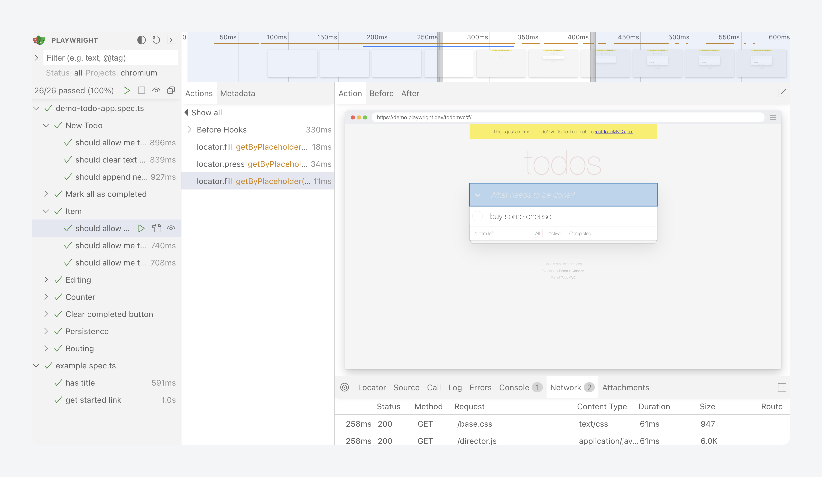
Built by Microsoft, Playwright is a JavaScript-powered framework that stress-tests WordPress sites across Chromium, Firefox, and WebKit, ensuring they function seamlessly in the real world.
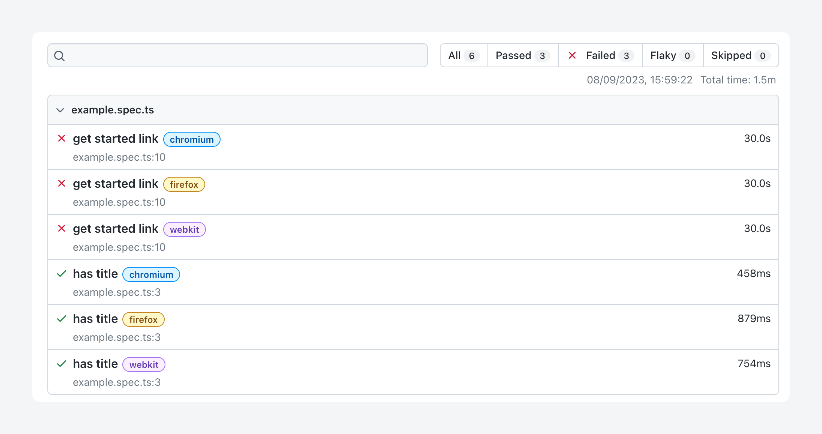
Playwright runs tests in parallel, slashing execution time while handling iframes, pop-ups, and even file downloads like a pro. It’s ideal for end-to-end and UI automation, making sure every button click, form submission, and navigation flow works.
Additionally, it operates with a headless mode that’s actually usable, giving you lightning-fast results without the overhead of a visible browser.
Beyond frontend testing, Playwright can also intercept network requests, simulate slow connections, and even validate API responses, making it a powerhouse for debugging flaky WordPress behaviors. If you want to test a plugin’s impact on page load, it has built-in performance monitoring. If you need to validate authentication flows, it can persist browser state, bypassing login screens while maintaining security.
The Advanced Custom Fields (ACF®) team uses Playwright to perform automated testing of the ACF and ACF PRO plugins to ensure the codebase is tested thoroughly between releases.
Supercharge Your Website With Premium Features Using ACF PRO
Speed up your workflow and unlock features to better develop websites using ACF Blocks and Options Pages, with the Flexible Content, Repeater, Clone, Gallery Fields & More.
4. WP-CLI
WP-CLI isn’t a test framework, but if you’re serious about automated testing, you’ll want it in your toolkit. This command-line interface streamlines everything from core installation and database resets to plugin activation and environment setup – basically, all the unglamorous but essential tasks that keep WordPress testing efficient and repeatable.
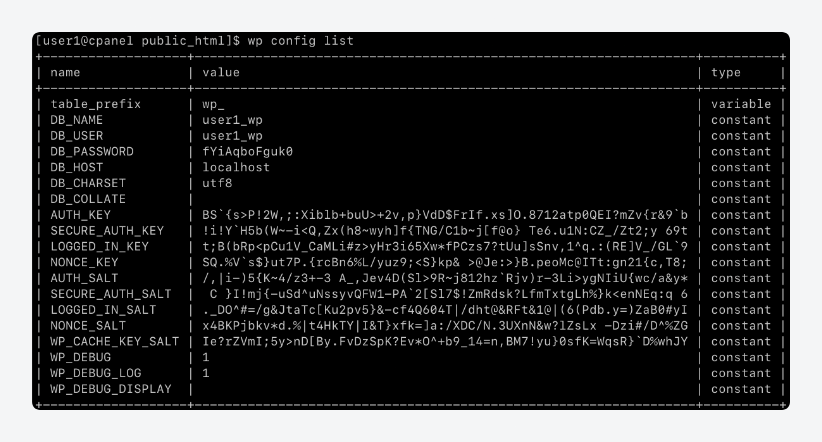
It provides noteworthy test preparation features. Instead of manually configuring test environments or clicking through the WordPress dashboard, you can script everything: spin up a fresh WordPress install, wipe and restore databases, or toggle themes and plugins on demand.
It also integrates with PHPUnit and Playwright, ensuring a clean slate before every test run. It saves time in Continuous Integration (CI) pipelines. Running wp db reset before each test ensures no residual data pollutes results.
Testing across different WordPress versions only takes one line, and validating plugin behavior under varying configurations takes one script you can rerun endlessly.
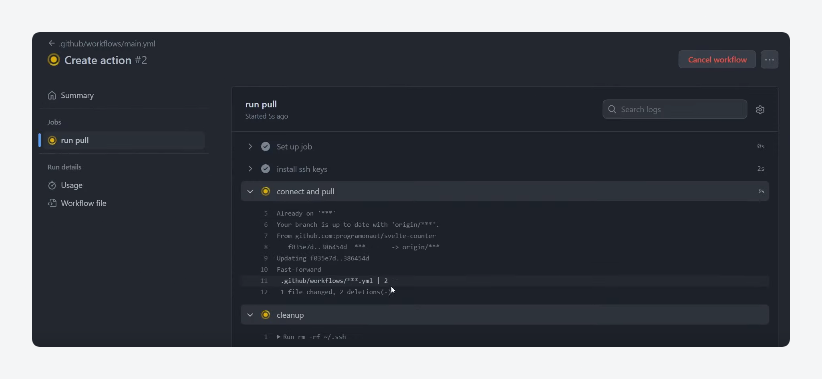
5. GitHub Actions
GitHub Actions turns automated testing from a chore into a nonintrusive, behind-the-scenes operation. Built directly into GitHub, it triggers workflows the moment you push code, open a pull request, or tag a release – no extra setup or third-party services required.
From simple unit tests to deploying a thoroughly tested website straight from a repository, GitHub Actions can handle it.
It spins up containers or virtual machines, installs dependencies, and runs Playwright, PHPUnit, or several other testing frameworks without you lifting a finger.
The YAML-based configuration means you define the workflow once and forget – tests just happen.
It ensures every commit is vetted before deployment, catching issues before they hit production. Matrix builds test against multiple PHP or WordPress versions while built-in status checks automatically embed test results in pull requests.
How to run comprehensive automated WordPress tests
Let’s break down the key components of a solid automated testing regimen and provide you with real, actionable steps to implement them.
Unit testing
Unit tests are precise, surgical, and focused entirely on small, isolated pieces of code. Instead of testing an entire page or user flow, unit tests drill down into individual functions and methods, ensuring they behave exactly as expected. There’s no loading WordPress and no waiting for the database.
Because they run in complete isolation, unit tests are fast. You get near-instant feedback on whether a function is broken, making them important for catching regressions before they snowball into bigger issues. If you’re tweaking how a plugin handles metadata or refactoring a utility function, a solid suite of unit tests will tell you immediately if something goes sideways.
Let’s take a site that uses ACF as an example. A well-written unit test can confirm that a custom field saves and retrieves data correctly without needing a full WordPress install. If a core function handling field groups changes unexpectedly, the test fails, and you know exactly where the problem is.
How to run automated unit tests in WordPress
Here’s how to run automated unit tests in WordPress using PHPUnit:
- Install PHPUnit via Composer in your plugin or theme directory:
composer require --dev phpunit/phpunit- Copy the WordPress core test suite or reference it using phpunit.xml.dist to define paths and configurations.
- Create a separate test database to prevent data corruption:
wp db create --dbname=wordpress_test- Execute the tests. The command below will run all unit tests in your project, verifying that individual components function as expected:
vendor/bin/phpunit- If you want targeted tests, specify a file or function, such as:
vendor/bin/phpunit tests/MyFunctionTest.phpIntegration testing
Integration tests evaluate how different WordPress components – plugins, themes, and core functions – work together. This is where you find the weird, unexpected conflicts that break sites in ways unit tests usually can’t.
A plugin might work flawlessly in isolation but fail when paired with another that modifies database queries or enqueues conflicting scripts. Integration testing catches these problems early, ensuring updates don’t trigger catastrophic failures.
For example, let’s say you’re using ACF alongside WooCommerce. A unit test can confirm that an ACF field saves data, but only an integration test will reveal if a WooCommerce update breaks how those fields display on product pages. The same applies to theme-plugin interactions, database queries, or even REST API responses that rely on multiple moving parts.
How to run automated integration tests in WordPress
Here’s how to run automated integration tests in WordPress using PHPUnit:
- Install PHPUnit:
composer require --dev phpunit/phpunit- Copy or reference the WordPress cire test suite in phpunit.xml.dist.
- In your test classes, load and interact with WordPress functions, plugins, or database queries to verify compatibility.
- Use
wp db create --dbname=wordpress_testto create a separate test database. - Reset the database to start with a clean slate:
wp db reset --yes- Flag tests for integration:
vendor/bin/phpunit --group integrationEnd-to-end testing
End-to-end, or E2E, tests simulate real interactions – clicks, form submissions, logins, and even full checkout flows.
They ensure that everything works together, from the front end to the database, exactly as a user would experience it. These tests provide confidence in user-facing workflows by catching issues that other tests might miss.
A function might pass a unit test, and a plugin might work fine in isolation, but what happens when, say, an admin fills out a custom field, saves a post, and expects that data to display on the frontend? If the UI fails, a database update gets skipped, or a script conflict blocks rendering, E2E tests will catch it.
For example, an E2E test can programmatically log into WordPress, navigate to the post editor, fill out an ACF field, save the post, and verify that the correct data appears on the live site. It’s the closest thing to having a robot QA tester clicking through your site 24/7.
How to run E2E tests in WordPress
You can run E2E tests using Selenium and Playwright. For this walkthrough, we’re using the latter:
- Install Playwright:
npm install --save-dev @playwright/test
npx playwright install- Create a test file like tests/login.spec.js:
import { test, expect } from '@playwright/test';

test('Login to WordPress', async ({ page }) => {
  await page.goto('/wp-login.php');
  await page.fill('#user_login', 'your-username');
  await page.fill('#user_pass', 'your-password');
  await page.click('#wp-submit');
  await expect(page).toHaveURL(/wp-admin/);
});- Use the UI mode to show the browser in real time with
npx playwright test --headedor headless mode for CI/CD pipelines withnpx playwright test.
Regression testing
Regression testing is about one thing: making sure fixes stay fixed. Every time you update WordPress, tweak a theme, or deploy a plugin change, there’s a chance something that used to work suddenly doesn’t.
Regression tests re-run existing test cases after every deployment or major code change, ensuring that new updates don’t resurrect old problems.
Without regression testing, WordPress development turns into a game of whack-a-mole. Fix a bug today, and it might quietly creep back in six months later during a routine update. A well-maintained regression test suite eliminates this risk by continuously validating core functionality, preventing accidental breakages, and ensuring long-term stability.
For example, if you’ve tested that ACF properly saves and displays data, a regression test will confirm that future updates – whether to ACF, WordPress core, or your theme – haven’t broken that functionality.
How to run regression tests in WordPress
Tools like Playwright and PHPUnit let you run regression tests. Here, we’re using the first one:
- Create playwright.config.js to define test settings:
export default { use: { baseURL: 'http://localhost:8888', headless: true } };- Write a regression test in tests/regression.spec.js:
import { test, expect } from '@playwright/test';

test('Verify dashboard UI after login', async ({ page }) => {
  await page.goto('/wp-login.php');
  await page.fill('#user_login', 'your-username');
  await page.fill('#user_pass', 'your-password');
  await page.click('#wp-submit');
  await expect(page).toHaveURL(/wp-admin/);
  await expect(page.locator('#wpadminbar')).toBeVisible();
  await expect(page.locator('#dashboard-widgets-wrap')).toBeVisible();
});- Run the tests:
npx playwright testCross-browser testing
Different browsers interpret the same code in slightly different ways, and what looks perfect in Chrome might break in Safari, glitch in Firefox, or refuse to load properly in Edge.
Cross-browser testing ensures that your WordPress site functions consistently across all major browsers and platforms, preventing layout issues, broken functionality, and inconsistent user experiences.
Modern browsers claim to follow web standards, but quirks still exist – especially in areas like CSS rendering, JavaScript execution, or third-party integrations.
A button that works in Firefox might not trigger the same event in Safari due to differing JavaScript handling. A flexbox layout that aligns perfectly in Firefox might collapse in Edge. Cross-browser tests catch these inconsistencies before users do.
For example, if your WordPress theme needs to display custom content from ACF, a cross-browser test ensures that those fields render correctly on every browser, device, and viewport size.
How to run cross-browser tests in WordPress
Playwright and Selenium let you run cross-browser tests in WordPress. We’re going to walk you through how to do it using Selenium, which provides more reliable compatibility with legacy browsers:
- Install Selenium WebDriver:
npm install selenium-webdriver- Download and configure drivers for the browsers you want to test for, e.g. GeckoDriver for Firefox, ChromeDriver for Chrome, and the official WebDriver for Edge.
- Write a test script in tests/cross-browser.js:
const { Builder, By, until } = require('selenium-webdriver');

async function testLogin(browser) {
  let driver = await new Builder().forBrowser(browser).build();
  try {
    await driver.get('http://localhost/wp-login.php');
    await driver.findElement(By.id('user_login')).sendKeys('your-username');
    await driver.findElement(By.id('user_pass')).sendKeys('your-password');
    await driver.findElement(By.id('wp-submit')).click();
    await driver.wait(until.urlContains('wp-admin'), 5000);
    console.log(${browser}: Login test passed);
  } finally {
    await driver.quit();
  }
}

(async () => {
  await Promise.all([testLogin('chrome'), testLogin('firefox'), testLogin('edge')]);
})();- Execute the tests:
node tests/cross-browser.jsBonus: Improving automated testing with continuous integration
Automated tests are powerful on their own, but they’re even better when they run automatically with every code change.
Continuous integration ties all your tests together into an automated workflow. Instead of manually running them, CI ensures they execute in the background every time you push new code or open a pull request.
GitHub Actions makes this incredibly easy; with a simple configuration file, you can define a workflow that checks out your repository, installs dependencies, runs tests, and reports results – without any manual intervention.
Here’s a sample YAML file workflow for Playwright, which handles E2E testing for WordPress:
name: Playwright Tests for WordPress
on:
  push:
    branches: [main]
  pull_request:
    branches: [main]

jobs:
  playwright-tests:
    runs-on: ubuntu-latest

    steps:
    - name: Checkout Repository
        uses: actions/checkout@v4

    - name: Set up Node.js
        uses: actions/setup-node@v4
        with:
        node-version: 18

    - name: Install Dependencies
        run: npm install

    - name: Install Playwright Browsers
        run: npx playwright install --with-deps

    - name: Run Playwright Tests
        env:
        BASE_URL: https://your-wordpress-site.com
        run: npx playwright test
With this setup, every push or pull request automatically triggers Playwright tests, ensuring WordPress UI elements, navigation flows, and critical user journeys stay functional. A similar setup works for unit and integration tests by adjusting dependencies and test commands.
Best practices for managing automated WordPress tests
A well-managed test suite strengthens your development workflow, prevents regressions, and ensures stability. Follow these best practices to keep automated testing effective and maintainable:
- Start with core features to prioritize critical paths like user login, checkout flows, and main site pages. Expanding coverage is easier once these essential tests are in place.
- Iterate to ensure tests stay relevant as your codebase evolves. Regularly add tests for new features, update outdated ones, and refactor scripts to maintain accuracy.
- Isolate test environments so you eliminate flaky tests caused by inconsistent setups. Use Docker or virtual machines and use WP-CLI to reset databases and reinstall WordPress before each test run.
- Keep tests readable and maintainable to keep debugging and updates simple. Use clear file structures, descriptive names, and modular test steps instead of long, complex workflows.
- Use CI for team efficiency so tests run automatically on every pull request. Enforce test requirements in GitHub Actions or another CI tool to catch issues before merging.
- Avoid over-reliance on fragile selectors to prevent UI tweaks from breaking E2E tests. Use stable identifiers like
data-test="login-button"instead of CSS classes. - Budget time for maintenance to keep tests accurate and valuable. Allocate time in each sprint to fix failing tests, refactor brittle scripts, and expand coverage.
Start building test-ready sites with ACF
A solid automated WordPress test suite catches issues before they hit production, speeds up deployment, and gives developers the confidence to iterate without fear of breaking core functionality.
Start small. Begin with unit tests, expand into integration testing, and eventually build out full end-to-end coverage. Good tests take time to set up, but they pay off through fewer regressions, faster feature releases, and a more stable codebase.
Use structured data patterns like those provided by ACF to create predictable, testable workflows that scale with your project.
Whether you’re building custom plugins, managing enterprise sites, or maintaining a complex WordPress ecosystem, automated testing is the only way to sustain growth, and ACF is the best way to keep it all manageable.
Get started with ACF today and build more testable, maintainable WordPress projects that stand the test of time.

For plugin support, please contact our support team directly, as comments aren't actively monitored.