
Key points:
- Custom post types store structured content, while their fields hold the actual data you display or filter.
- Coding fields manually means registering meta, building UI, validating input, querying, and rendering values yourself.
- That workflow is powerful but fragile; small mistakes lead to missing data or broken templates.
- Advanced Custom Fields (ACF®) replaces all that wiring with a UI, automatic saving, and simple template helpers.
Adding custom fields to your custom post types (CPTs) is a great way to organize and manage data in WordPress.
But while the data gets saved in the database, you can’t do much with it unless everything is properly set up.
To unlock the full potential here, you’ll need to handle a few key steps on the backend first:
- Registering the fields
- Creating a simple interface for adding data
- Ensuring everything is saved properly
- Then displaying it on the frontend
Next steps are to learn the manual process for handling WordPress custom post type fields, or go with a more automated way using Advanced Custom Fields (ACF®).
Let’s get started.
How custom post types and their fields work
Custom post types are WordPress content containers you create when posts and pages don’t fit the job. They hold structured data like products, events, portfolio items, or property listings.
If you’ve seen the term “custom content type,” it’s simply another name for the same thing – WordPress’s actual implementation calls them custom post types.
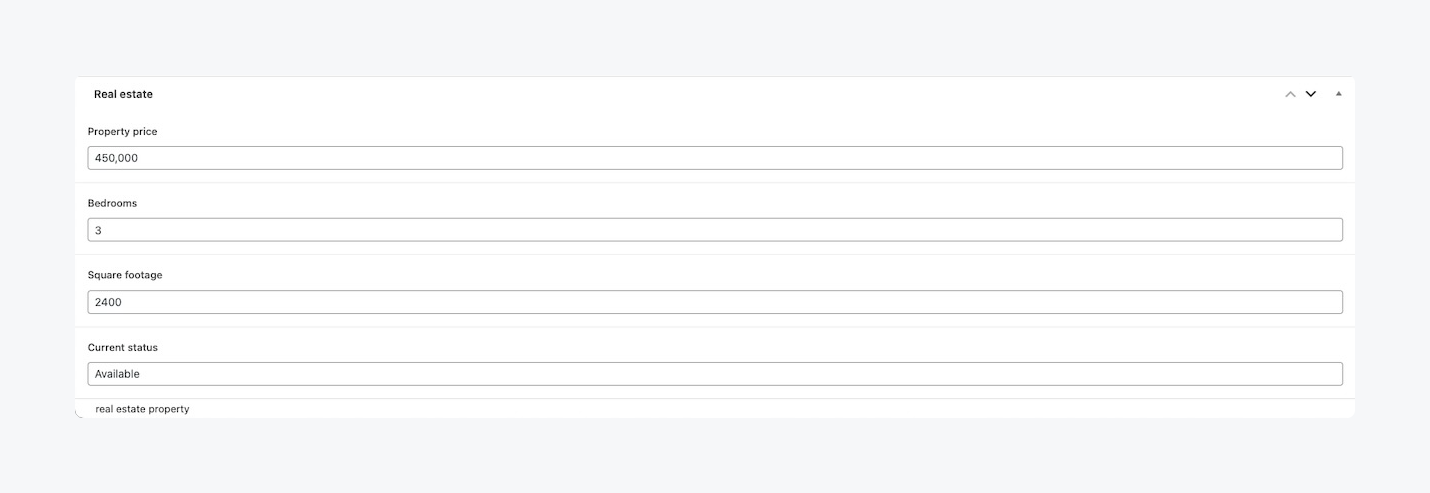
Custom fields are the individual data points stored inside those posts – things like price, date, number of bedrooms, or square footage.
On a real estate site, for instance, you might register a Properties post type to separate listings from your blog.
Each property needs a price, number of bedrooms, square footage, and maybe a map location. Those values don’t belong in the title or main editor field. They need their own fields, which WordPress stores separately in post meta.
Understand this separation, and the workflow makes more sense: the post type defines the content category, while custom fields hold the specific facts you want to display or filter by.
How to register a custom post type
Registering a custom post type is likely familiar territory, but we’ll still do a quick pass before we move into field handling.
If you prefer a more straightforward UI approach, ACF includes CPT creation – our dedicated guide to creating a custom post type walks through that in detail.
In short, though: go to ACF > Post Types > Add New, set a name, choose labels, and decide which features it supports (title, editor, thumbnail, etc.).
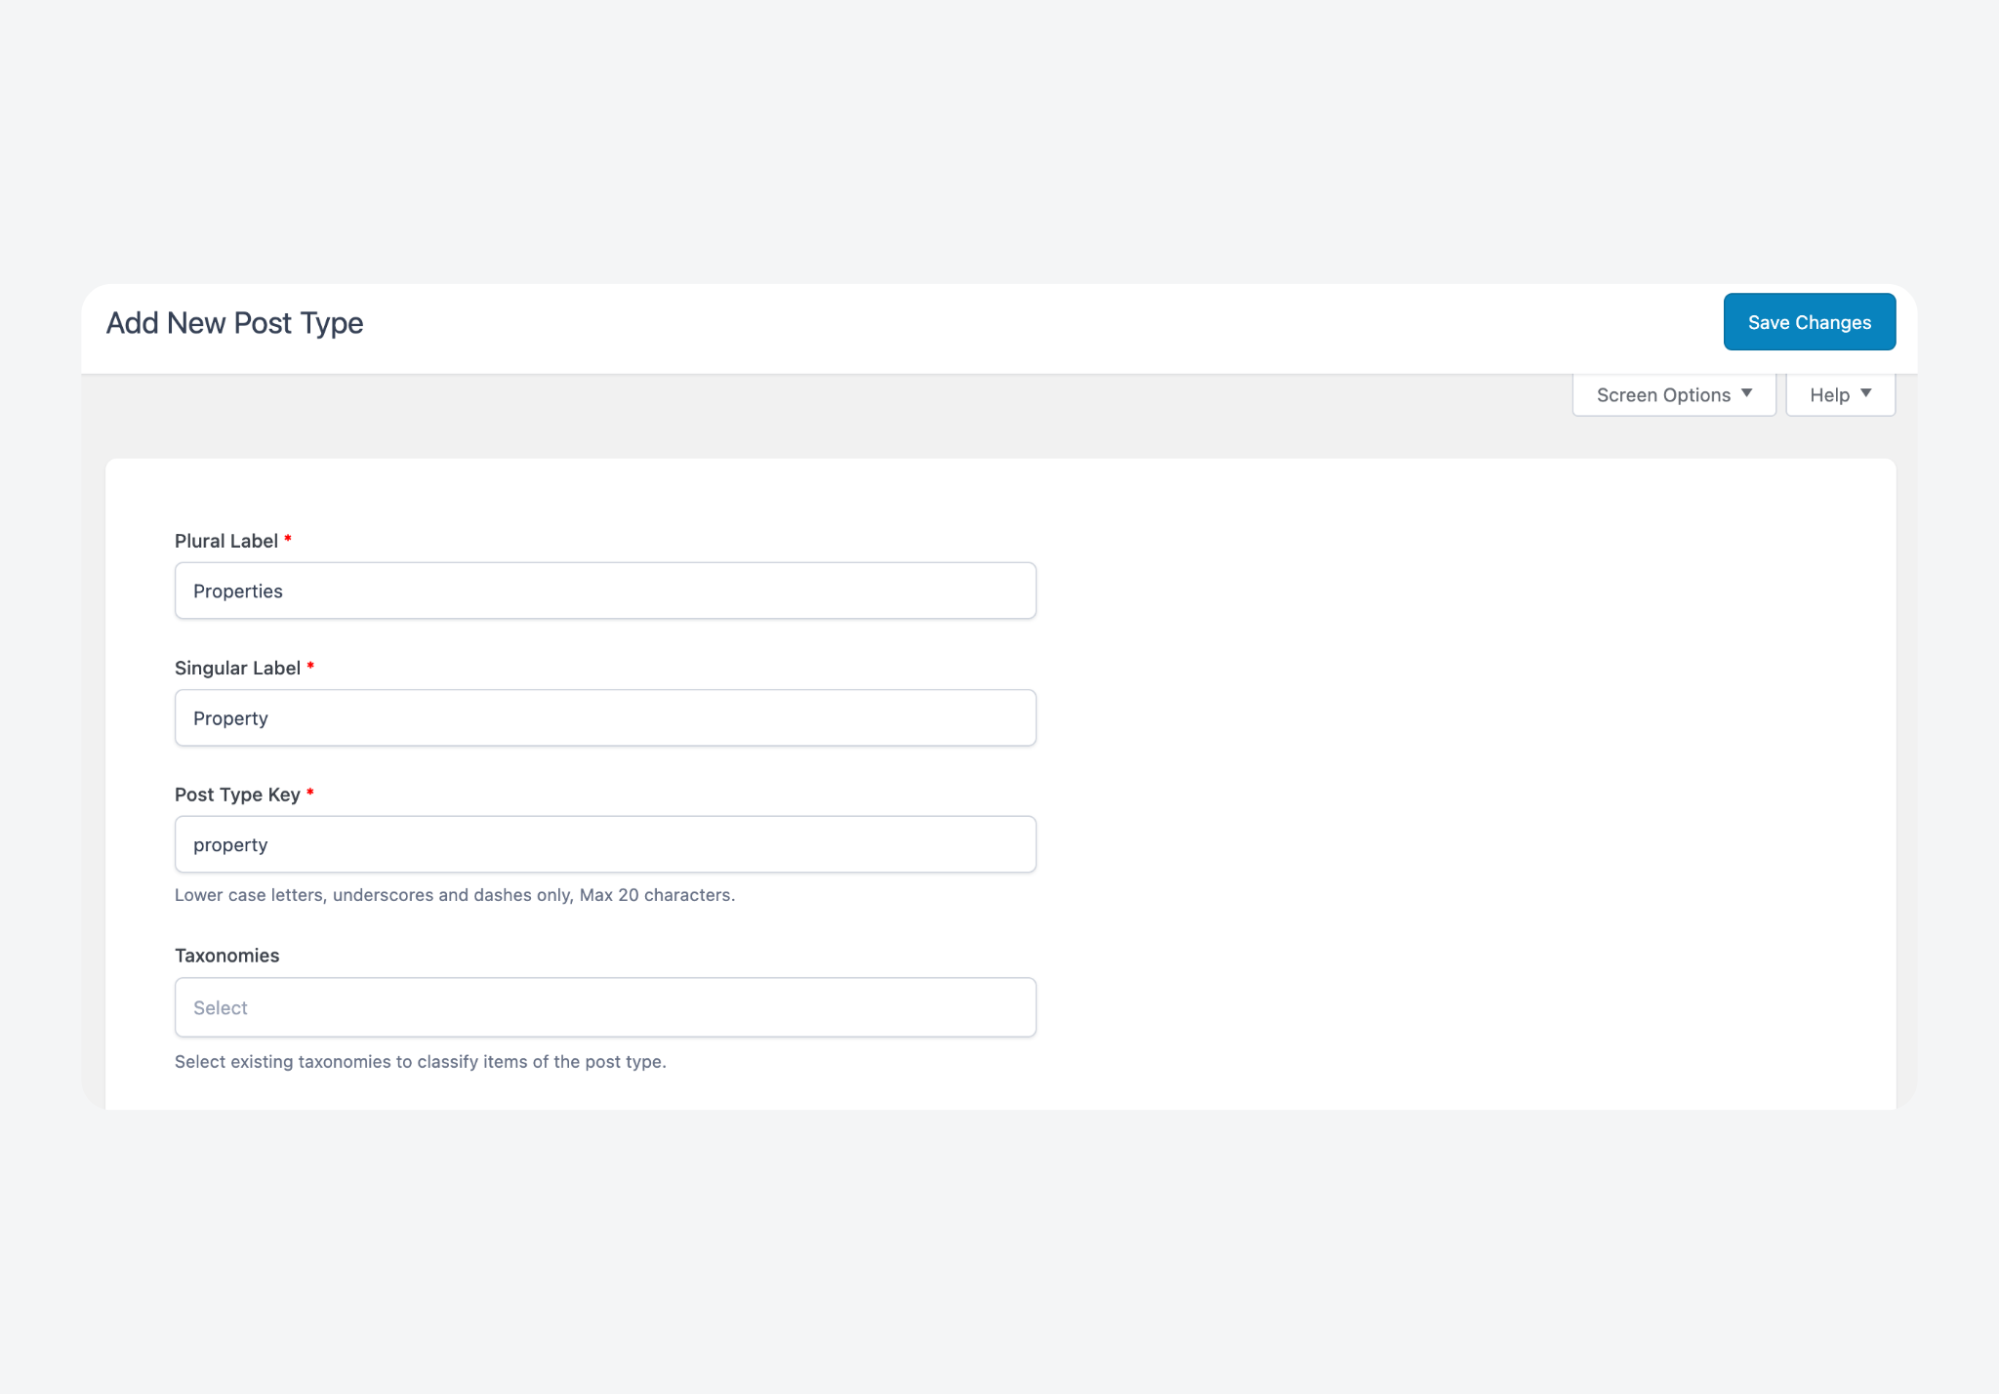
Publish it, and WordPress adds it to the admin menu automatically.
If you want instead to build CPTs in code, we also have a more in-depth guide to WordPress custom post types. In a nutshell:
- Call
register_post_type()inside a must-use plugin or a custom code snippet. - Set labels to define the admin UI text.
- Use supports to determine available editing features.
- Configure
has_archiveto control whether an archive page exists. - If you want WordPress’s built-in Custom Fields box to show up, add
'supports' => ['custom-fields']– it appears in the classic editor and Gutenberg’s screen options.
That said, many modern setups skip the legacy metabox and rely instead on explicitly registering fields using register_post_meta(). It gives better control, REST visibility, and block editor integration.
Either way, the important point is: registering a CPT just creates a container. It doesn’t give you field storage, editing screens, or display logic. That’s what we’re covering next.
How to add WordPress custom post type fields using code
We’ll cover for adding usable fields to custom post types: register the field, show it in the editor, save the value, and output it in your template.
If you prefer a UI-based workflow, you can let ACF handle most of this. Skip the manual approach and jump ahead.
Registering custom fields
To register a custom field properly, you define it with register_post_meta(). This tells WordPress what the field is, how it should behave, and how it should be stored:
add_action( 'init', function () {
    register_post_meta( 'property', 'price', [
        'type'              => 'number',
        'single'            => true,
        'sanitize_callback' => 'floatval',
        'show_in_rest'      => true,
    ] );
} );
Here, property is the post type and price is the field name. Setting the type helps WordPress validate and cast values correctly. The single parameter tells it to store one value instead of multiple entries. A sanitized callback ensures bad or unexpected data doesn’t end up in your database.
Finally, show_in_rest makes the field available in the block editor and via the API, which matters if you are using Gutenberg or building a headless frontend.
Without this step, WordPress would just treat a field as unstructured meta with no rules attached.
Creating an admin interface for custom fields
If you need a custom interface for entering field values, add a metabox.
WordPress doesn’t create one for register_post_meta(), so you build it yourself:
add_action( 'add_meta_boxes', function () {
    add_meta_box( 'property_price', 'Property Price', 'property_price_box', 'property' );
} );

function property_price_box( $post ) {
    wp_nonce_field( 'save_price', 'price_nonce' );
    $value = get_post_meta( $post->ID, 'price', true );
    echo '<input type="number" name="price" value="' . esc_attr( $value ) . '" />';
}
This attaches a box to the Property CPT editor screen.
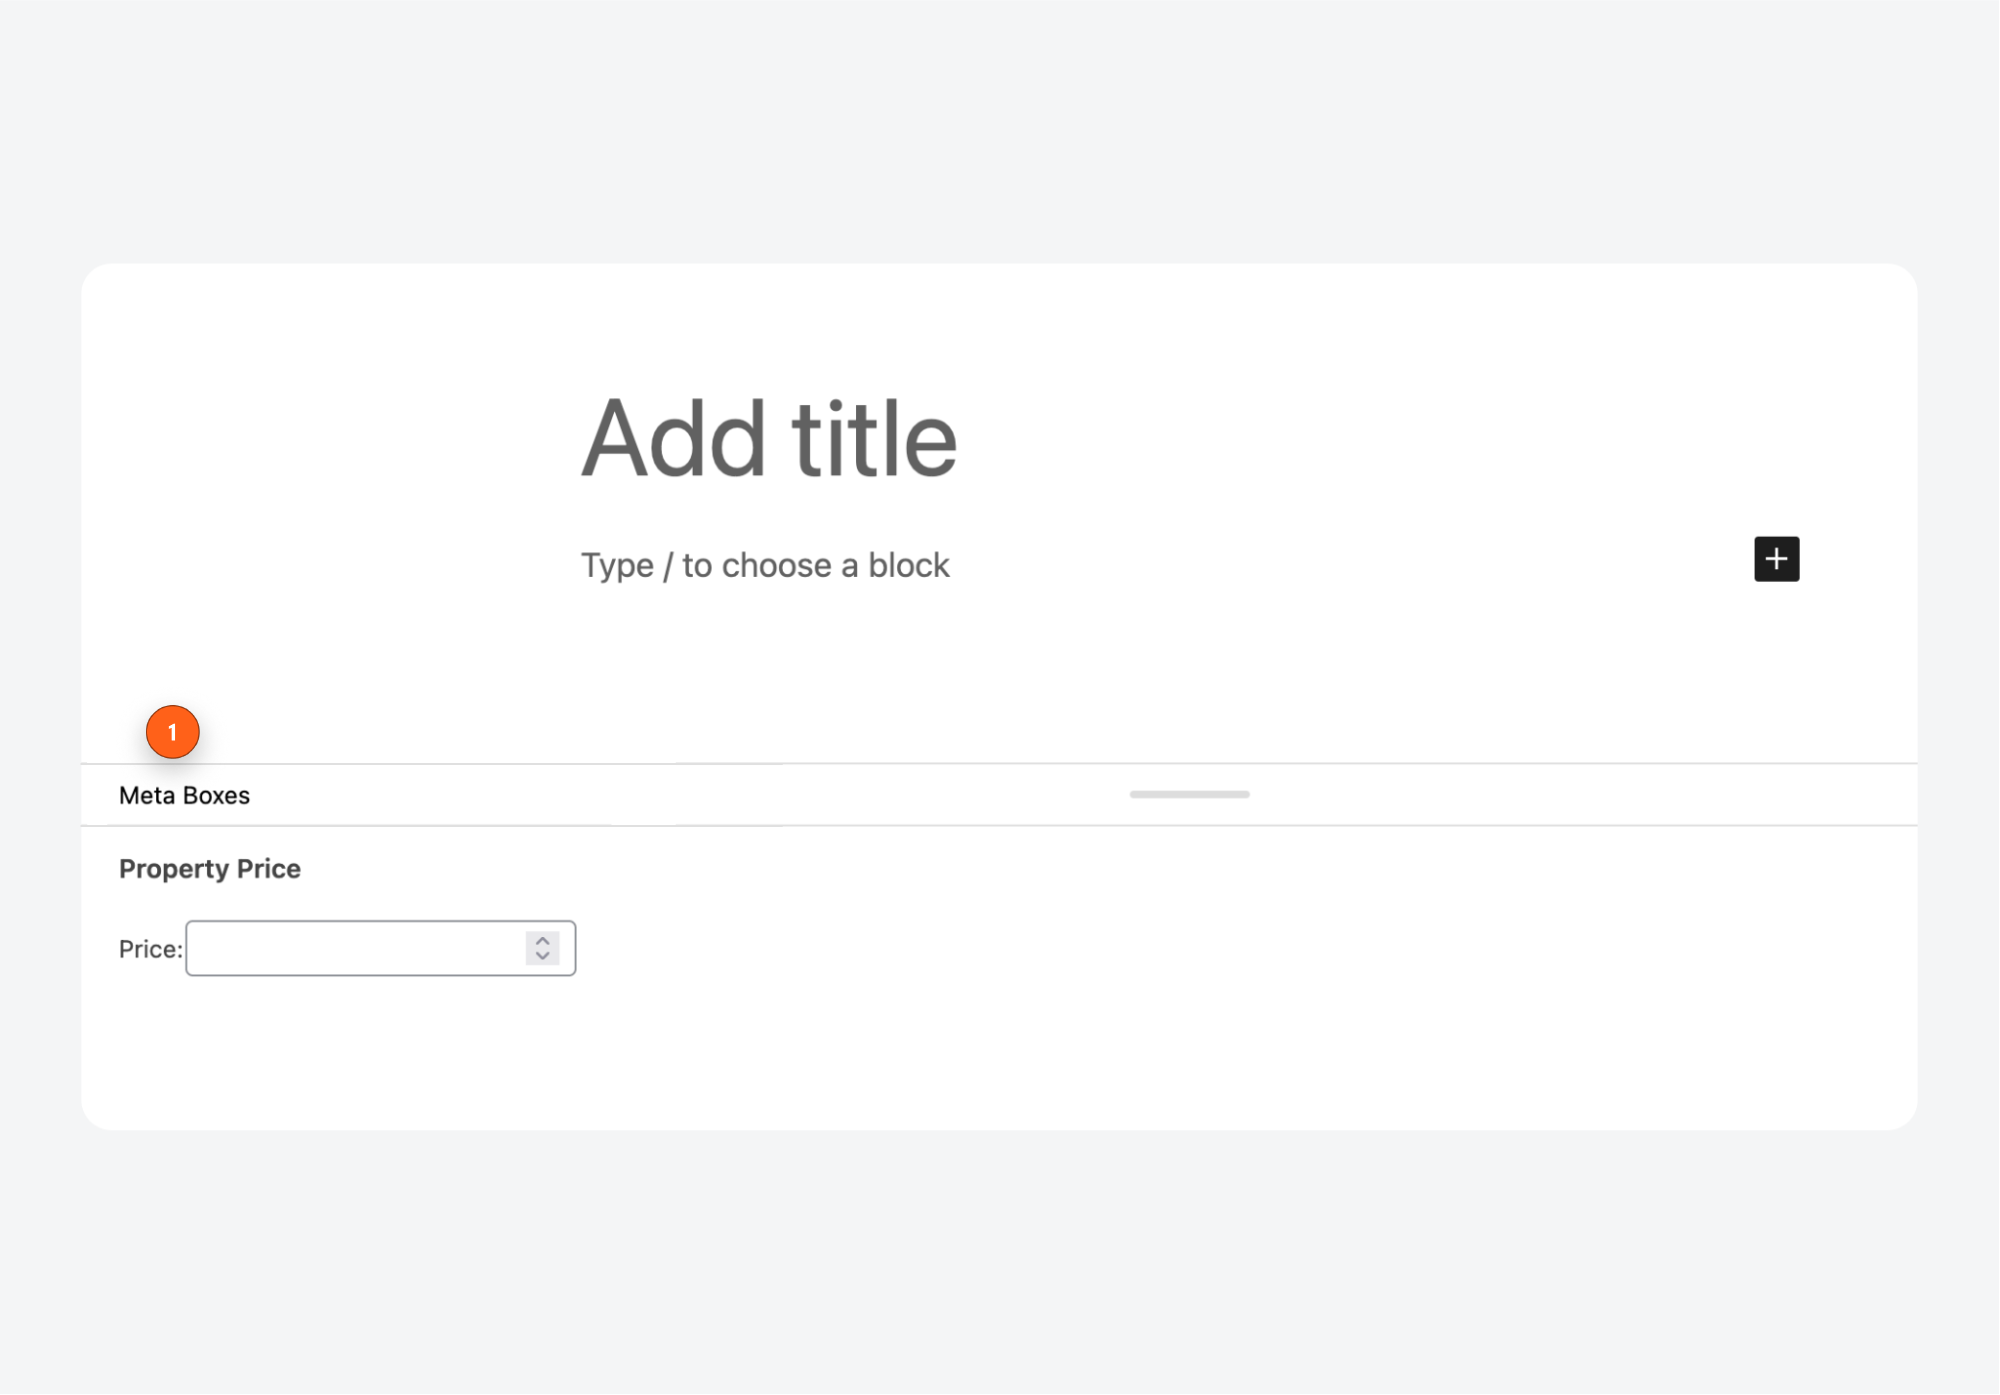
Inside the callback, you load the stored value with get_post_meta() so editors can update it, output a nonce for security, and render the input field.
You only add metaboxes when the default UI isn’t enough or when you want a controlled layout. This complements the registration step by giving editors a clear place to enter data.
Saving field values securely
To store the value, hook into save_post and make sure the request is legitimate:
add_action( 'save_post_property', function ( $post_id ) {
    if ( ! isset( $_POST['price_nonce'] ) || ! wp_verify_nonce( $_POST['price_nonce'], 'save_price' ) ) {
        return;
    }
    if ( defined( 'DOING_AUTOSAVE' ) && DOING_AUTOSAVE ) {
        return;
    }
    if ( ! current_user_can( 'edit_post', $post_id ) ) {
        return;
    }

    $value = isset( $_POST['price'] ) ? floatval( $_POST['price'] ) : null;
    update_post_meta( $post_id, 'price', $value );
} );
This checks the nonce, skips autosaves, and verifies user permissions before doing anything. The input is sanitized based on the field’s expected type, then stored with update_post_meta().
If you registered the field with a sanitize callback, WordPress will also enforce cleanup automatically.
Displaying custom field values on the frontend
To show your field on the frontend, call get_post_meta() inside your template:
$price = get_post_meta( get_the_ID(), 'price', true );
if ( $price ) {
    echo '<p>Price: ' . esc_html( number_format( $price ) ) . '</p>';
}
This reads the stored value for the current post. You handle formatting yourself. Maybe add a currency symbol or wrap it in markup. Always escape output so untrusted data doesn’t leak into the page; esc_html() works for text, esc_attr() for attributes, and wp_kses() for controlled HTML.
If you enabled show_in_rest when registering the field, the value also appears in the block editor sidebar and in REST API responses. That makes it usable for Gutenberg blocks, headless frontends, or external integrations.
Querying posts by custom field value
You can filter posts by field values using WP_Query and a meta_query. For example, to list properties priced under $500,000:
$query = new WP_Query([
    'post_type'  => 'property',
    'meta_query' => [
        [
            'key'     => 'price',
            'value'   => 500000,
            'compare' => '<',
            'type'    => 'NUMERIC',
        ],
    ],
]);
meta_query supports comparisons like =, !=, <, >, BETWEEN, and LIKE, so you can match ranges, search text, or filter content by category. This works with fields created via register_post_meta() or normal post meta.
You’ll use this pattern anytime you need dynamic listings, e.g., showing events after today or powering custom search pages.
Managing custom post type fields with ACF (the faster way)
Writing meta logic yourself works, but it’s fragile. One missed capability check or sanitize step can create bugs you don’t notice until something in your workflow fails.
ACF exists to eliminate that risk.
It gives you a UI, builds the metaboxes, saves values correctly, and keeps things consistent across projects. That’s why most agencies default to it once they’ve had enough of debugging their own field code.
Supercharge Your Website With Premium Features Using ACF PRO
Speed up your workflow and unlock features to better develop websites using ACF Blocks and Options Pages, with the Flexible Content, Repeater, Clone, Gallery Fields & More.
Adding fields for a CPT in ACF takes a handful of actions:
- Open ACF > Field Groups > Add New.
- Create your fields from 30+ field types with the correct types, labels, and names.
- Set a location rule so the group appears only on your CPT. You can see the location rules at the bottom of the page here:
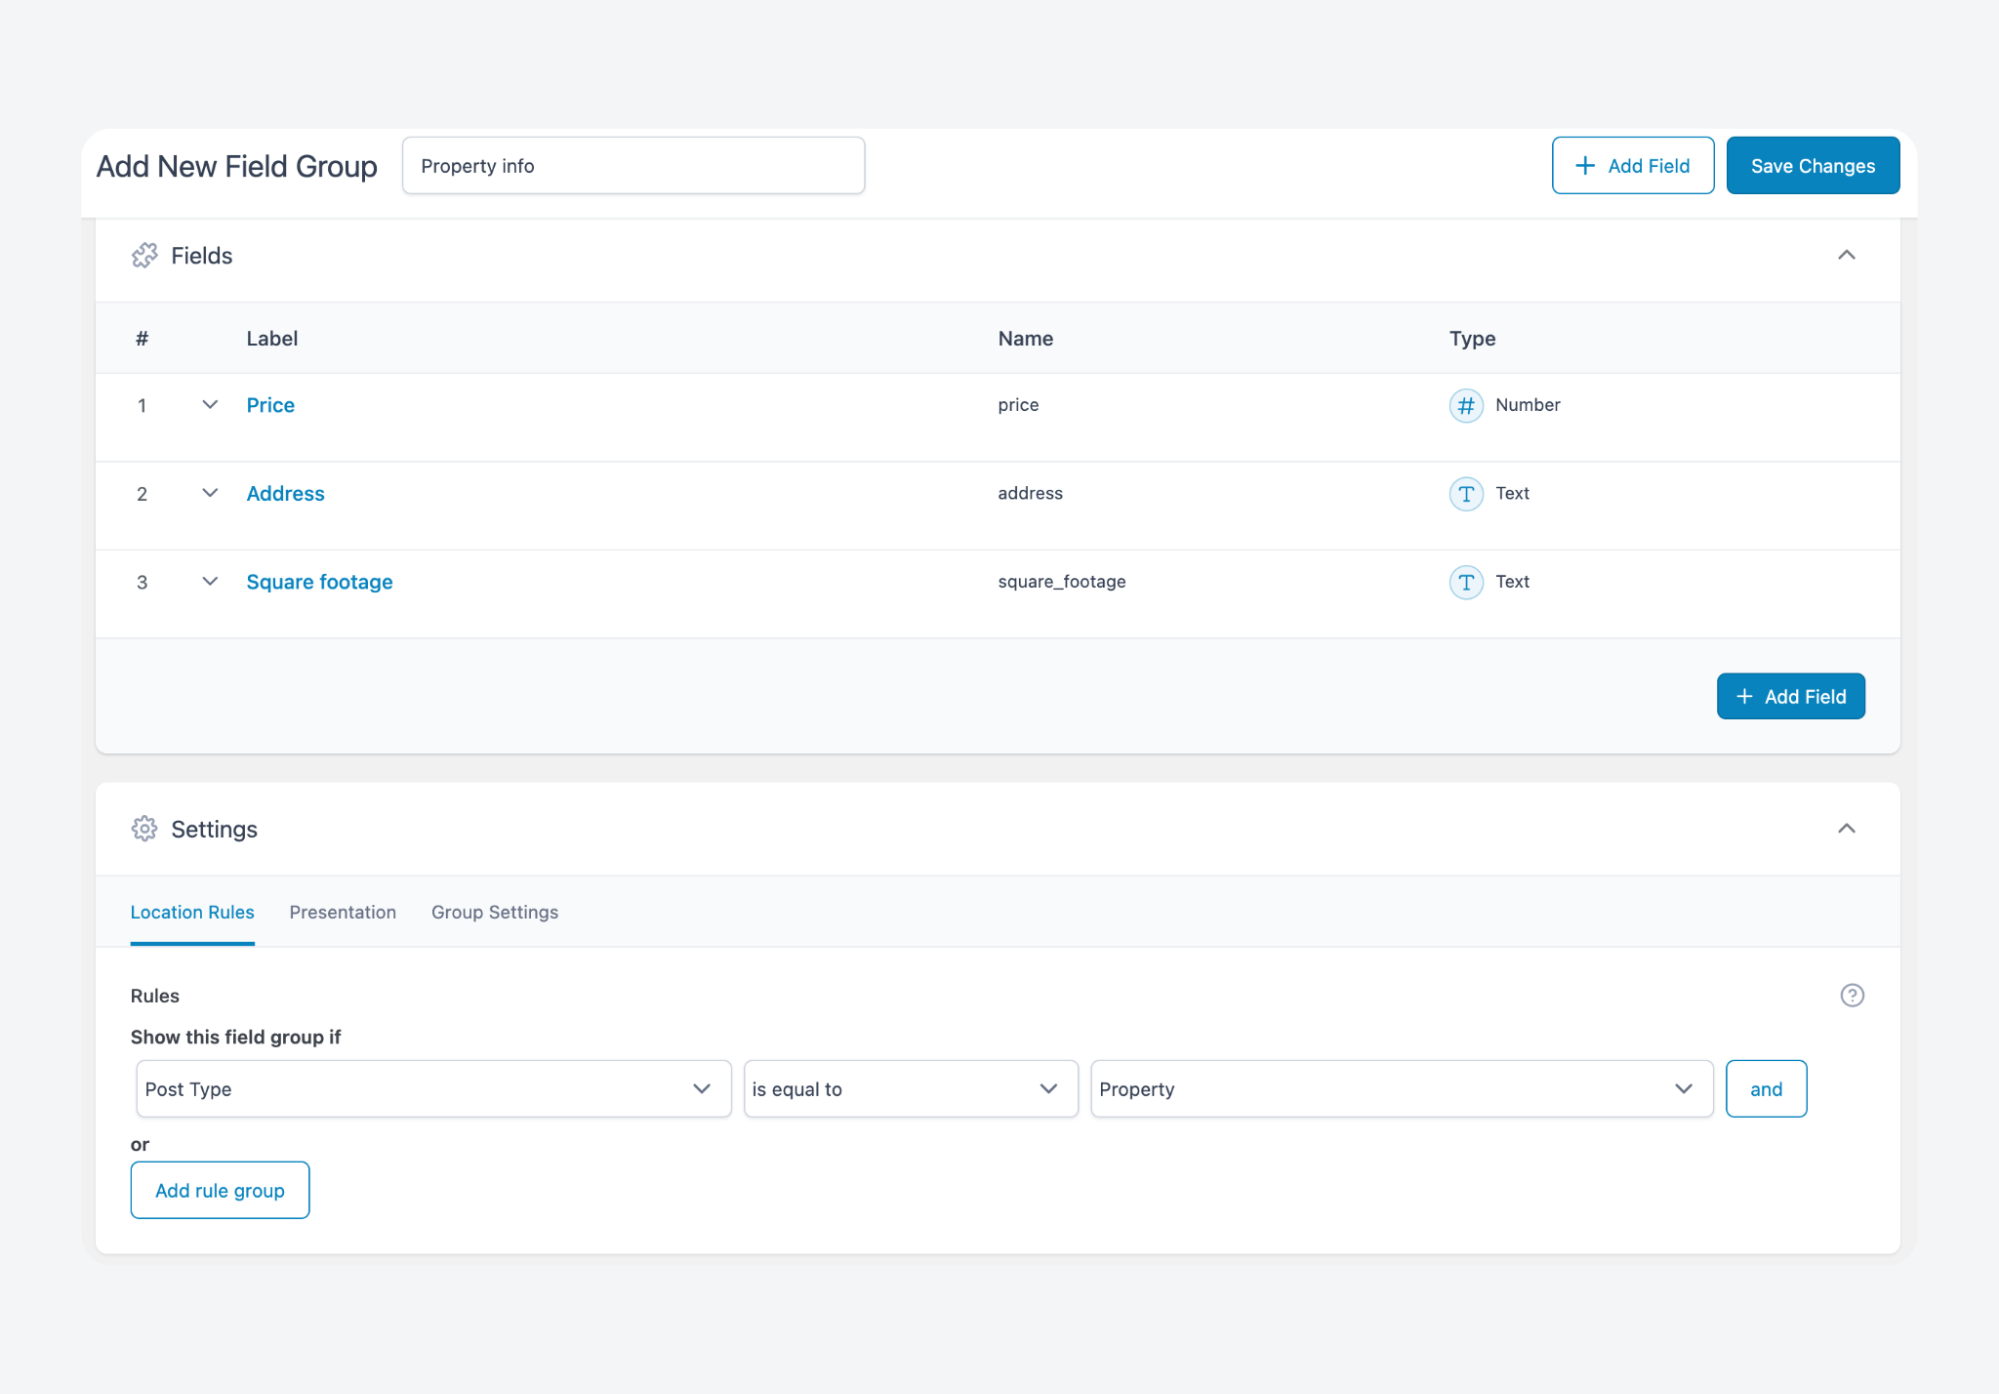
- Save the group.
That’s it.
The editor screen will now show usable inputs without requiring you to wire anything up.

ACF writes the meta, validates it, and stores it.
For a complete walkthrough of creating custom post types and fields with ACF, including how to display them in your theme, you can watch this tutorial:
If you’re using a major page builder such as WPBakery, Bricks, or Beaver Builder, you can display these fields on the frontend without touching any code.
If you build themes manually instead, ACF gives you get_field() to fetch values and the_field() to output them, so you don’t have to write the retrieval and display logic yourself.
When you’re managing sites for repeat clients, reliability like this goes a long way.
Troubleshooting issues with fields not displaying
Building custom fields by hand invites breakage. ACF sidesteps most of these problems, but if you’re going the DIY route, here’s what to watch for, and what to do:
- Field group location rules misconfigured means your fields don’t appear because WordPress doesn’t think they belong to that post type. Fix it by correcting the location rules so they target the right CPT.
- Template file not loading happens when you edit a parent theme file while a child theme actually controls output. Move your changes into the active child theme template.
- Code outside the loop occurs when retrieval runs before WordPress knows which post is being displayed. Wrap your calls inside the Loop or pass the correct post ID manually.
- Caching masking updates means stored values exist, but the frontend or editor shows stale data due to object or page cache. Clear all caches after registering fields or saving meta.
- Hidden UI panels occur when the Screen Options toggle disables field visibility. Enable the panel at the top of the editor.
- Permalinks not refreshed lead to CPT routing issues and missing fields. Visit Settings > Permalinks and click Save.
- Data exists but isn’t showing typically means your logic fails silently because you’re referencing the wrong field name or context. Dump values with
var_dump( get_post_meta( $post->ID ) )orvar_dump( get_field( 'field_name' ) )to verify before debugging templates.
Let ACF handle your custom post type fields
Custom fields turn generic post types into structured, queryable content.
You can build the system yourself – register meta, create metaboxes, handle sanitization, and write template logic – but every step is another place for things to break. ACF handles all of that for you.
“ACF handles the repetitive, error-prone parts of custom fields – the sanitization, validation, and security checks – so developers can focus on building the features that make their projects stand out. It’s about freeing you up to do your best work.”
– Liam Gladdy, Senior Software Engineer at ACF and WP Engine.
Define fields visually, attach them to any post type, retrieve values with clean functions, and skip the fragile wiring entirely. You avoid nonce juggling, capability checks you might miss, sanitization errors, and site-breaking failures from referencing the wrong key.
If you’re building a single site or managing dozens for clients, ACF gives you a workflow that scales reliably.
When you’re ready to simplify your custom field workflow, download ACF and start building more fine-tuned WordPress sites.

For plugin support, please contact our support team directly, as comments aren't actively monitored.