
Key points:
- WordPress reusable blocks (synced patterns) let you update content once to change it everywhere it appears.
- Create reusable blocks in native WordPress for basic content like CTAs and author bios.
- Standard reusable blocks become limiting when you need structured data entry or complex logic.
- For advanced needs, ACF Blocks provide more control with custom fields and dynamic data handling.
Managing a WordPress website often means dealing with repetitive content elements across multiple pages and posts. Just think about how often you’ve had to update the same call-to-action, team member bio, or contact information throughout your site.
For many WordPress site owners, this tedious task consumes hours every month – hours that could be spent on more valuable activities.
WordPress reusable blocks solve this common problem. With reusable blocks, you create content once and use it throughout your site. Need to make changes? Edit the block once, and the updates appear everywhere. This approach saves time and keeps your content consistent.
This guide covers everything about WordPress reusable blocks: creation, implementation, editing, management, and advanced techniques. We’ll start with the built-in WordPress features available to everyone before exploring options for specific needs.
Understanding WordPress reusable blocks and synced patterns
If you’ve updated to WordPress 6.3, you might have noticed that “reusable blocks” are now labeled as “synced patterns.” Don’t worry, they work the same way, just with a new name.
WordPress offers two types of patterns that serve different purposes:
- Synced patterns (formerly reusable blocks) automatically update all instances when you edit them anywhere on your site.
- Unsynced patterns work more like templates. After insertion, each instance can be modified independently without affecting others.
Most WordPress users rely on synced patterns for elements that need consistency across their sites, including:
- Call-to-action buttons where the messaging must match on all pages.
- Author bios that appear at the end of multiple blog posts.
- Product feature sections used across various landing pages.
- Legal disclaimers or contact information that must stay uniform.
- Email signup forms with consistent styling and functionality.
The native WordPress pattern system handles basic content reuse effectively. However, for more complex dynamic content needs, you might find its capabilities somewhat limited. Later in this article, we’ll look at how ACF Blocks from Advanced Custom Fields (ACF®) provides more effective solutions for sophisticated content reuse.
How to create synced patterns (reusable blocks) in WordPress
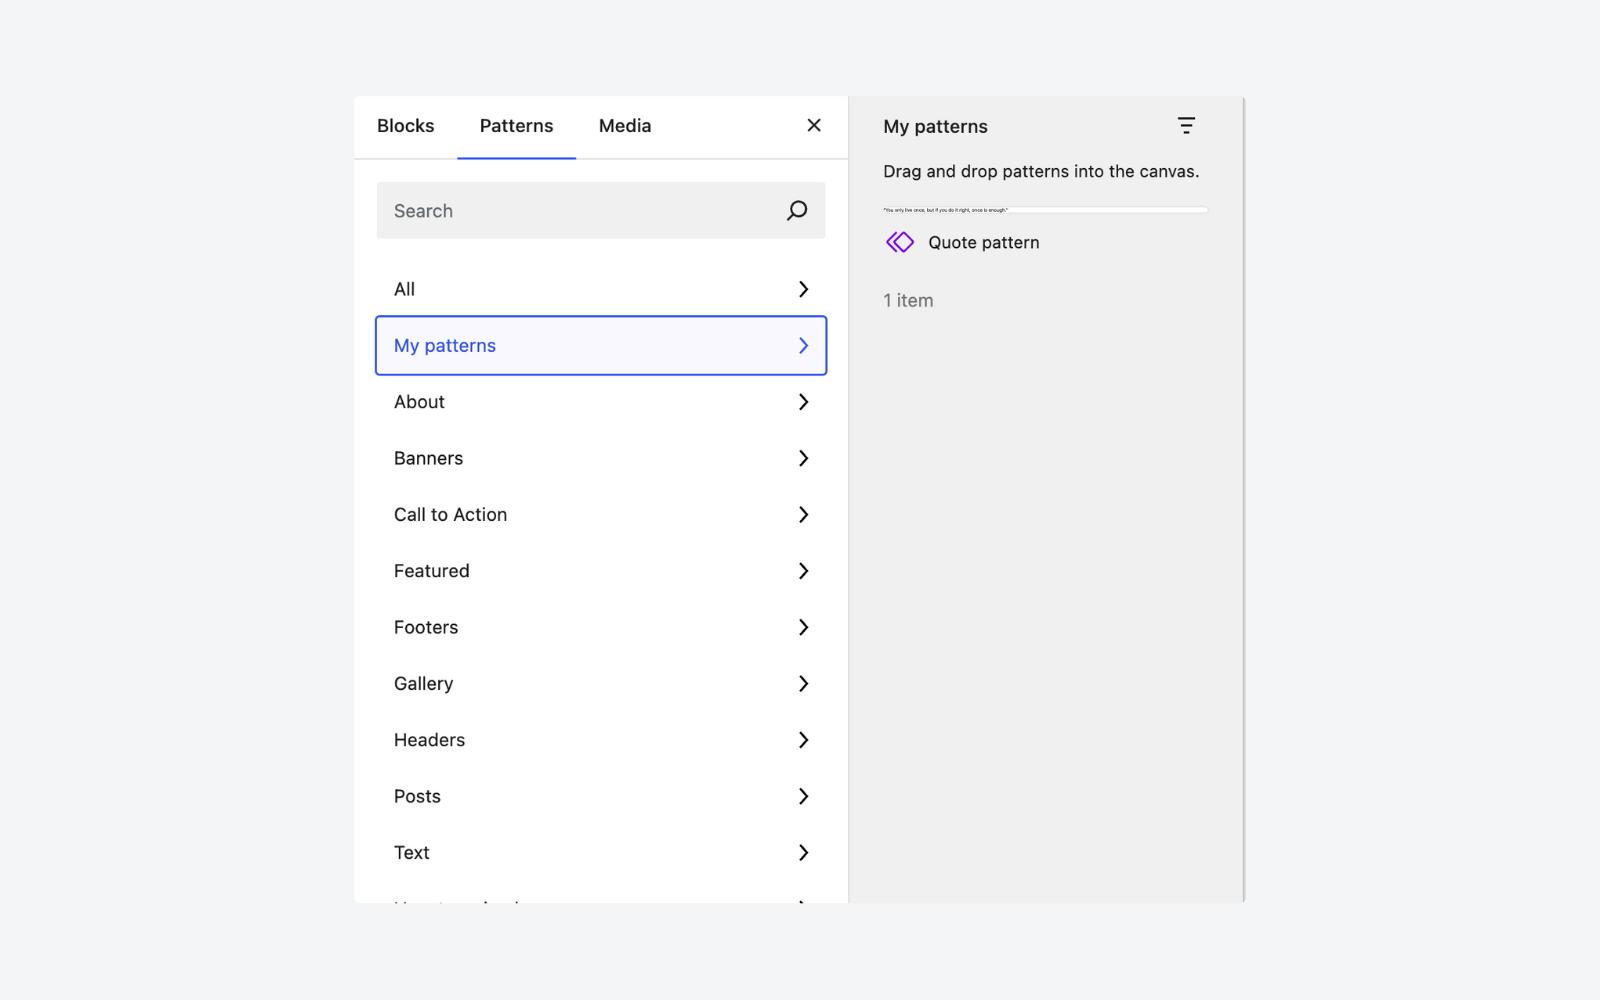
Here’s a step-by-step guide for creating synced patterns in WordPress:
- Create the block(s) you want to turn into a synced pattern in the editor. In this example, we’ve created a quote block.
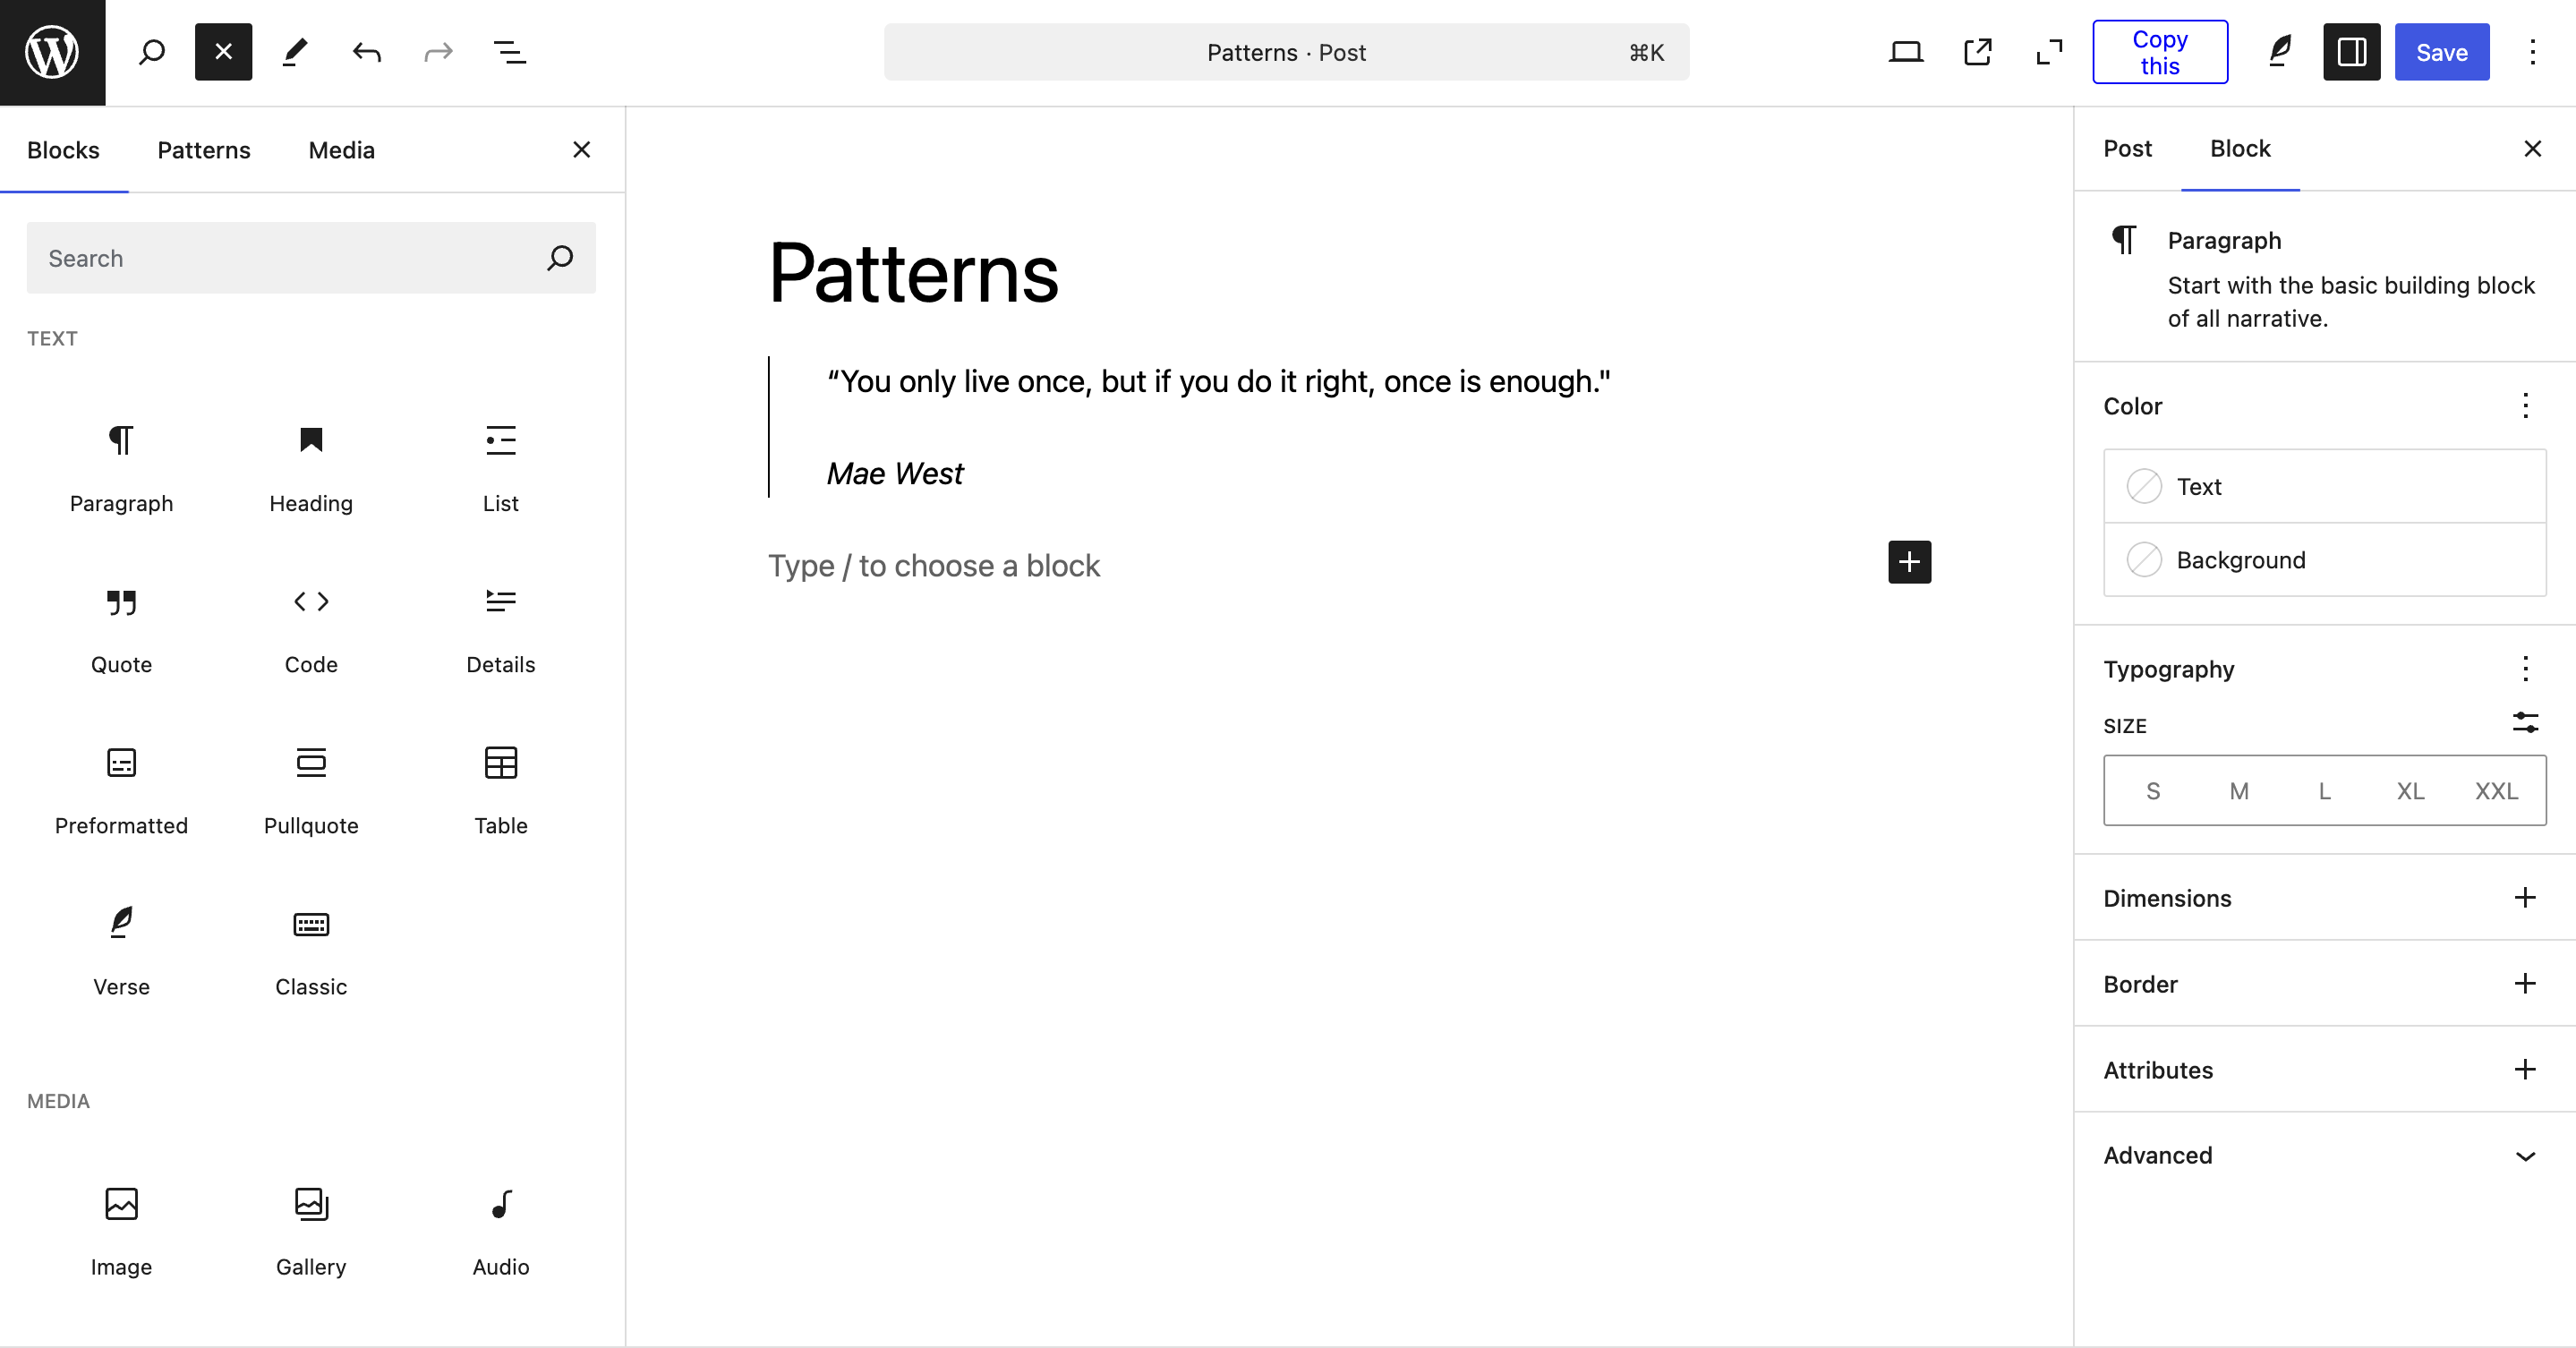
- Drag your cursor over all the content you want to use in a pattern, even if it’s spread across multiple blocks, and choose “Create pattern” from the three-dot menu.

- Give your pattern a descriptive name that clearly indicates its purpose and select a category so you can easily find it later.
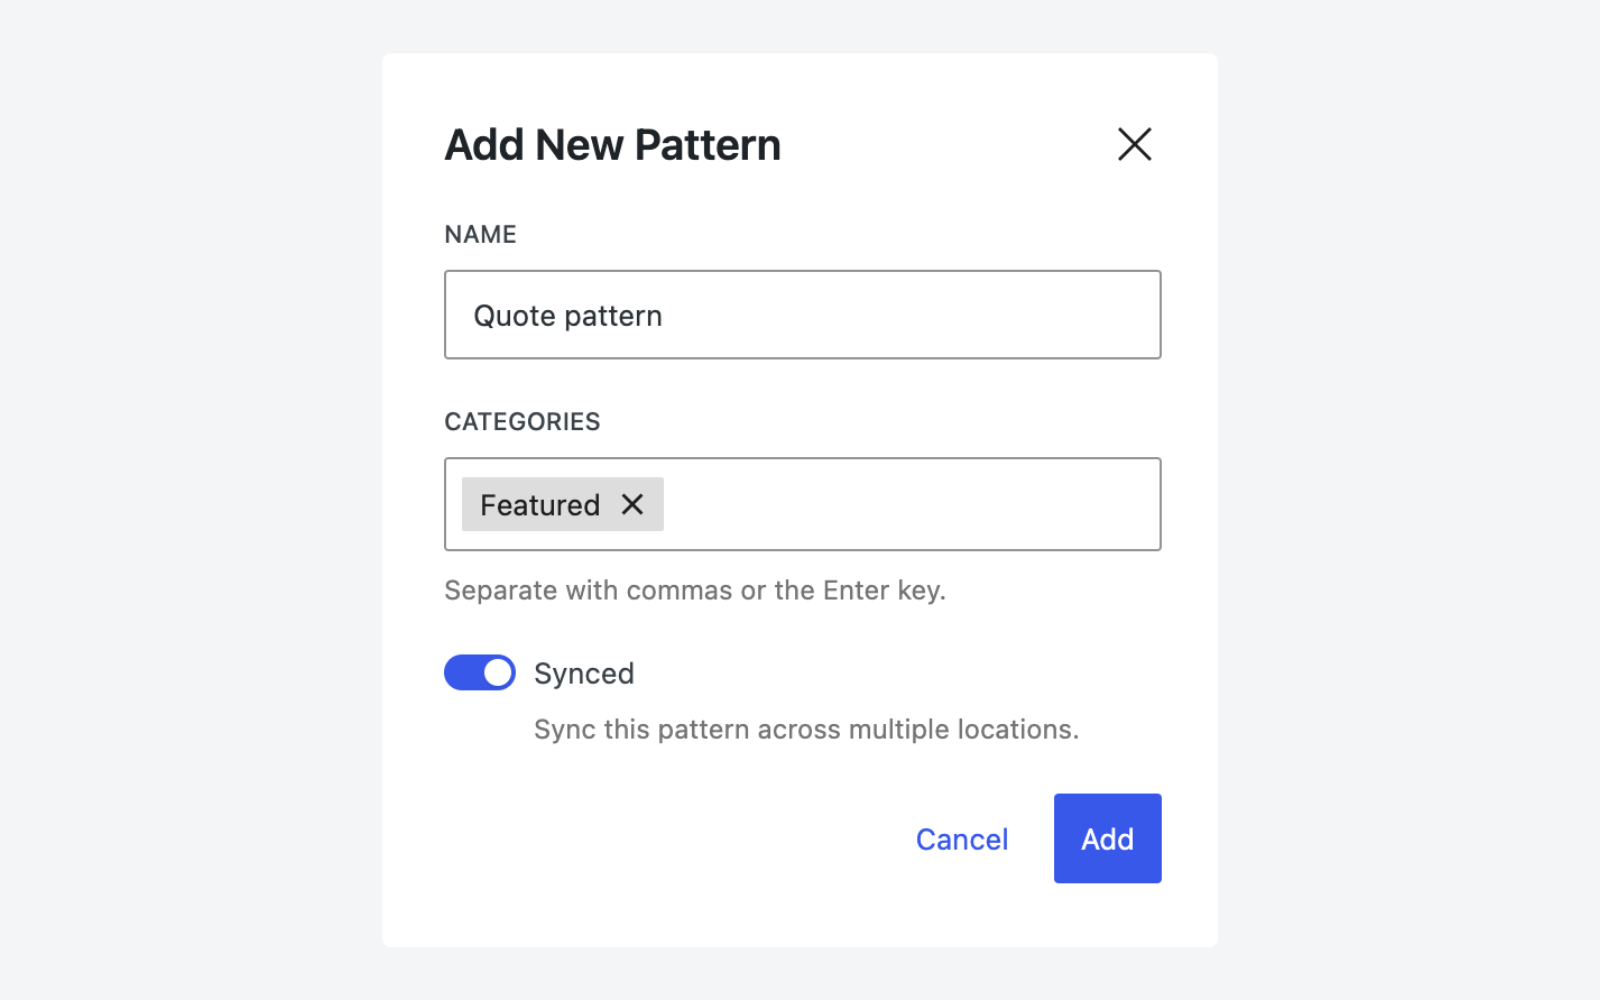
- Ensure the “Sync” option is toggled on to create a synced pattern.
- Click “Create.”
That’s it! Your content is now saved as a synced pattern that can be used throughout your site.
Adding reusable blocks to your content
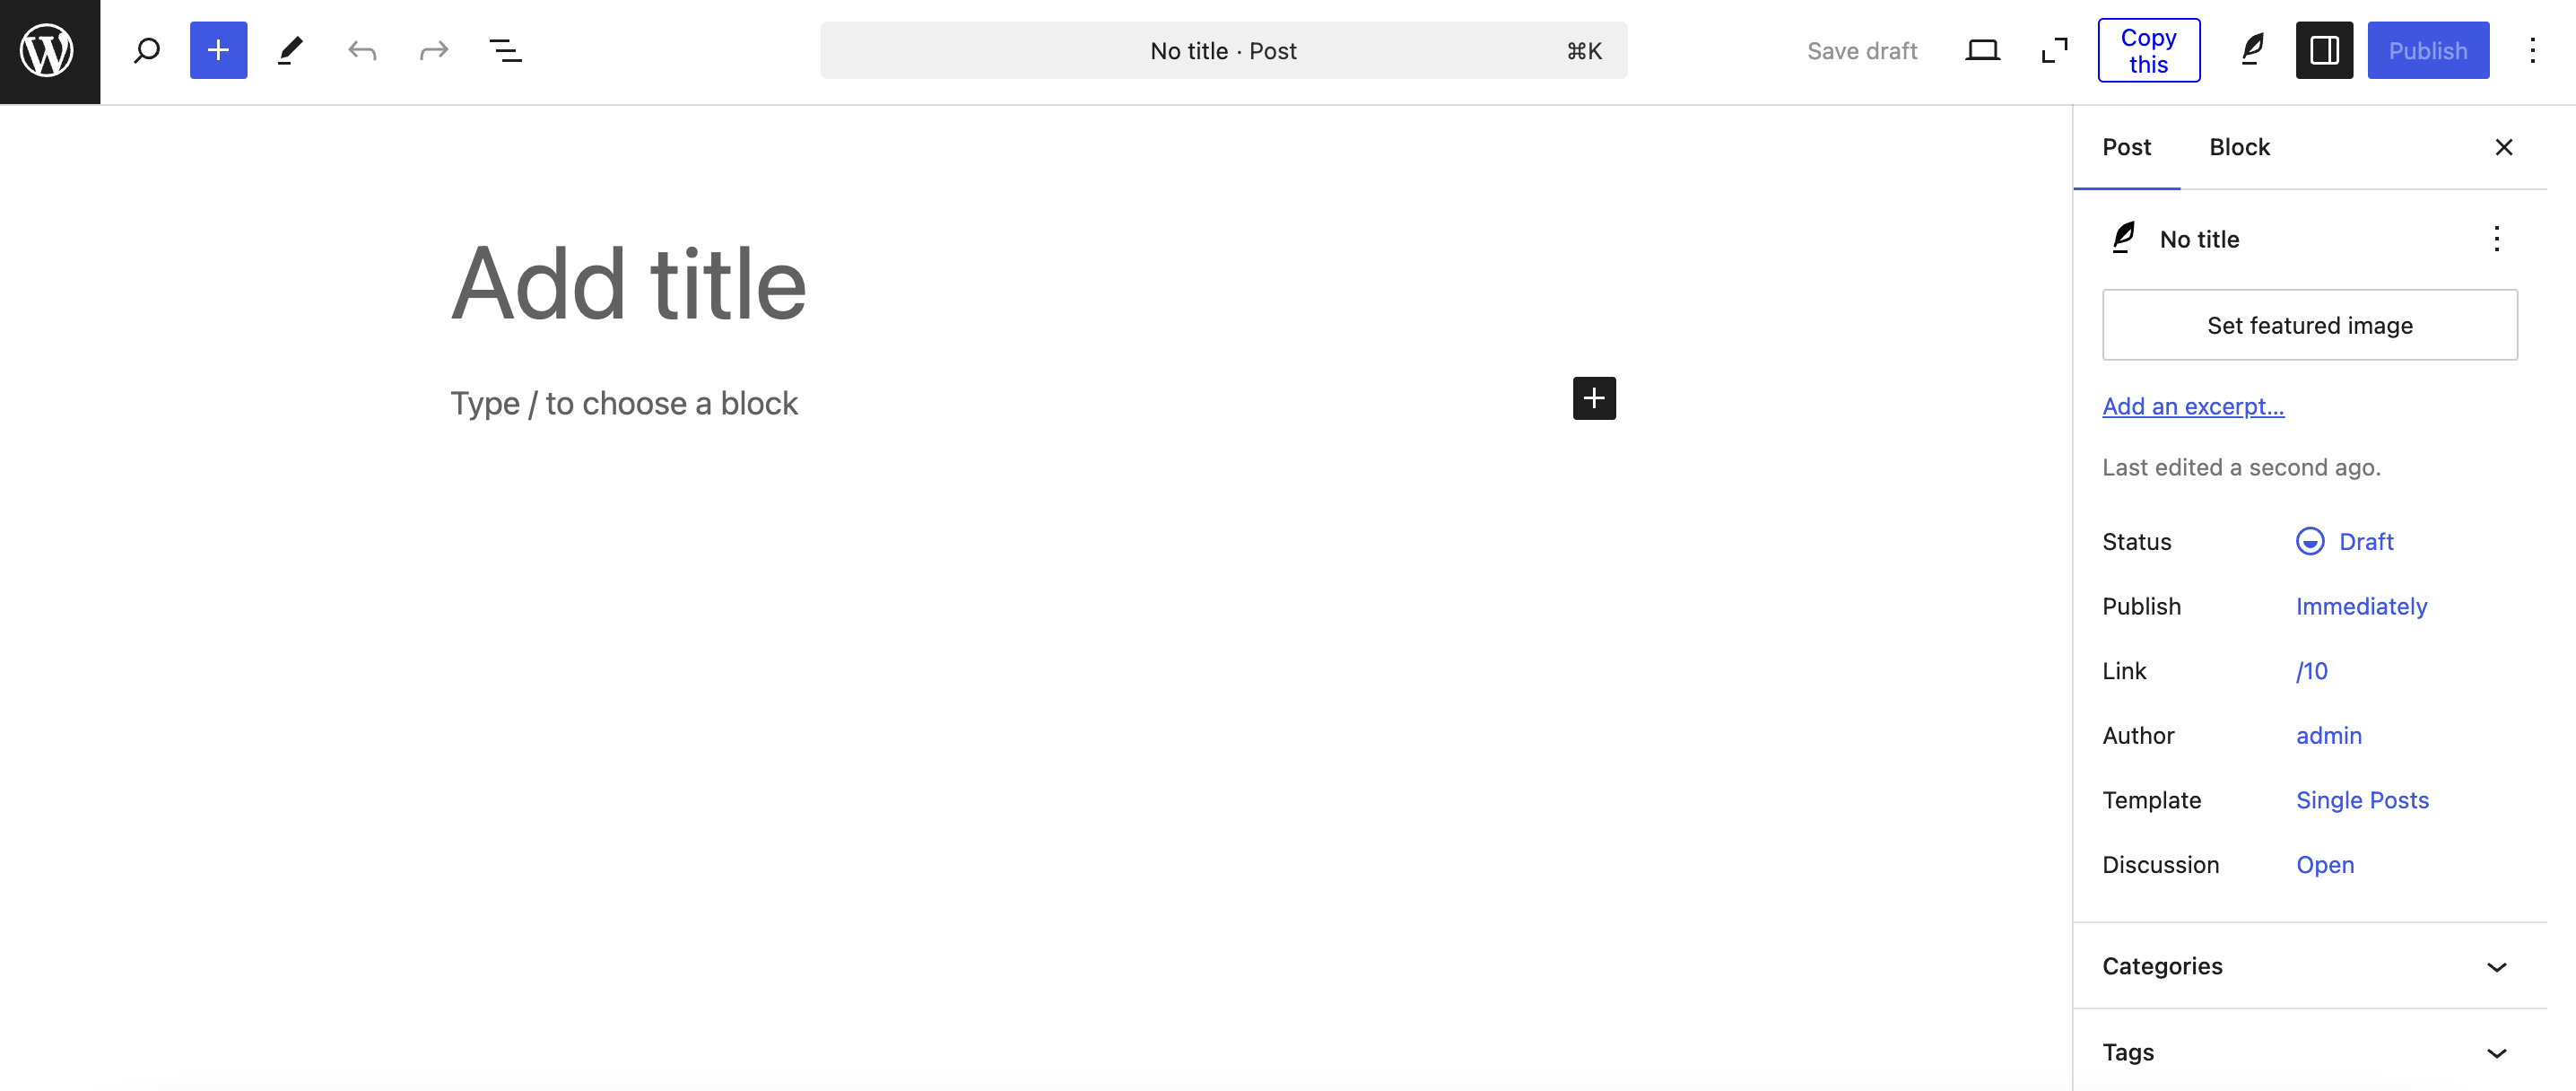
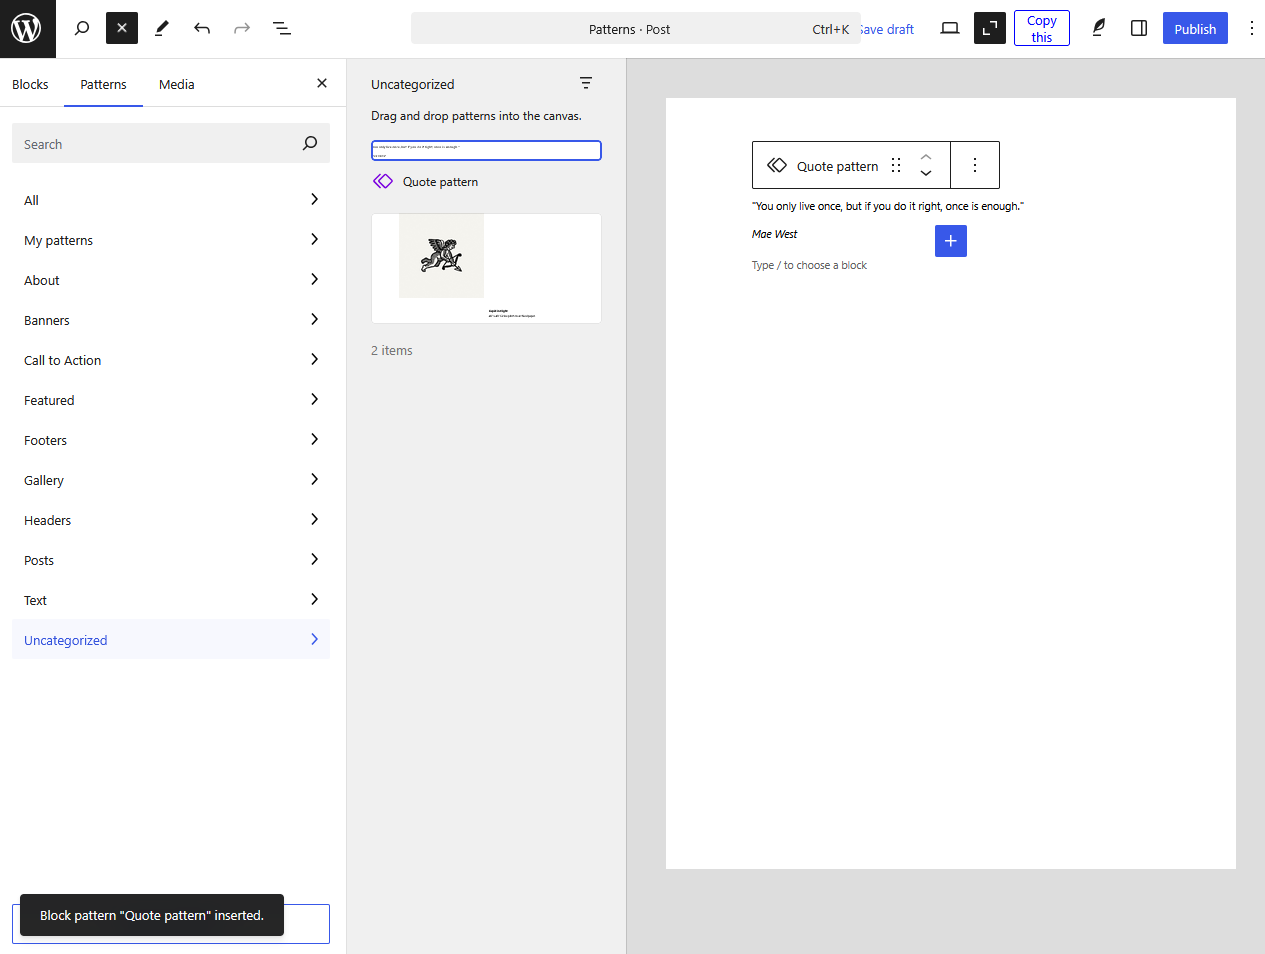
Once you’ve created synced patterns, adding them to your content takes just a few clicks:
- While editing a post or page, click the “+” icon to add a new block.
- Select the “Patterns” tab in the inserter panel.
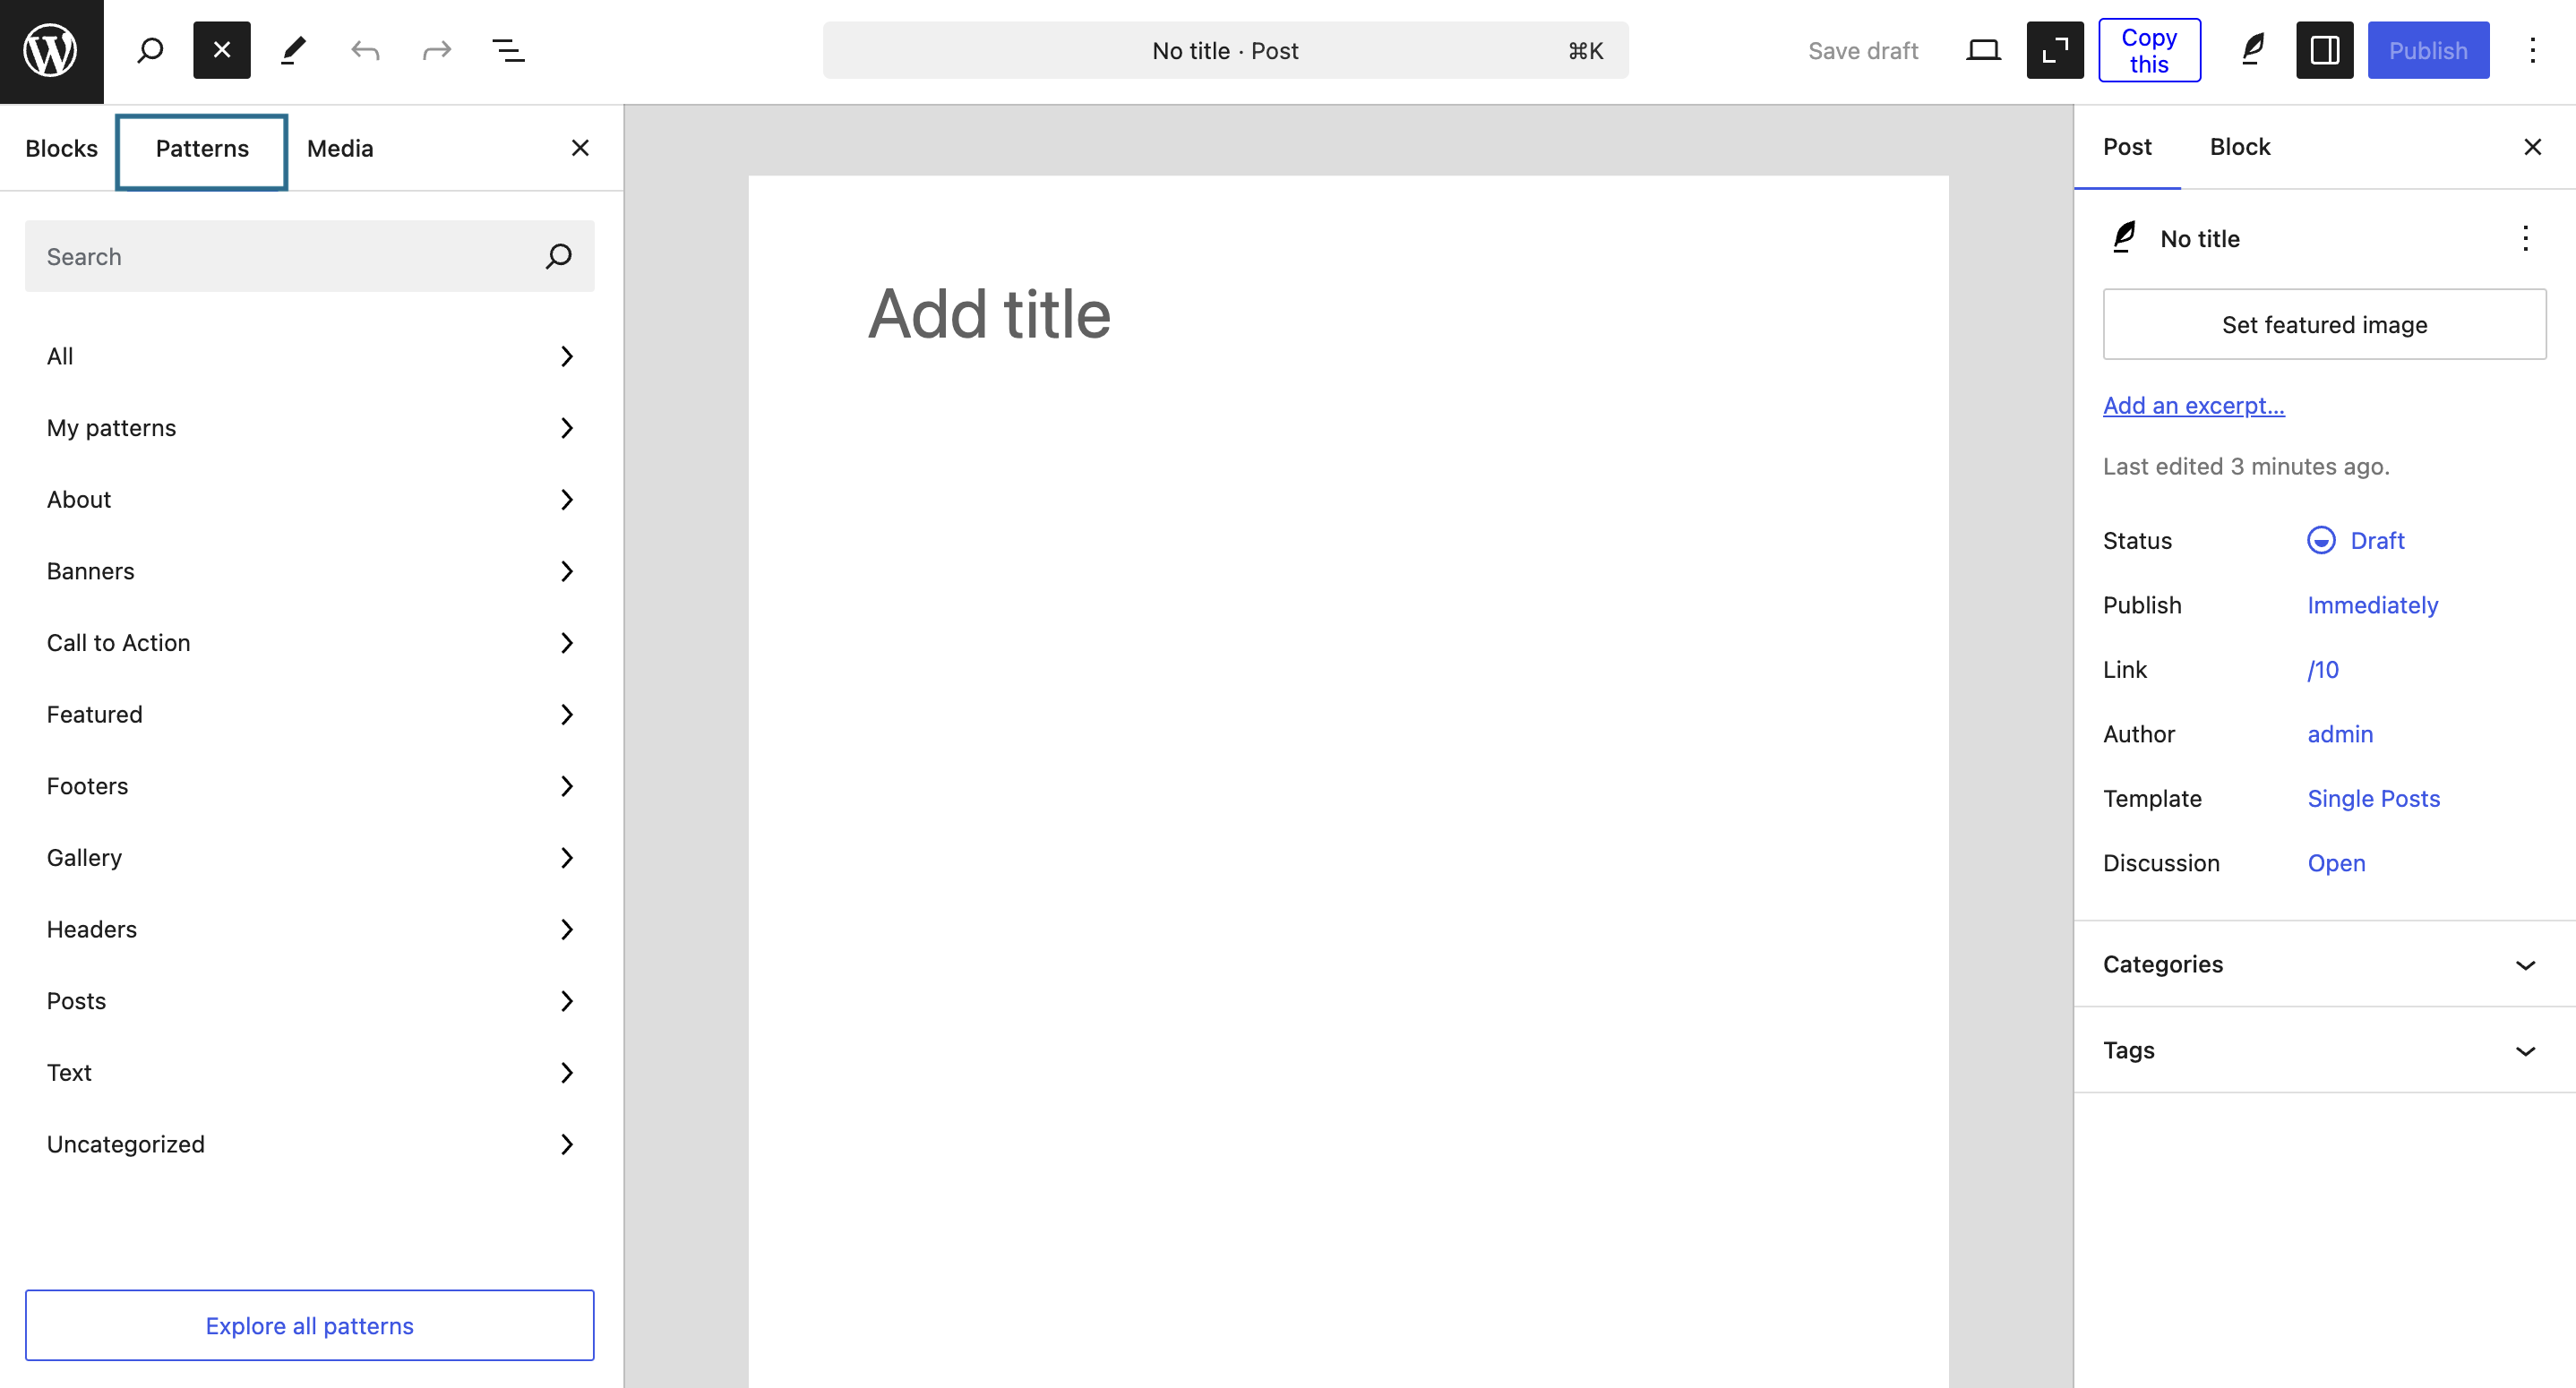
- Find your pattern by browsing categories or using the search function.
- Click on your synced pattern to insert it into your content.
Editing and updating your reusable blocks
Synced patterns are most useful when you need to make updates. You can edit a synced pattern from any instance where it appears by selecting it and clicking “Edit original” in the block toolbar.

Alternatively, navigate to Appearance > Editor > Patterns to edit any pattern directly and make your changes to the pattern content, formatting, or design.
Remember that any edits to a synced pattern will automatically update every instance across your entire site. If you need to make changes to just one instance without affecting others, you can convert it to a regular block by selecting the pattern, clicking the ellipses (three dots) at the end of the toolbar, and choosing “Deatch.”
Managing your reusable blocks library
As your collection of synced patterns grows, you’ll need a system to keep them organized. WordPress provides a central management area for all your patterns.
To access this library, go to Appearance > Editor > Patterns in your WordPress admin dashboard. This screen gives you full control over your pattern collection. You can view all patterns at a glance, edit their content, rename them for clarity, or delete ones you no longer need.
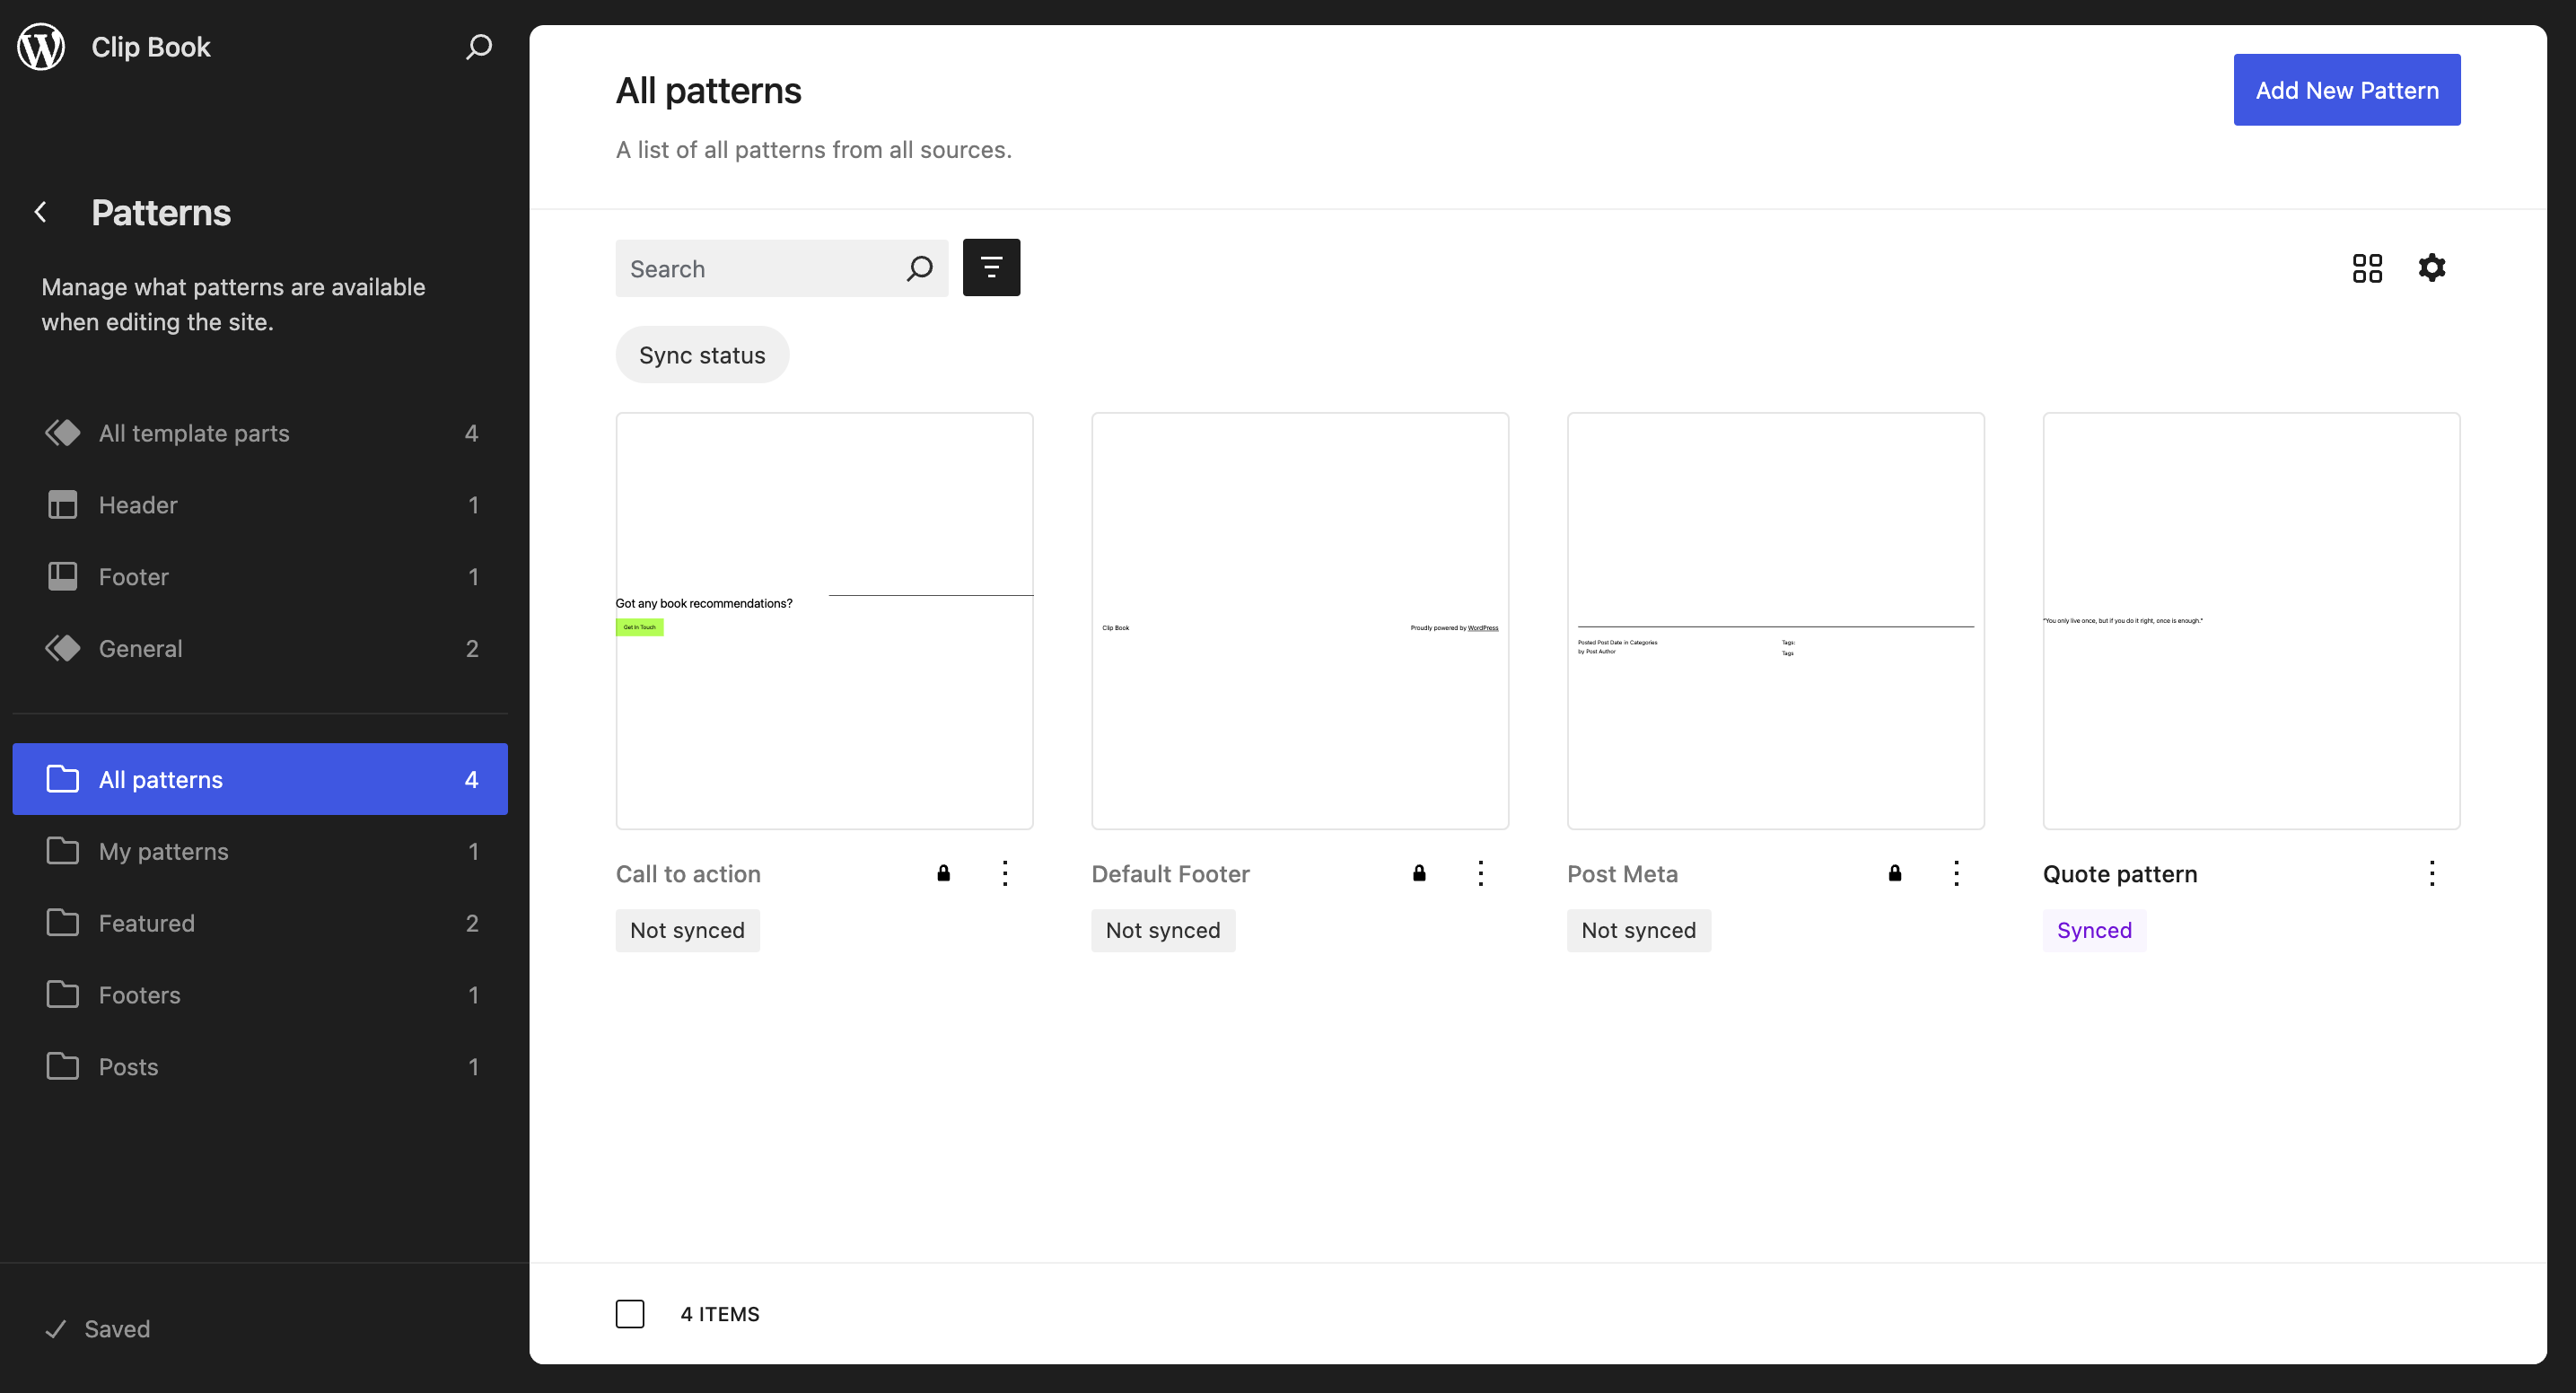
For better organization, assign your patterns to specific categories that make sense for your workflow. Using descriptive names like “Summer 2024 Promotion Banner” rather than generic labels like “Banner” makes it much easier to find what you need later.
For efficient pattern management, consider creating a naming convention (like “CTA: Holiday Sale” or “Bio: Marketing Team”) and regularly review your library to remove outdated patterns.
Importing and exporting your blocks
When working with multiple WordPress sites, you may want to transfer your synced patterns between them. WordPress doesn’t have a built-in tool specifically for exporting individual patterns. However, you can use the WordPress export tool (Tools > Export) to export your content, which includes your patterns. You can then import this file on your destination site using Tools > Import.
For more selective pattern transfers, you can copy the HTML code of a pattern and paste it into the code editor on another site.
Several WordPress plugins, like Block Styles and BlockMeister, also offer enhanced import/export functionality specifically for blocks and patterns if you need more control over the process.
Create a reusable block using ACF Blocks: The better way
While WordPress’s native reusable blocks work well for simple content, they have limitations when you need more advanced functionality.
Standard blocks struggle with structured data entry, complex conditional logic, or integration with other WordPress systems. Traditional WordPress block development presents a steep learning curve, requiring JavaScript and React knowledge that many WordPress developers don’t have.
In contrast, ACF Blocks, a premium feature of ACF PRO, simplifies this process dramatically by allowing developers to create sophisticated custom blocks using familiar PHP and HTML.
According to a 2024 survey, 56.55% of ACF users rely on the block editor for building custom blocks with ACF Blocks rather than writing JavaScript.
Let’s consider a real-world example: A testimonial block that needs functionality beyond what standard blocks offer. With ACF Blocks, you could create a testimonial that includes:
- A dynamically populated author selection field pulling directly from your user database.
- Custom styling options with predefined color schemes.
- Rating systems with star icons.
- Conditional display logic based on user roles or page context.
Once your custom ACF Block is registered, content editors can use it throughout the site just like any standard block. They can even save specific configurations as synced patterns, effectively combining the power of custom fields with WordPress’s native pattern system.
Supercharge Your Website With Premium Features Using ACF PRO
Speed up your workflow and unlock features to better develop websites using ACF Blocks and Options Pages, with the Flexible Content, Repeater, Clone, Gallery Fields & More.
Step-by-step guide to create dynamic reusable blocks
1. Setting up your environment
Before diving into block creation, you’ll need:
- ACF PRO (version 5.8.0 or later) installed and activated on your WordPress site.
- A development environment where you can safely add custom code.
- A child theme to house your block code so updates don’t erase your work.
- A local development tool like Local to create a sandbox site for testing.
2. Creating and registering your block
To create and register your custom block:
- In your child theme’s root, create a Blocks folder. Inside that, create a new folder titled Testimonials.
- In Testimonials, add a block.json file and add the following code to it:
{
    "name": "acf/testimonial",
    "title": "Testimonial",
    "description": "A testimonial block that uses ACF fields.",
    "style": [ "file:./style.css" ],
    "category": "formatting",
    "icon": "admin-comments",
    "keywords": ["testimonial"],
    "acf": {
      "mode": "preview",
      "renderTemplate": "testimonial.php",
      "validate": false
    },
    "supports": {
      "anchor": false,
      "ariaLabel": true,
      "align": false,
      "color": {
        "background": true,
        "text": false
      },
      "background": {
        "backgroundImage": true
      },
      "selectors": {
        "color": "text"
      }
    }
}- In the same folder, create a testimonial.php file to use as the template for the block. Add the following code to it:
<?php

// Retrieve custom field values.
$message = get_field('message');
$name    = get_field('name');
$company = get_field('company');
?>
<div class="testimonial-block">
    <?php if ( $message ) : ?>
        <div class="testimonial-message"><?php echo esc_html($message); ?></div>
    <?php endif; ?>

    <?php if ( $name || $company ) : ?>
        <div class="testimonial-author">
            <?php if ( $name ) : ?>
                <strong><?php echo esc_html($name); ?></strong>
            <?php endif; ?>
            <?php if ( $company ) : ?>
                <span><?php echo esc_html($company); ?></span>
            <?php endif; ?>
        </div>
    <?php endif; ?>
</div>
- Finally, create a stylesheet using style.css in the same folder, with the following code:
.testimonial-block {
    background-color: #FDF0D5;
    color: #780000;
    padding: 20px;
    border-radius: 5px;
    margin: 20px 0;
}

.testimonial-message {
    font-size: 18px;
    line-height: 1.5;
    margin-bottom: 15px;
}

.testimonial-author {
    font-size: 16px;
    text-align: right;
}
3. Building your field group
Next, you’ll create the custom fields from which the block pulls data. Here’s how to do that in a few clicks with ACF:
- From your admin dashboard, go to ACF > Field Groups and add a new one.
- Create the fields specified in the block template, i.e.
messagefor the testimonial,namefor the person it’s attributed to, andcompanyfor where they work. Make sure you’re using the correct field type for each field, e.g. image for pictures.
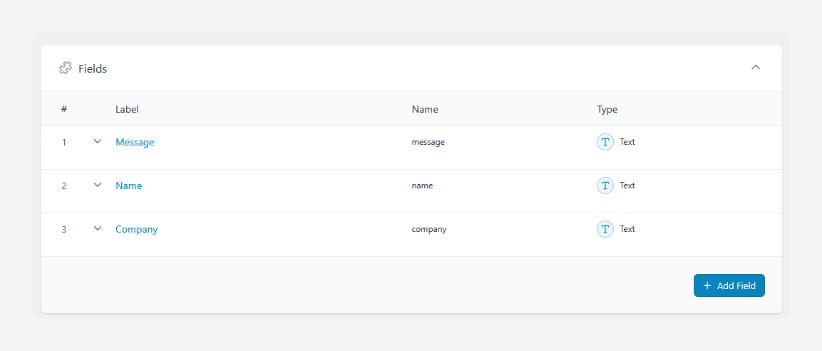
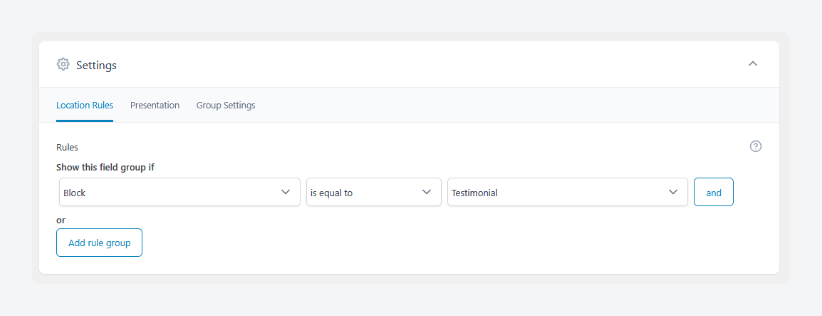
- Scroll down to the Location Rules section and set it to show the field group if Block is equal to Testimonial. This will hide the custom fields until you insert the block, keeping your editor from being too cluttered.
4. Using your reusable block
To see your block in action, create a new page or post so you’re in the Gutenberg editor, and search for the custom block using the keywords from block.json.
The block and custom fields should show up, and you’ll be able to enter your data as shown below:
Enhance your content workflow with ACF Blocks
WordPress’s built-in synced patterns handle many common needs, but ACF Blocks offers additional possibilities when you need more structure. What makes ACF Blocks especially useful is how they connect reusable content with the flexibility of custom fields.
Many site builders find standard blocks limiting. ACF PRO helps solve this by letting you create blocks with specific fields tailored to your needs. Need a testimonial block with author information and ratings? Or a product feature with specific data points? ACF makes creating these structured blocks possible without needing to learn React.
One of the biggest advantages of ACF Blocks is full support for all ACF field types. This includes powerful options like Repeater fields for creating dynamic lists and Clone fields for reusing field groups. These advanced field types enable sophisticated content structures that simply aren’t possible with standard WordPress blocks.
Perhaps most importantly, ACF Blocks maintains complete compatibility with WordPress core while adding these powerful templating capabilities. Ready to take your WordPress blocks to the next level? Get started with ACF PRO today.

For plugin support, please contact our support team directly, as comments aren't actively monitored.