There has been a lot of excitement surrounding Gutenberg, the new block-based WordPress editing experience. One of its most compelling features is the ability for developers to create their own custom block types. This opens up an endless array of possibilities for customization.
There’s just one little problem. Creating custom blocks is extremely complicated. How complicated? Well, even a simple testimonials block requires a massive amount of code.
The entire process is both time and code intensive. The result is that many developers will consider the custom blocks feature to be out of their reach.
While we have been hard at work to ensure metabox compatibility with Gutenberg, an idea hit us. What if we could make it easier to build custom block types for Gutenberg? Blocks that allow you to use ACF + PHP to create stunning dynamic content!
Well, it hasn’t been easy, but we are delighted to announce that our ACF Blocks feature is starting to take shape! In fact, you can now take it for spin! ACF version 5.8.0-beta1 is now available for download and includes an early stage of our ACF Blocks feature to help you create custom block types without the fuss.
Let’s take a deeper look into this new addition to ACF.
Create Custom Blocks in Minutes, Not Hours ⚡️
Manually creating custom blocks means digging through endless mounds of JavaScript. ACF Blocks, on the other hand, does all the hard work for you so you can sit back, relax, and continue writing simple PHP and HTML.
We’ve simplified the process down to just three steps:
1. Register a Block
Similar to registering a post type in WP, the acf_register_block() function allows you to register a custom block type from your functions.php file. This function accepts an array of settings that you can use to customize your block, including a name, description, and more.
💡 These settings are closely related to the WordPress JavaScript registerBlockType() function.
You’ll also need to add the name of your callback function, which we’ll explain in further detail below.
functions.php

add_action('acf/init', 'my_acf_init');
function my_acf_init() {
// check function exists
if( function_exists('acf_register_block') ) {
// register a testimonial block
acf_register_block(array(
'name' => 'testimonial',
'title' => __('Testimonial'),
'description' => __('A custom testimonial block.'),
'render_callback' => 'my_acf_block_render_callback',
'category' => 'formatting',
'icon' => 'admin-comments',
'keywords' => array( 'testimonial', 'quote' ),
));
}
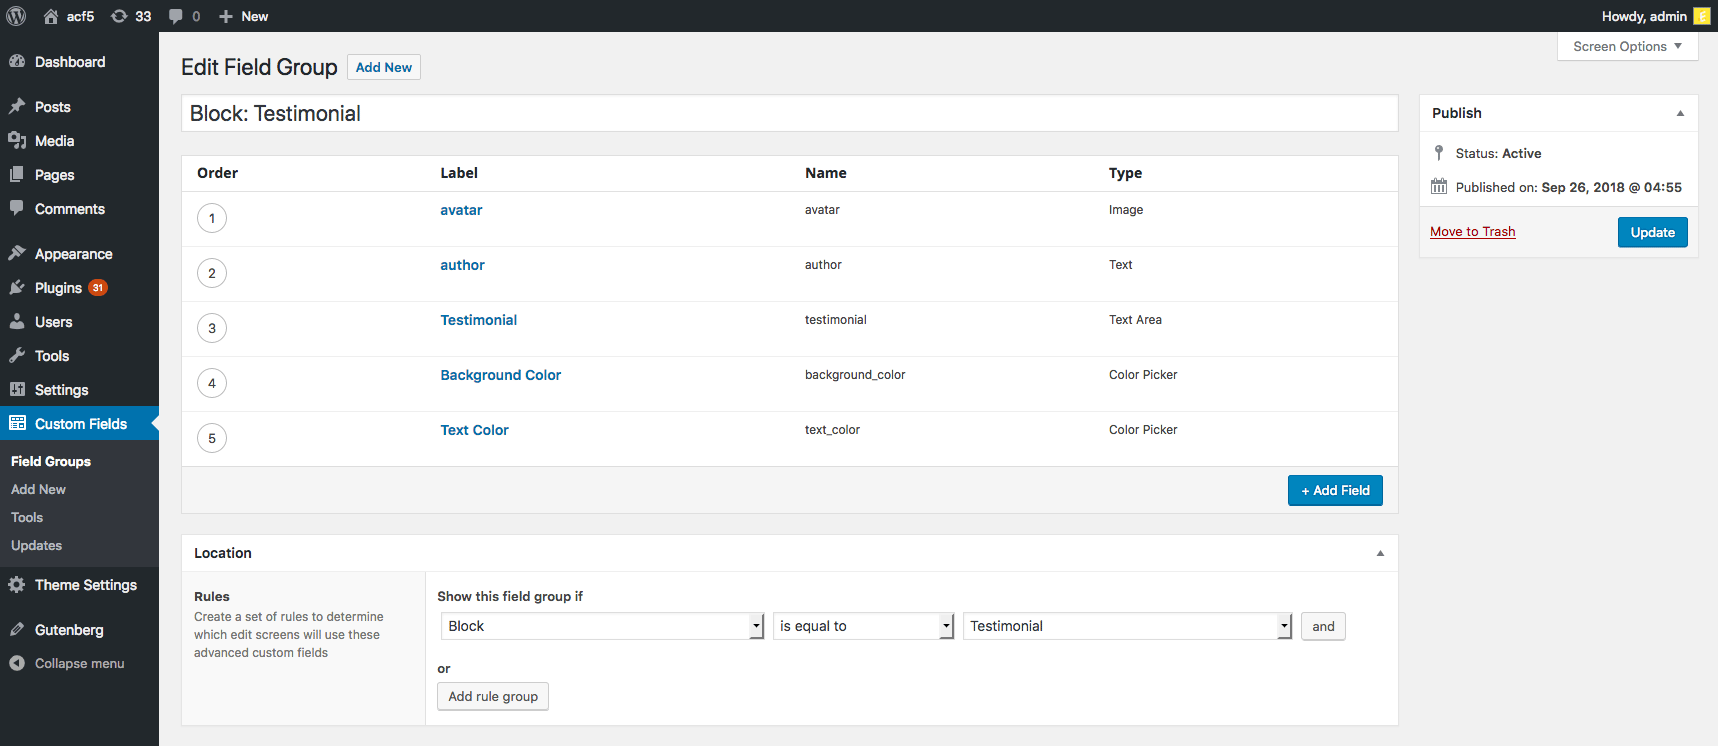
}2. Create a Field Group
Next, create a field group. Note that any and all ACF fields can be used within your block – there are no limitations.
From the location rules, use the “Block” rule to select your newly registered block type.
3. Render the Block
Lastly, you’ll need to tell ACF how to render your block. It’s essentially the same process you’re used to for displaying custom fields – only that your HTML + PHP is wrapped in a function.
Remember that render_callback setting mentioned earlier? This is the PHP function that renders your block’s HTML and is where you can write your custom code. We recommend taking a “modular” approach by using a generic callback function to include a “template part” for your block. This is possible by making use of the $block parameter.
functions.php
function my_acf_block_render_callback( $block ) {

    // convert name ("acf/testimonial") into path friendly slug ("testimonial")
    $slug = str_replace('acf/', '', $block['name']);

    // include a template part from within the "template-parts/block" folder
    if( file_exists( get_theme_file_path("/template-parts/block/content-{$slug}.php") ) ) {
        include( get_theme_file_path("/template-parts/block/content-{$slug}.php") );
    }
}
template-parts/block/content-testimonial.php
<?php
/**
 * Block Name: Testimonial
 *
 * This is the template that displays the testimonial block.
 */

// get image field (array)
$avatar = get_field('avatar');

// create id attribute for specific styling
$id = 'testimonial-' . $block['id'];

// create align class ("alignwide") from block setting ("wide")
$align_class = $block['align'] ? 'align' . $block['align'] : '';

?>
<blockquote id="<?php echo $id; ?>" class="testimonial <?php echo $align_class; ?>">
    <p><?php the_field('testimonial'); ?></p>
    <cite>
        <img src="<?php echo $avatar['url']; ?>" alt="<?php echo $avatar['alt']; ?>" />
        <span><?php the_field('author'); ?></span>
    </cite>
</blockquote>
<style type="text/css">
    #<?php echo $id; ?> {
        background: <?php the_field('background_color'); ?>;
        color: <?php the_field('text_color'); ?>;
    }
</style>
The only thing we haven’t included is the enqueuing of styles, which can easily be done via the admin_enqueue_scripts and wp_enqueue_scripts actions.
That’s all there is to it! You can immediately start using your new block within Gutenberg and place it anywhere within your content 💯.

The Scope of ACF Blocks 👀
You may be wondering if ACF Blocks are a replacement for metaboxes, to which the answer is no. Metaboxes are still an important part of the editing and development process. In fact, ACF will continue to utilize them as the primary tool for saving content.
The main difference between blocks and metaboxes is scope.
Metaboxes save data as “meta” (individual bits of data connected to the post via the wp_postmeta table) which allows the developer full control over when and where they appear within the theme template files – perfect for bespoke websites.
Blocks save their data within the post_content value (as JSON within HTML comments) which allows the user full control over when and where they appear within the post’s content – perfect for blog posts or rich content areas.
Love it or hate it, the way that Gutenberg stores its data allows for a lot of flexibility. ACF Blocks can be inserted multiple times within the same post, re-ordered, edited and deleted without any bloat to the postmeta table!
Noteworthy features 🎤
Previews
Gutenberg’s biggest gift to content creators is that blocks do a better job of reflecting the front-end design. With the Classic editor, content style and layout doesn’t always match up. The new editor deftly solves this problem.
To keep in-sync with Gutenberg, ACF Blocks provides a preview mode! Simply select a block and click the “Switch to preview” button in the block settings. Once enabled, your block HTML will appear and your fields will move over to the sidebar – just like other Gutenberg blocks. Plus, changes are continually updated in real-time!
If you’re working on something a bit more complex, you’ll want to stay in Edit Mode. This provides you with more screen real estate to build the perfect page.
Alignment
To provide you with even more control over your content, ACF Blocks supports Gutenberg’s alignment toolbar. Use it to align blocks exactly where you want them.
In addition, you can also utilize Gutenberg’s “wide” and “full-width” alignments to break out of the box!
Have a comment or an idea for improving these features? We’d love to hear from you!
Bringing Blocks to Everyone 💪
We believe that ACF Blocks is one of the more important features ever added to our plugin. It levels the playing field and allows more developers to take advantage of Gutenberg’s key feature.
You don’t need to be a JavaScript expert in order to create custom blocks. And you won’t have to radically alter your workflow. ACF Blocks will help you accomplish more, while avoiding the chaos of manual block creation.
We plan to include the ACF Blocks feature with both the free and PRO versions of ACF 5.8 in ACF PRO version 5.8. You can expect that version to drop sometime in November.
If you are an ACF PRO customer, you can take ACF Blocks for a spin today by downloading the latest beta version! To test ACF PRO 5.8.0-beta1, please login to your store account and click the See all versions link alongside your license. Download, extract and replace ‘advanced-custom-fields-pro’ plugin folder contents.
Thanks for spending the time to read this post, we can’t wait to hear your feedback on our ACF Blocks feature! If you do have any feedback, please use our contact form online to get in touch!