
Overview
ACF uses field groups to attach fields to posts. Each field group contains a title, fields, location rules, and visual settings. To create a field group, hover over ACF in your WordPress admin and select Field Group from the menu. You will see a welcome screen like this:
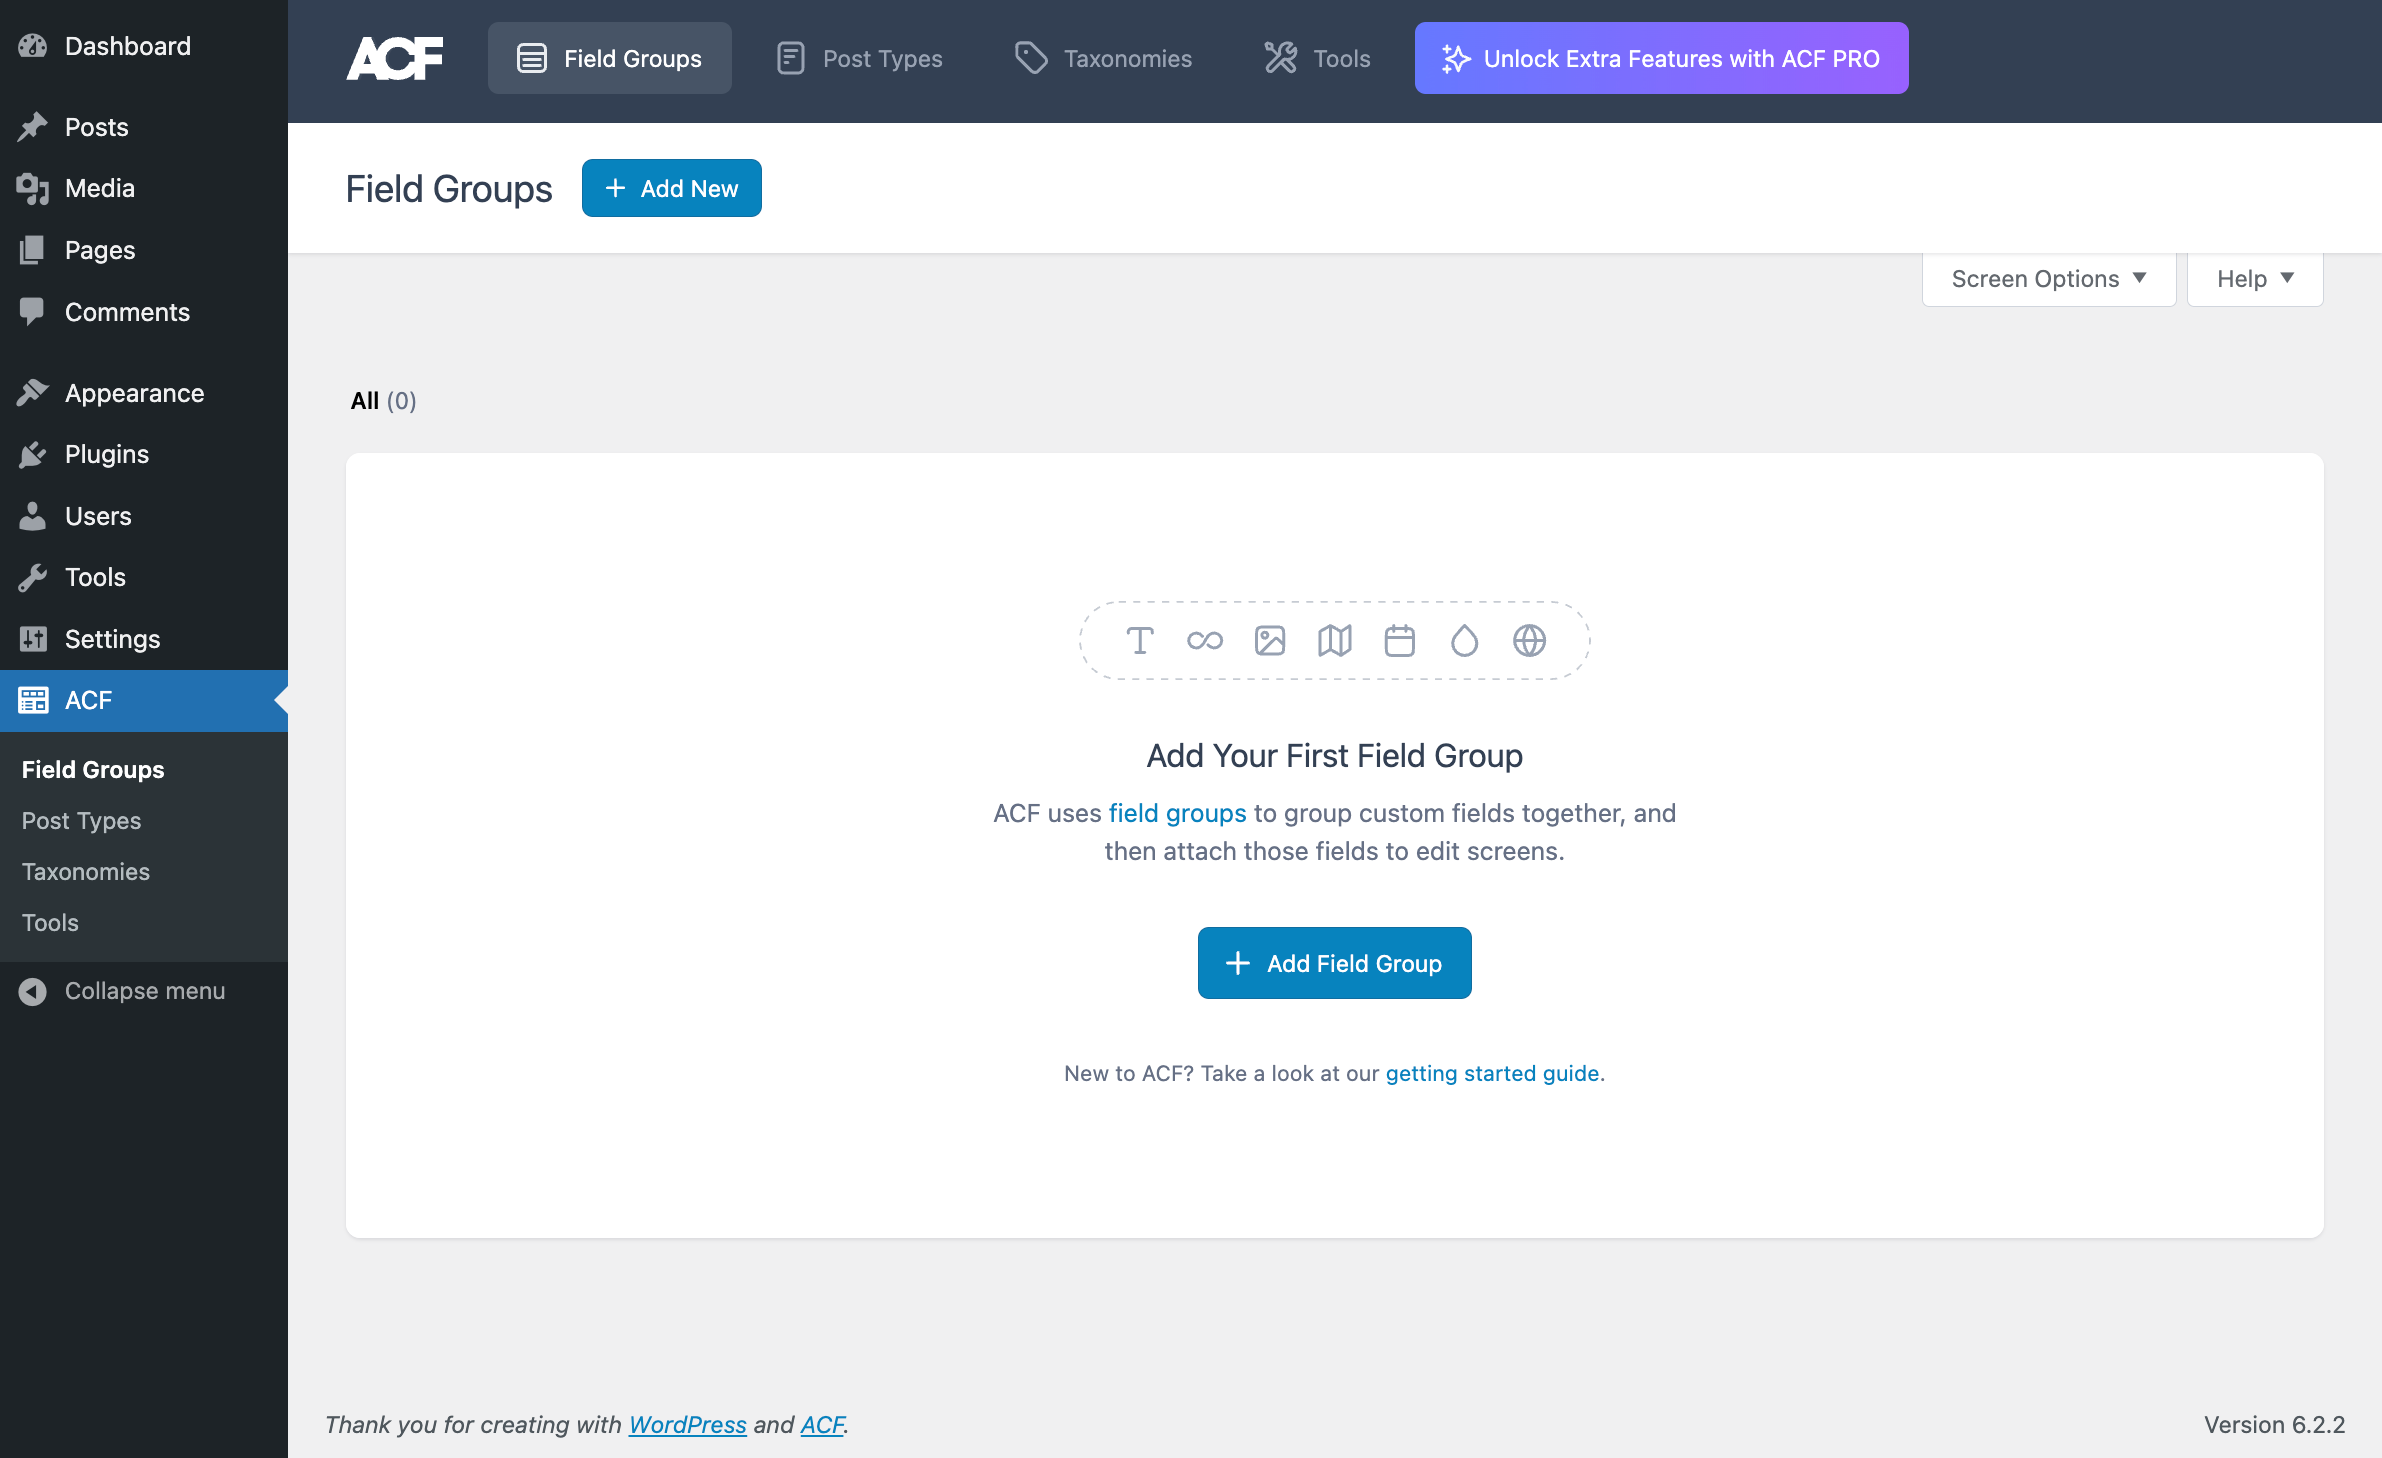
Creating a New Field Group
Click the Add Field Group or Add New buttons to create your first field group. Next, give the field group a relevant and descriptive title, such as “Home Page” or “Event.” This title is shown in the metabox handle on the edit screen. The “Save Changes” button will not activate until you have given the field group a title.
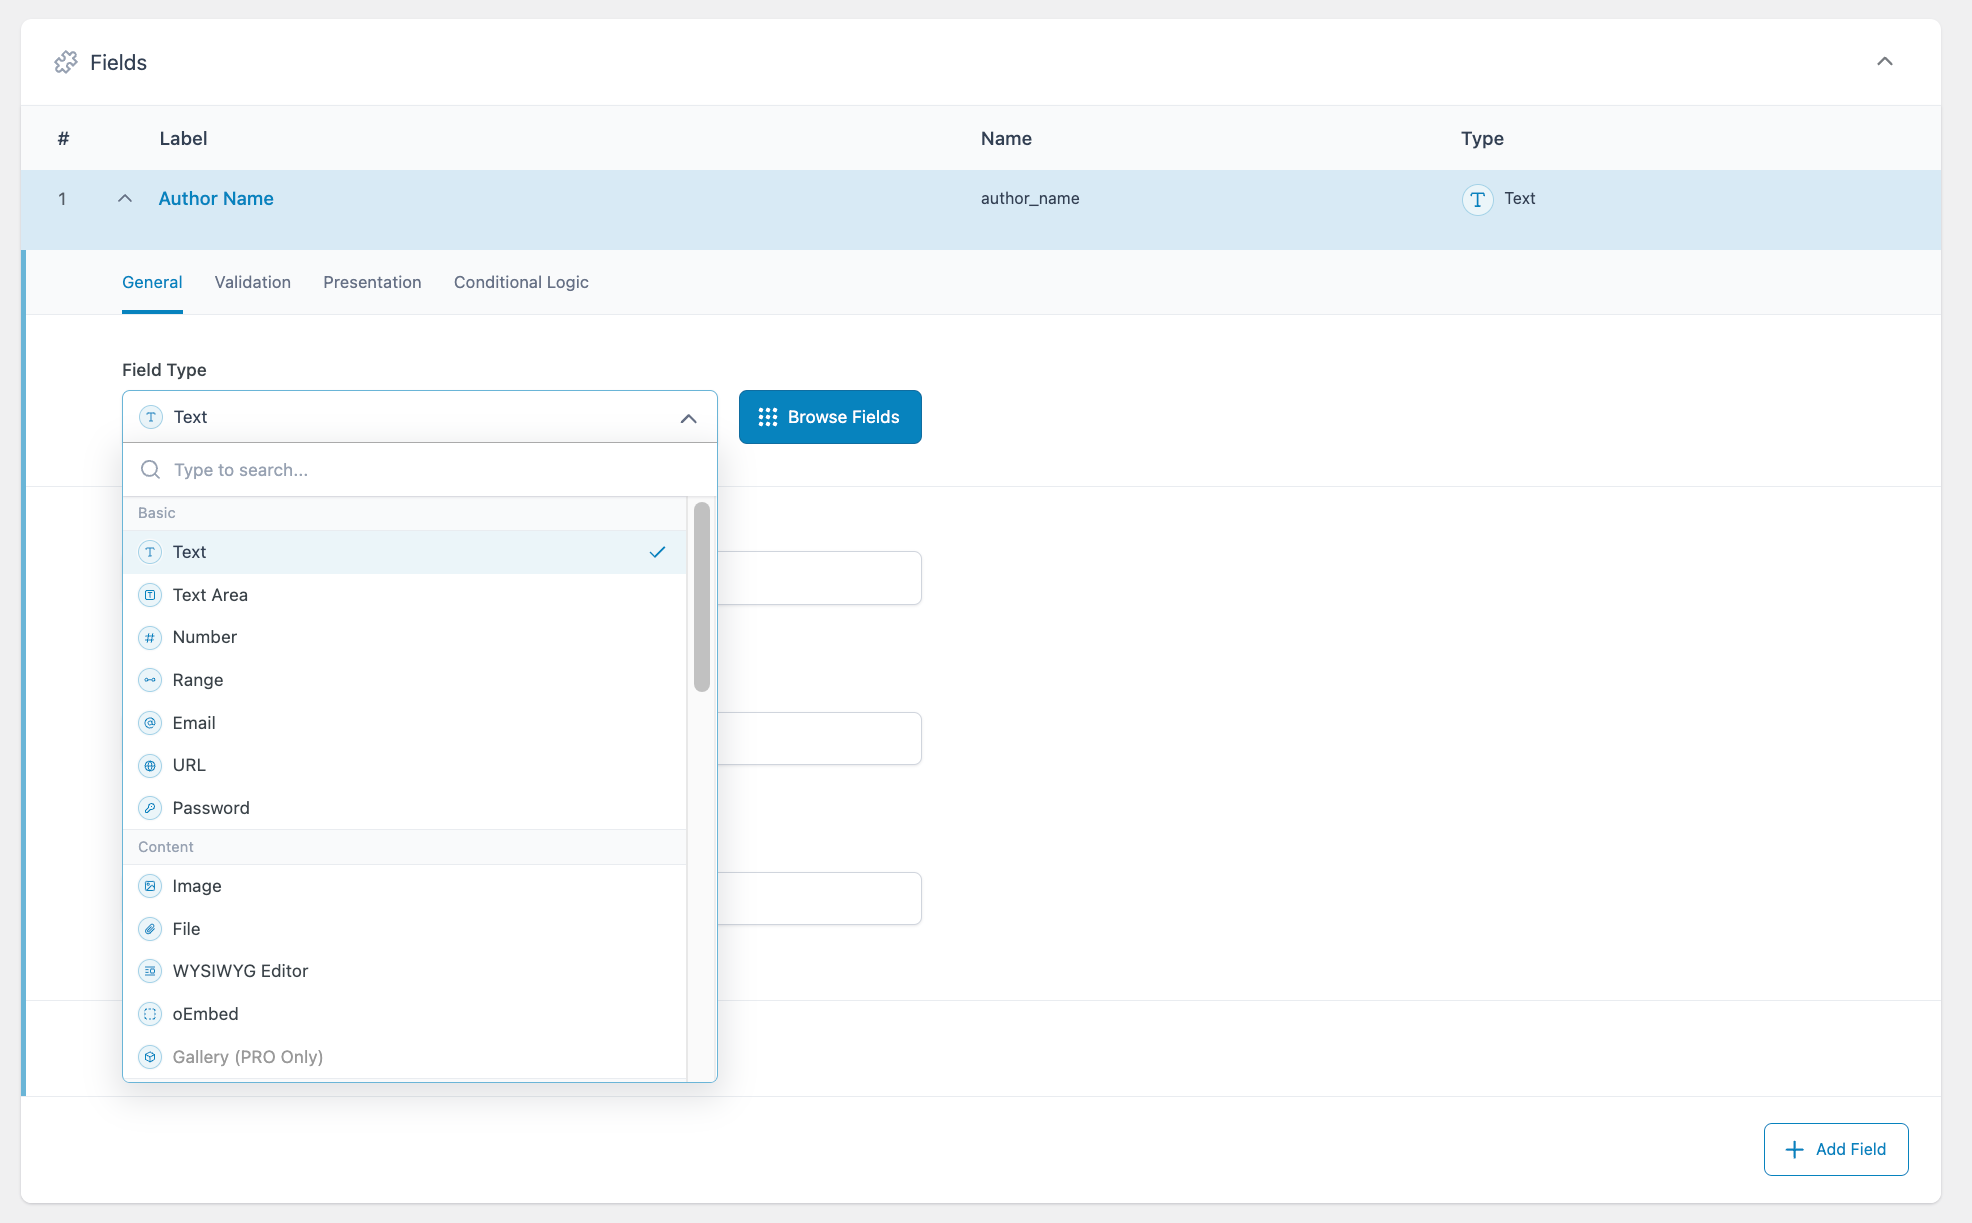
Clicking the Add Field button on the top bar will create a new field and add it to the bottom of the list. You can reorder your fields at any time by dragging the order number as a handle.
Fields
Field groups start with a single field. This defaults to a Text field on creation. Click the menu under “Field Type” to search or scroll through the available fields.
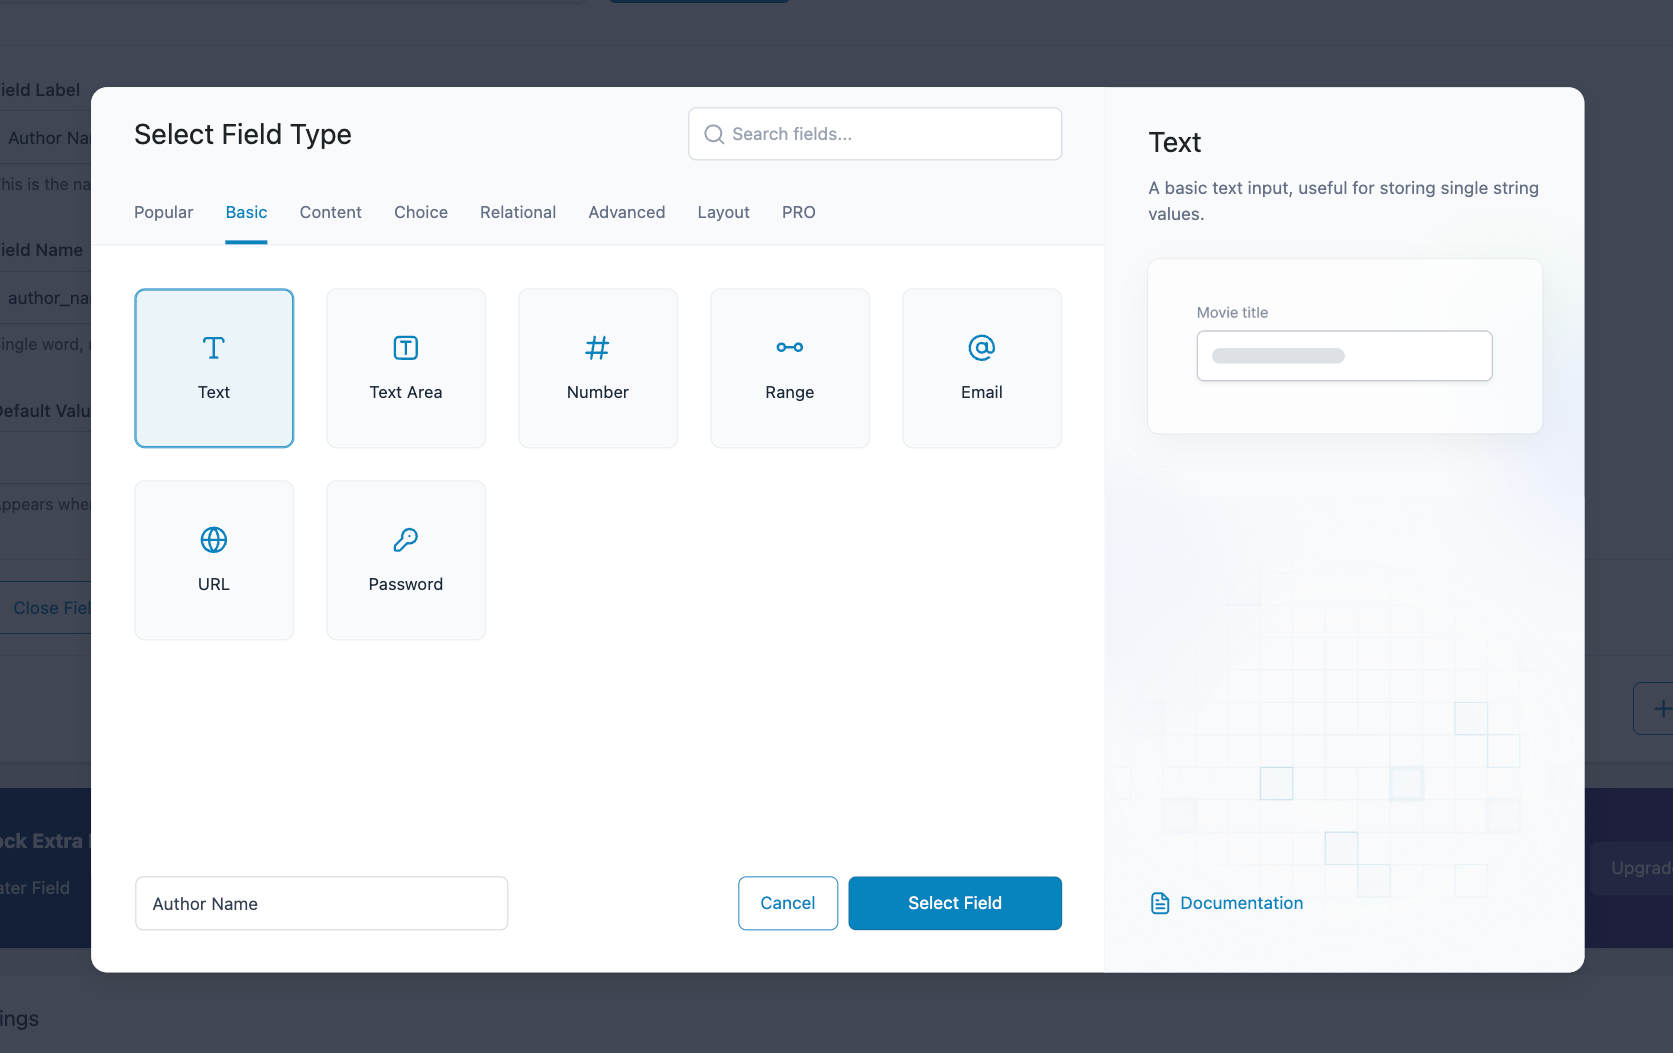
Click on Browse Fields for an alternative field selection method. This opens a modal with fields sorted into tabs. Clicking on any field in the modal will bring up a short description, graphical representation, and links to documentation.
All fields must have a “Field Label” and “Field Name.”
Field Label: Visible when entering content but is not used by the API. Use capitals and spaces for human-friendly field text.
Field Name: This is autogenerated from the field label. Used in the API and templates to retrieve content and data. This should be lower case, and have no spaces or special characters.
Other settings change based on the type of field. These are usually optional, such as “Default Value.”
Hovering over any part of the field will reveal action buttons similar to any other WordPress table list screen. These actions allow you to edit (open/close), duplicate, or delete the field.
Settings
The settings panel is located beneath the field group editor. Tabs allow you to set location rules, alter how the field will look to content editors, and adjust group settings.
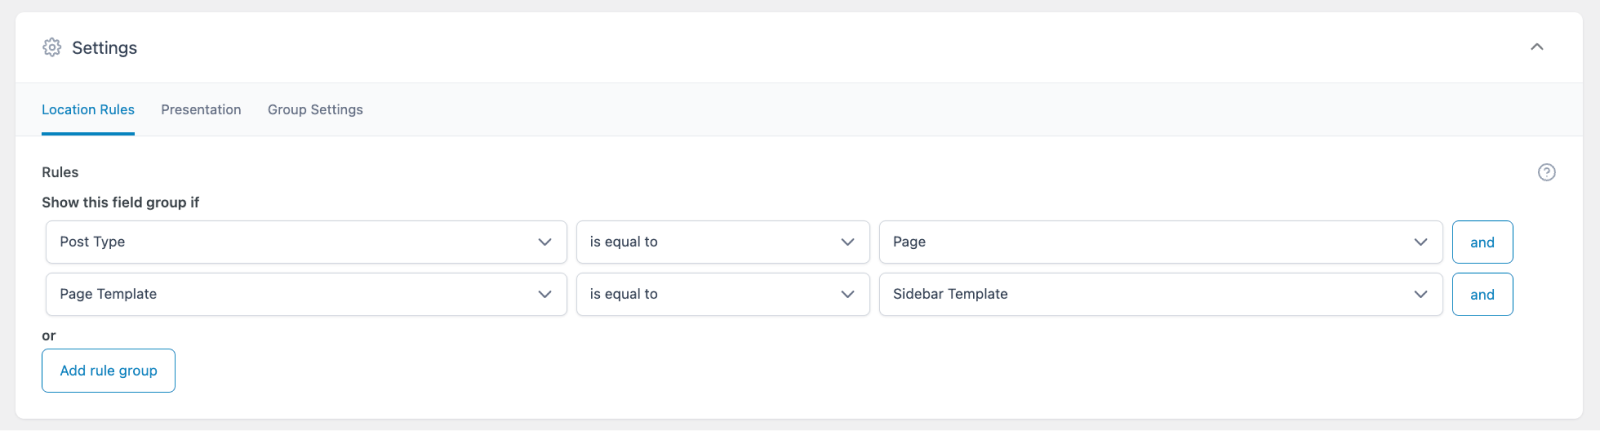
Location
The location box allows you to create rules that determine when and where these fields are added to the edit screen or post object. The example location rules shown below will make this field group appear only on pages using the “Sidebar Template”. Location rules can be grouped together to create any combination of and and or statements.
Presentation
The Presentation tab provides options to help customize the edit screen where this field group appears.
You can also set the “Order No.” on this tab, indicating the order in which field groups and their options should be loaded. Field groups are loaded and displayed by “Order No.”, with 0 as the first. If you have multiple field groups appearing on a page, only the options from the first field group will be used.
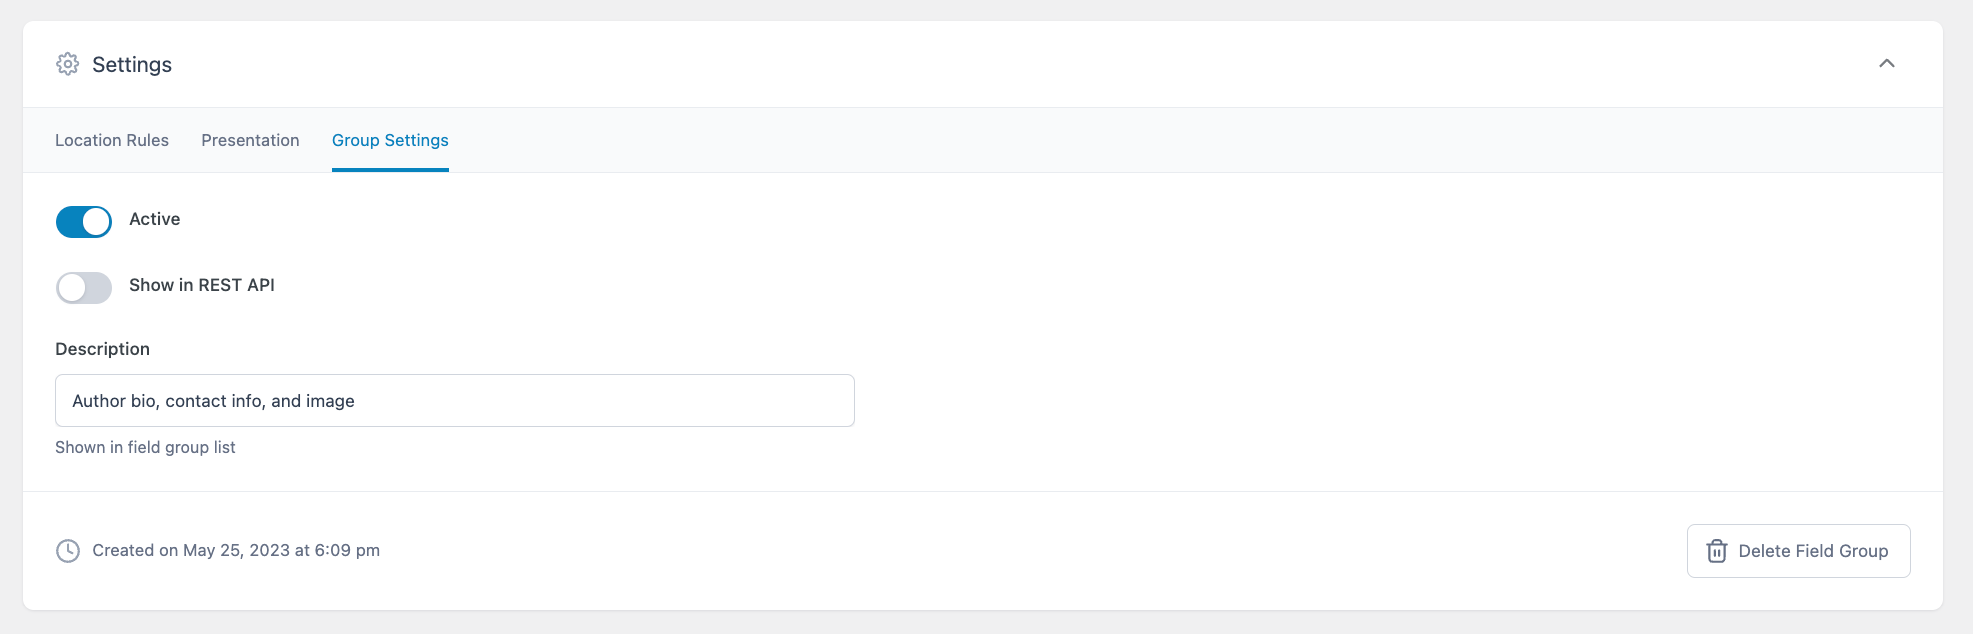
Group Settings
You can deactivate your field group on this tab by means of the “Active” toggle. This defaults to on, with all field groups active on your site once they’re created. Another toggle allows you to make the field group visible in the REST API. This defaults to off.
The “Description” field allows you to enter a description that will be displayed in the field group list. Finally, the “Display Title” setting allows you to display a different field group title for content editors while retaining the original title in the ACF admin screens.
Supercharge Your Website With Premium Features Using ACF PRO
Speed up your workflow and unlock features to better develop websites using ACF Blocks and Options Pages, with the Flexible Content, Repeater, Clone, Gallery Fields & More.
Related
- Integrations: Ability: acf/create-field-group
- Features: Options Page
- Getting Started: Getting Started with ACF
- Guides: Adding fields to Posts
- Frequently Asked Questions
