
Overview
Post Types are great for storing data objects other than posts and pages, where WordPress provides an admin UI for managing your data and a URL structure for viewing them on the frontend of the site.
Add New
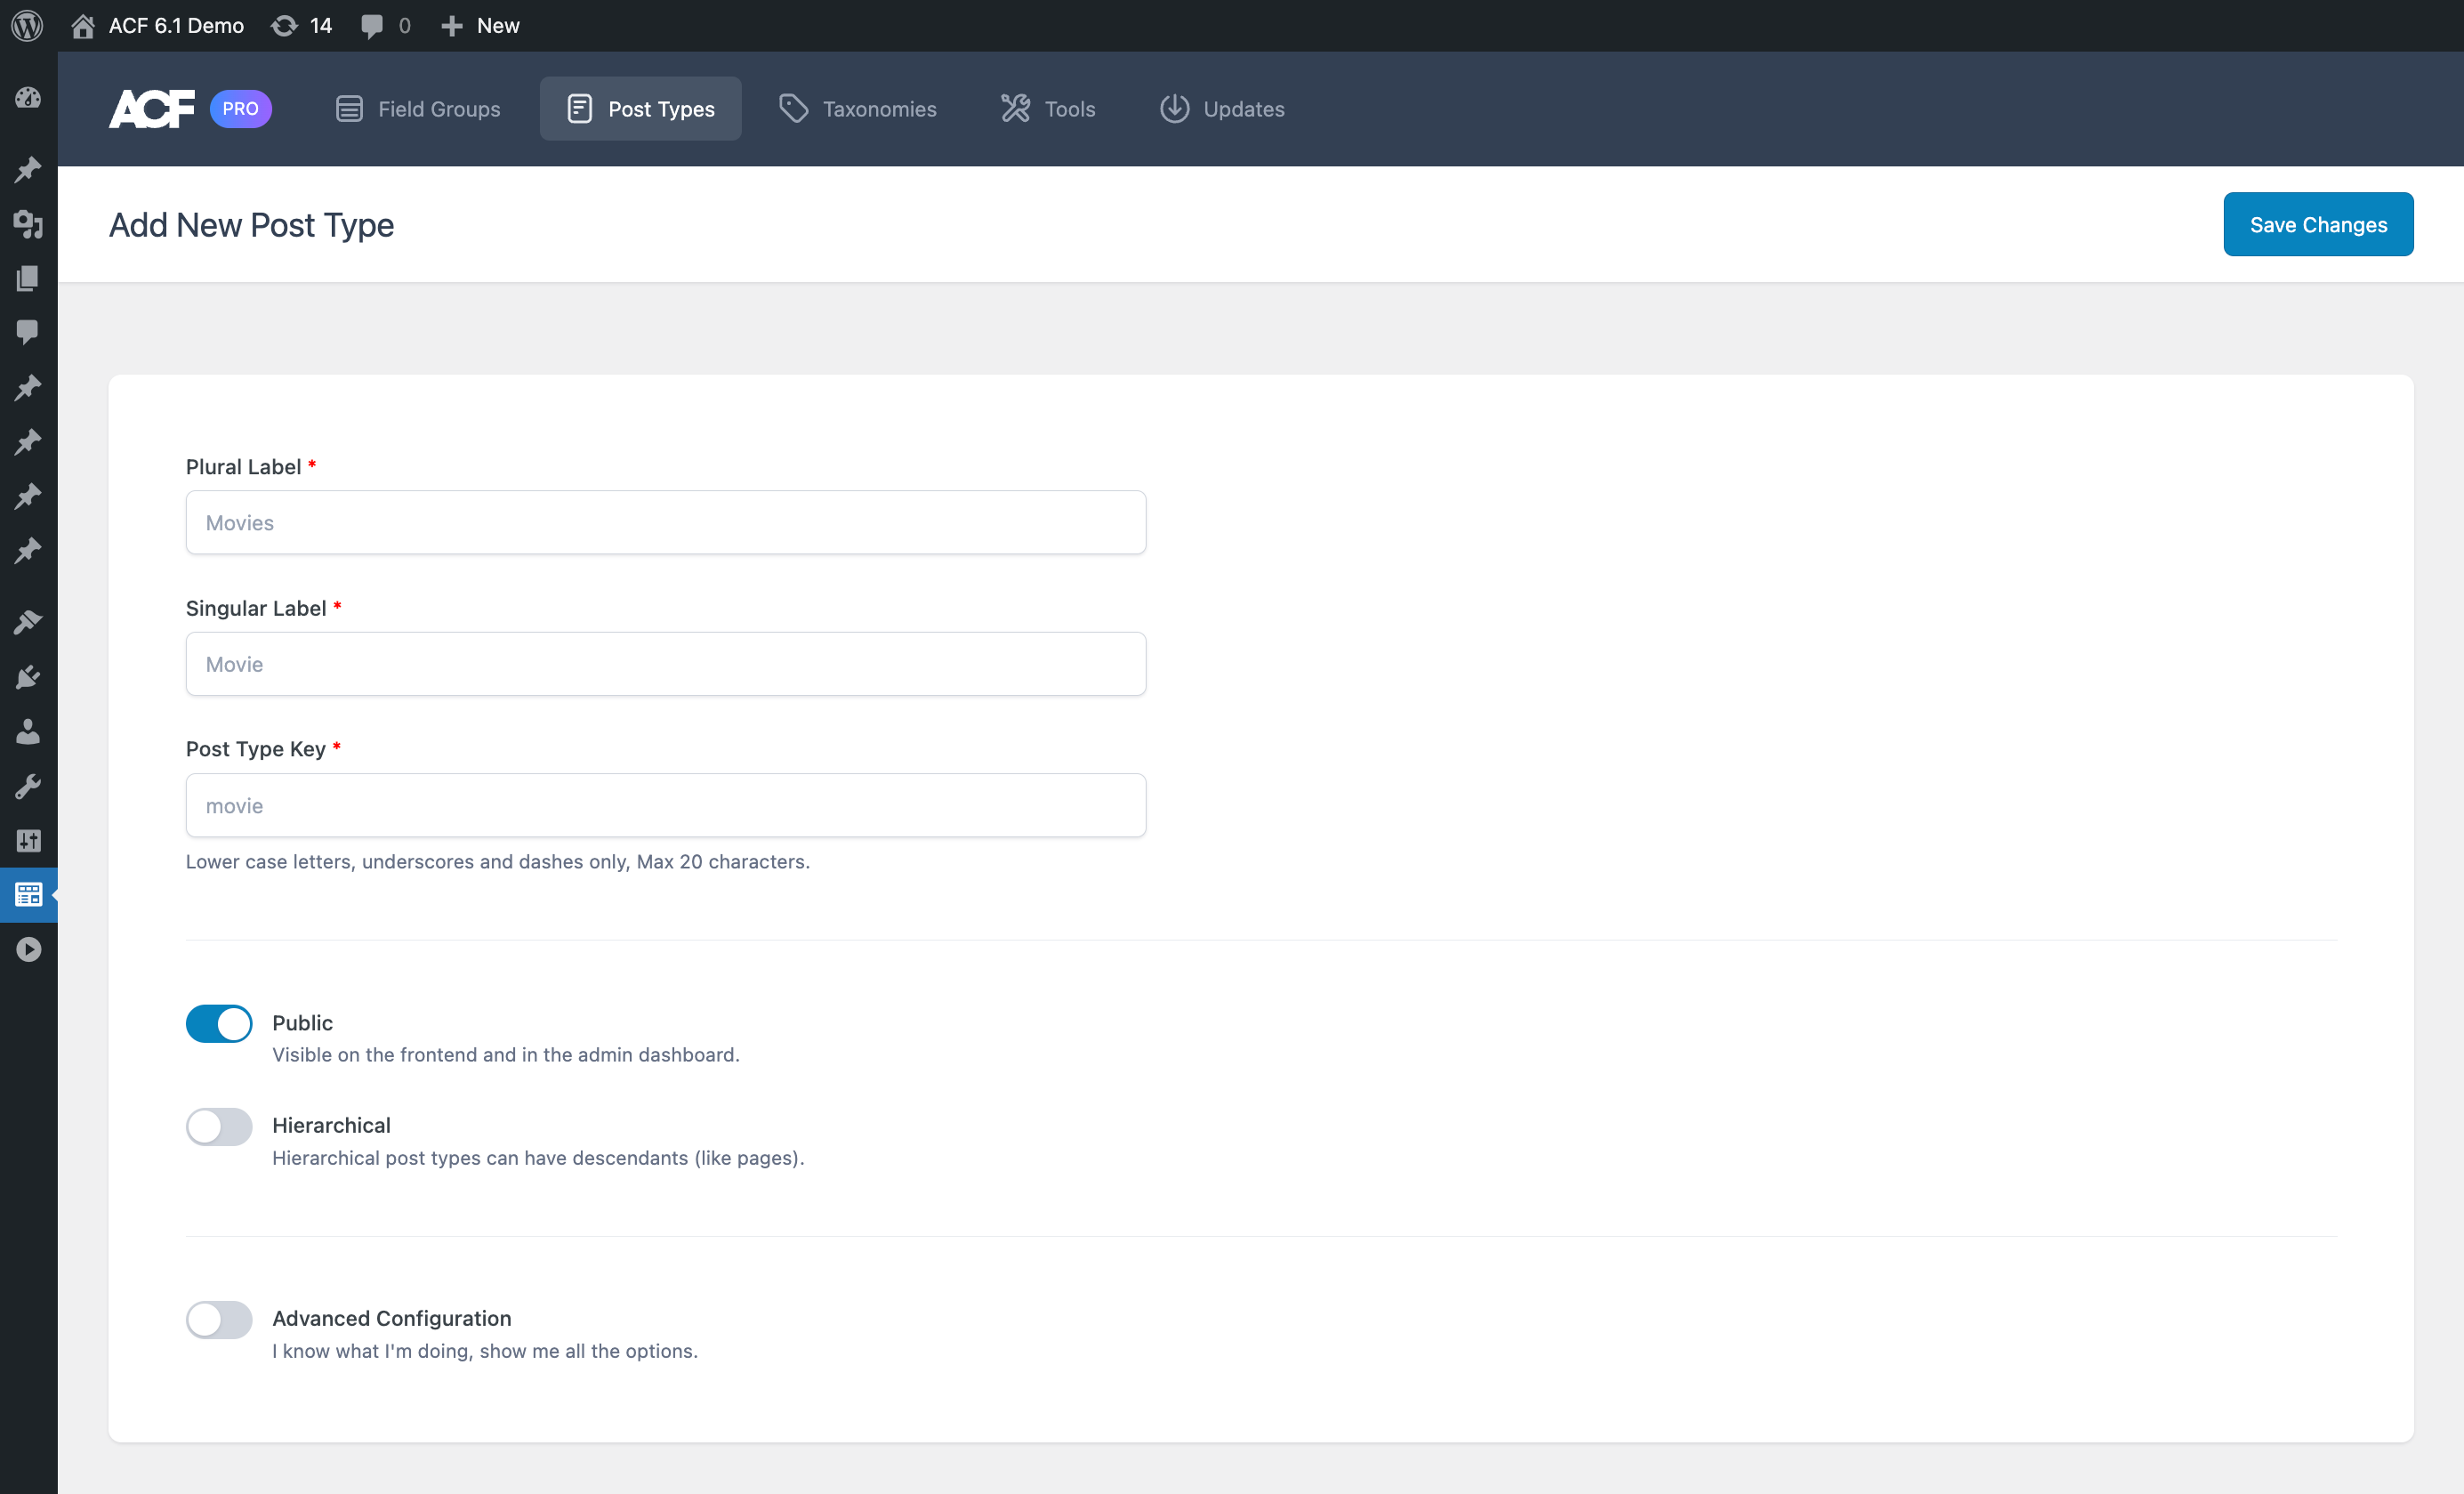
To register a new post type, navigate to the ‘ACF’ > ‘Post Types’ screen and click ‘Add New’. You will see a screen with some basic settings for the post type.
Basic Settings
The required fields of “‘Plural Label”, “Singular Label” and “Post Type Key” are the minimum required information to create a post type, however, there are other settings available if you want to perform more granular configurations.
Plural Label
This is the plural label of the date object you are registering. For example, Movies, actors, and books.
Singular Label
This is the singular label of the data object you are registering. For example, Movie, actor, and book.
Post Type Key
This is automatically generated from the singular label you enter but can be changed. It must be a string made up of lowercase letters, numbers, underscores and dashes only. It has a 20 character limit.
Public
This setting controls if the post type is public or private. It is on by default, meaning the post type shows in the admin dashboard and is publicly accessible on the site frontend.
Hierarchical
This setting controls the type of post type when it comes to allowing parent and child relationships between objects of the post types, like the WordPress ‘Pages’ post type.. It is off by default.
Advanced Configuration
There are a large number of settings that can be configured when registering a post type. To keep things simple, ACF doesn’t show them by default but you can control them when the ‘Advanced Configuration’ toggle is on.
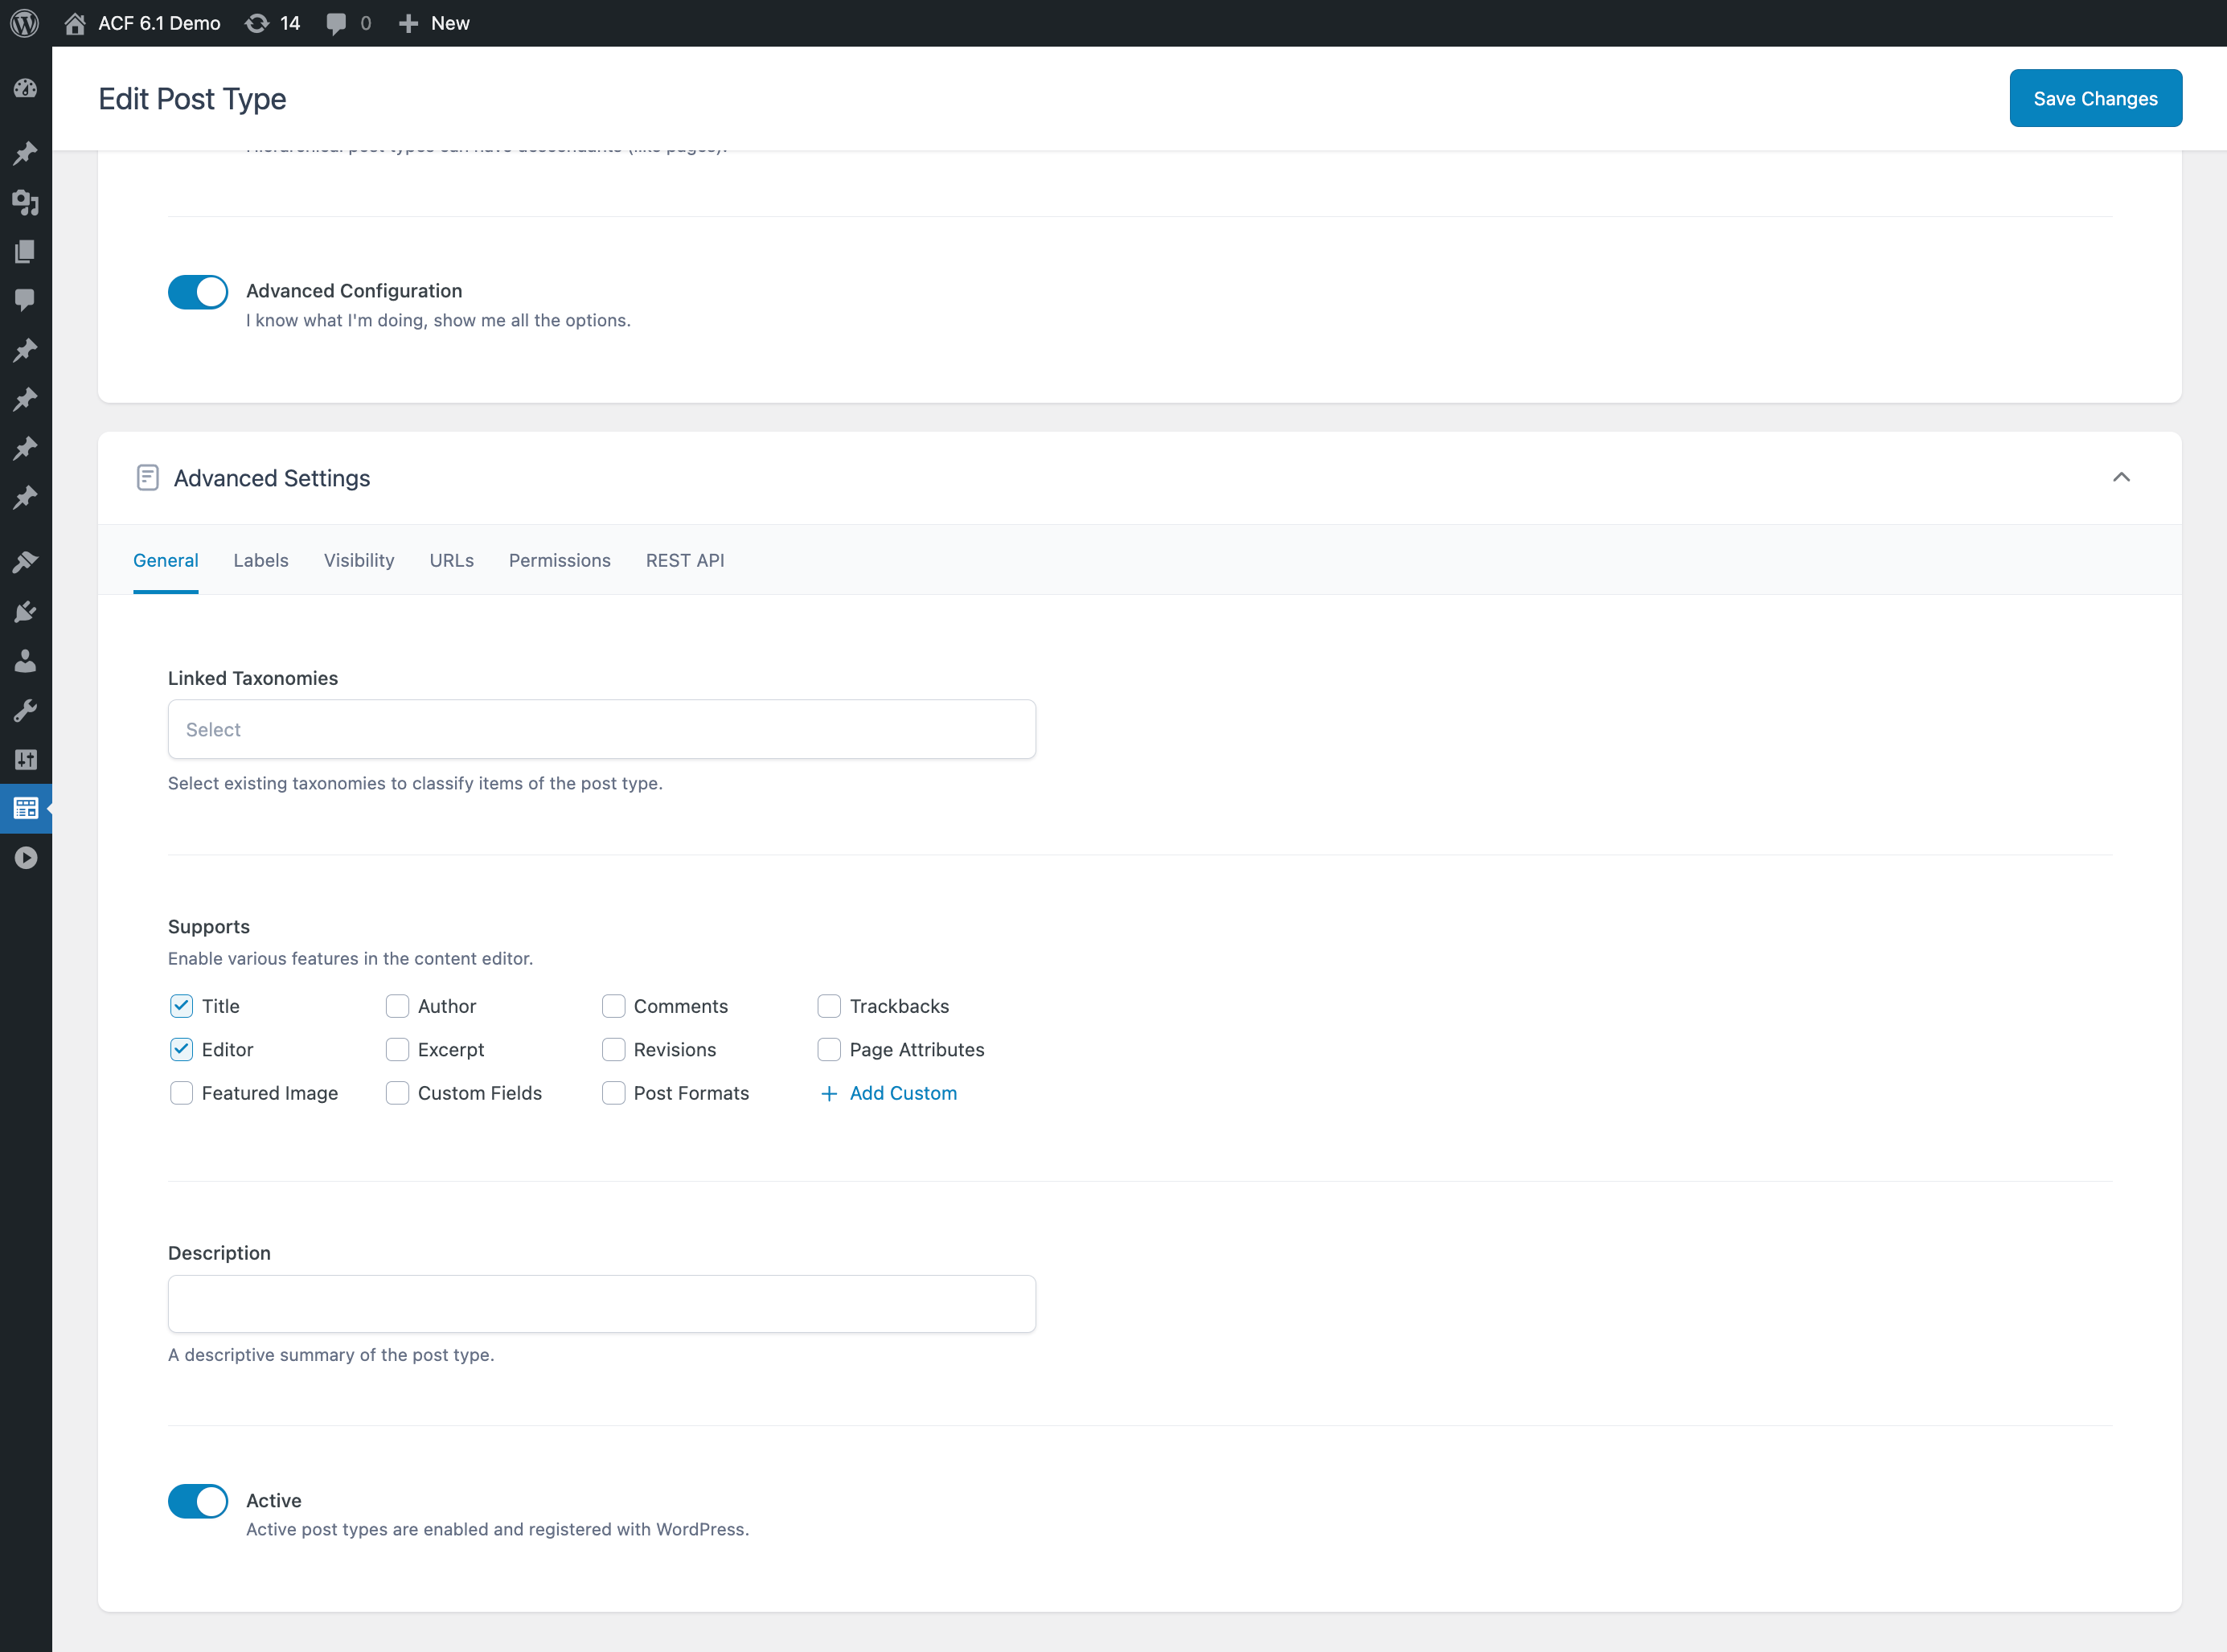
General
The ‘General Settings’ gives you several general settings related to the post type.
Linked Taxonomies
Select from existing taxonomies that should be used to classify the post type.
Supports
Allows you to define which features of the content edit screen for the post type are supported. Enable the title, featured image, author, and more.
You can also add custom items to allow you to customize the editor for your site.
Description
Use this to add a description about your post type that will be displayed in the post type list screen.
Active
The active toggle is a quick way to deactivate the post type so it can be turned off without deleting it.
Labels
The ‘Labels’ tab allows you to define the label strings used for the post type throughout the admin dashboard. You can quickly either regenerate all labels based on your ‘Plural Label’ and ‘Singular Label’ entered earlier or clear all labels.
All of the labels used by WordPress can be configured.
Visibility
The ‘Visibility’ tab contains the settings that control how the post type will be displayed in the admin dashboard and the frontend of the site. Control how it appears in the sidebar menu, remove it from the admin bar, exclude it from search results on the frontend, and more.
Show in UI
Enabled by default, this means the post type can be edited and managed in the WordPress admin dashboard.
Show in Admin Menu
Enabled by default, this controls if the post type appears in the sidebar menu in the admin dashboard.
Admin Menu Parent
By default the post type will get a new top level item in the admin menu. If an existing top level item is supplied here, the post type will be added as a submenu item under it.
Menu Position
A number that controls the position of the menu item in the admin dashboard sidebar menu.
Menu Icon
This is the icon used for the post type menu item in the admin dashboard. Can be a URL or Dashicon class name to use for the icon.
Custom Meta Box Callback
A PHP function name to be called when setting up the meta boxes for the edit screen.
Show In Admin Bar
Enabled by default, controls if the post type should appear as an item in the ‘New’ menu in the admin bar.
Appearance Menus Support
Enabled by default, controls if items can be added to menus in the ‘Appearance’ > ‘Menus’ screen. Must be turned on in ‘Screen options’.
Exclude From Search
Sets whether posts should be excluded from search results.
URLs
The ‘URLs’ tab contains the settings that control how the post type appears in URLs. This includes the permalink structure of URLs for items of the post type, if the post type should have an archive page URL, and how to control the query variable settings for the URL.
Permalink Rewrite
Rewrite the URL for an item of the post type using the post type key as the slug, a custom slug or disable it to prevent URL rewriting.
Front URL Prefix
Enabled by default, alters the permalink structure to add the WP_Rewrite::$front prefix to URLs.
Feed URL
Enables an RSS feed URL for the post type items.
Pagination
Enabled by default, allows pagination support for the items URLs such as the archives.
Archive
Controls if the post type has an item archive that can be customized with an archive template file in your theme.
Publicly Queryable
Enabled by default, controls if URLs for an item and items can be accessed with a query string.
Query Variable Support
Controls id items can be accessed using the non-pretty permalink, with the post type key as the query variable, a custom variable or query variable access is disabled.
Permissions
The ‘Permissions’ tab contains settings all about accessing the post type.
Rename Capabilities
By default the capabilities of the post type will inherit the ‘Post’ capability names, eg. edit_post, delete_posts. Enable to use post type specific capabilities, eg. edit_{singular}, delete_{plural}.
Singular Capability Name
Choose another post type to base the capabilities for this post type.
Plural Capability Name
Optionally provide a plural to be used in capabilities.
Can Export
Enabled by default, controls if the post type to be exported from ‘Tools’ > ‘Export’.
Delete With User
Controls if the items by a user are deleted when that user is deleted.
REST API
The ‘REST API’ tab contains settings to control the post type’s behavior in the WordPress REST API.
Show in REST API
Enabled by default, controls if this post type is exposed in the REST API. Required to use the block editor.
Base URL
The base slug for the post type REST API URLs.
Namespace Route
The namespace part of the REST API URL.
Controller Class
Optional custom PHP controller class to use instead of WP_REST_Posts_Controller.
The Next Step
Once you have configured the post type and saved your changes, a saved success notice appears along with some helpful links to perform typical next actions.
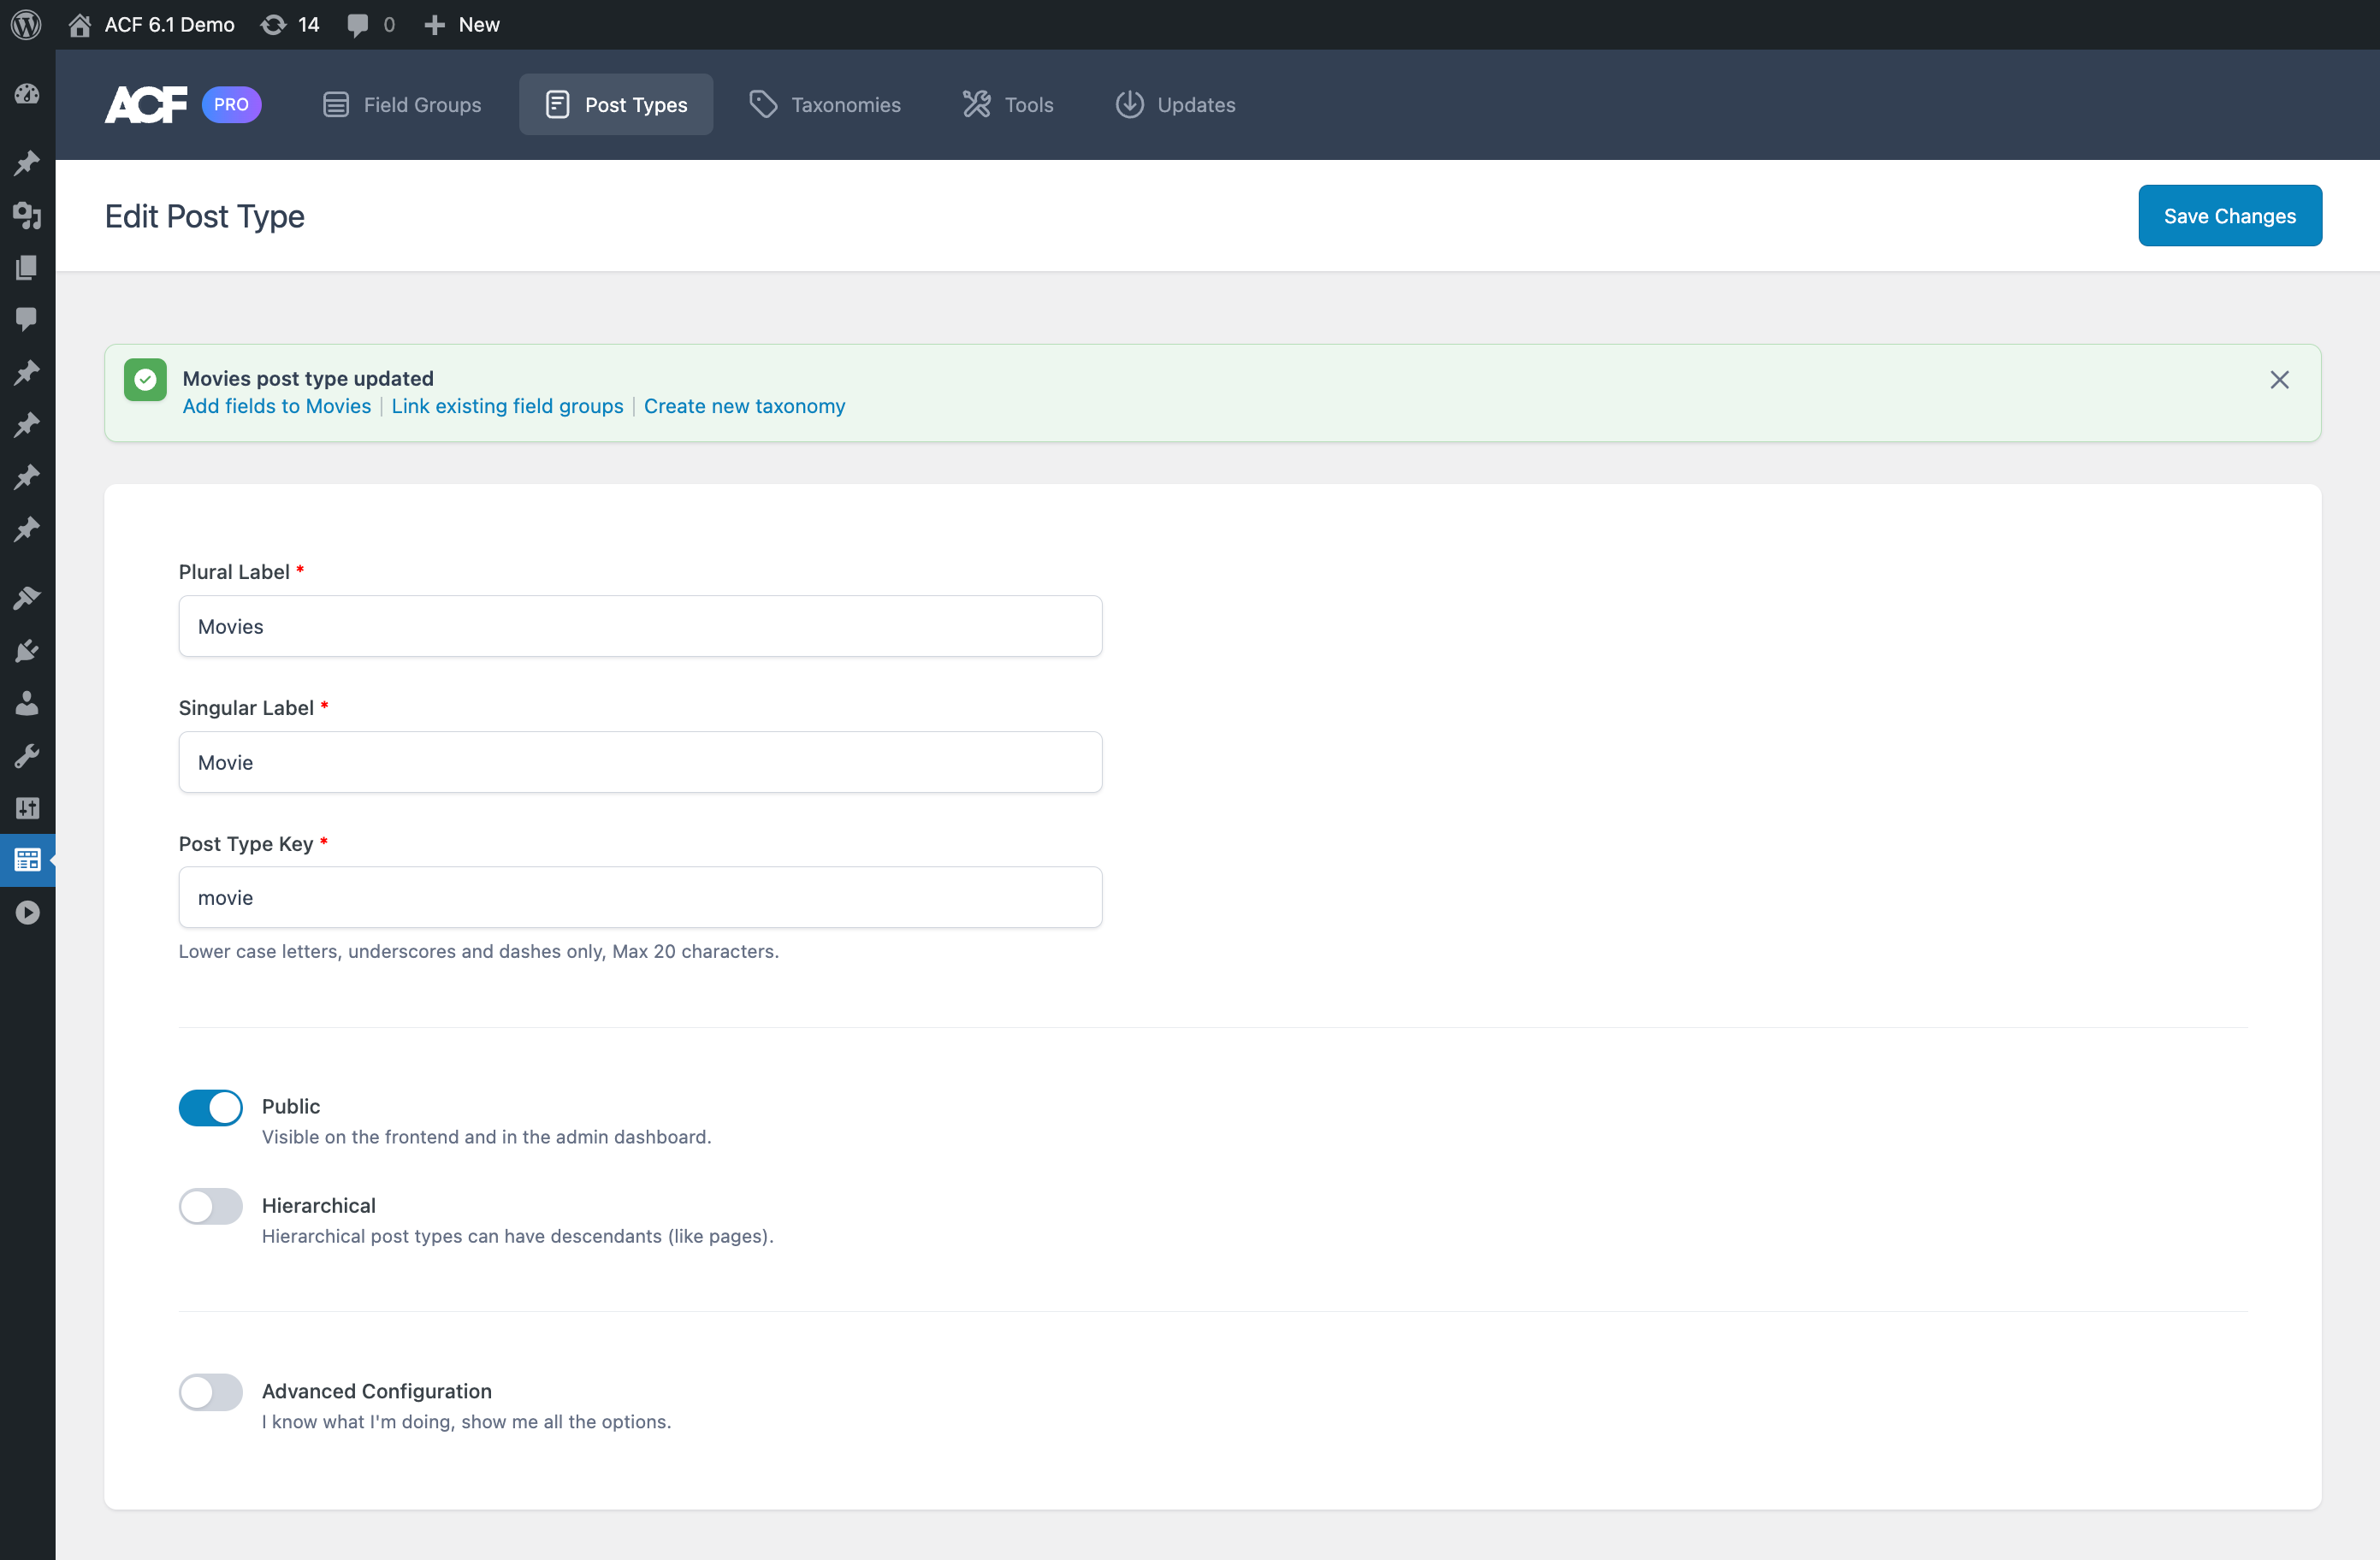
These include:
- Creating a new ACF field group for the post type
- Connecting existing ACF field groups to the post type
- Creating a new taxonomy for the post type
Creating a New Field Group
A common workflow is to register a post type then add some fields to it to store other structured data outside of the post title and content. This is made extremely easy by clicking the ‘Add fields to’ link, which takes you to a new field group where the location rule is already set to make the field group appear when editing posts of the new post type.
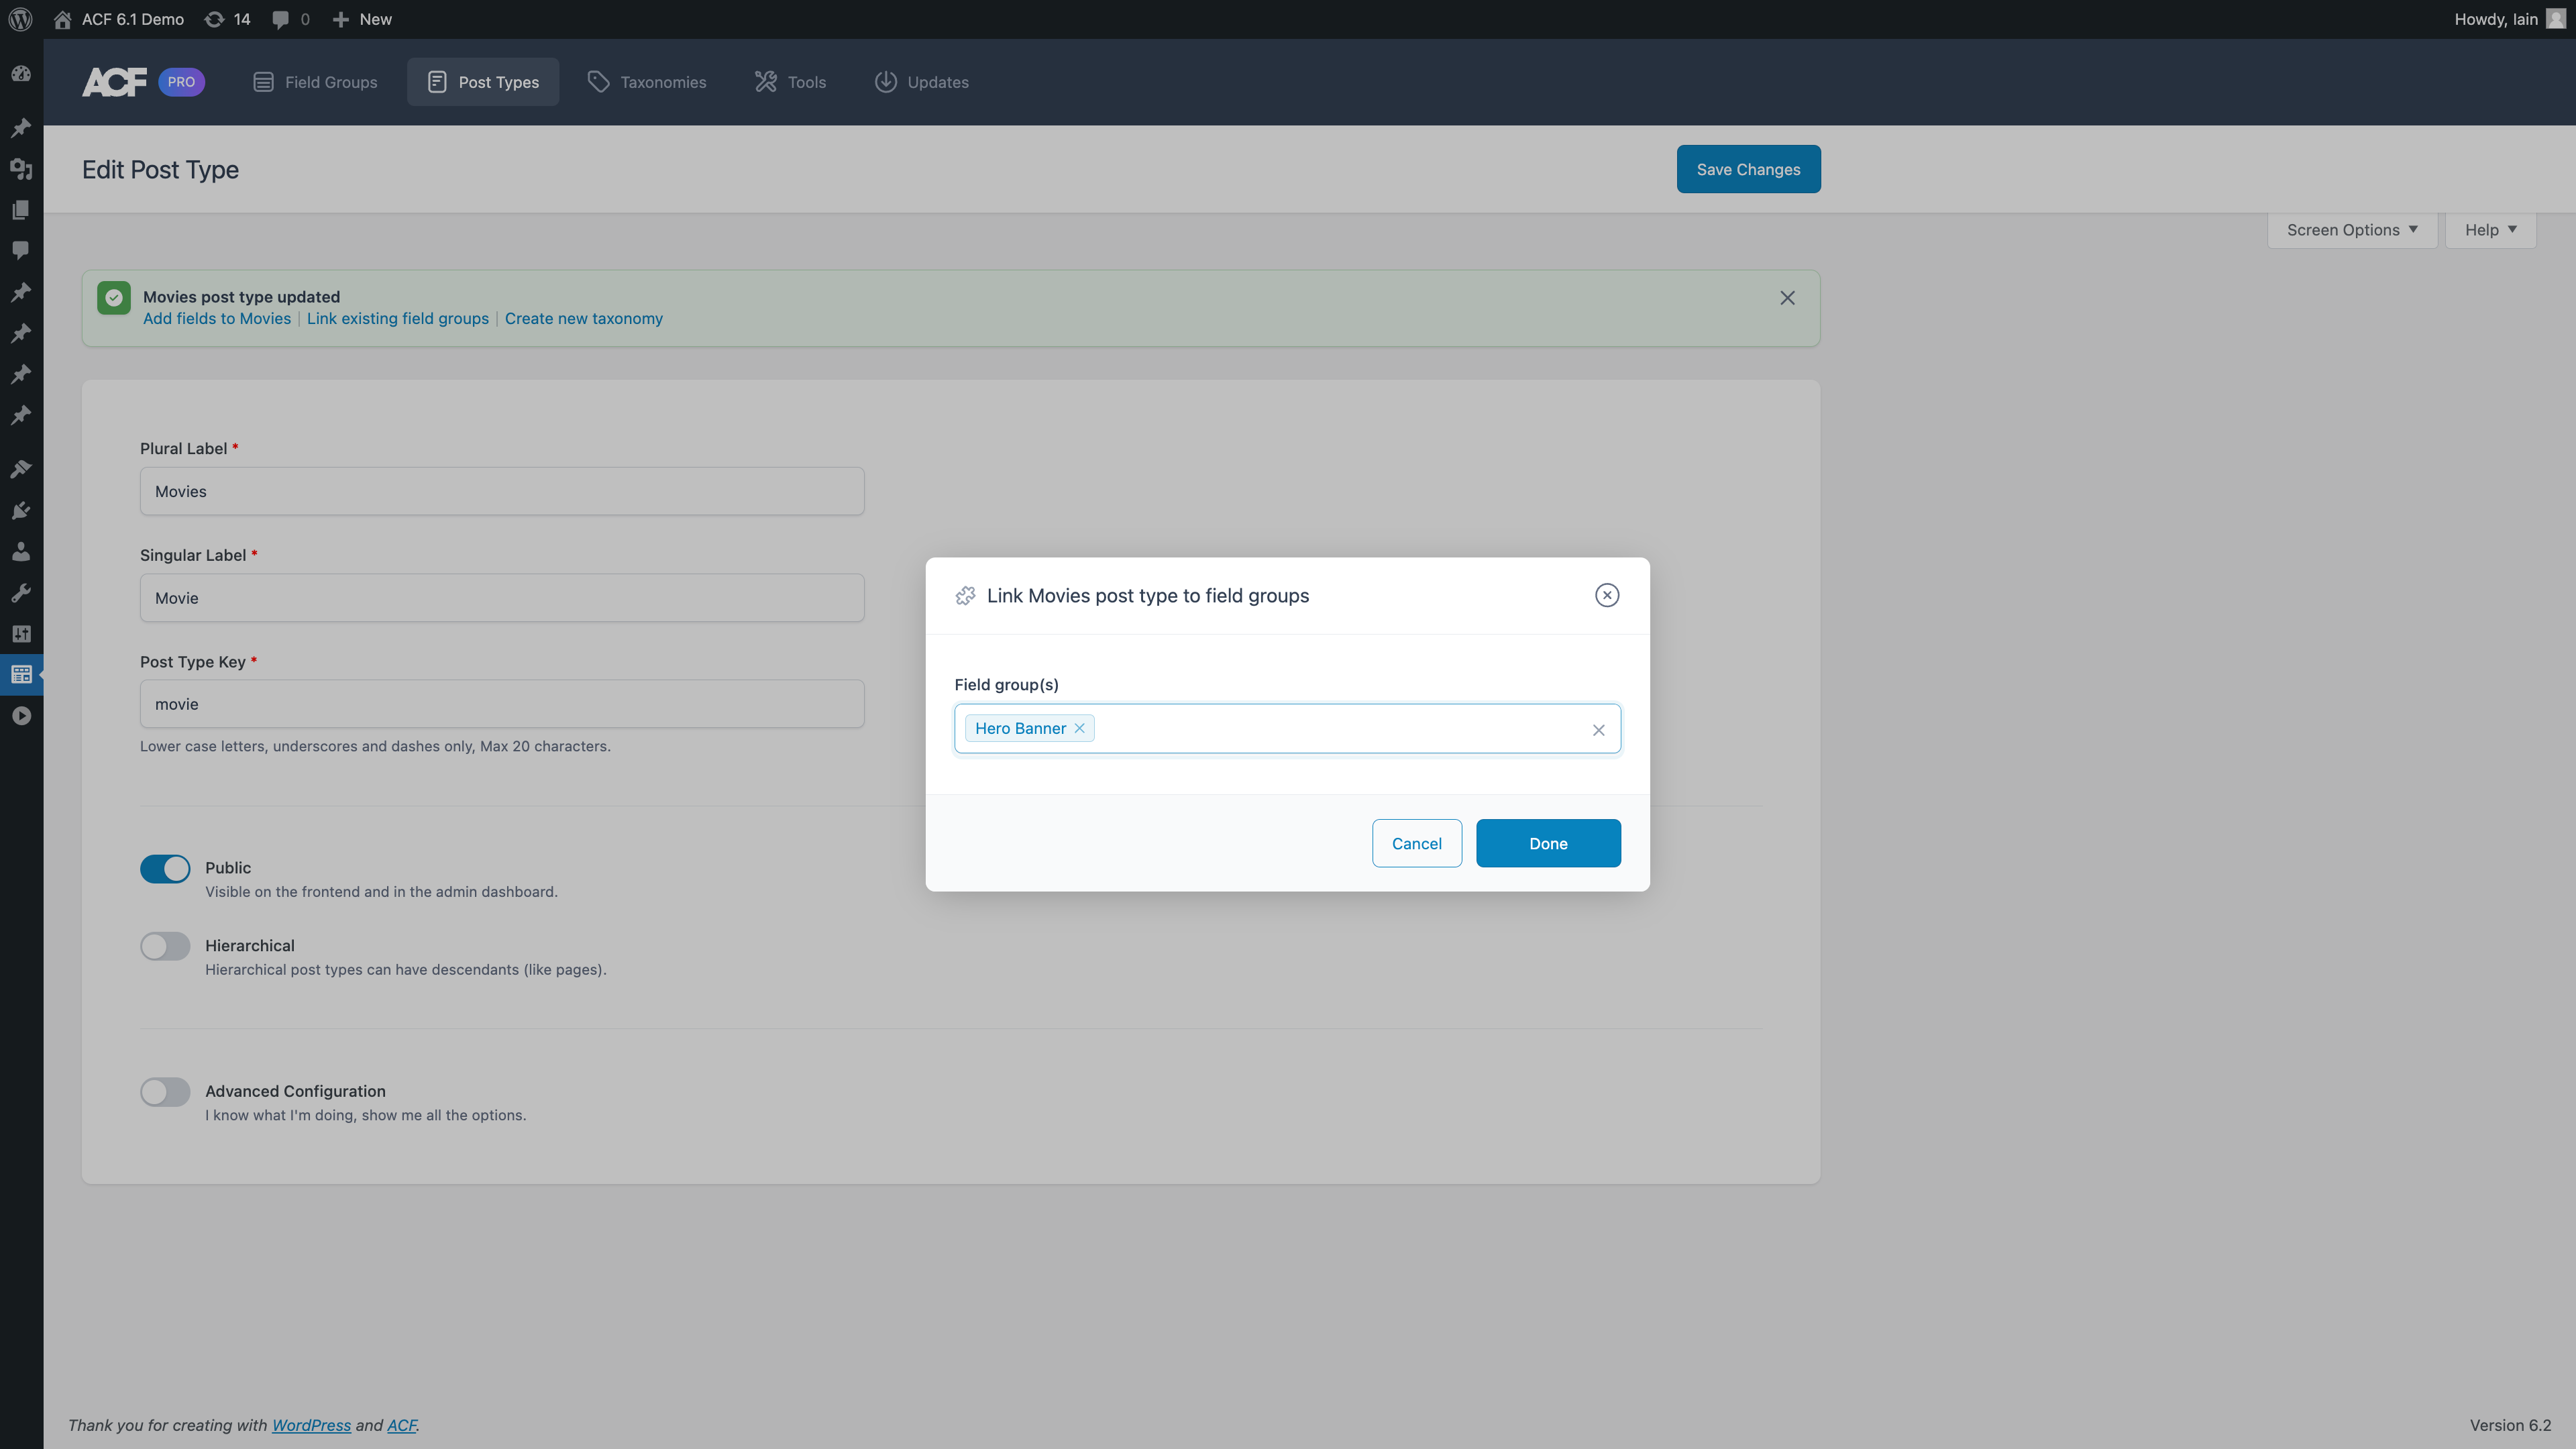
Connecting to Existing Field Groups
There will be times when a new post type is created and existing field groups should also be displayed when editing posts of the new post type. You can connect existing field groups by clicking the ‘Link existing field groups’ link and selecting the field groups in the modal that appears.
This process adds a new location rule to the selected field groups to make them appear when editing posts of the new post type.
Supercharge Your Website With Premium Features Using ACF PRO
Speed up your workflow and unlock features to better develop websites using ACF Blocks and Options Pages, with the Flexible Content, Repeater, Clone, Gallery Fields & More.
Related
- Guides: Registering a Custom Taxonomy
- Videos: Creating a Custom Taxonomy with ACF
- Integrations: Ability: acf/create-custom-post-type
- Getting Started: Post Types and Taxonomies
- Videos: Creating a Custom Post Type with ACF
