
Key points:
- React-based WordPress themes let you build interactive frontends while keeping WordPress’s backend, plugins, and SEO intact.
- They require a more complex setup involving webpack, React components, and data bridging between PHP and JavaScript.
- For many projects, ACF PRO with ACF Blocks offers a WordPress-native way to build dynamic content blocks without the overhead of React.
Building React-powered themes that work within WordPress’s traditional structure offers compelling advantages for developers who want modern JavaScript capabilities without abandoning the WordPress ecosystem entirely.
Unlike headless setups that require separate hosting and complex deployment pipelines, React-integrated WordPress themes let you access a component-based architecture while maintaining familiar WordPress workflows.
You keep the admin dashboard, plugin compatibility, and SEO benefits that make WordPress dominant, while gaining React’s powerful state management and reusable components.
The integration, of course, isn’t trivial. You’ll need to configure webpack, handle WordPress’s unique asset enqueueing system, and bridge PHP templating with React components. The payoff comes when building complex, interactive frontend experiences that would be cumbersome with traditional PHP templates and jQuery.
For this reason, React themes can be overkill for many projects. If you’re primarily seeking dynamic content blocks and aren’t comfortable with React’s learning curve, Advanced Custom Fields (ACF®) Blocks offers a more straightforward path to modern WordPress development without the JavaScript complexity.
How React-based WordPress themes work
React-based WordPress themes combine traditional WordPress PHP templates with React components. WordPress still handles the backend – managing content, users, and plugins – but React takes over specific parts of the frontend where you need interactive features.
The setup works like this: WordPress loads your PHP template files normally, but instead of outputting all HTML through PHP, certain sections contain empty div containers where React components will render. You build your React components separately, then use a build tool to compile them into JavaScript files that WordPress can load.
Getting data from WordPress to React happens in two main ways. For initial page loads, WordPress can pass data directly to your React components through JavaScript variables. For dynamic updates, React components fetch fresh data using WordPress’s REST API.
Here’s an example of that in action:
The key difference from headless WordPress is architectural. Headless setups completely separate WordPress from the frontend – you build a standalone React app that talks to WordPress purely through APIs. With React themes, you’re still building a WordPress theme that lives inside WordPress.
You get React’s benefits for interactive parts while keeping WordPress’s ecosystem intact – plugins work normally, SEO is handled traditionally, and you deploy everything together as one WordPress site.
Considerations for React-based WordPress themes
React-integrated WordPress themes occupy an awkward middle ground that may not suit every project or developer.
You need solid JavaScript skills and React knowledge on top of WordPress expertise, creating a steeper learning curve than traditional theme development.
Yet despite this added complexity, you’re still constrained by WordPress’s architecture and conventions – you won’t have the complete freedom that comes with a fully headless React application.
For many WordPress developers, ACF Blocks presents a more practical path to modern functionality. ACF Blocks lets you create dynamic, reusable content blocks using familiar WordPress tools and minimal JavaScript.
Here’s an ACF Block populated entirely using custom field data:
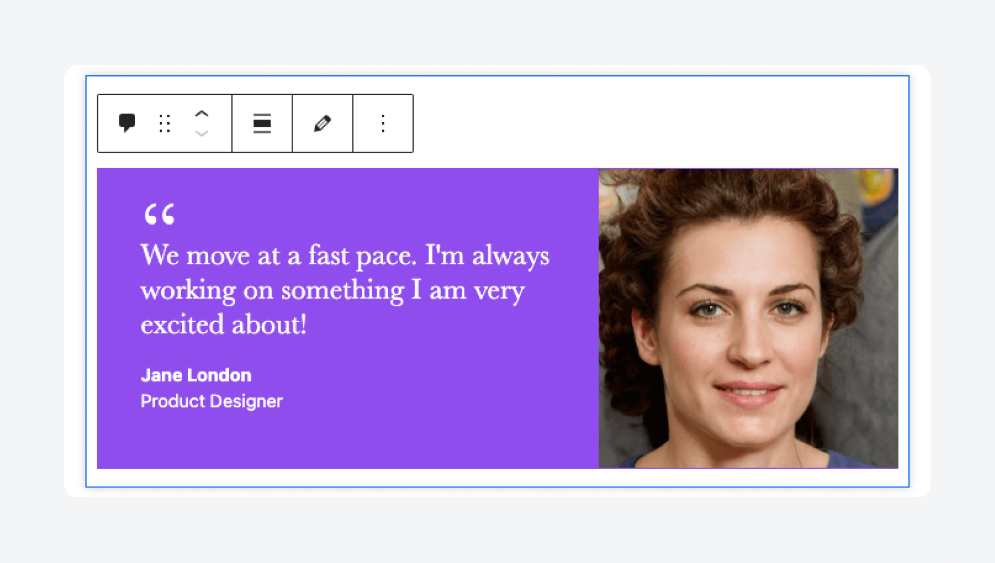
You can build sophisticated custom blocks with PHP and basic JavaScript, avoiding React’s complexity while still delivering interactive features that clients expect.
The sweet spot for React themes is when you specifically need React’s state management and component architecture for complex user interfaces, but want to maintain WordPress’s content management benefits.
If you’re primarily looking to add some interactivity to otherwise standard WordPress sites, ACF Blocks will likely serve you better with significantly less overhead.
Supercharge Your Website With Premium Features Using ACF PRO
Speed up your workflow and unlock features to better develop websites using ACF Blocks and Options Pages, with the Flexible Content, Repeater, Clone, Gallery Fields & More.
How to build a WordPress theme using React
Now that we’ve gotten the basics out of the way, it’s finally time to build a custom WordPress theme using React.
1. Set up WordPress and your development environment
Before you can build a React-powered WordPress theme, you need both WordPress and Node.js running locally to handle the PHP backend and JavaScript build processes:
- Install WordPress locally using tools like Local, XAMPP, or Docker for a controlled development environment.
- Download and install Node.js from the official website, which includes npm.
- Verify your installation by running
node --versionandnpm --versionin your terminal. - Ensure both WordPress and Node.js are running properly since you’ll work with PHP templates and JavaScript build processes simultaneously.
2. Create the theme directory
Next, you’ll create the basic WordPress theme structure that will house your React components alongside traditional PHP template files:
- Navigate to your WordPress installation’s wp-content/themes directory.
- Create a new folder for your theme with a descriptive name.
- Inside this folder, create essential WordPress theme files: style.css, index.php, and functions.php.
- Add proper theme headers to your style.css file so WordPress recognizes it as a valid theme. Something like:
/*
Theme Name: My React Theme
Version: 1.0
*/- Start with minimal content in these files since React will handle frontend rendering.
- Activate your new theme from the WordPress admin dashboard to confirm it’s working.
3. Set up React in the theme
Now you’ll transform your WordPress theme into a Node.js project and install all the necessary React dependencies and build tools:
- Open your terminal in the theme directory and run npm init -y to create a package.json file.
- Install core React dependencies:
npm install react react-dom. - Install Babel for JSX compilation:
npm install --save-dev @babel/core @babel/preset-env @babel/preset-react babel-loader. - Install webpack for bundling:
npm install --save-dev webpack webpack-cli webpack-dev-server. - Add CSS and file loaders:
npm install --save-dev css-loader style-loader file-loader.
These dependencies create the foundation for compiling modern JavaScript and JSX into browser-compatible code.
4. Configure webpack
With your dependencies installed, you need to configure webpack to compile your React components and prepare them for WordPress to serve:
- Create a webpack.config.js file in your theme root directory.
- Configure entry point to src/index.js and output path to a dist directory.
- Set up Babel loader to process JSX files through your installed presets.
- Add CSS and file loaders to handle stylesheets and assets.
- Include development server settings for hot reloading during development.
- Configure both development and production builds with appropriate optimization settings.
5. Create React components
Time to build the actual React components that will power your theme’s interactive features and replace traditional PHP templating where needed:
- Create a src directory in your theme folder for all React code.
- Build a main App.js component that serves as your application root.
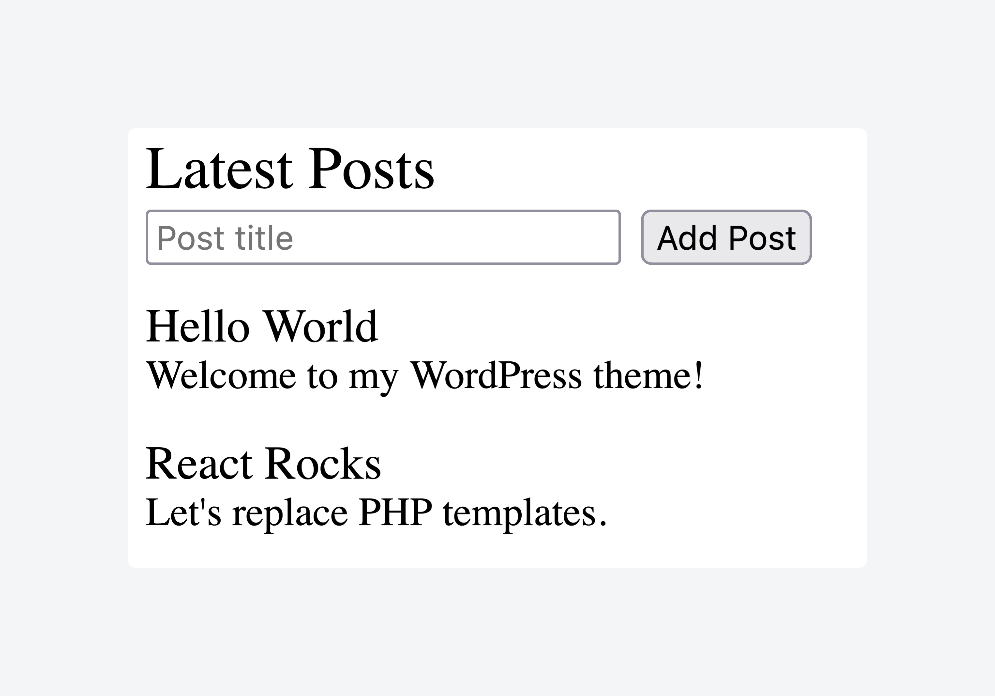
- Create additional components for specific functionality like post listings, comment forms, or interactive widgets. This example shows how a component can render a list of posts and handle interactivity using React state:
- Structure components to accept WordPress data as props for flexibility and reusability.
- Consider separate components for different content types – blog posts, custom post types, and common UI elements.
- Use this modular approach to gradually replace traditional PHP templates with React functionality.
6. Enqueue scripts in WordPress
Your React components are ready, but WordPress needs to know how to load them properly alongside its existing asset management system:
- Open your theme’s functions.php file.
- Use
wp_enqueue_script()function to load your compiled React bundle. - Hook this into the
wp_enqueue_scriptsaction for proper loading order. - Use
wp_localize_script()to pass WordPress data to React as JavaScript variables. - Include post data, user information, or custom field values that your components need.
- Handle dependencies correctly – ensure React DOM loads before your components try to render.
7. Render React components
Now you’ll connect your React components to your WordPress templates by creating mounting points and establishing data flow between PHP and JavaScript:
- Create your main src/index.js file.
- Use
ReactDOM.render()to mount your React application to specific DOM elements. - In your PHP template files, create div containers with unique IDs where React components will render.
- For ACF custom field data, fetch it using WordPress’s REST API within React components.
- Alternatively, pass initial data directly through
wp_localize_scriptfor faster page loads. WordPress often useswp_localize_script()to pass dynamic data – like the current user or post info – into JavaScript. In your theme, you’d output this data from PHP, then read it in your React components. - Structure data flow so React components receive WordPress content as props while maintaining separation between PHP backend and JavaScript frontend.
8. Build and run React app
With everything connected, you need build scripts to compile your React code during development and create optimized bundles for production:
- Add development script to package.json that runs webpack with watch mode for continuous compilation.
- Create production script that builds optimized, minified bundles for deployment.
- Enable source maps and hot reloading in development mode for efficient coding.
- Configure production builds to optimize bundle sizes and prepare assets for caching.
- Test both build processes to ensure they generate correct files in your theme’s distribution directory.
- Verify that WordPress can properly serve the compiled assets to visitors.
9. Test and deploy
Finally, you’ll thoroughly test your React-powered WordPress theme and deploy it to production, ensuring everything works correctly in a live environment:
- Test your React components across different browsers and devices for compatibility.
- Verify that WordPress functionality like plugins, widgets, and admin features work correctly.
- Use performance tools like Lighthouse to ensure React additions don’t impact page load times.
- Test both development and production builds thoroughly before deployment.
- Upload your entire theme directory, including built JavaScript files to production WordPress site.
- Confirm that your production environment serves compiled assets correctly and all WordPress-to-React data flows function properly.
Best practices for building WordPress themes with React
When building a WordPress theme with React, it’s easy to focus on setup and overlook deeper integration strategies. Below are less obvious but high-impact best practices to help your theme remain maintainable, performant, and WordPress-friendly:
- Separate responsibilities between PHP templates and React components to avoid mixing logic layers. Use PHP to handle routing, SEO, and backend logic, while React focuses purely on interactivity and UI.
- Use
wp_localize_script()to inject dynamic data into React apps without extra API calls. This approach keeps pages lightweight and avoids hitting the REST API for data already available server-side. - Scope React mounting to specific template areas instead of wrapping the whole frontend. This keeps your theme lean and allows WordPress to handle static rendering where React isn’t needed.
- Build components to accept props from PHP, allowing you to pass data like post content, user info, or theme options without full re-renders or client-side fetching.
- Bundle assets smartly by separating vendor code and app logic with webpack’s
splitChunksconfiguration. This improves caching and prevents users from re-downloading unchanged libraries. - Mirror WordPress structure by organizing your React files to match theme templates or content types. This keeps your project understandable for developers familiar with WordPress development best practices and conventions.
- Use enqueue handles consistently when registering scripts and styles to avoid duplication or conflict with plugins. An organized enqueue strategy ensures your React app coexists peacefully with other WordPress features.
Build dynamic WordPress-native themes with ACF Blocks
React-based WordPress themes offer a powerful way to build highly interactive sites without leaving the WordPress ecosystem. They’re best suited for projects where dynamic interfaces, complex state management, or custom UI logic are central to the user experience.
But not every project needs the overhead of React tooling, asset pipelines, and component lifecycles. If your goal is to create reusable, content-rich components within WordPress – and you prefer to work mostly in PHP with minimal JavaScript – ACF Blocks is the smarter choice.
It’s part of ACF PRO, and it lets you build custom Gutenberg blocks using familiar WordPress patterns, without the need for a JavaScript framework.
In the end, it’s about choosing the right tool for the job. React themes shine when you need full control over interactivity and UI behavior. But when you just need flexible, dynamic content editing for clients – without the build process or complexity – ACF Blocks provides an efficient and WordPress-native solution.
Check out ACF PRO and start building flexible, dynamic WordPress sites using tools you already know.


For plugin support, please contact our support team directly, as comments aren't actively monitored.