
Key points:
- Beaver Builder and Advanced Custom Fields (ACF®) integrate smoothly, allowing you to design dynamic layouts without risking your custom field data.
- You can display everything from basic text fields to complex repeaters and custom post types using modules that support dynamic content.
- With support for ACF Blocks and advanced features like the Loop module, the setup is scalable and flexible for a wide range of projects.
If you’re using Advanced Custom Fields (ACF®), you already know what it takes to manually code field displays. And if you’re building with Beaver Builder, you want neater data workflows without touching PHP.
The good news is that these tools integrate smoothly when you know what you’re doing.
This integration lets ACF users drag and drop custom field values directly into their layouts while giving Beaver Builder users proper data structure and flexibility. But combining them isn’t always straightforward, especially if you’re worried about breaking existing designs or losing data.
We’ll cover exactly how the ACF-Beaver integration functions, walk through real-world applications that actually matter, and tackle the common issues that trip people up.
Understanding how Beaver Builder and ACF work together
The integration between these tools is intentional, not accidental.
ACF is designed to work with any page builder, while Beaver Builder is specifically built with ACF compatibility in mind. This means you can introduce either tool to an existing workflow without data loss or compatibility headaches.
The magic happens through Beaver Builder’s dynamic data system. Any module displaying a + icon in its settings supports dynamic content, including all your ACF fields. You’re not limited to basic text fields either – Beaver Builder natively recognizes 29 different ACF field types, from simple text and images to complex relationship fields and repeaters.
This integration works whether you’re using the standard Beaver Builder plugin or have upgraded to Beaver Themer. It extends beyond custom fields, too, supporting ACF-powered custom post types and taxonomies.
As developer @JimmyK1995 puts it: “I found that Beaver Builder integrates well with Advanced Custom Fields“ – and we’ll prove it.
Using Beaver Builder with ACF
Now let’s get practical. We’ll start with basic field connections that take minutes to set up, then move into advanced techniques for complex data structures and custom workflows.
Supercharge Your Website With Premium Features Using ACF PRO
Speed up your workflow and unlock features to better develop websites using ACF Blocks and Options Pages, with the Flexible Content, Repeater, Clone, Gallery Fields & More.
Displaying simple ACF fields using Beaver Builder
The simplest integration involves outputting basic ACF data through Beaver Builder’s dynamic content modules. We’ll use a text field as our starting point since it demonstrates the core connection process without complications.
Before getting started, make sure you have an ACF text field created and assigned to your target content type. If you’re working with posts rather than pages, verify that posts are enabled for Beaver Builder editing under Settings > Beaver Builder > Post Types. This foundational setup ensures your fields are accessible when you start building.
When you’re ready, just follow these steps:
- Create a new post/page and fill in the ACF meta box with your custom field data.
- Save the draft, then launch Beaver Builder.
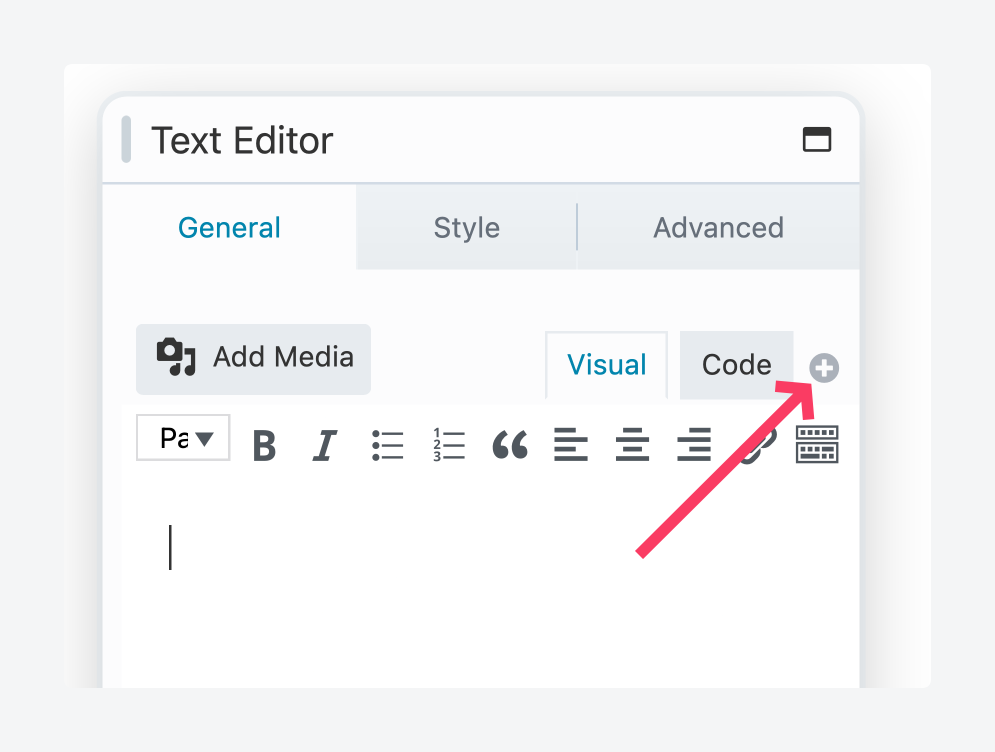
- Add a Text Editor module by dragging it onto the canvas.
- Switch to the module’s General tab and look for a + icon.
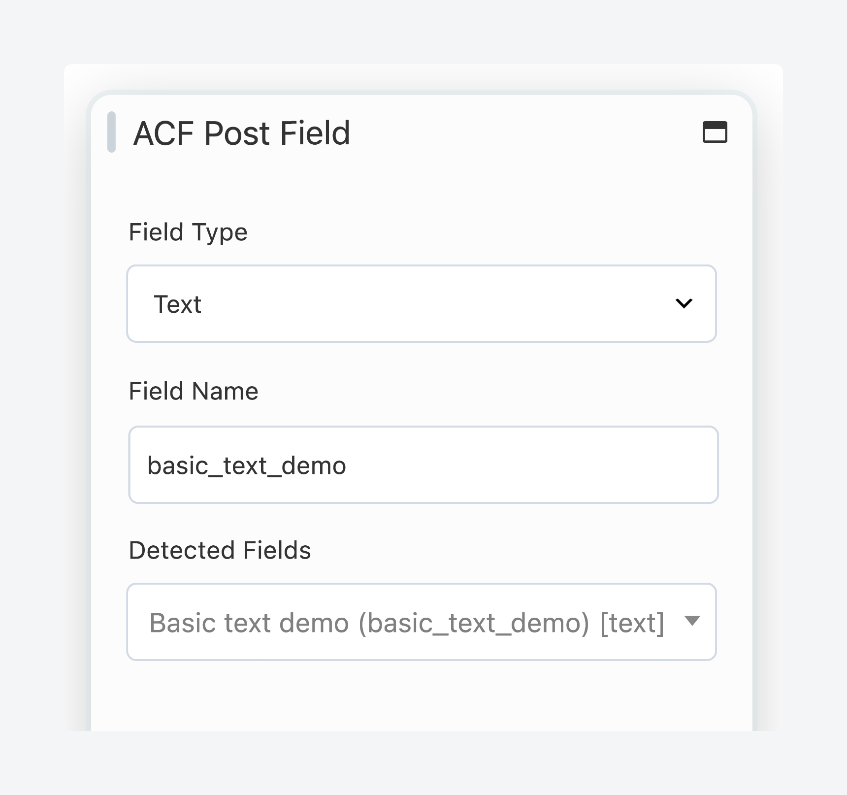
- Scroll down to the Advanced Custom Fields section, hover over ACF Post Field, then click on Connect.

- From the Detected Fields dropdown, select your field and the rest of the details should auto-populate.
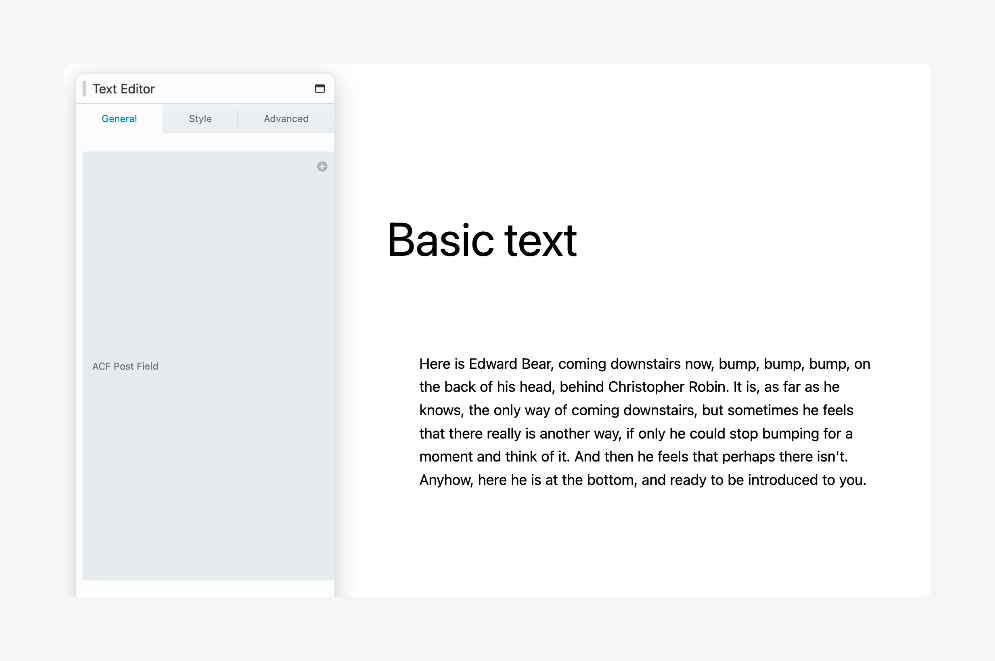
- Save the settings, and you should see your custom field data appear on the canvas.
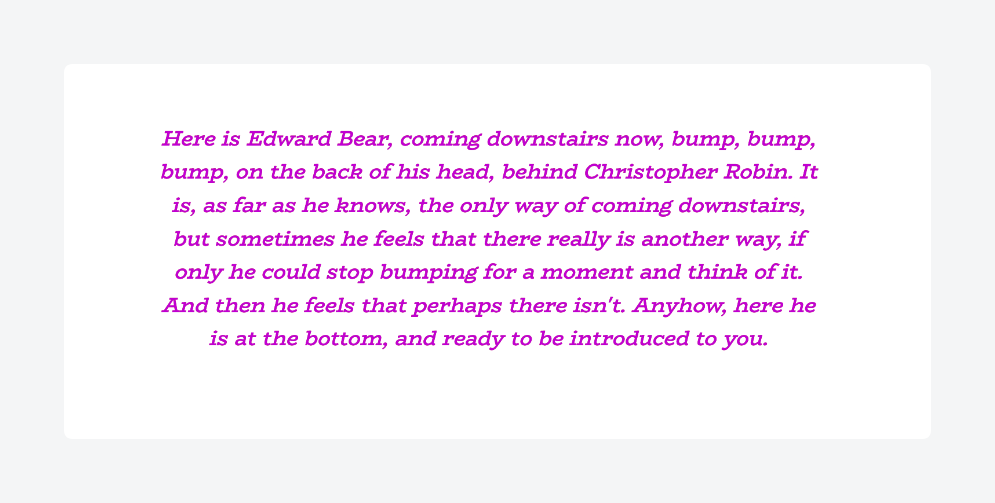
- Switch to the module’s Style tab to customize its look further. Here’s what it’d look like with some tweaks to the typography (font, color, alignment):
Displaying advanced ACF data with Beaver Builder
Complex field types require more sophisticated handling.
For this section, we’ll go over repeater fields (part of ACF PRO), Beaver Builder’s Loop module for iterating through data sets, and integration with custom post types.
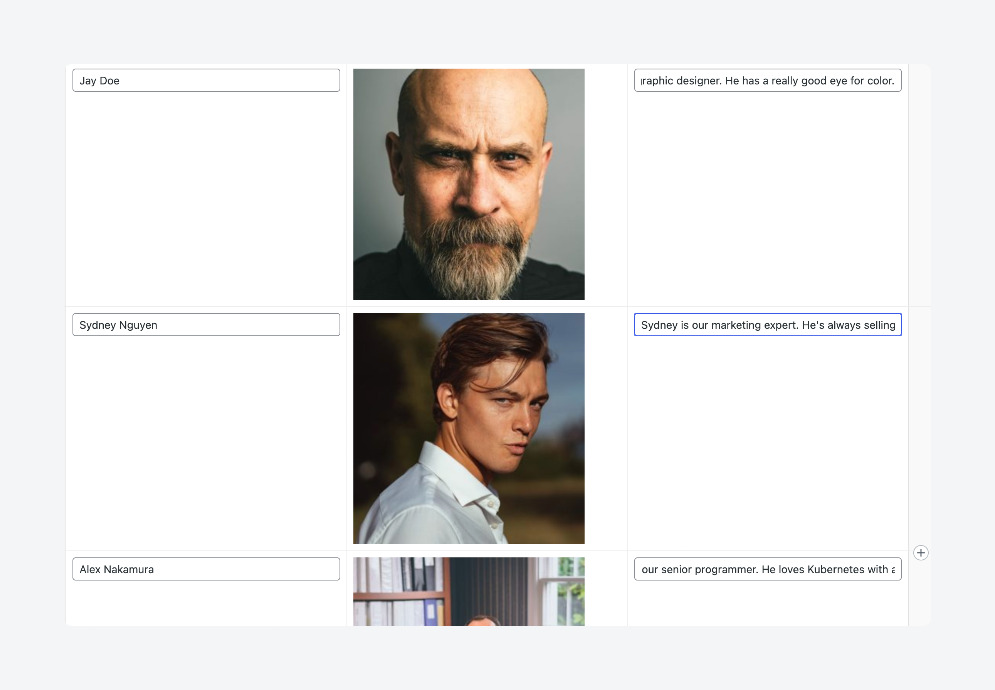
We’ll build a team member directory using an ACF repeater field containing name, profile photo, and bio subfields. This should demonstrate how to handle nested data structures and multiple field types simultaneously.
Set up your ACF repeater field with the three subfields mentioned above. Under location rules, assign it to your target content type – in our case, show if post type equals Team Member. Don’t forget to enable Beaver Builder for your custom post type via Settings > Beaver Builder > Post Types and check the appropriate box.

When you’ve set everything up, here’s what you need to do:
- Create a new collection of team members in a post via Team Members > Add New Team Member.
- Create new rows and add the repeater data as needed.
- Save the draft, then launch Beaver Builder.
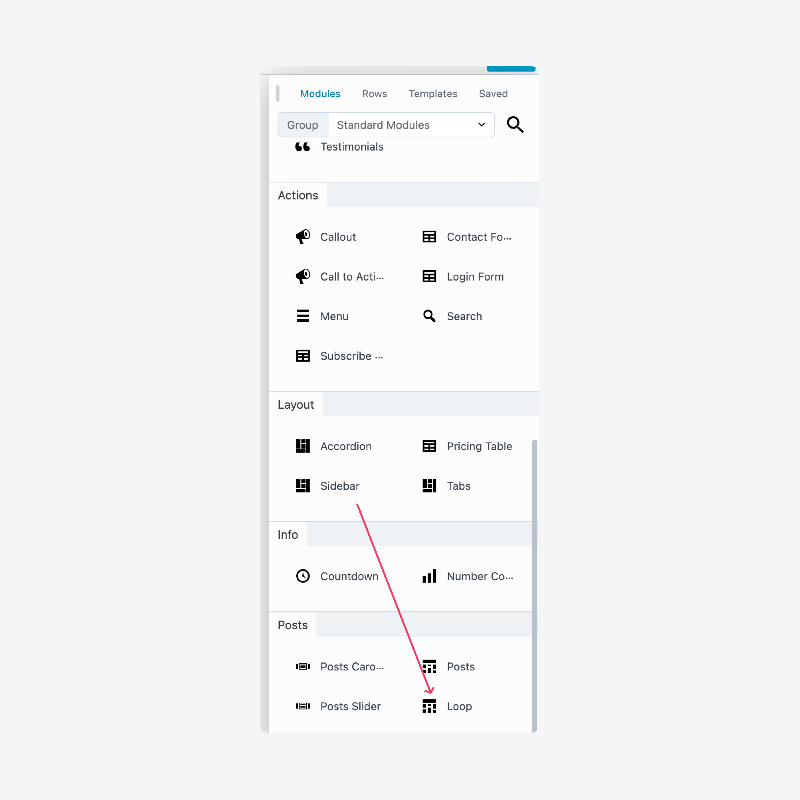
- Add a Loop module to the canvas. You can find it at the bottom of the list of modules, in the Posts section.
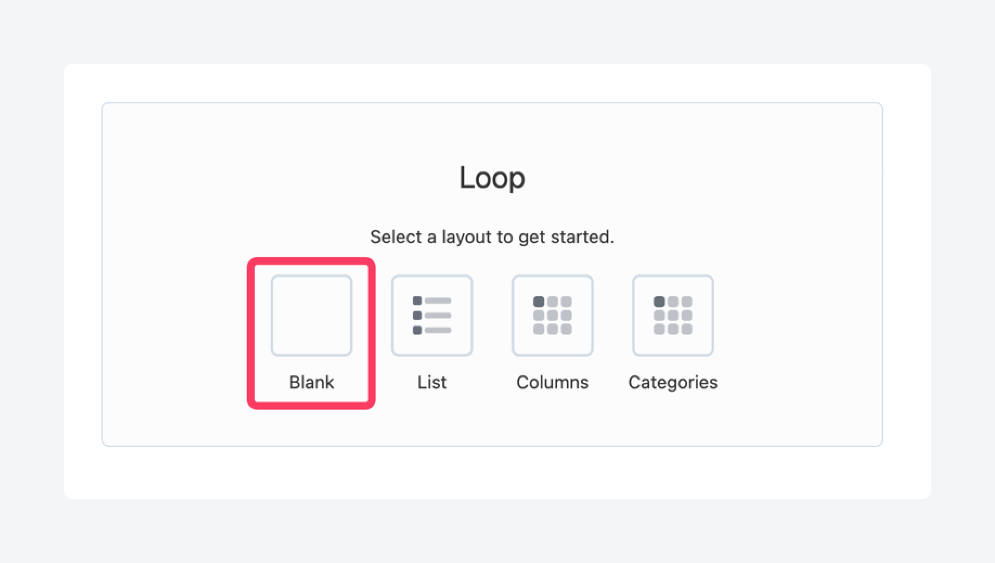
- Select the blank layout for the loop.
- In the module’s settings box, switch to the Content tab.
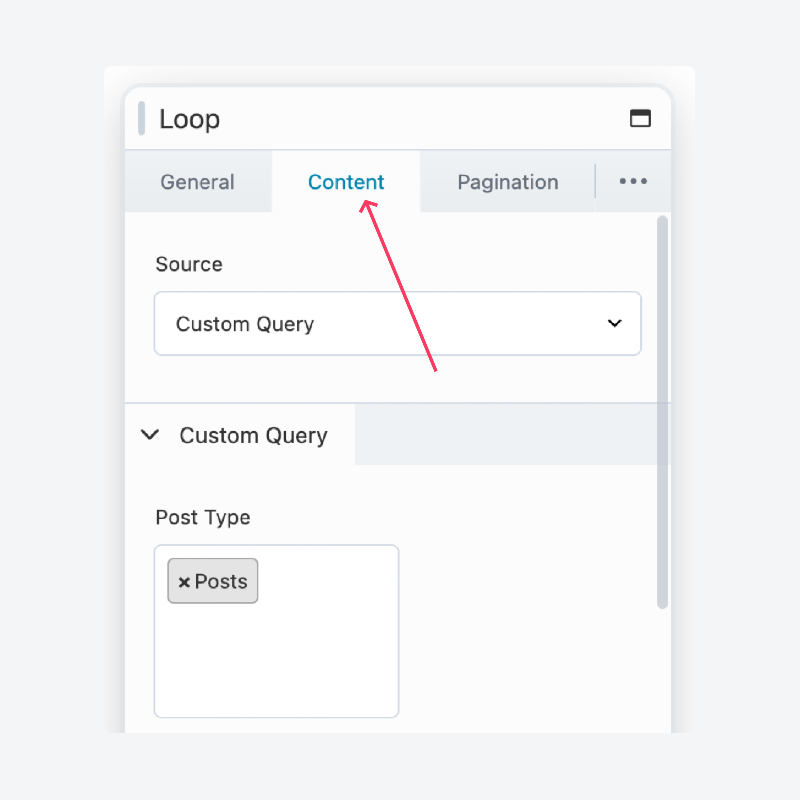
- Click the Source dropdown and select ACF Repeater, then enter your repeater field’s name as the Key.

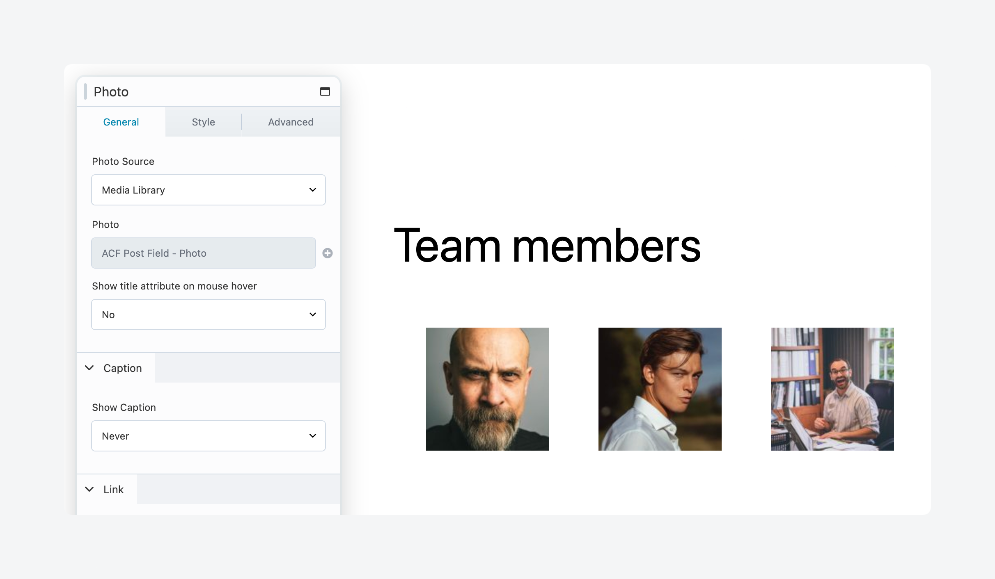
- Drag a module that supports dynamic content into the loop so you can use it to display the repeater’s sub-fields. We’ll start with a Photo module for the team members’ profile pictures.
- Click the + icon next to Photo, then scroll down to the Advanced Custom Fields section and hover over ACF Post Field – Photo, then click Connect.
- Fill in the field’s details. You can select it from the Detected Fields dropdown rather than trying to do everything yourself.
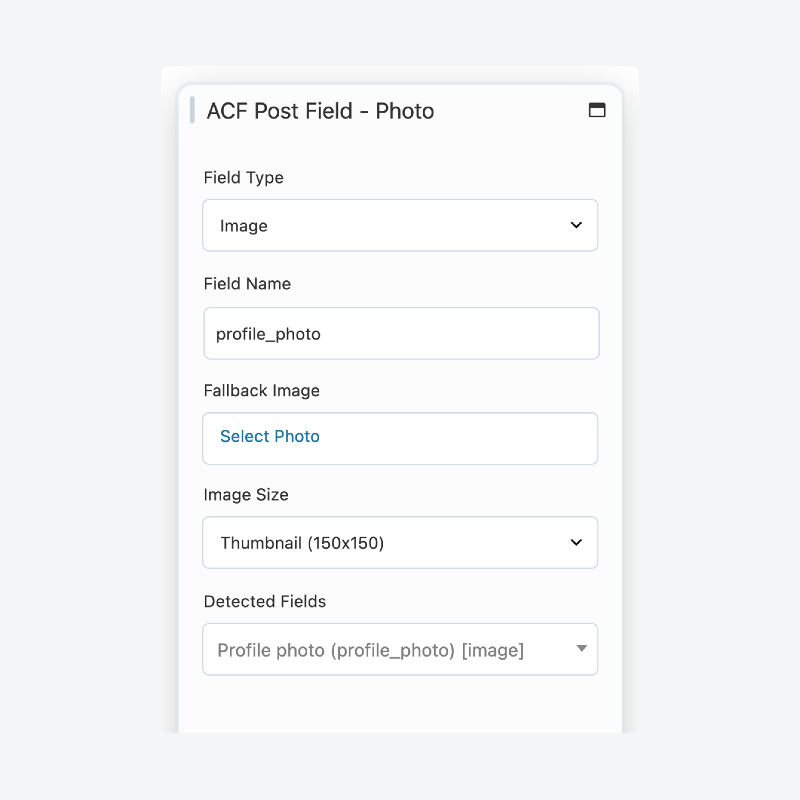
- Save the module’s settings and you should see the first round of fields looped through and displayed.
- Repeat this process with each of the remaining fields, i.e., adding a Loop module and nesting the relevant modules inside it. Here’s what that should look like, along with the structure on the right:
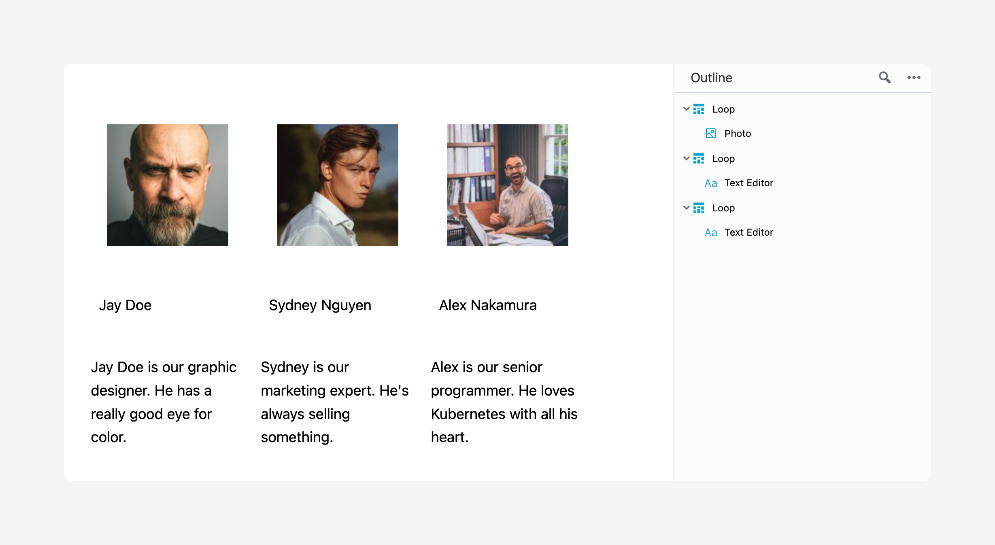
- For styling, whatever you apply to one looped module will apply to all others, making it as scalable as you need it to be. Take this example below, where styling the Jay Doe column (alignment, typography, rounding image borders) replicates the styles across all other columns:

Displaying ACF Blocks using Beaver Builder
Beaver Builder supports Gutenberg-ready blocks, including ACF Blocks from ACF PRO. This gives you another way to integrate custom field data while maintaining block-based workflows.
Start by creating your ACF Block as you normally would. Just make sure you add "jsx": false to the supports section in your block registration. Without this, your block won’t appear in Beaver Builder’s module list.
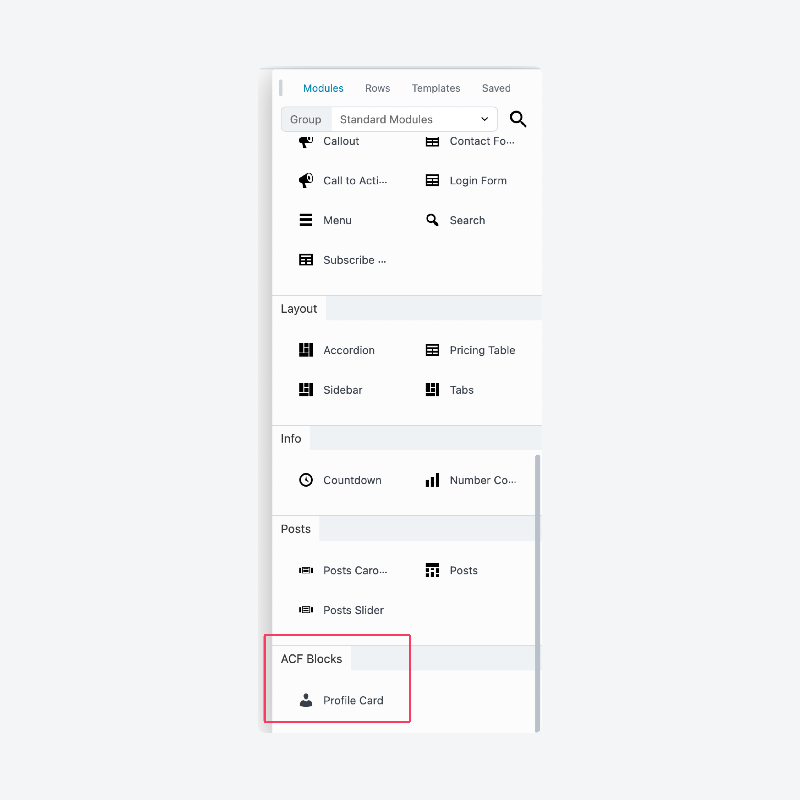
Open Beaver Builder and click the + icon to add a new module. Navigate to the Modules tab and scroll down to the ACF Blocks section. Your custom block will be listed here – drag it onto the canvas where you want it to appear.
Fill in the custom fields for your block through Beaver Builder’s interface. The data should render immediately on the canvas, giving you real-time feedback as you build.

Troubleshooting issues when integrating Beaver Builder with ACF
Even with a solid setup, you might hit roadblocks when combining these tools. Here are the most frequent problems and their solutions:
- ACF Block fields not showing up happens when your field group location rules aren’t properly configured. Set your location rule to Block is equal to… and select your specific block name.
- ACF Blocks not appearing in Beaver Builder’s module list occurs when JSX support is enabled in your block configuration. Add
"jsx": falseto your block’s block.json file to make it visible in Beaver Builder. - ACF Block settings displaying in Gutenberg but missing in Beaver Builder results from Beaver’s limited support for extended block.json features. Beaver currently doesn’t recognize most additional block configuration options beyond basic field definitions.
- Loop module layout issues typically stem from insufficient container structure around your dynamic content. Nest your Loop module inside a Box module to provide proper spacing and alignment controls.
- ACF data not displaying when using Beaver Builder shortcodes occurs because shortcodes don’t integrate with Beaver’s dynamic data system. Use modules that natively support dynamic data instead of relying on shortcode outputs.
Unlock advanced ACF PRO features in Beaver Builder
The ACF and Beaver Builder combination delivers exactly what both technical and non-technical user bases want: powerful custom field functionality without coding complexity. These tools integrate natively by design, so introducing one to an existing workflow with the other won’t threaten your data or break your designs.
The integration centers around Beaver Builder’s dynamic data system. Any module displaying the + icon can pull ACF field values directly, covering everything from simple text fields to complex data structures. Beaver’s Loop module takes this further, letting you iterate through advanced ACF field types like repeaters without custom PHP.
Don’t overlook ACF Blocks support either. This feature bridges the gap between block-based editing and Beaver Builder’s visual interface, giving you access to more of ACF PRO’s toolkit within your builder workflow.
Ready to unlock these advanced field types and block functionality? Upgrade to ACF PRO to access repeaters, flexible content fields, and the complete ACF Blocks system.

For plugin support, please contact our support team directly, as comments aren't actively monitored.