
Key points:
- Build frontend navigation menus using WordPress’s built-in Site Editor/Customizer, mega menu plugins, or custom PHP code for any theme type.
- Create custom backend menu items using PHP functions to organize admin tools and resources for logged-in users.
- Use ACF PRO’s Options Pages to build centralized admin pages for managing global site content like contact info across all templates.
If you’ve been managing WordPress sites since before the Gutenberg editor arrived, you’ve likely noticed that menu creation isn’t as straightforward as it used to be. The familiar Appearance > Menus path now competes with block-based navigation, and finding the right approach for your specific setup can be frustrating.
In this article, you’ll learn exactly how to create and manage menus effectively across classic themes, block themes, and hybrid setups. We’ll cover both frontend navigation menus for your site visitors and backend administrative menus for logged-in users and admins.
How WordPress menus work
Let’s start by clearing up the distinction between WordPress menus and headers.
A menu is simply a custom navigation list you create – it’s pure data, a barebones collection of links with no visual formatting. The header, however, is where you assign that menu to your theme’s header area, typically at the top of your site. This assignment layer handles the visual presentation, including mobile responsiveness and styling.
WordPress supports multiple menu types across two main categories:
- Frontend menus handle site navigation and include the header menu (your primary navigation), footer menus for bottom-of-page links, sidebar menus placed in widget areas, mobile menus optimized for smaller screens, social links menus for social media profiles, and secondary menus like top bars or category navigation that some themes provide.
- Backend menus serve a different purpose entirely – they customize the WordPress admin dashboard interface for different user roles and administrative needs. These allow you to control what logged-in users see in their dashboard experience.
How to create WordPress navigation menus
Now that you understand how WordPress menus function, here are step-by-step walkthroughs for creating them across every setup you’ll encounter. Classic themes with traditional menu interfaces, block themes using navigation blocks, plugin-based solutions, and manual coding.
Method 1: Using WordPress’s built-in tools
The Site Editor introduced a new process for creating menus in WordPress, fundamentally changing how block themes handle navigation. Classic themes still use the familiar Customizer interface. We’ll cover both approaches so you can work effectively with any theme type.
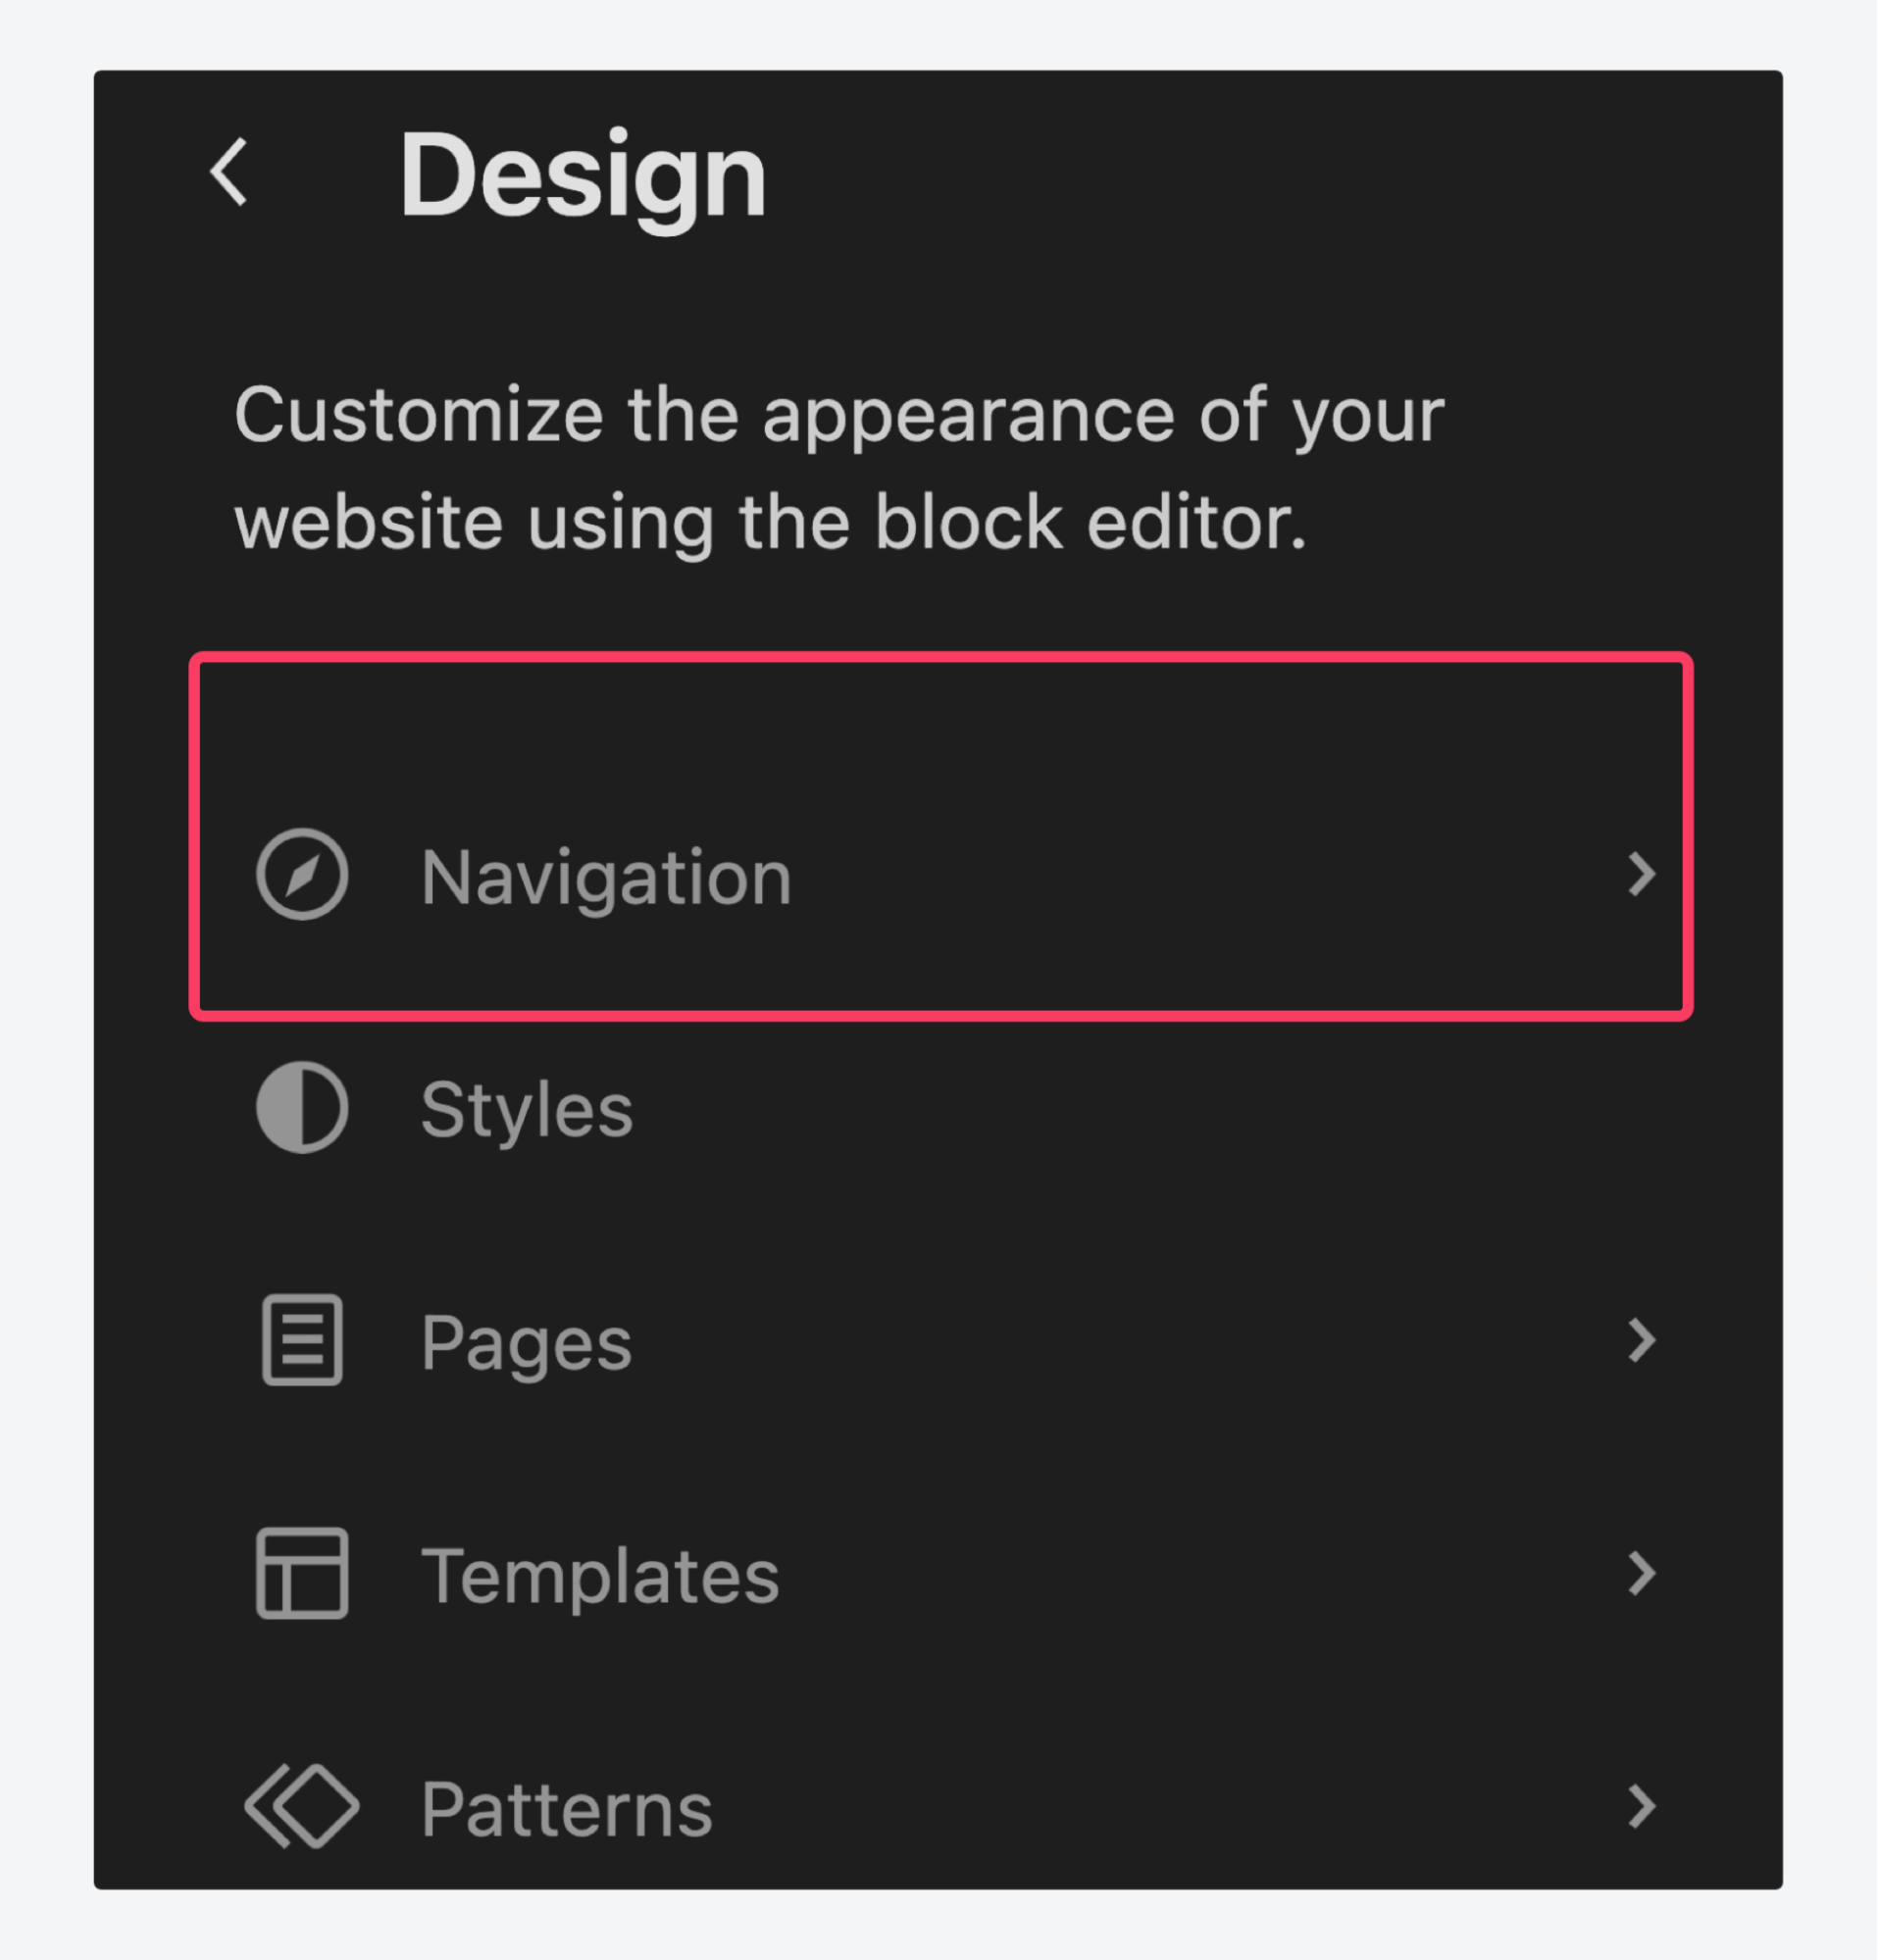
Creating custom menus for WordPress block themes
Block themes handle menus through the Site Editor’s navigation system, i.e., the header.
Navigate to Appearance > Editor > Templates or Patterns, then add a Navigation block. This creates a reusable block that you can deploy across multiple areas of your site.
Alternatively, you can edit the existing Navigation block in your theme via the Site Editor.
The block-based approach offers significant advantages over traditional menus. Since it operates within the Gutenberg editor, you can integrate custom blocks created with ACF Blocks directly into your navigation. This means displaying custom field values, dynamic content, or complex layouts right within your menu structure.
Create your navigation once and reuse it throughout your site. The Navigation block automatically adapts to different contexts while maintaining consistent styling and functionality across all implementations.
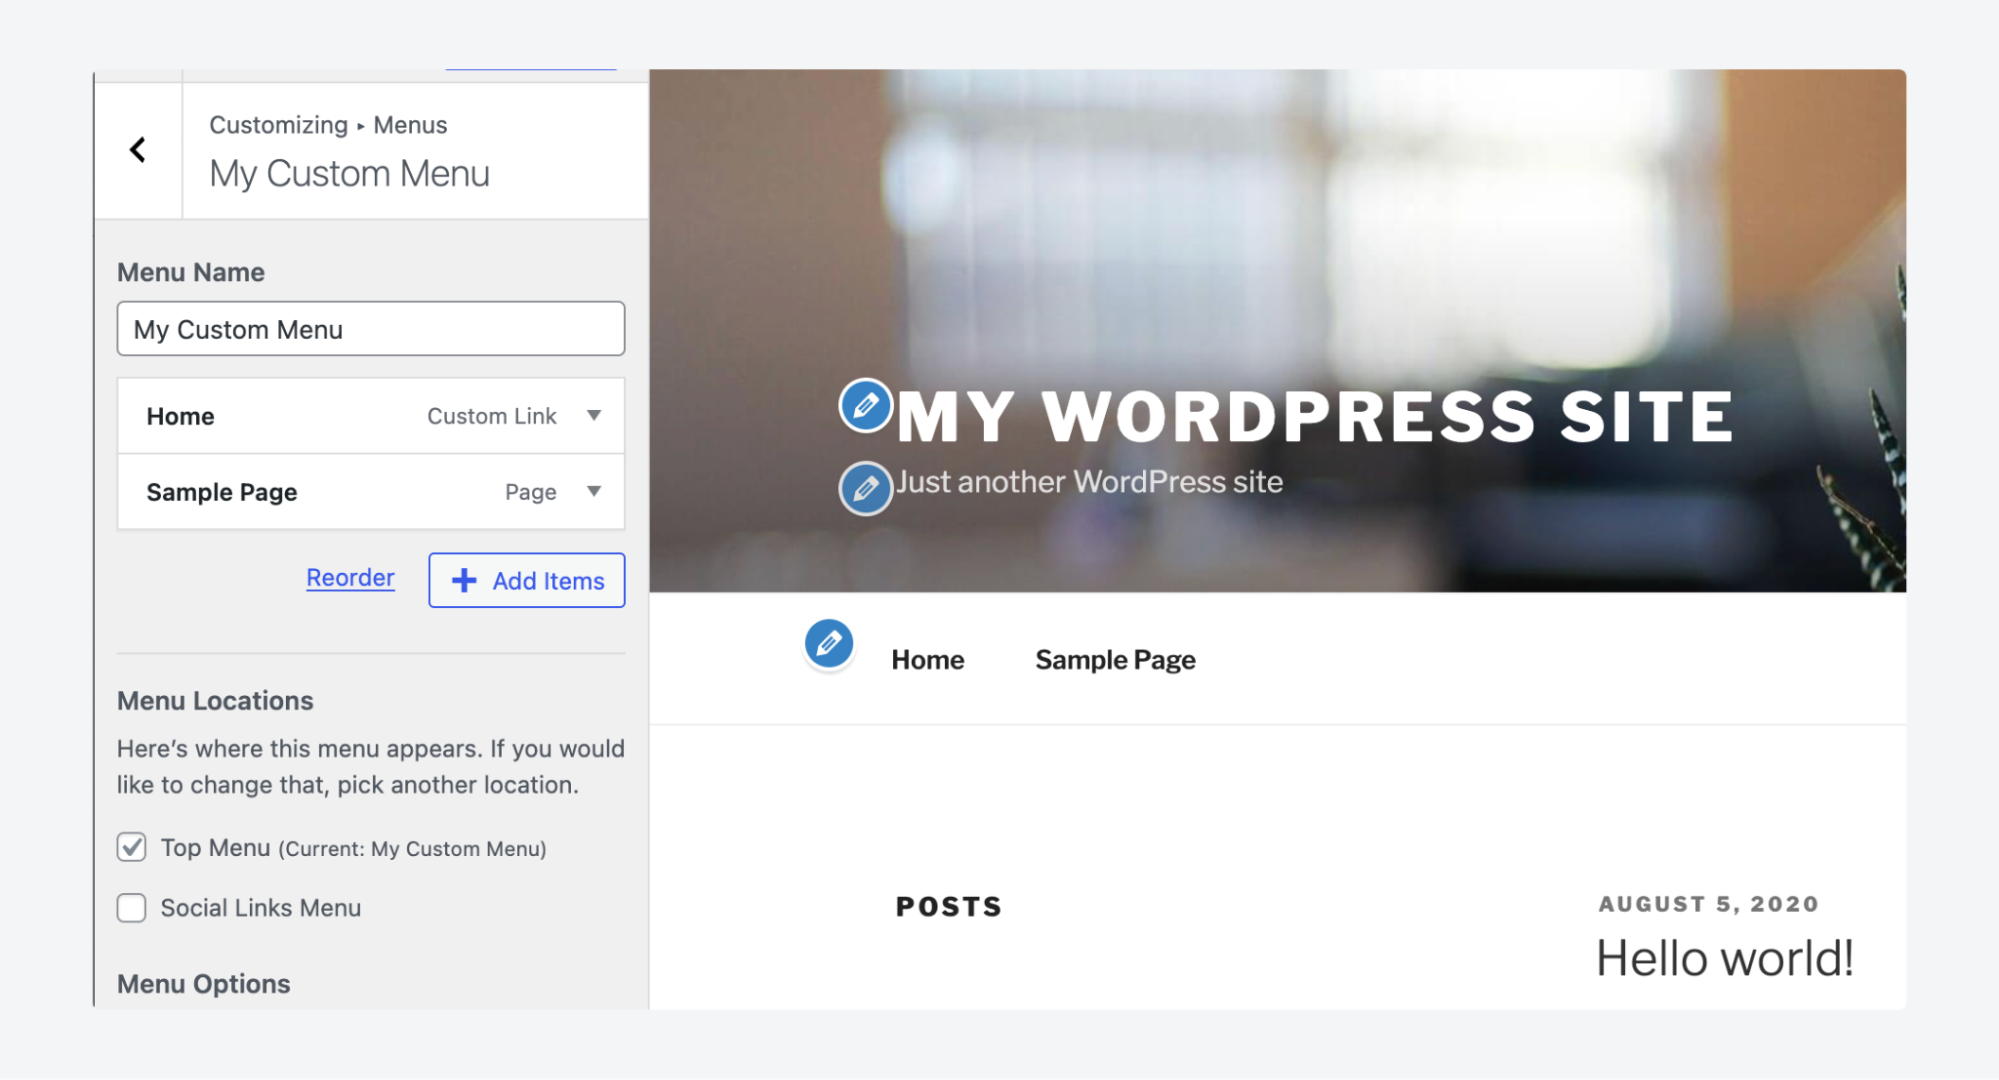
Creating menus for classic WordPress themes
Classic themes offer two primary methods for menu creation. The traditional Appearance > Menus interface provides comprehensive control over menu structure, allowing you to add pages, posts, custom links, and categories with drag-and-drop functionality.
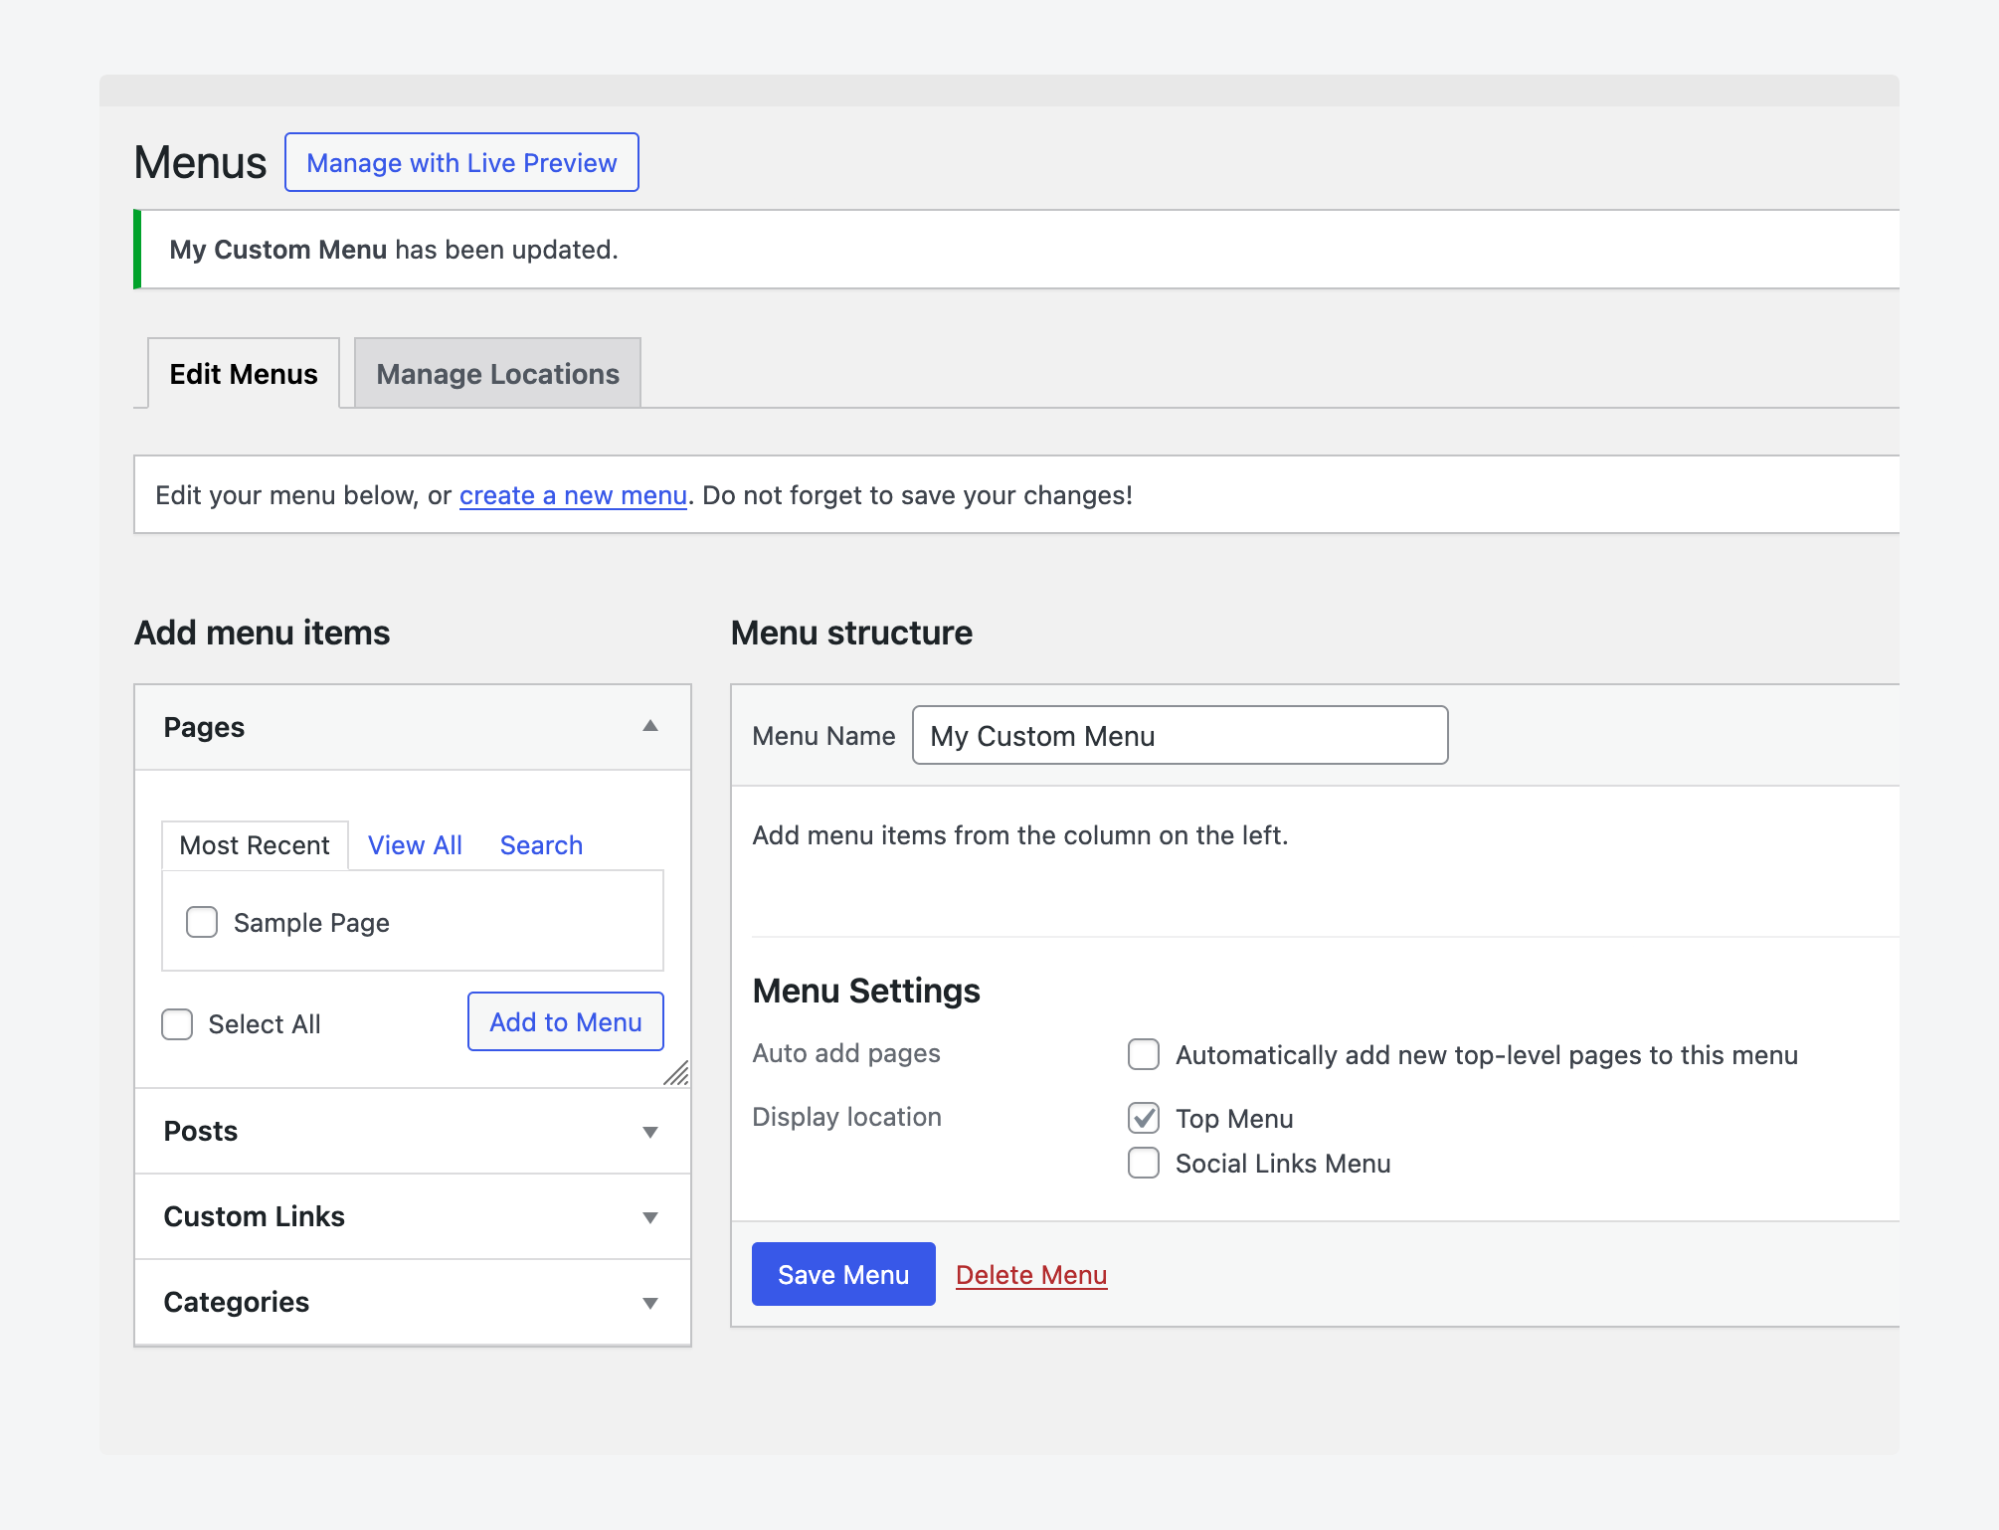
Alternatively, use Appearance > Customize > Menus for real-time preview capabilities. This approach lets you see changes immediately as you build your menu structure.
Classic themes excel at displaying custom post type entries in menus. Just create a custom post type using Advanced Custom Fields (ACF®), then expand the Screen Options when creating your menu, check the box for your custom post type, and it becomes available in the dropdown selector.
Supercharge Your Website With Premium Features Using ACF PRO
Speed up your workflow and unlock features to better develop websites using ACF Blocks and Options Pages, with the Flexible Content, Repeater, Clone, Gallery Fields & More.
Method 2: Using WordPress menu plugins
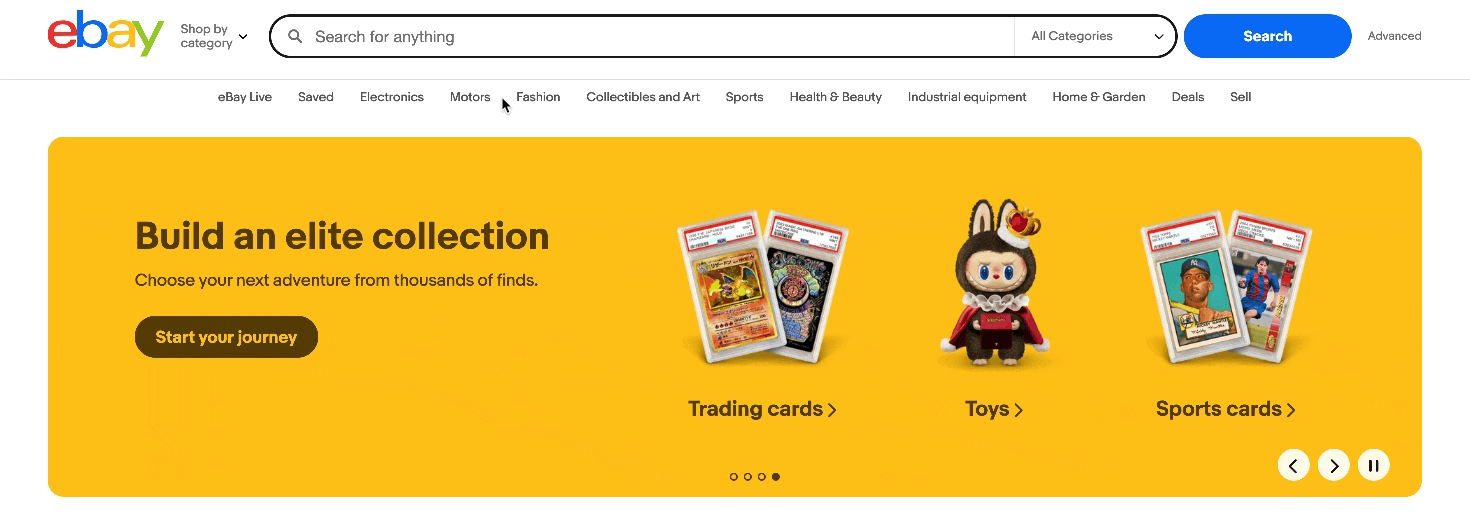
Plugin-based solutions should expand WordPress’s built-in functionality significantly rather than simply replicating existing features. Mega menu plugins like Max Mega Menu deliver this enhanced capability by creating sophisticated navigation experiences.
A mega menu is an expanded navigation menu that displays multiple columns of links, images, or widgets in a large dropdown panel. They accommodate complex multi-level site structures while maintaining organized navigation.
They’re popular on eCommerce sites, though you may never have known they had an official name. Here’s one on eBay’s homepage:
Interested? Let’s build a mega menu for your WordPress block theme with max Mega Menu:
- With the plugin installed and activated, go to Mega Menu > Menu Locations from your dashboard.
- Add a new menu location called “Header” and save it.
- Go to Appearance > Menus from your dashboard. The plugin adds this section to your dashboard, so it should be available even with a block theme.
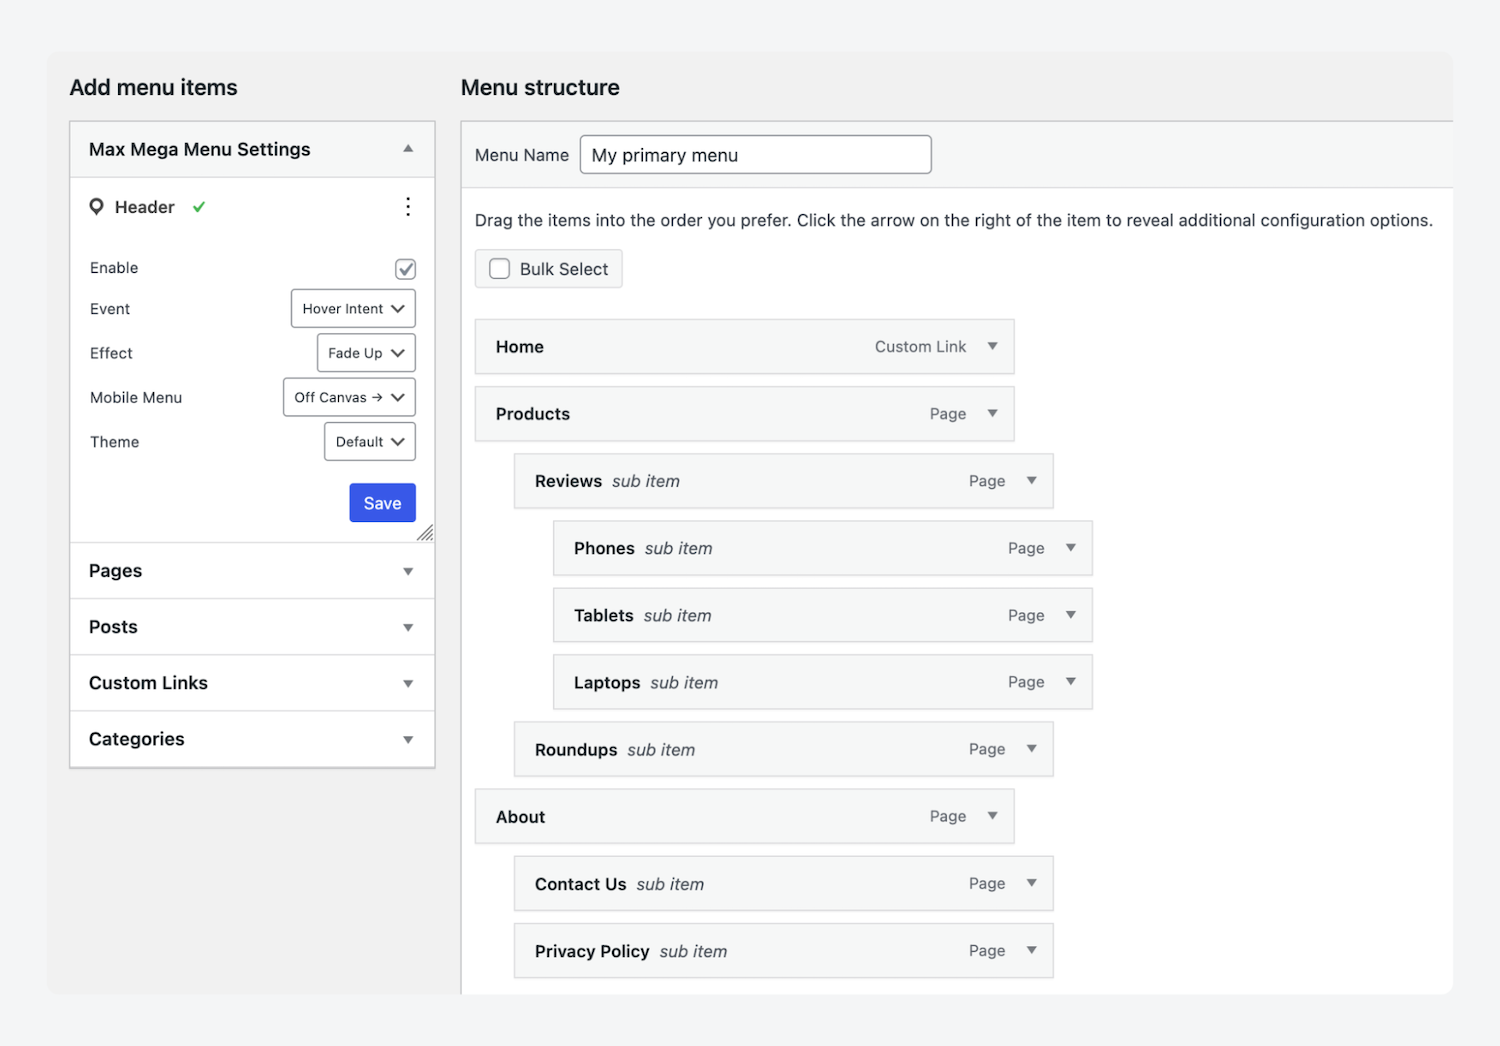
- Create a new menu, and make sure to check Enable on the Max Mega Menu Settings section on the left. Here’s what our structure looks like:
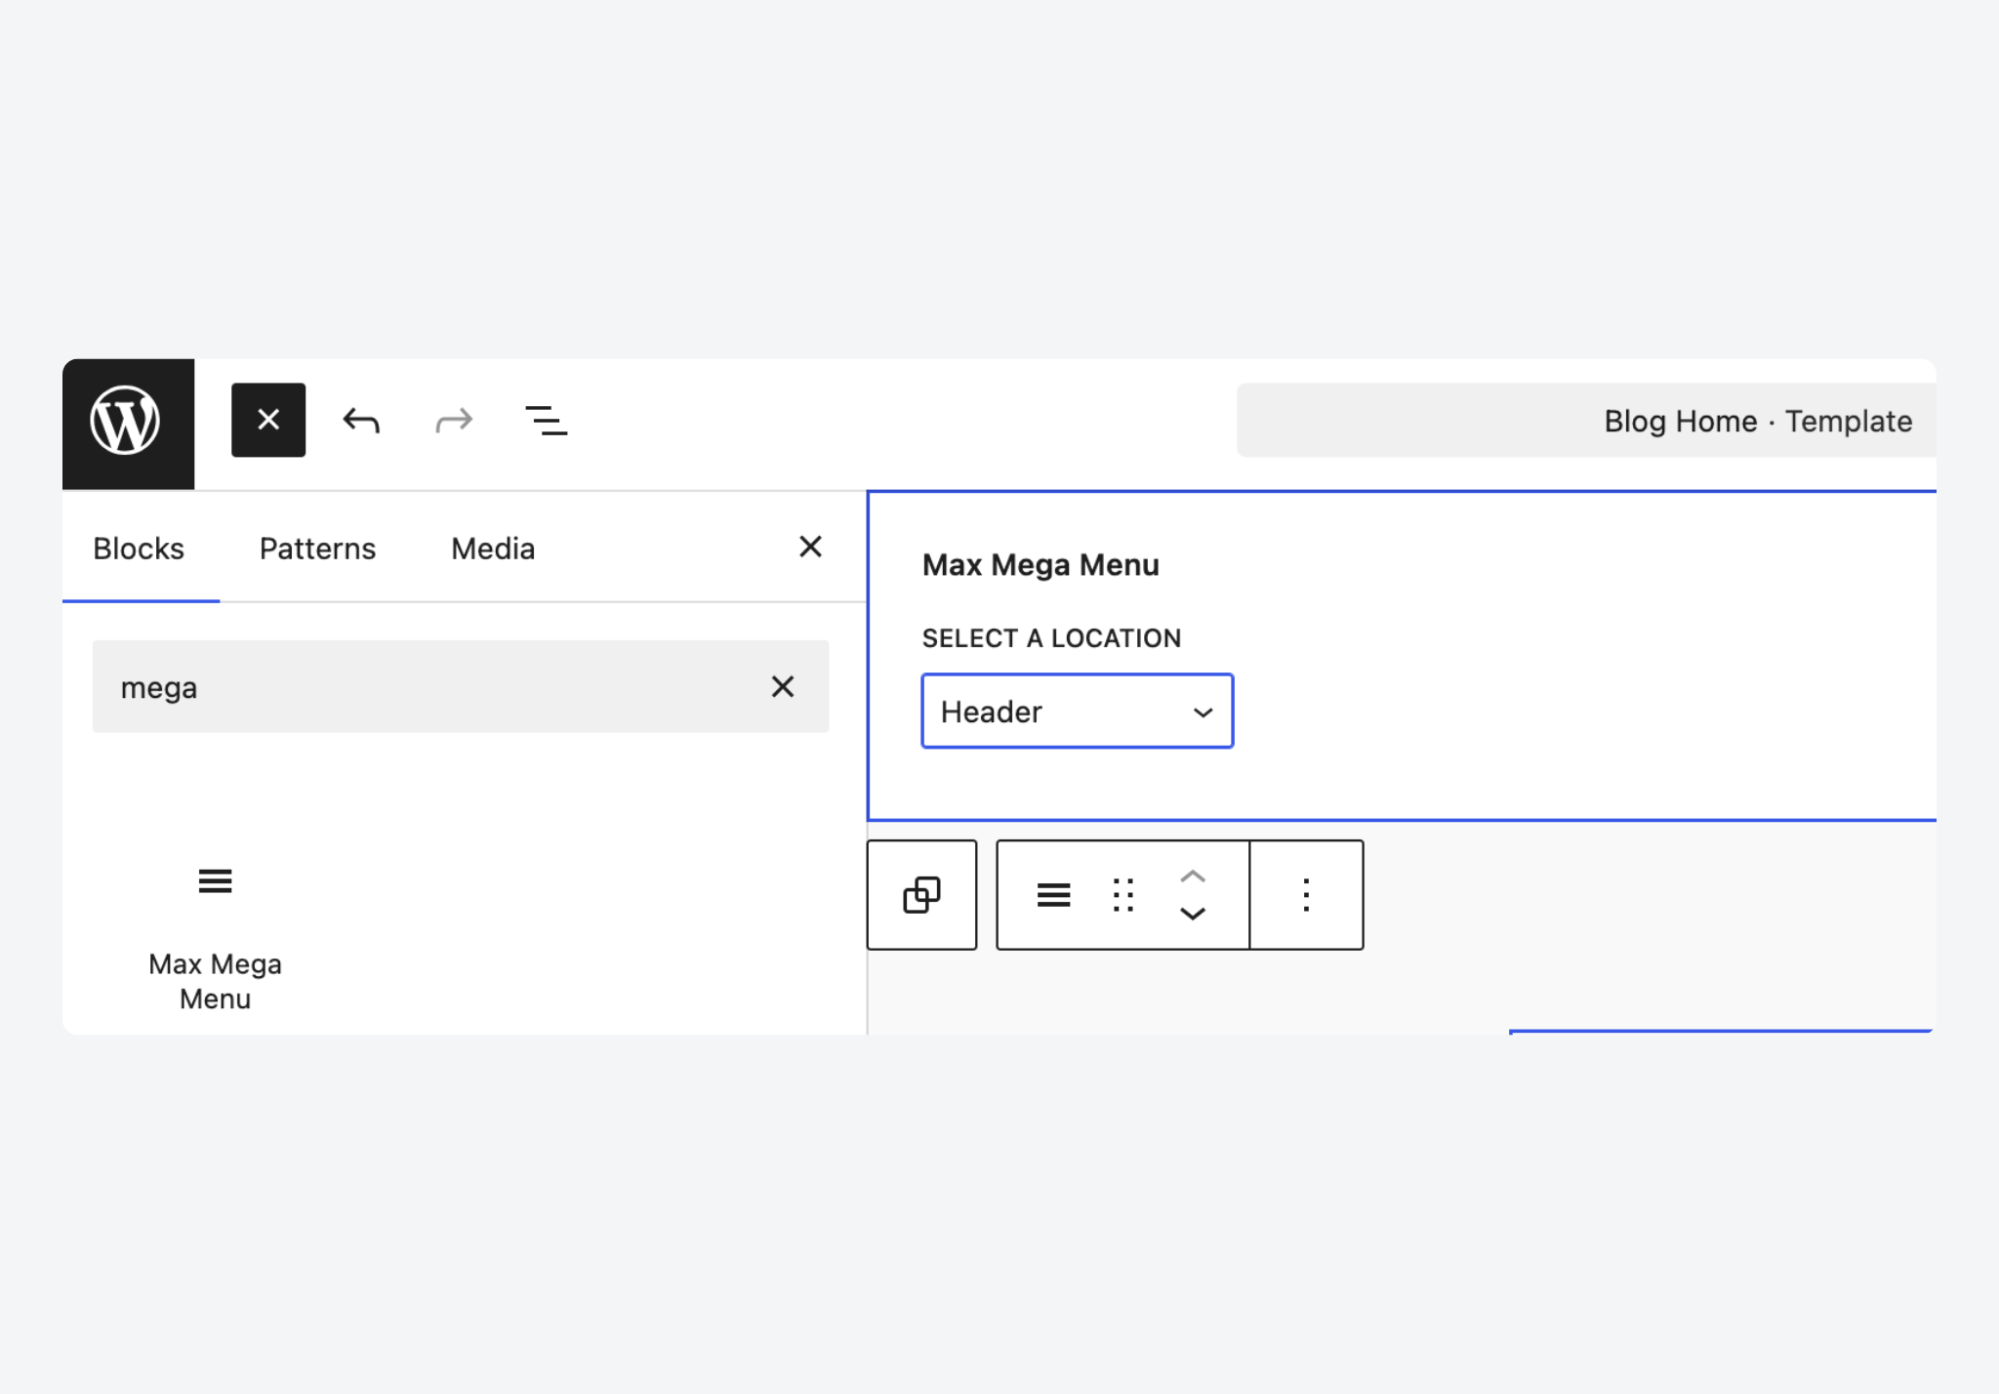
- Go to Appearance > Editor to open the block editor and delete the navigation block from the top of the page.
- Open the block inserter and search for the new Max Mega Menu block, then add it to the position where the old navigation block was.
- From the Select a location dropdown, choose the one you’d created in step 2, which should have your menu from step 4 assigned to it.
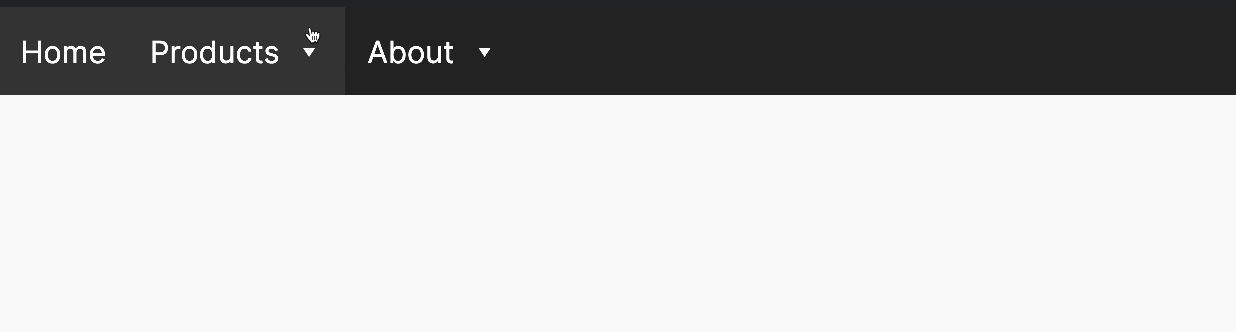
- Load up a page on your site’s frontend, where you should see the basic mega menu show up in the header:
And that’s it – you have a fully functional mega menu in your WordPress block theme. To style it, go to Mega Menus > Menu Themes, where you can tweak everything from colors, layout, and typography, to adding widgets for banners.
Method 3: Using custom code
Custom code provides complete control over menu functionality and appearance. The approach below offers unlimited flexibility for unique navigation requirements in classic themes that plugins cannot address.
- In your theme’s functions.php, create a custom function to register menu locations:
function register_my_menus() {

    register_nav_menus(

        array(

            'primary' => __('Primary Menu'),

        )

    );

}

add_action('init', 'register_my_menus');- Save the functions.php file.
- Navigate to Appearance > Menus in your WordPress dashboard.
- Create your menu and assign it to your registered location.
- Open the template file where you want to display the menu.
- Add the wp_nav_menu() function with your registered location:
wp_nav_menu(array('theme_location' => 'primary'));- Save your template file.
This function outputs the complete menu HTML structure, which you can then style with CSS to match your design requirements.
How to create custom WordPress admin dashboard menus
Custom admin dashboard menus are visible only to administrators and logged-in users, making them ideal for account management, custom plugin controls, and internal resource organization.
This walkthrough creates a custom admin menu for storing important resources like notes, links, and reference materials that administrators can access quickly:
- Open your theme’s functions.php file or create a custom plugin
- Add the
admin_menuaction hook to register your custom menu:
function add_custom_admin_menu() {

    add_menu_page(

        'Admin Resources',     // Page title

        'Resources',           // Menu title

        'manage_options',      // Capability required

        'admin-resources',     // Menu slug

        'display_admin_resources', // Callback function

        'dashicons-clipboard-list', // Icon

        30                     // Position

    );

}

add_action('admin_menu', 'add_custom_admin_menu');- Create the callback function that displays your menu content:
function display_admin_resources() {

    echo '<div class="wrap"><h1>Admin Resources</h1>';

    echo '<p>Important links and notes for site management.</p></div>';
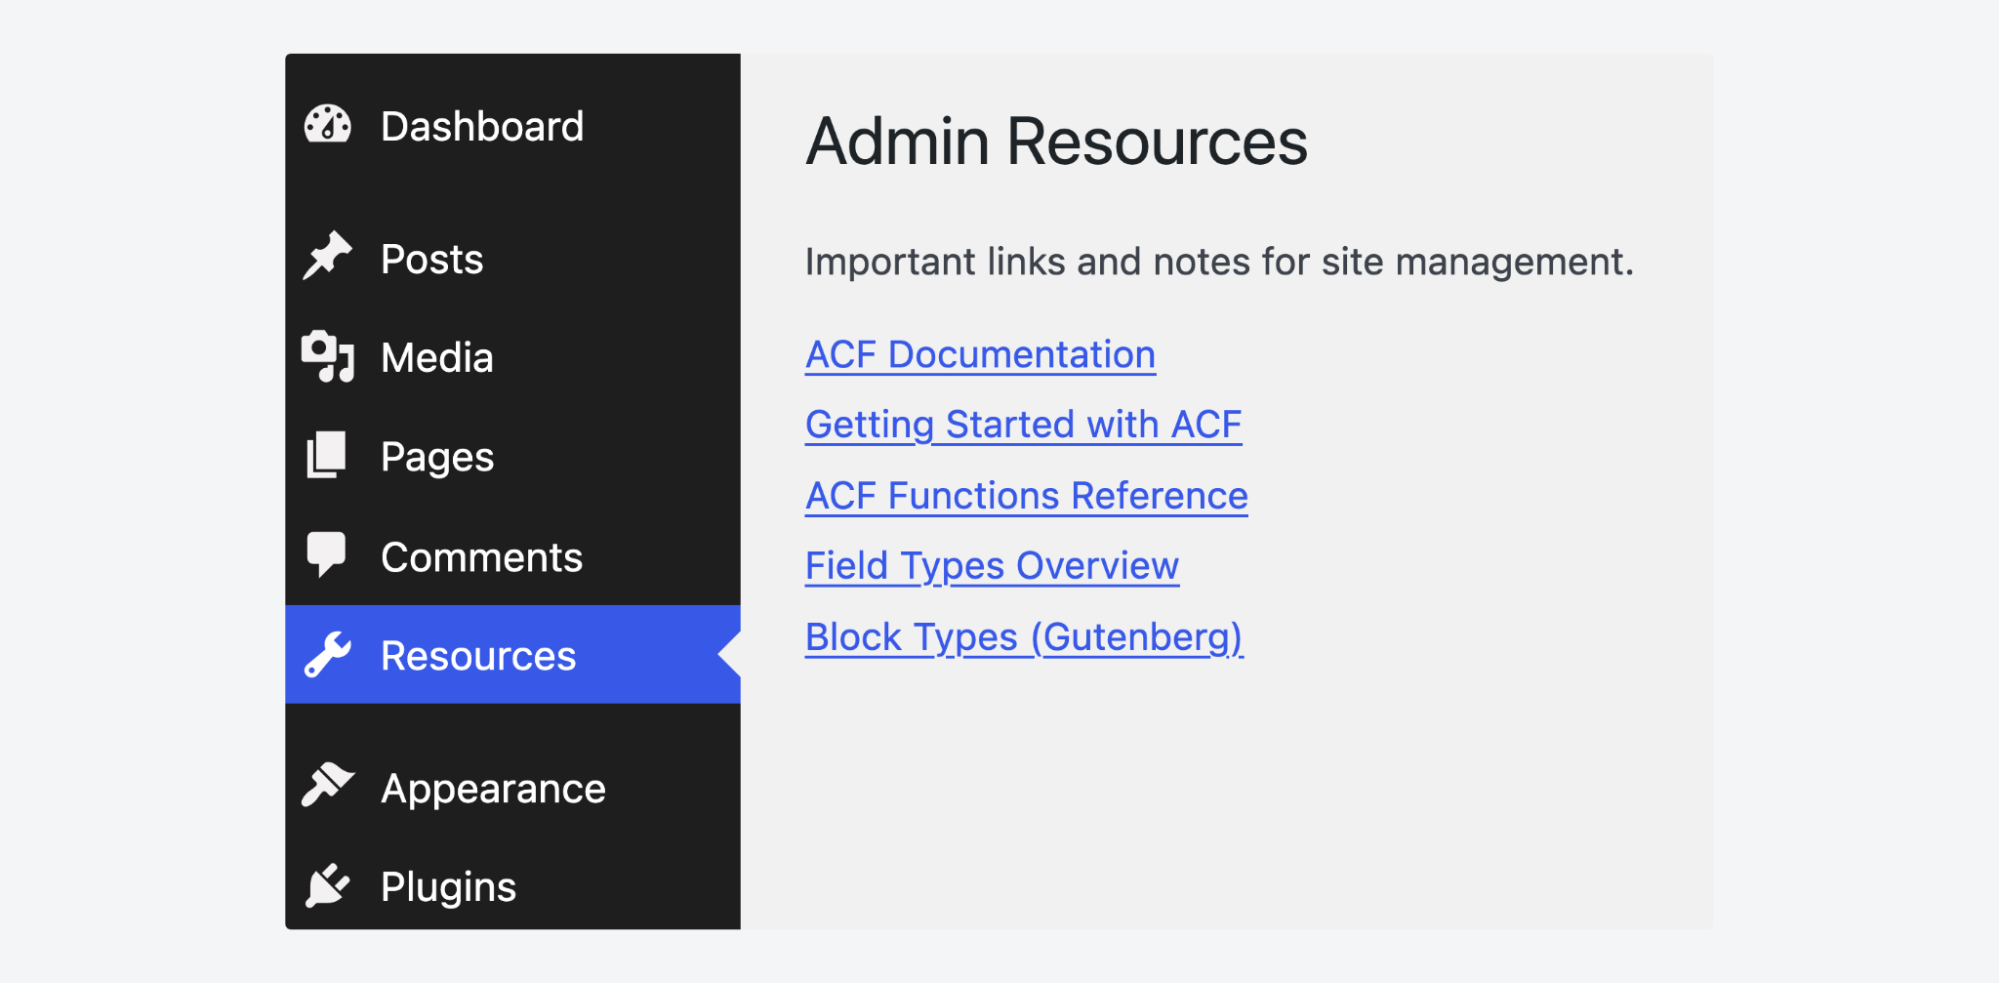
}- Save your file and check the WordPress admin dashboard. Here’s a menu that conveniently displays entries from the ACF docs:
Build custom menus for managing custom data with ACF’s Options Pages
An ACF Options Page, part of ACF PRO, is a custom admin menu page in WordPress that lets you create global site-wide settings and content fields that can be accessed from any template, separate from individual posts or pages. These pages centralize reusable content management, eliminating the need to update information across multiple locations.
Creating an Options Page for business information demonstrates this powerful functionality perfectly:
- Navigate to ACF > Options Pages in your WordPress dashboard.
- Click Add New to create your Options Page.
- Give it a name, and ACF will give it a corresponding unique menu slug. Add a parent if you’d prefer it to show up under an existing dashboard menu item.
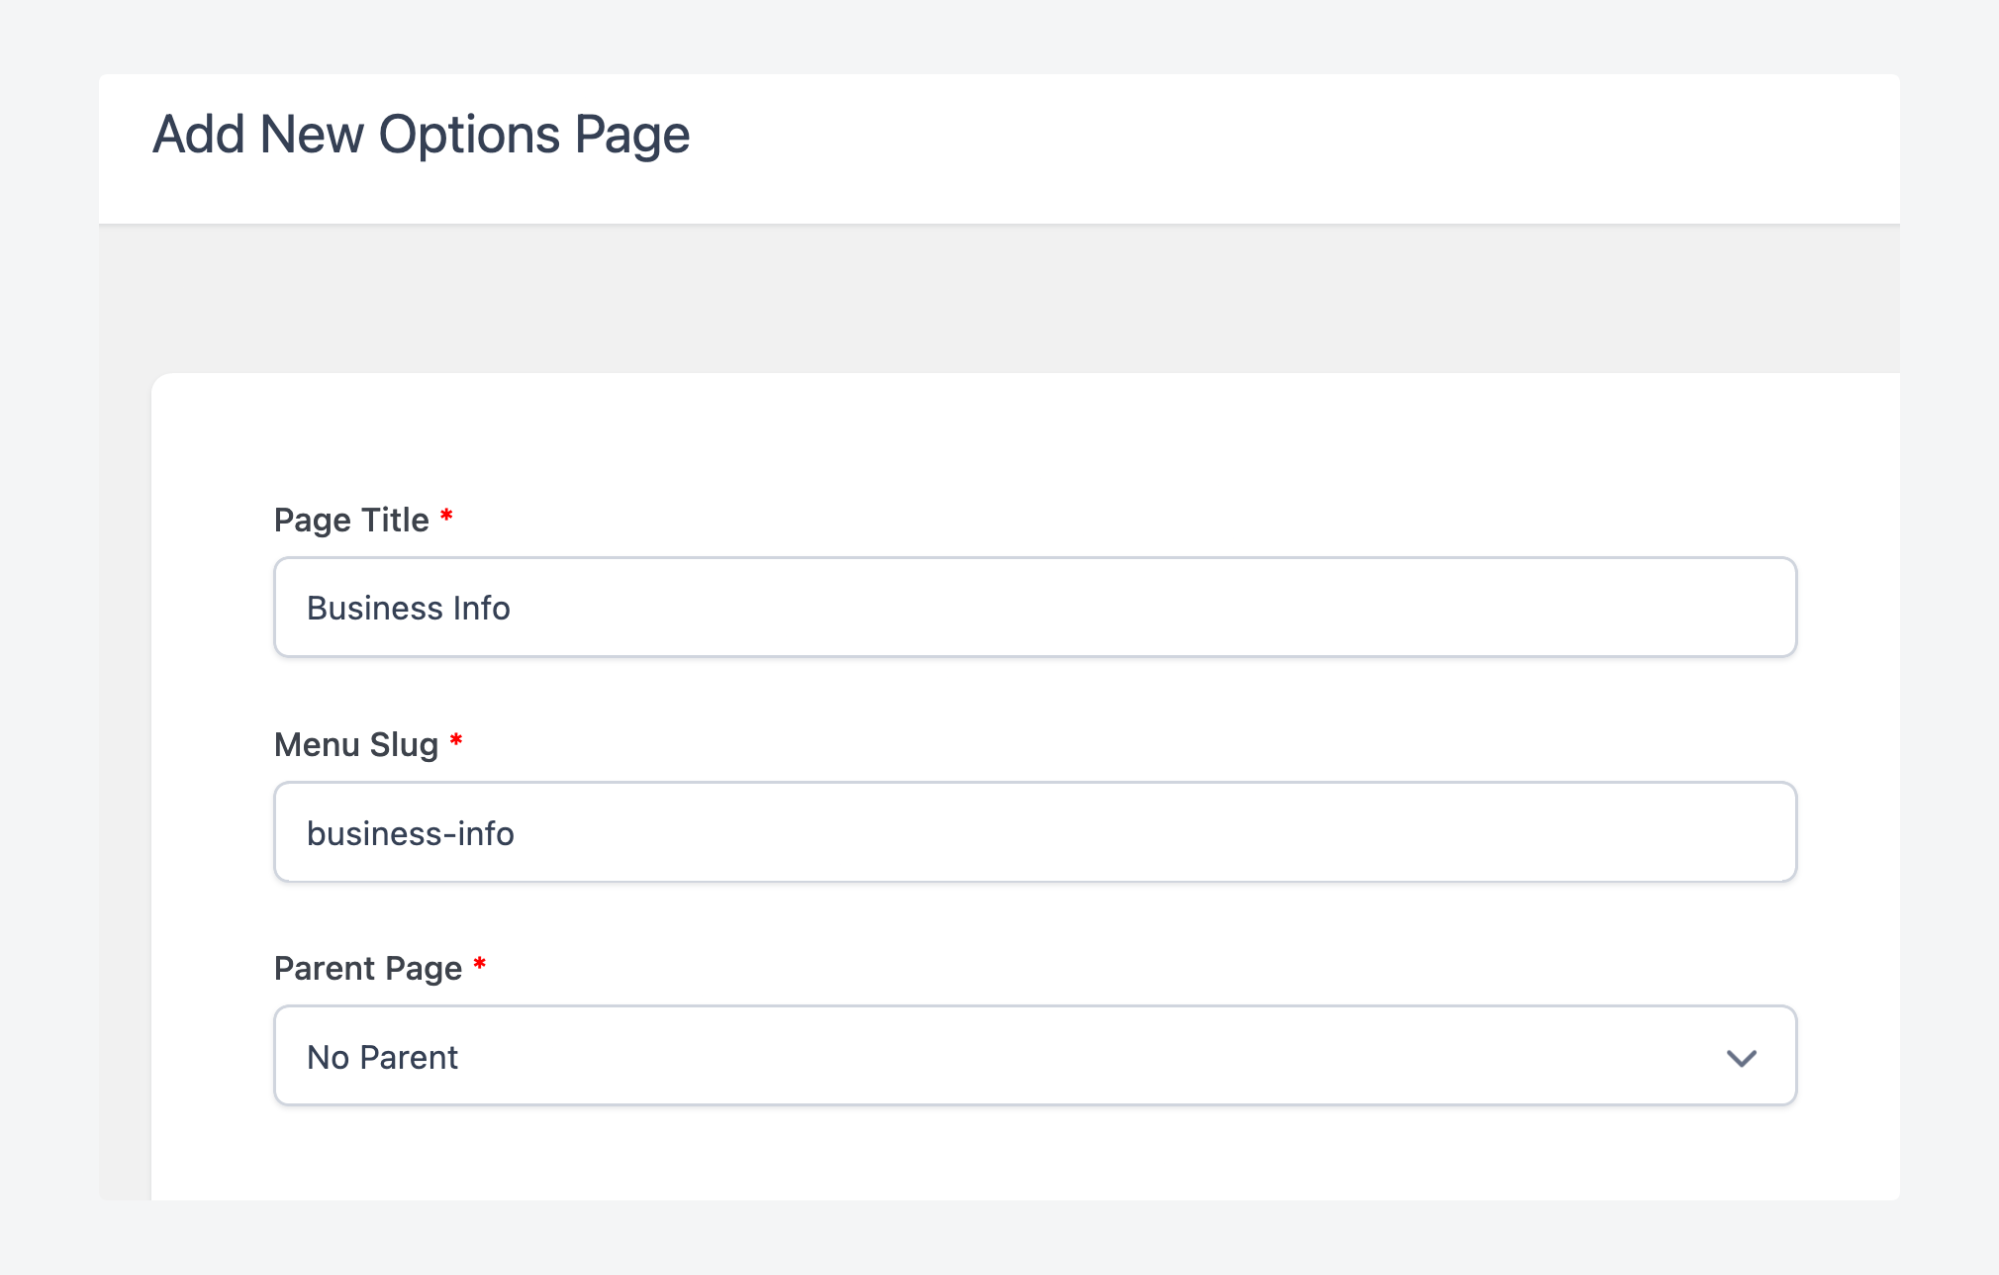
- Save the options page.
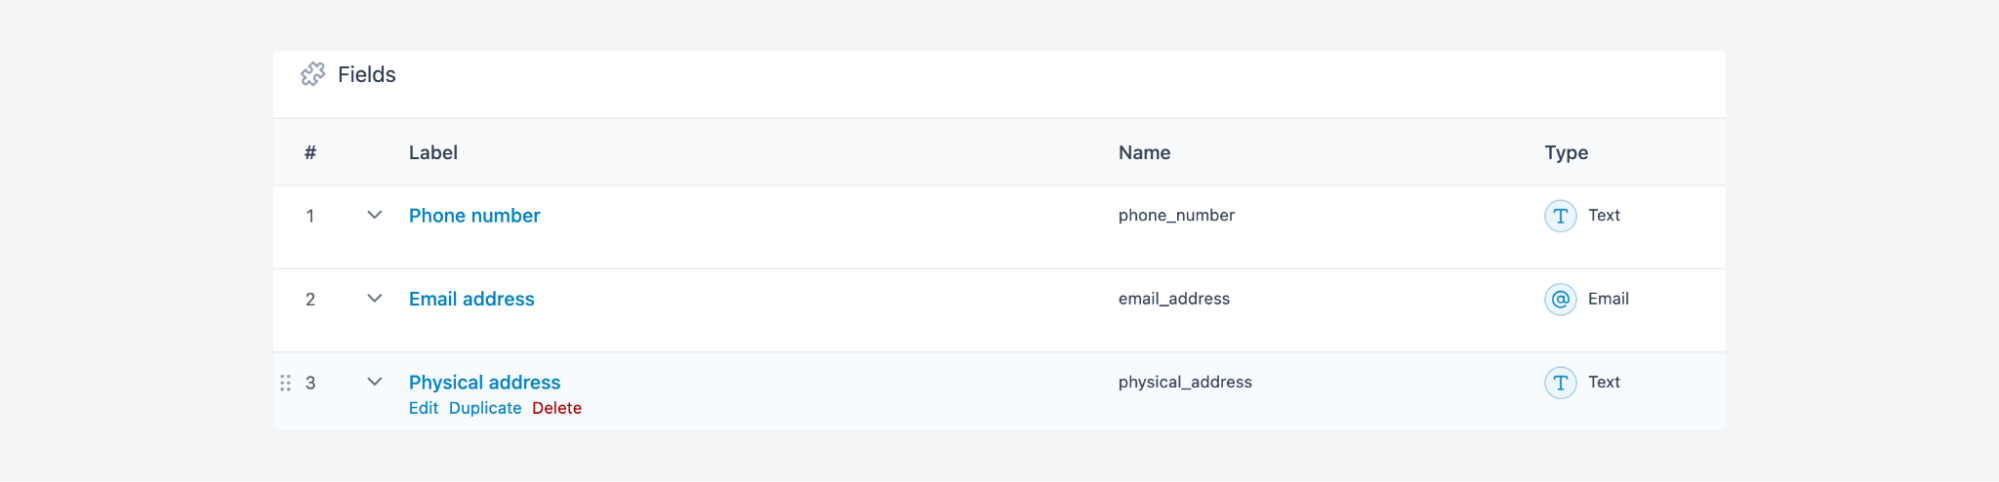
- Navigate to ACF > Field Groups and create a new field group.
- Add fields for phone number, email address, and physical address.
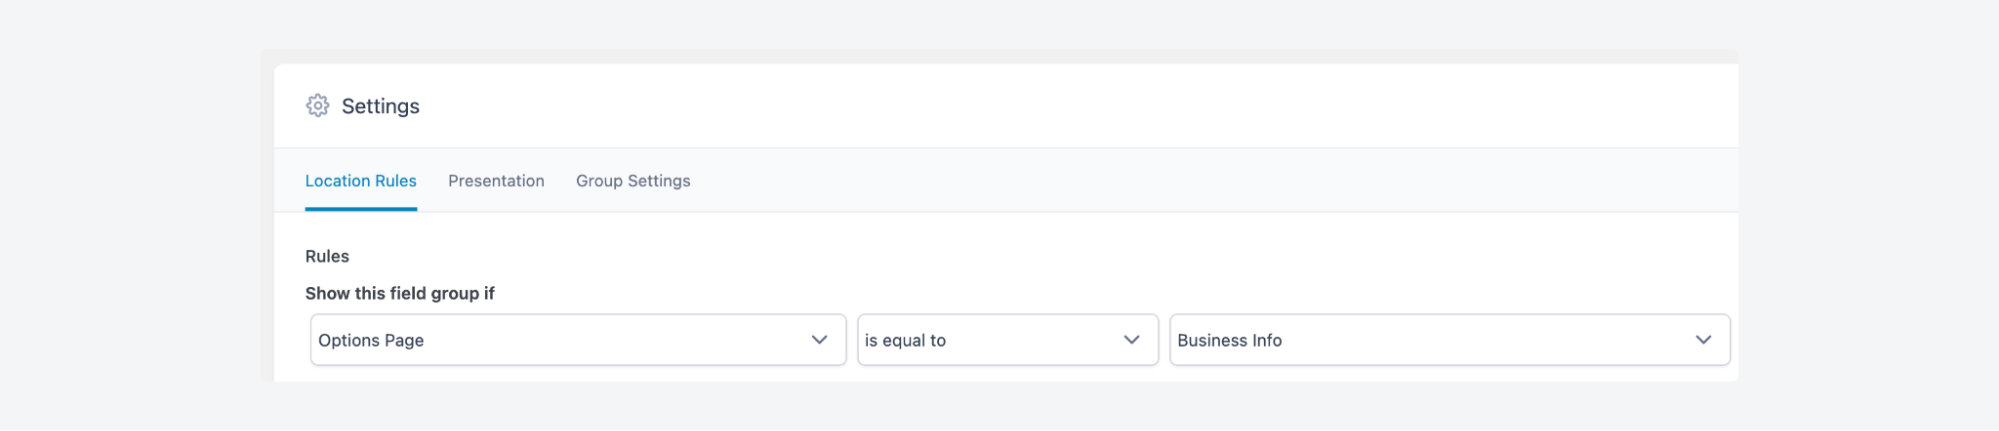
- Set the location rule to Options Page is equal to Business Information:
- Publish your field group.
Your new Business Info menu appears in the WordPress dashboard. Update these fields once, and the information becomes available globally across headers, footers, sidebars, and any template you’ve set it to display on.

Page builders like Elementor and Divi support this dynamic content natively, displaying your centralized business information without manual template editing.
Streamline your WordPress site’s user experience with custom menus and ACF
Custom menus transform basic navigation into professional user experiences that guide visitors exactly where they need to go. You can create them using WordPress’s built-in tools, specialized plugins, or custom code – choose the approach that matches your technical comfort level and project requirements.
Backend admin menus put essential tools directly at administrators’ fingertips, reducing clicks and improving workflow efficiency. ACF PRO’s Options Pages centralize reusable content like contact information, social media links, and company details. Global ACF fields ensure this data remains consistent across all your templates and pages.
The combination of custom menus and ACF creates scalable content management solutions that grow with your site’s needs. Take your WordPress menu development to the next level with ACF PRO’s advanced features.

For plugin support, please contact our support team directly, as comments aren't actively monitored.