
WordPress has many strengths, but out of the box it’s somewhat limited in the type of content you can store and how it displays. Enter custom post types. These significantly expand the flexibility and versatility of the platform, allowing you to create and manage content beyond the default post types.
With ACF, you can to register custom post types and custom taxonomies along with your custom fields, eliminating the need for a separate plugin. In some cases, though, you may want to generate CPTs without any plugins at all, such as when you’re developing custom plugins or themes. In this article, we’ll show you two different ways to create custom post types in WordPress without a plugin.
What are WordPress Custom Post Types?
WordPress comes with two main types of content: posts and pages. These are the post types (post types is a confusing name for content types) used most frequently, but default WordPress includes a few others:
- Attachments
- Revisions
- Navigation menus
- Custom CSS
- Changesets (revisions for the customizer)
These are sufficient for most purposes, but what happens if you want to build a WordPress site with different types of content?
That’s where the power of custom post types comes in. When you can make custom post types in WordPress without a plugin, you have the ability to create virtually any kind of content.
When Not to Use Custom Post Types
While custom post types expand your site or theme’s functionality, it comes at a cost. First, the weight and complexity of your site’s database increases with each new post type you add, all sharing the same table in the database. This can negatively impact performance as the table size grows. Second, having too many custom post types also adds needless complexity and confusion to your WordPress admin, not to mention a very large menu sidebar.
It’s agony to go through a client’s site, sift through different post types, and try to locate a specific piece of content that had no business being anything other than a regular post with a Post Format applied.
On that note, here are some rules of thumb you can use when deciding if you really need to create your own custom post types in WordPress.
- Would it work just as well as a Post Format? More than likely, you’re better off creating one of these instead.
- Could the content you’re developing utilize custom fields within the base post type? Advanced Custom Fields makes this incredibly easy with little need for coding and a virtually endless supply of customization and functionality.
- Are you using the standard post type at all? If you’re creating a site with very specific types of content, it may make sense to customize posts with Post Formats, taxonomies, and custom fields to fit your needs rather than needlessly multiplying post types.
- Are you trying to leverage WordPress custom post typesfor data that really should be in a custom table?
How to Code a WordPress Custom Post Type
The first way to create custom post types in WordPress without a plugin is to write them in PHP and make use of WordPress’s built-in functions and hooks. We’ll go over how to register a custom post type in WordPress, select a custom icon, and set the capability type.
Just like any change you make to your site, you should try it out in a local environment or on a staging site before rolling it into production.
The code for custom post types should be placed either in your theme’s functions.php file or in a custom plugin. If you’re going to place it in functions.php, we recommend creating a child theme first.
Step 1: Registering the custom post type
The first thing we need to do is define a function that will register the custom post type with WordPress using the register_post_type function.
The function name books_custom_post_type in the example code below is completely arbitrary and can be changed to anything you want. However, it’s good practice to follow some conventions when naming functions in WordPress:
- Use a prefix to avoid conflicts. In this case,
books_is used as a prefix. Something likemy_custom_post_typeis fine for practice, but try to use prefixes that give some indication of what the custom post type is for, e.g.,books_ormovies_. - Use a descriptive name related to what the function does. In this case,
custom_post_typeis a perfectly good description. - Avoid using reserved words or functions that are already defined in WordPress.
You can rename the function to anything you want, as long as it’s a valid PHP function name. For example, you could rename it to my_movie_post_type or register_movie_post_type.
Keep in mind that if you rename the function, you’ll need to update the add_action hook to match the new function name. For example:
add_action( 'init', 'my_movie_post_type' );
Below is some example code you can use to get started. We’re using a “Books” custom post type as an example, but it’s the same basic process for every custom post type.
// Register Custom Post Type
function books_custom_post_type() {

    $labels = array(
        'name'                  => _x( 'Books', 'Post Type General Name', 'text_domain' ),
        'singular_name'         => _x( 'Book', 'Post Type Singular Name', 'text_domain' ),
        // ...
    );
    $args = array(
        'label'                 => __( 'Book', 'text_domain' ),
        'description'           => __( 'Book Description', 'text_domain' ),
        'labels'                => $labels,
        'supports'              => array( 'title', 'editor' ),
        'hierarchical'          => false,
        'public'                => true,
        'show_ui'               => true,
        'show_in_menu'          => true,
        'menu_position'         => 5,
        'show_in_admin_bar'     => true,
        'show_in_nav_menus'     => true,
        'can_export'            => true,
        'has_archive'           => true,
        'exclude_from_search'   => false,
        'publicly_queryable'    => true,
        'capability_type'       => 'post',
        'menu_icon'       => 'dashicons-admin-post',
    );
    register_post_type( 'movie', $args );

}
add_action( 'init', 'demo_custom_post_type' );
Step 2: Adding a custom icon to the custom post type
To add a custom icon to our custom post type, we’ll need to modify the menu_icon argument in our books_custom_post_type function. Currently, it uses the same pin icon used for ordinary WordPress posts.
Dashicons are a set of icons that are included with WordPress. You can find a list of available Dashicons on the WordPress Codex.
Alternatively, you can use an image from your WordPress site’s Media Library. To do this, you’ll need to upload the image to your Media Library and then use the image URL in the menu_icon argument.
After modifying themenu_icon argument in our example code above, we end up with this:
'menu_icon' => 'dashicons-book',
Step 3: Setting a custom capability type
To set a custom capability type for our custom post type, we’ll need to modify the capability_type argument in our books_custom_post_type function.
Capability types are used to determine the permissions and roles associated with a custom post type. The default capability type is post, which means that the custom post type will inherit the same permissions and roles as the default WordPress post type. This works for most cases, and it’s what we’ll use for our “Books” custom post type. However, you can also choose page, which inherits permissions and roles from the default WordPress page type, and attachment, which can be used for attachments such as images and files.
Creating Custom Post Types with GenerateWP
The process of creating custom post types in WordPress without a plugin gets easier the more you do it, but it never becomes less tedious. There’s a reason plugins are a popular choice for creating custom post types. Using ACF, you can not only create custom post types in seconds, but use custom taxonomies, and integrate any number of the more than 30 custom fields found in the plugin.
However, if you really don’t want to use a plugin to create custom post types, but you still want to avoid the tedium of manual coding there’s a tool that makes it easier to create your custom post types (without a plugin). It’s called GenerateWP.
With GenerateWP, you’re provided a step-by-step wizard that helps you craft all the specifications of your CPT:
GenerateWP gives us 9 tabs we can use to adjust our new CPT. We’ll discuss some of these tabs in detail below.
- General
- Post Type
- Labels
- Options
- Visibility
- Query
- Permalinks
- Capabilities
- Rest API
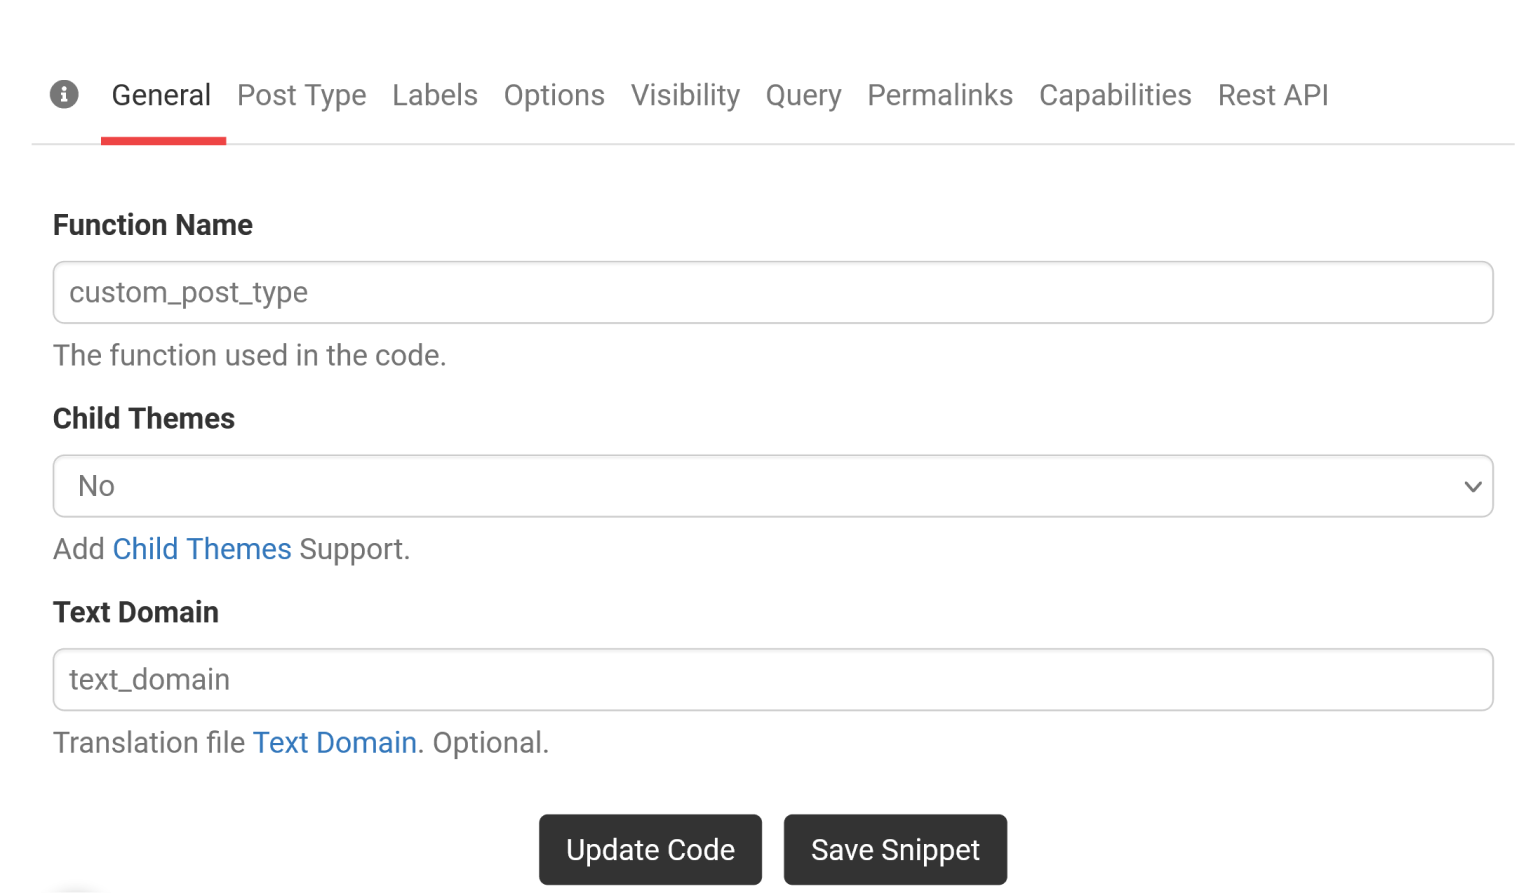
General Tab
The “General” tab is displayed above, and allows you to input the function name, whether it supports child themes, and whether to include a text domain for translation. For the function name, input whatever you’d like to call it, followed by _post_type.
Post Type Tab
In the “Post Type” tab, you can set the “Post Type Key”, provide a description, and set the singular and plural names for the post type. You can also link to taxonomies on this tab.
![]()
Integrating Custom Taxonomies
Taxonomies are a great way to help categorize and organize content—particularly when we’re dealing with CPTs. As you can see, the function for creating your own taxonomy is similar to that of a new CPT:
// Register Custom Taxonomy
function hfm_custom_taxonomy() {

    $labels = array(
        'name'                       => _x( 'Taxonomies', 'Taxonomy General Name', 'text_domain' ),
        'singular_name'              => _x( 'Taxonomy', 'Taxonomy Singular Name', 'text_domain' ),
        'menu_name'                  => __( 'Taxonomy', 'text_domain' ),
        'all_items'                  => __( 'All Items', 'text_domain' ),
        'parent_item'                => __( 'Parent Item', 'text_domain' ),
        'parent_item_colon'          => __( 'Parent Item:', 'text_domain' ),
        'new_item_name'              => __( 'New Item Name', 'text_domain' ),
        'add_new_item'               => __( 'Add New Item', 'text_domain' ),
        'edit_item'                  => __( 'Edit Item', 'text_domain' ),
        'update_item'                => __( 'Update Item', 'text_domain' ),
        'view_item'                  => __( 'View Item', 'text_domain' ),
        'separate_items_with_commas' => __( 'Separate items with commas', 'text_domain' ),
        'add_or_remove_items'        => __( 'Add or remove items', 'text_domain' ),
        'choose_from_most_used'      => __( 'Choose from the most used', 'text_domain' ),
        'popular_items'              => __( 'Popular Items', 'text_domain' ),
        'search_items'               => __( 'Search Items', 'text_domain' ),
        'not_found'                  => __( 'Not Found', 'text_domain' ),
        'no_terms'                   => __( 'No items', 'text_domain' ),
        'items_list'                 => __( 'Items list', 'text_domain' ),
        'items_list_navigation'      => __( 'Items list navigation', 'text_domain' ),
    );
    $args = array(
        'labels'                     => $labels,
        'hierarchical'               => false,
        'public'                     => true,
        'show_ui'                    => true,
        'show_admin_column'          => true,
        'show_in_nav_menus'          => true,
        'show_tagcloud'              => true,
    );
    register_taxonomy( 'taxonomy', array( 'post' ), $args );

}
add_action( 'init', 'custom_taxonomy', 0 );
By default, GenerateWP will give your CPT the same categories and tags as the base post type of WordPress. However, in many cases, you won’t want to share taxonomies with posts, and you’ll want new taxonomies specific to your CPT. The field in the “Post Type” tab allows you to link to a taxonomy, but it won’t create one. You can create a new taxonomy using the function shown above, but this can be somewhat time consuming. To save time, you can use GenerateWP’s taxonomy tool instead.
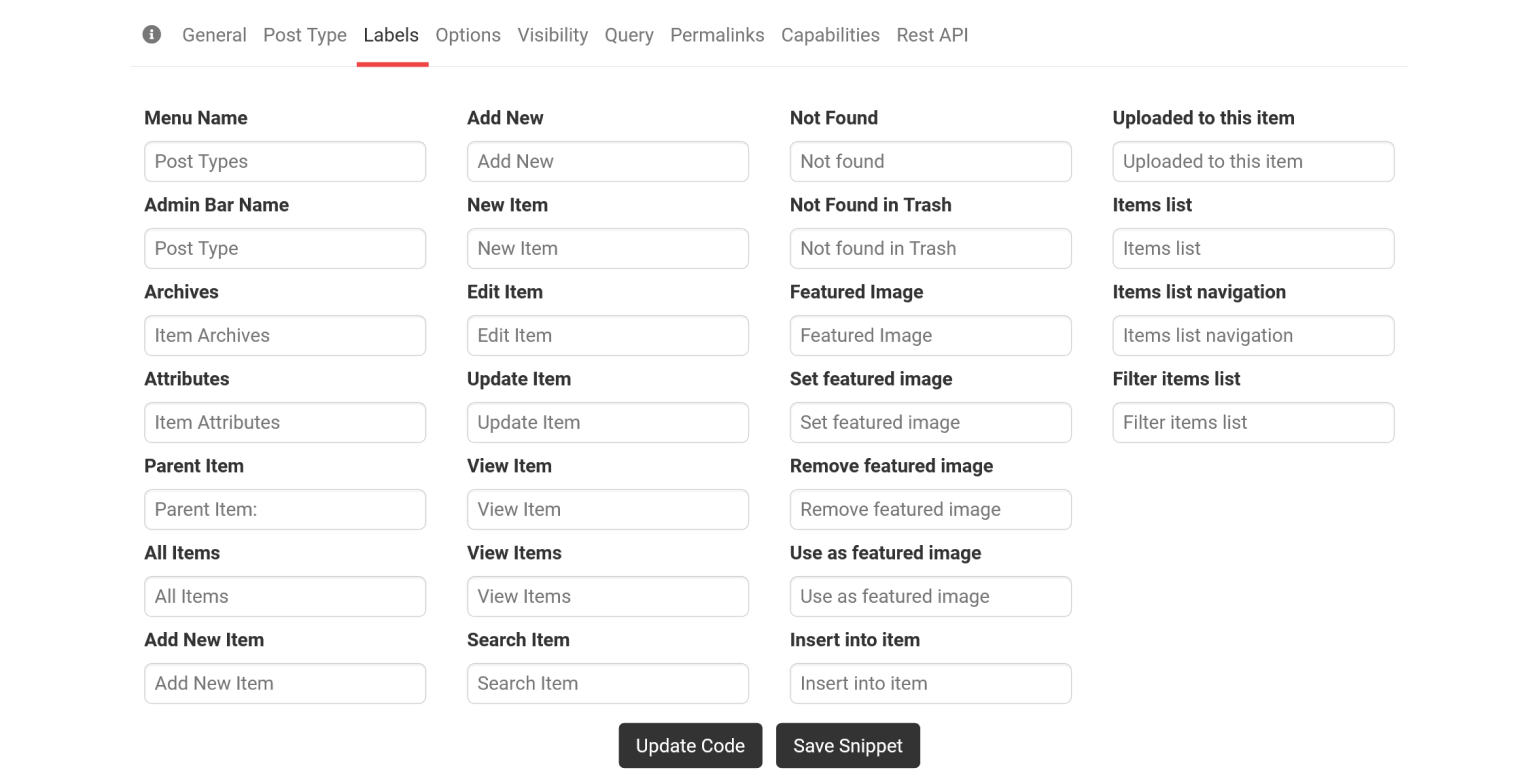
Labels Tab
This tab allows you to create an array that defines the labels for your new CPT. The CPT will inherit default labels for ones you don’t include.
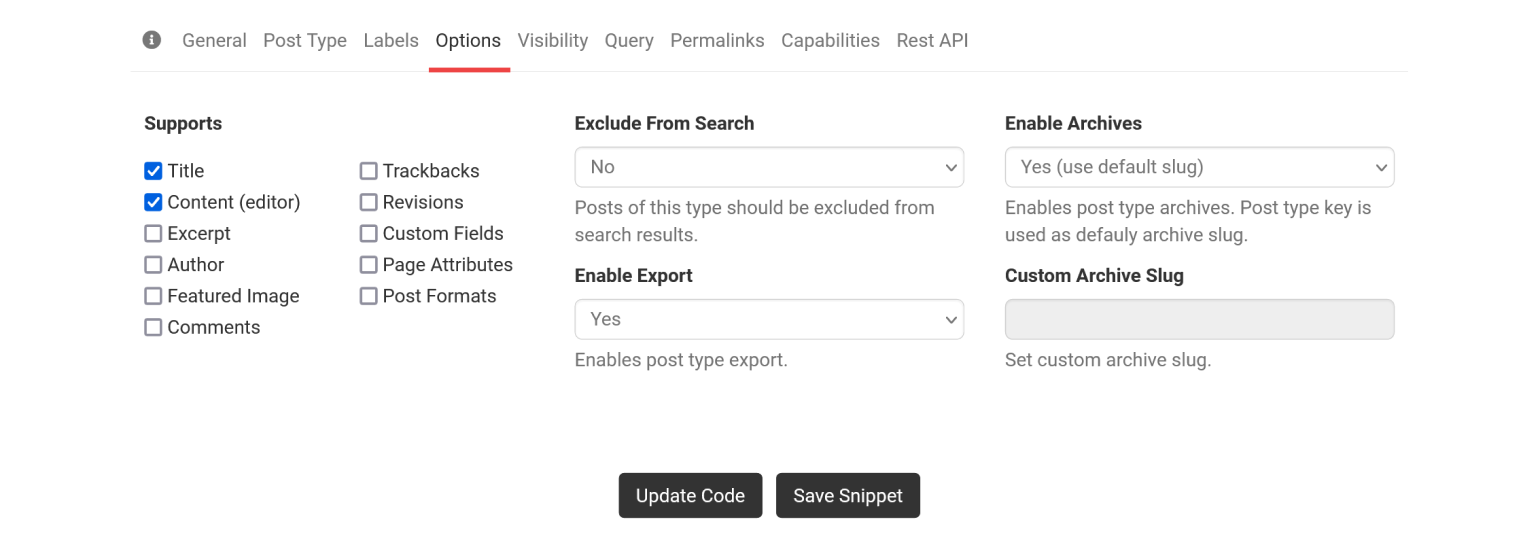
Options Tab
The “Options” tab is where you indicate which elements of your new CPT are editable. “Title” and “Content (editor)” are selected by default, but you can toggle these off if you have a reason to create a CPT where the title and content cannot be changed.
This tab also gives you options related to searchability, exporting, and archives.
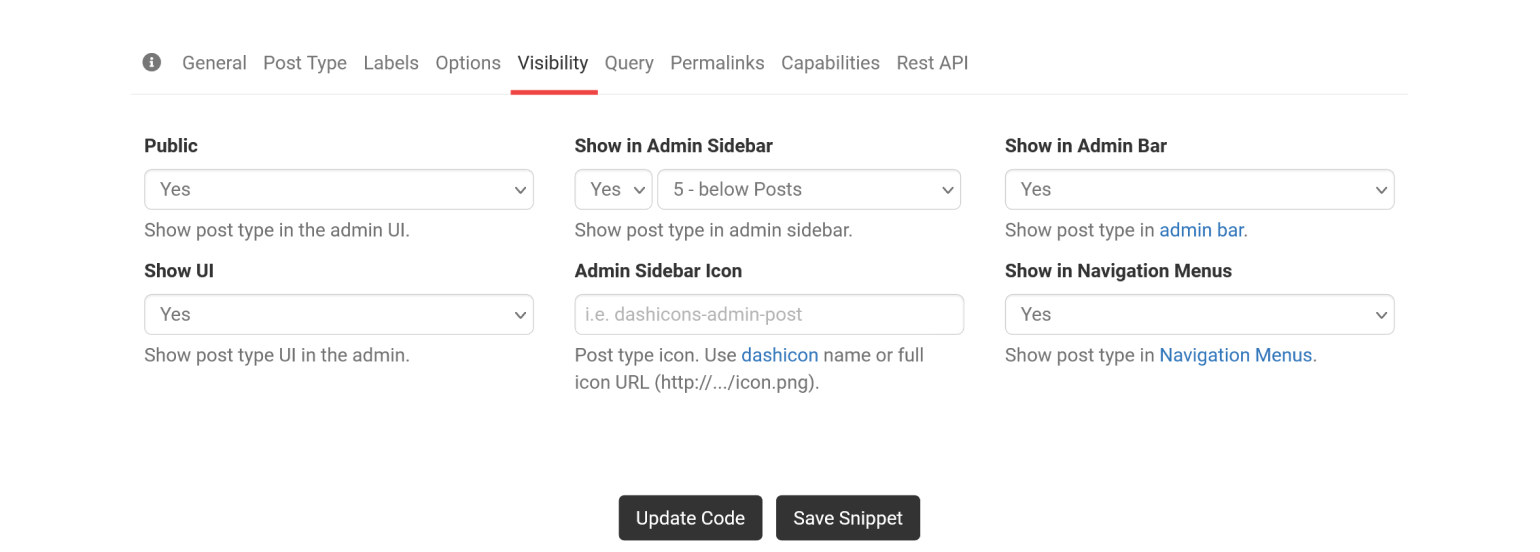
Visibility Tab
This has nothing to do with whether or not your CPT is visible on the frontend, and everything to do with how it displays in your WordPress navigation and admin menus. You can set these options here, including whether or not the CPT has its own icon as a menu item.
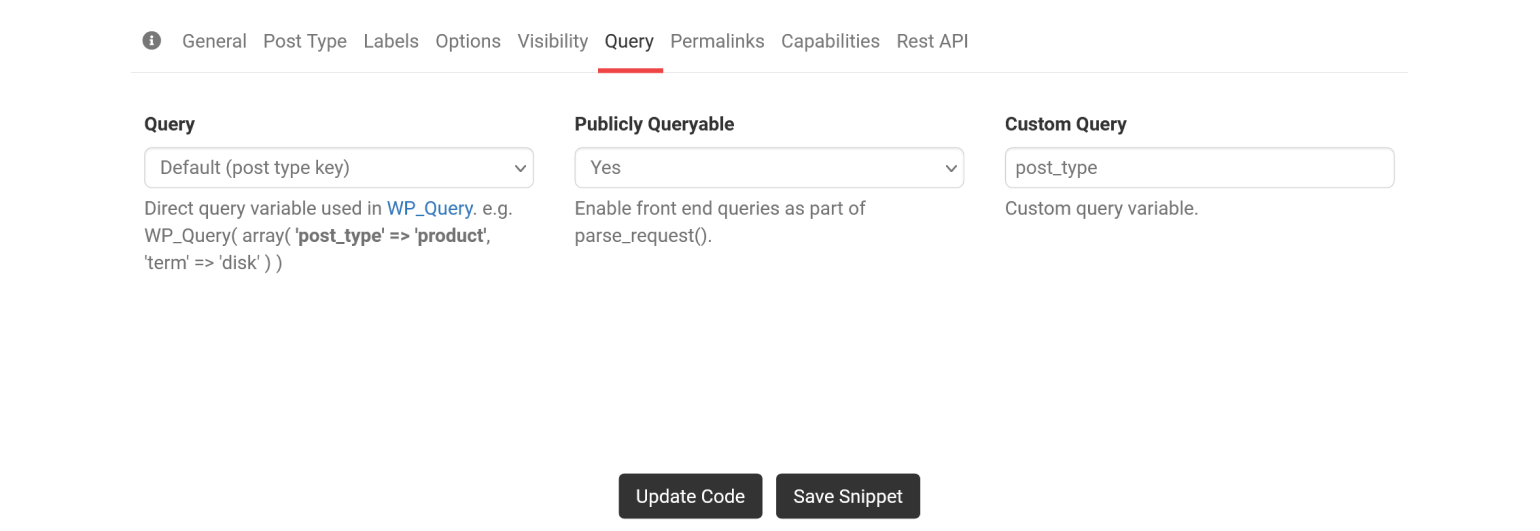
Query Tab
This tab allows you to configure how your new CPT interacts with WP_Query, a PHP class that WordPress primarily uses to pull posts from the database. For a thorough explanation of how WP_Query works, check out this WP Engine article.
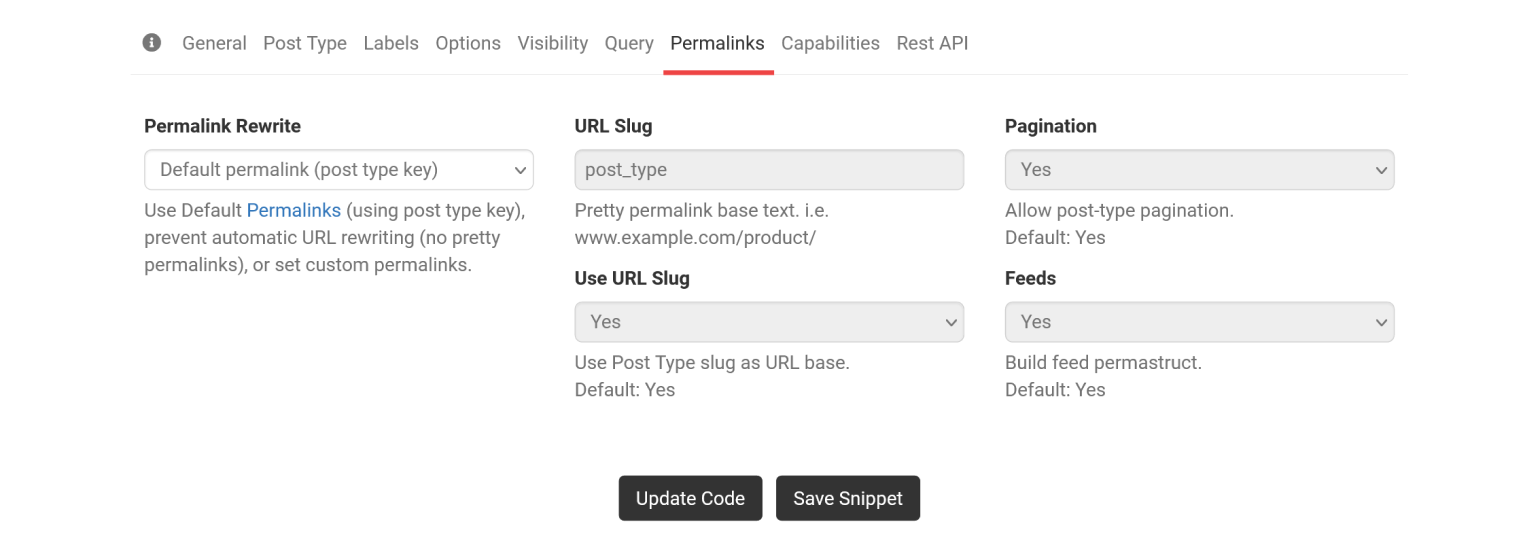
Permalinks Tab
While you can change permalink settings in your WordPress admin, those changes only apply to blog posts. WordPress uses the default permalink structure for both custom post types and custom taxonomies.
This tab in GenerateWP allows you to alter the permalink settings for your new CPT. The “Permalink Rewrite” dropdown gives you three options:
- Default permalink, which uses the post type key.
- No permalink, which prevents URL rewriting.
- Custom permalink, which activates the other options shown here.
You can typically leave permalink settings alone when creating a new CPT. Make sure you have a good reason before altering any of these settings.
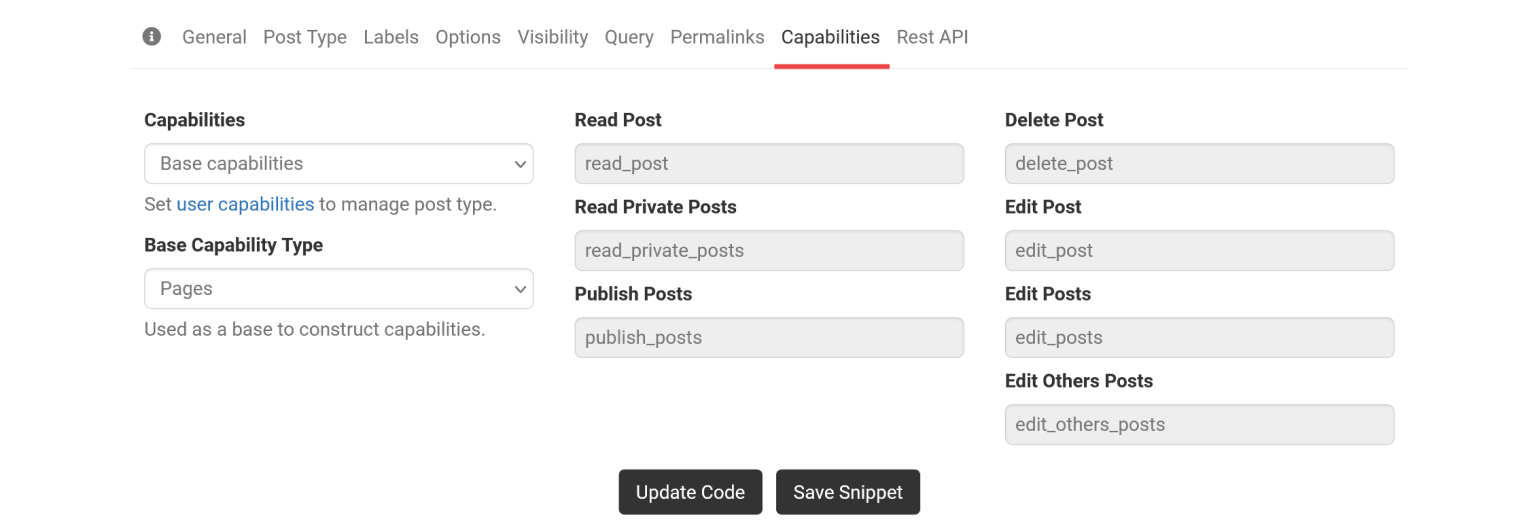
Capabilities Tab
This doesn’t have anything to do with the capabilities of your CPT. Rather, it allows you to set capabilities by Role. Changing Base capabilities to Custom capabilities unlocks the rest of the options, giving you the ability to fine tune what can be changed by which person.
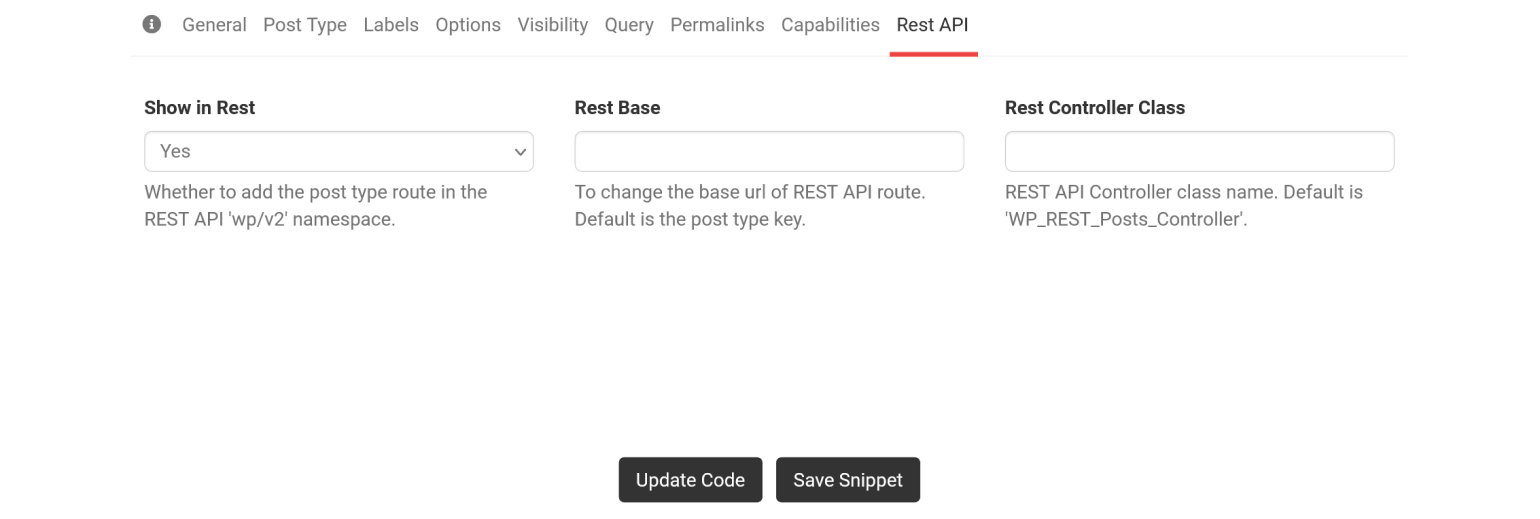
REST API Tab
This tab allows you to decide if the new CPT will be accessible via the REST API. In addition, you can change the base URL and the controller class name.
CPTs and custom taxonomies can use the same controllers as your default post types and taxonomies. However, it is possible to use your own controllers and namespace instead. Before changing any of these settings, it’s important to note that using the default controllers increases the chances of third-party compatibility. You’ll need to make sure to enable your CPT in the REST API if you want to use the Block Editor to edit content for your CPT.
Once you’ve configured all the settings for your custom post type, click Update Code and GenerateWP will format the code so you can simply copy and paste it directly into your theme or plugin. You can also click Save Snippet and give your new CPT code a title and description. Premium users can also mark the snippet “Private.”
Add in Custom Fields
If you’re going through the trouble of creating a custom post type and taxonomies, more than likely you also want to add custom fields not afforded by a standard post.
While GenerateWP offers a paid service for creating meta boxes meant for enabling custom fields for your CPT, we have another way.
Building custom meta fields is one of the most time consuming parts of creating custom themes. This is especially true if you want any type of drag and drop functionality available to the client or end user.
This is a case where a plugin is a no-brainer. Specifically, Advanced Custom Fields.
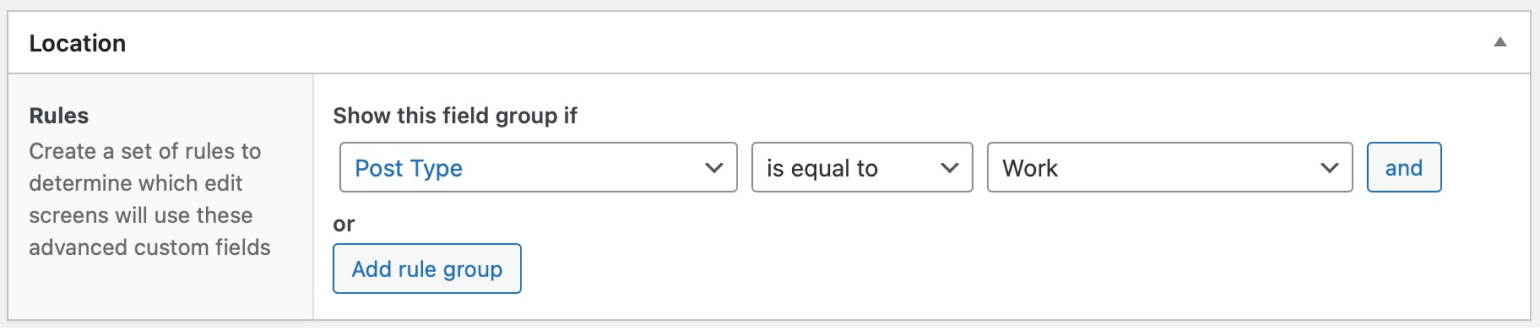
I won’t dive into a complete tutorial of the full capabilities of ACF here, but you can check out our Getting Started guide and field group doc for more information. Once your custom post type has been registered in ACF, you can simply select it from a dropdown to incorporate virtually any field type in your new CPT:
Conclusion
We know that there’s a lot of complexity involved in custom WordPress development—particularly when it comes to custom post types and managing their relationships. Our hope is that the tools and methods mentioned in this article will seriously reduce the time and complexity required to build your own WordPress themes and plugins.

For plugin support, please contact our support team directly, as comments aren't actively monitored.