
Key points:
- Custom post types often need specialized taxonomies beyond WordPress’ default categories and tags for effective content organization.
- Advanced Custom Fields (ACF®) provides a visual interface for both creating custom taxonomies and connecting them to your custom post types.
- Multiple taxonomies can be connected to a single post type – for example, Products can have Brand, Size, and Material taxonomies simultaneously.
- Custom fields enhance taxonomy terms with additional data, enabling advanced filtering and organization of your custom post type content.
- Common setup issues (like missing taxonomy-post type connections or permalink problems) are easily fixed through proper configuration.
If you’ve ever built a WordPress site that’s not a basic blog, you’ve probably hit that moment where categories and tags just aren’t enough anymore.
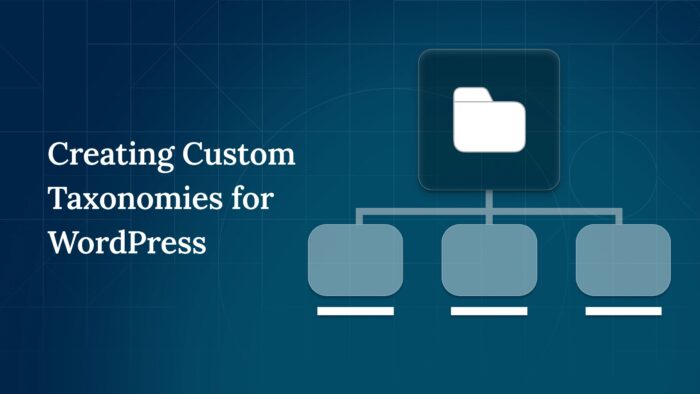
Custom taxonomies can help organize and filter custom content types.
Think of a recipe website with cuisine types and cooking methods, or a real estate site with property features and neighborhoods. These custom grouping systems make content easier to find and more meaningful.
When connected to custom post types, custom taxonomies can help you unlock new levels of scalable content organization.
We’re going to walk you through the complete process of building custom taxonomies and connecting them to custom post types, all using Advanced Custom Fields (ACF®). We’ll also cover enhancing taxonomies with custom fields for maximum flexibility.
Custom taxonomies and their relationship with custom post types
Custom taxonomies work hand-in-hand with custom post types (CPTs) to create organized, filterable content. While CPTs define the content structure, taxonomies provide the classification system.
For any visual learners out there, you can imagine CPTs as containers and taxonomies as labels that help sort those containers.
The relationship between post types and taxonomies is flexible by design. A single taxonomy can be used across different post types when it makes sense. For example, a “Location” taxonomy might apply to both “Events” and “Team Members” post types, creating natural connections in your content.
If you take a look at some successful WordPress sites, you’ll understand just how effective these combinations can be. Here are some examples:
- An online course platform like Coursera might use a “Courses” post type organized by “Subject,” “Language”, and “Difficulty Level” taxonomies.

- A digital music site, such as Spotify, would use “Albums” and “Singles” post types, both using “Artist” or “Genre” taxonomies.

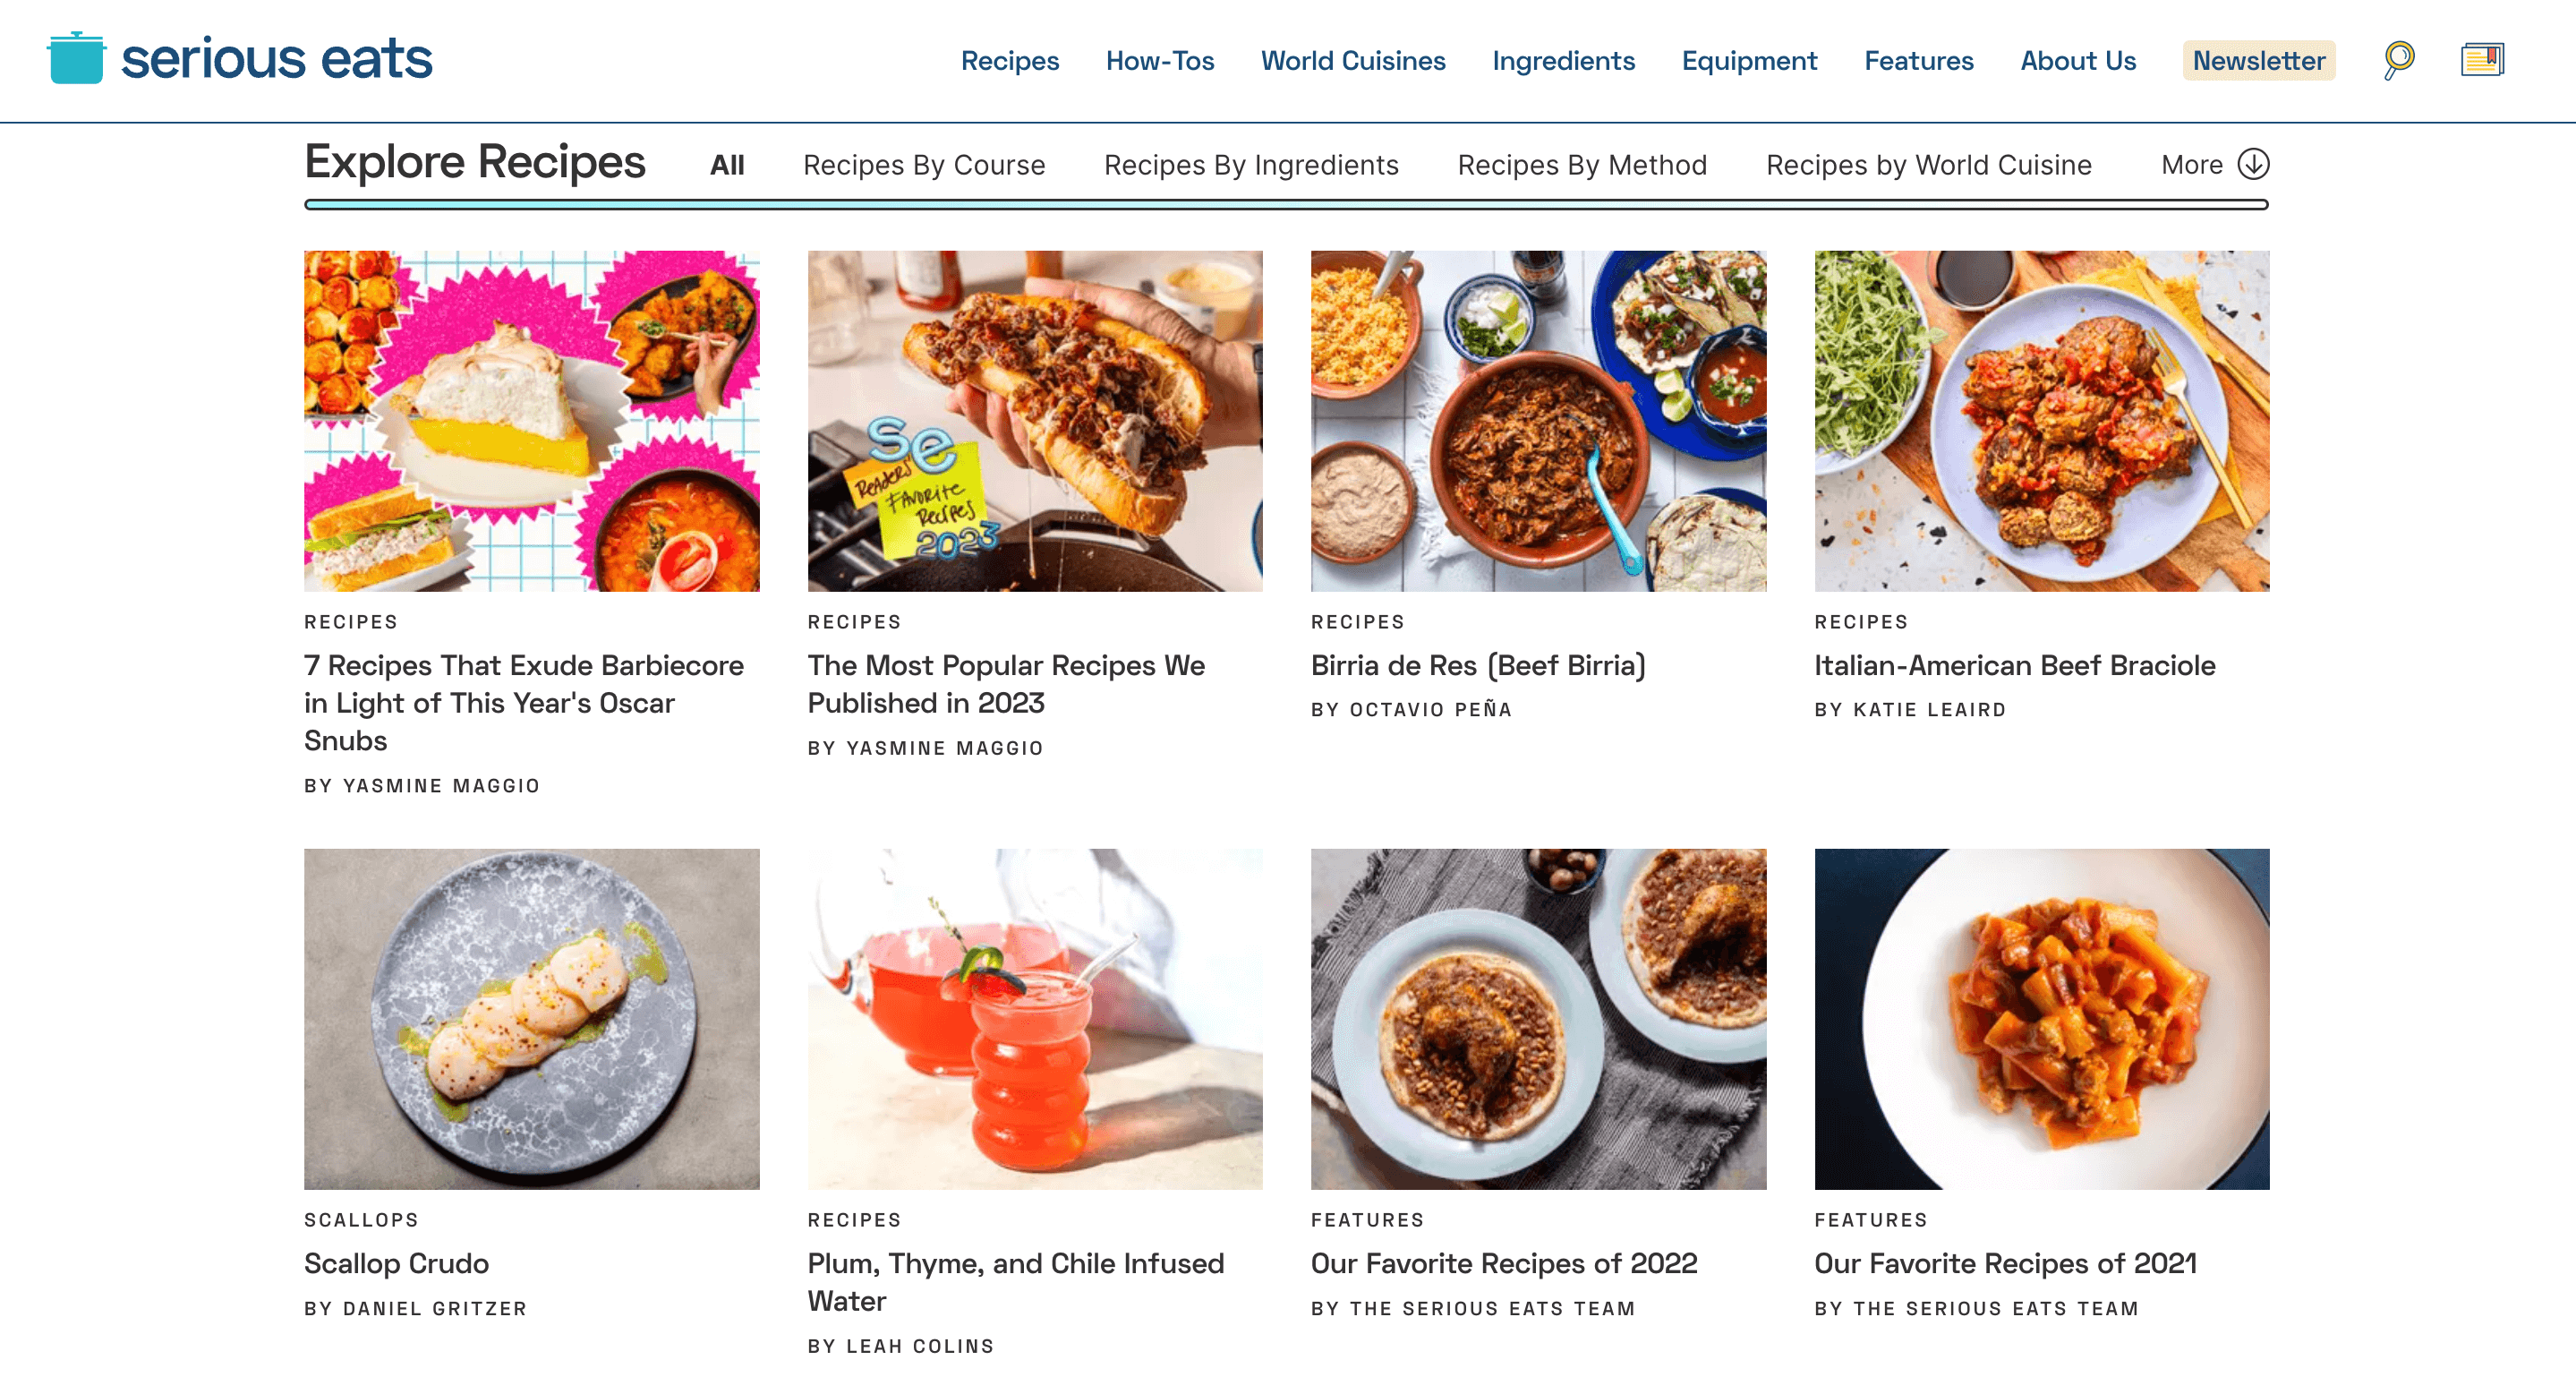
- A cooking blog like Serious Eats, on the other hand, would use “Recipes” sorted by “Ingredients,” “Method,” and “Dietary Needs” taxonomies.
When planning your site structure, consider how users will want to browse or filter content. Good taxonomies create intuitive navigation paths and powerful filtering options that make your WordPress site feel professionally organized without overcomplicating things.
For a deeper dive into how custom post types can relate to each other (not just to taxonomies), check out Mastering Advanced Custom Post Type Relationships in WordPress.
How to connect a custom taxonomy to custom post types in WordPress
WordPress taxonomies need to be registered before they can be used with any post type. While this traditionally requires writing custom PHP code, ACF provides a more straightforward approach that works great for most projects.
Before creating taxonomies, make sure you have your custom post type ready to go. If you haven’t created a custom post type yet, check out this video guide:
Once your custom post type is set up, you can create and connect taxonomies following these steps with ACF:
1. In your WordPress dashboard, go to ACF > Taxonomies > Add New.
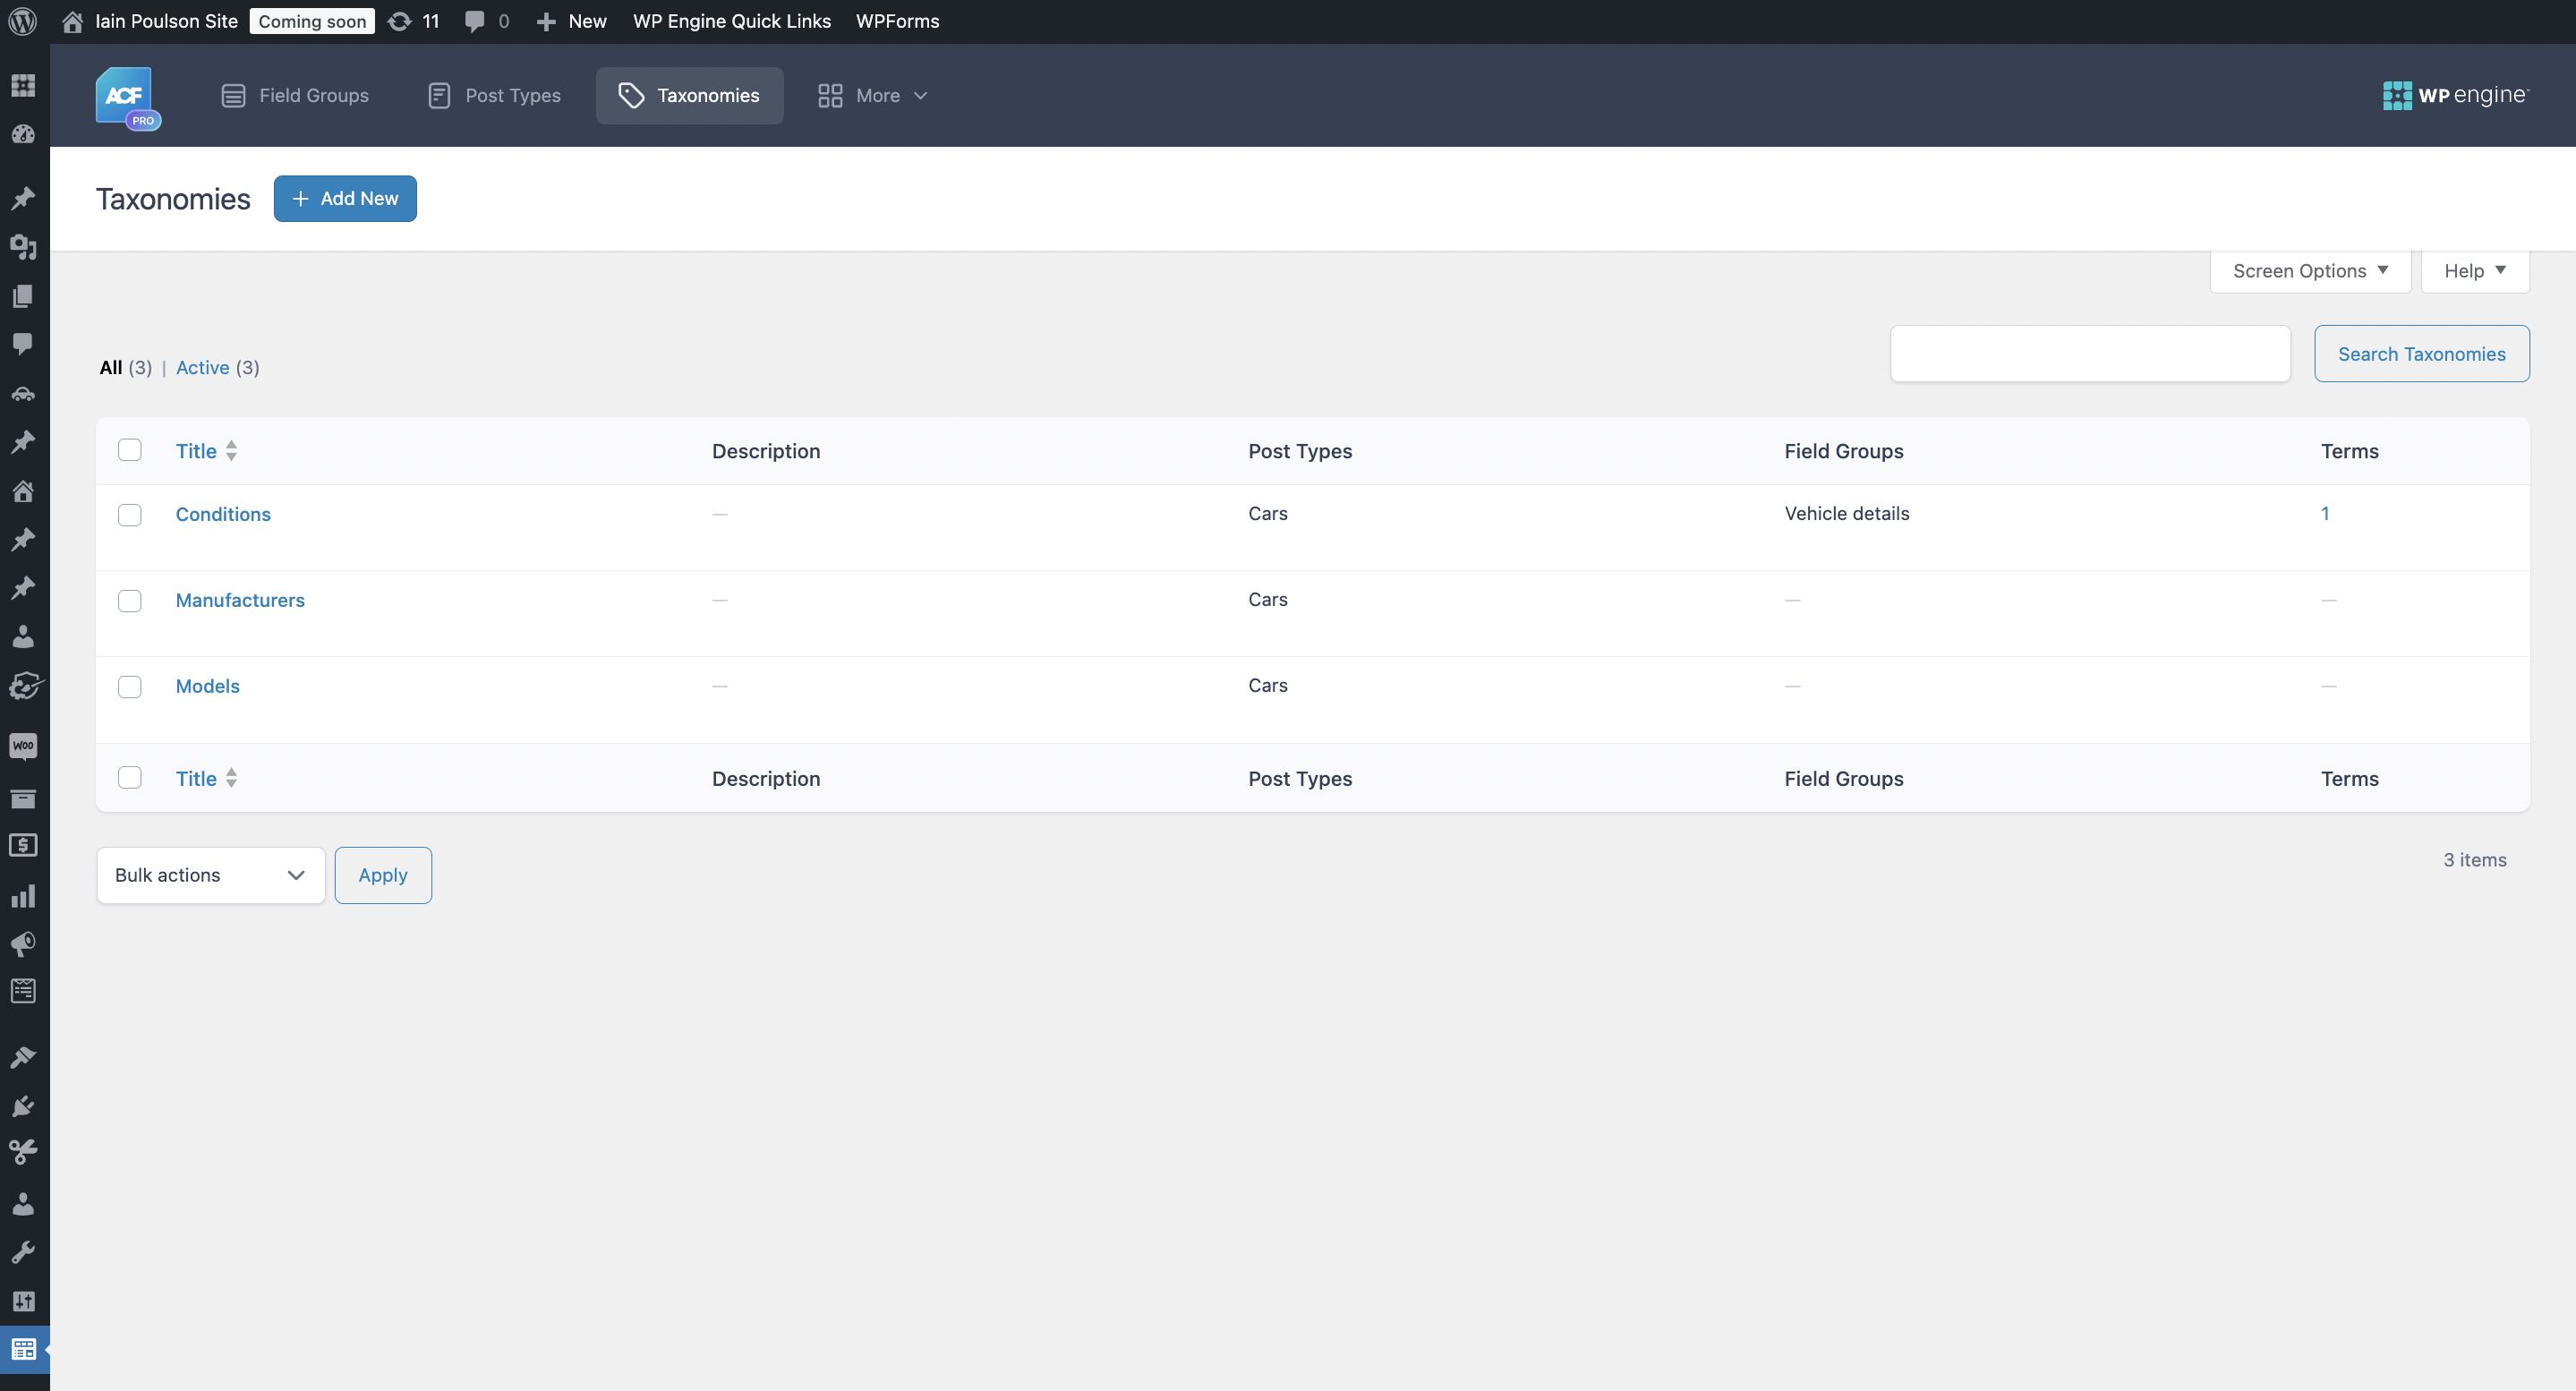
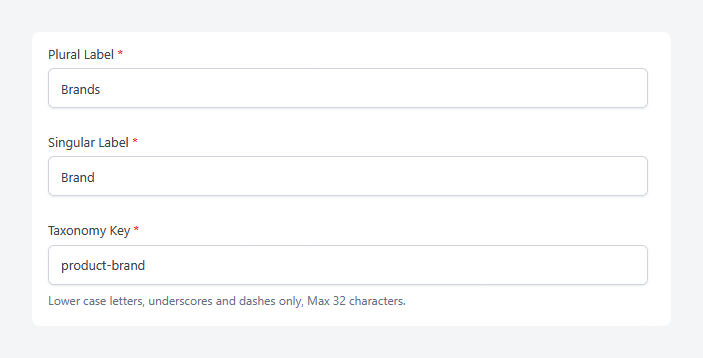
2. Enter your taxonomy details. For our example, let’s create a “Brand” taxonomy for an eCommerce product catalog:
- Singular Name: Brand
- Plural Name: Brands
- Taxonomy Key: product-brand
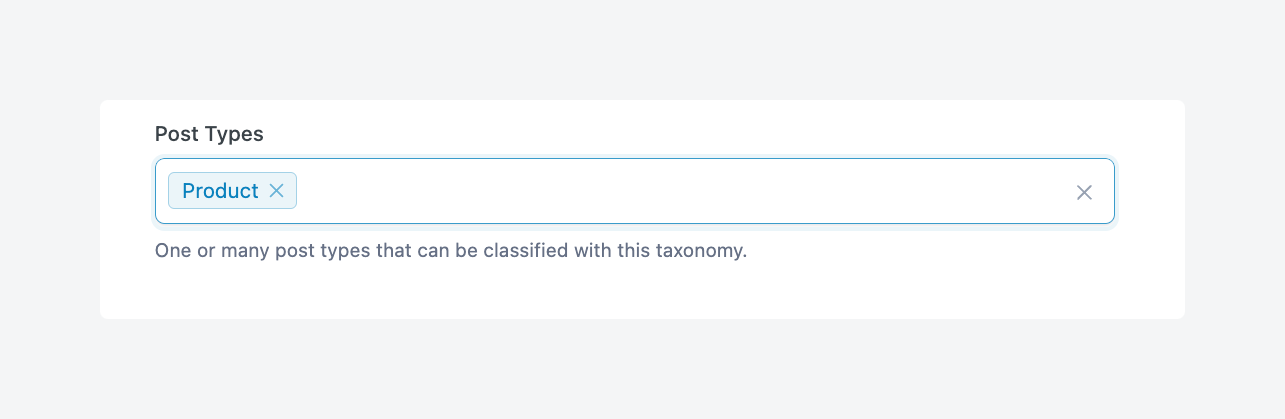
3. Connect to your custom post type. In the Post Type assignment section, select the custom post types that should use this taxonomy. For our eCommerce example, we’ll select the “Product” custom post type.
What makes this powerful is that you can add multiple custom taxonomies to a single custom post type. A “Product” custom post type might have taxonomies for:
- Brands
- Categories
- Sizes
- Colors
- Materials
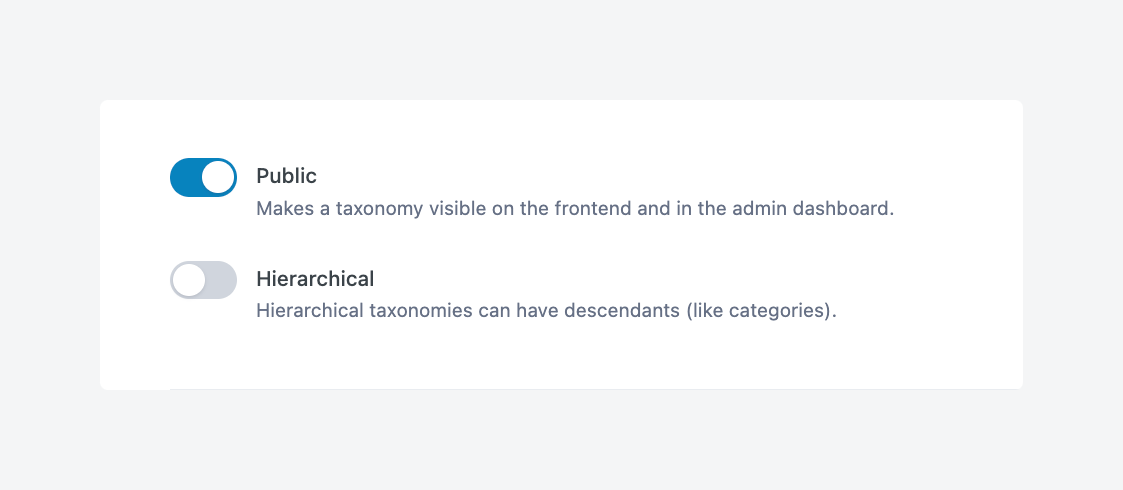
4. Decide whether your taxonomy should be hierarchical or non-hierarchical. Select this if you need parent-child relationships. For example, “Electronics > Smartphones > Accessories” would work well as a hierarchical product category taxonomy.
Non-hierarchical is for attributes that don’t need a hierarchy, such as colors, materials, or sizes. For our “Brand” example, non-hierarchical usually makes more sense, as brand names typically don’t have parent-child relationships.
5. In the Advanced Settings section, you can customize:
- URL structure: The permalink structure determines how taxonomy URLs appear. A thoughtful structure improves both user experience and SEO. For example, using /products/brand/apple/ creates a logical URL path that helps users understand where they are in your site.
- Admin UI options: Control how the taxonomy appears in the WordPress admin interface.
- REST API integration: Important if you’re building headless WordPress sites or using the block editor extensively.
Well-structured URLs provide several SEO benefits, as they include relevant keywords naturally in the URL path and help search engines determine the relationship between different content pieces.
6. After configuring all settings, save your taxonomy. WordPress will handle the registration process, and your new taxonomy will be immediately available for use with your selected post types.
7. To show your taxonomy terms on the frontend of your site, you’ll need to add some template logic. Here’s a simple example for displaying product brands:
$terms = get_the_terms(get_the_ID(), 'product-brand');
if ($terms && !is_wp_error($terms)) {
    echo '<div class="product-brands">';
    echo '<span>Brand: </span>';
    foreach ($terms as $term) {
        echo '<a href="' . get_term_link($term) . '">' . $term->name . '</a>';
    }
    echo '</div>';
}
If you’ve added custom fields to your taxonomy terms using ACF, you can access that data using the get_field() function:
$terms = get_the_terms(get_the_ID(), 'product-brand');
if ($terms && !is_wp_error($terms)) {
    $term = $terms[0]; // Get the first term
    $brand_logo = get_field('brand_logo', $term);
    if ($brand_logo) {
        echo '<img src="' . $brand_logo['url'] . '" alt="' . $term->name . ' logo">';
    }
Supercharge Your Website With Premium Features Using ACF PRO
Speed up your workflow and unlock features to better develop websites using ACF Blocks and Options Pages, with the Flexible Content, Repeater, Clone, Gallery Fields & More.
How custom fields transform taxonomy development
Standard WordPress taxonomies provide just three pieces of information: a name, a slug, and a description. While this is sufficient for basic categorization, modern websites demand much more from their content organization systems.
“Taxonomies with custom fields are what separate a basic website from a truly professional content platform,” says Matt Shaw, Senior Software Engineer. “They transform simple categorization into rich, interactive content relationships.”
Custom fields elevate taxonomies from basic labels into powerful data structures. Instead of just listing product brands, you can create brand profiles with logos, founding stories, headquarters locations, and social media links. Rather than just tagging products with “Cotton” or “Polyester,” you can include care instructions, sustainability information, and sourcing details.
For developers, these enhanced taxonomies offer substantial benefits:
- You avoid creating redundant custom database tables.
- You maintain WordPress’s native database optimization.
- All content remains within WordPress’s familiar taxonomy system.
- Code complexity and maintenance requirements decrease dramatically.
Here’s a step-by-step guide to adding custom fields to taxonomy terms with ACF:
- Navigate to ACF > Field Groups > Add New.
- Create your fields (images, text areas, selectors, etc.)
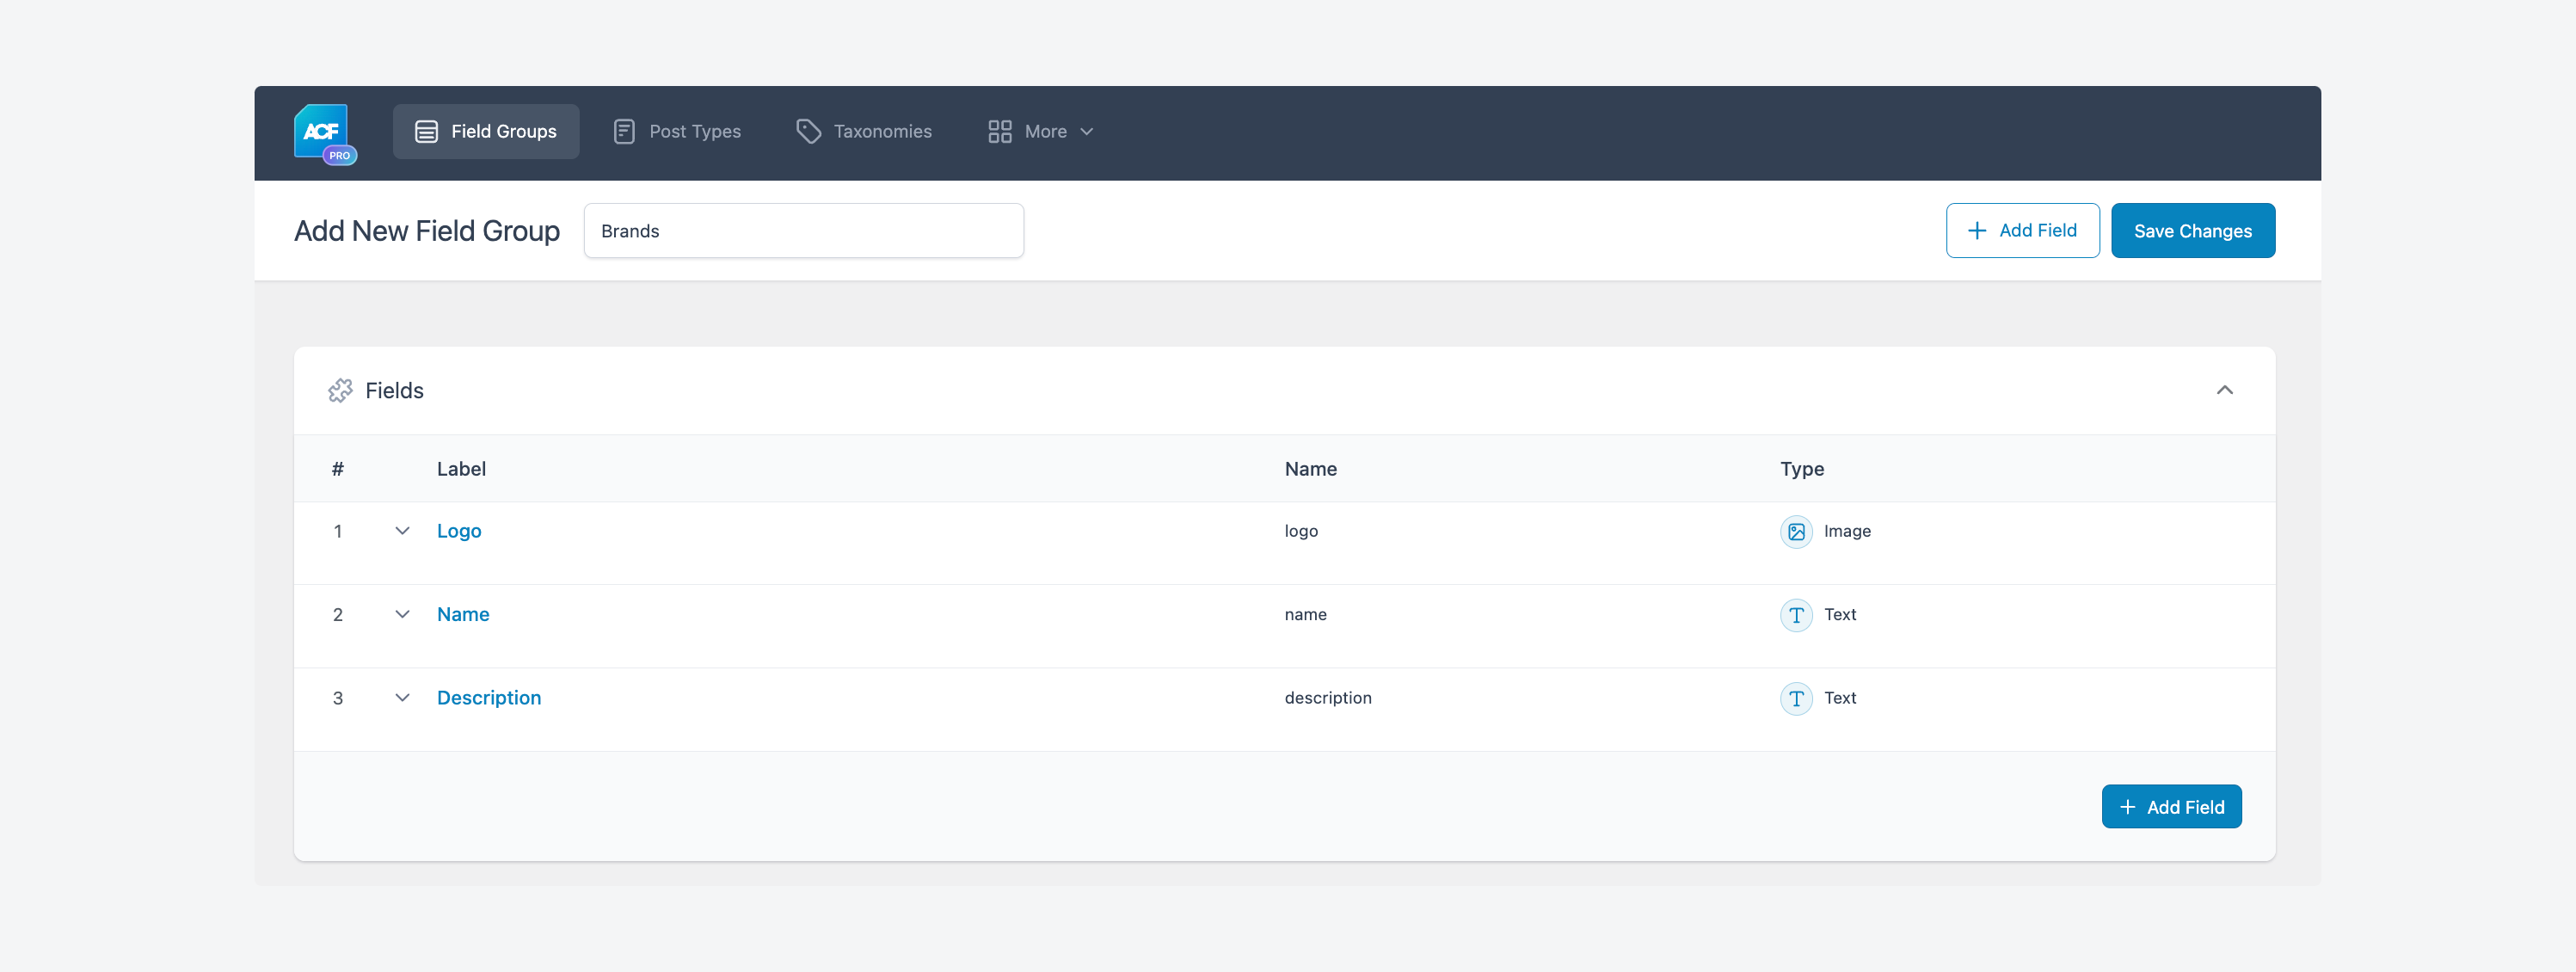
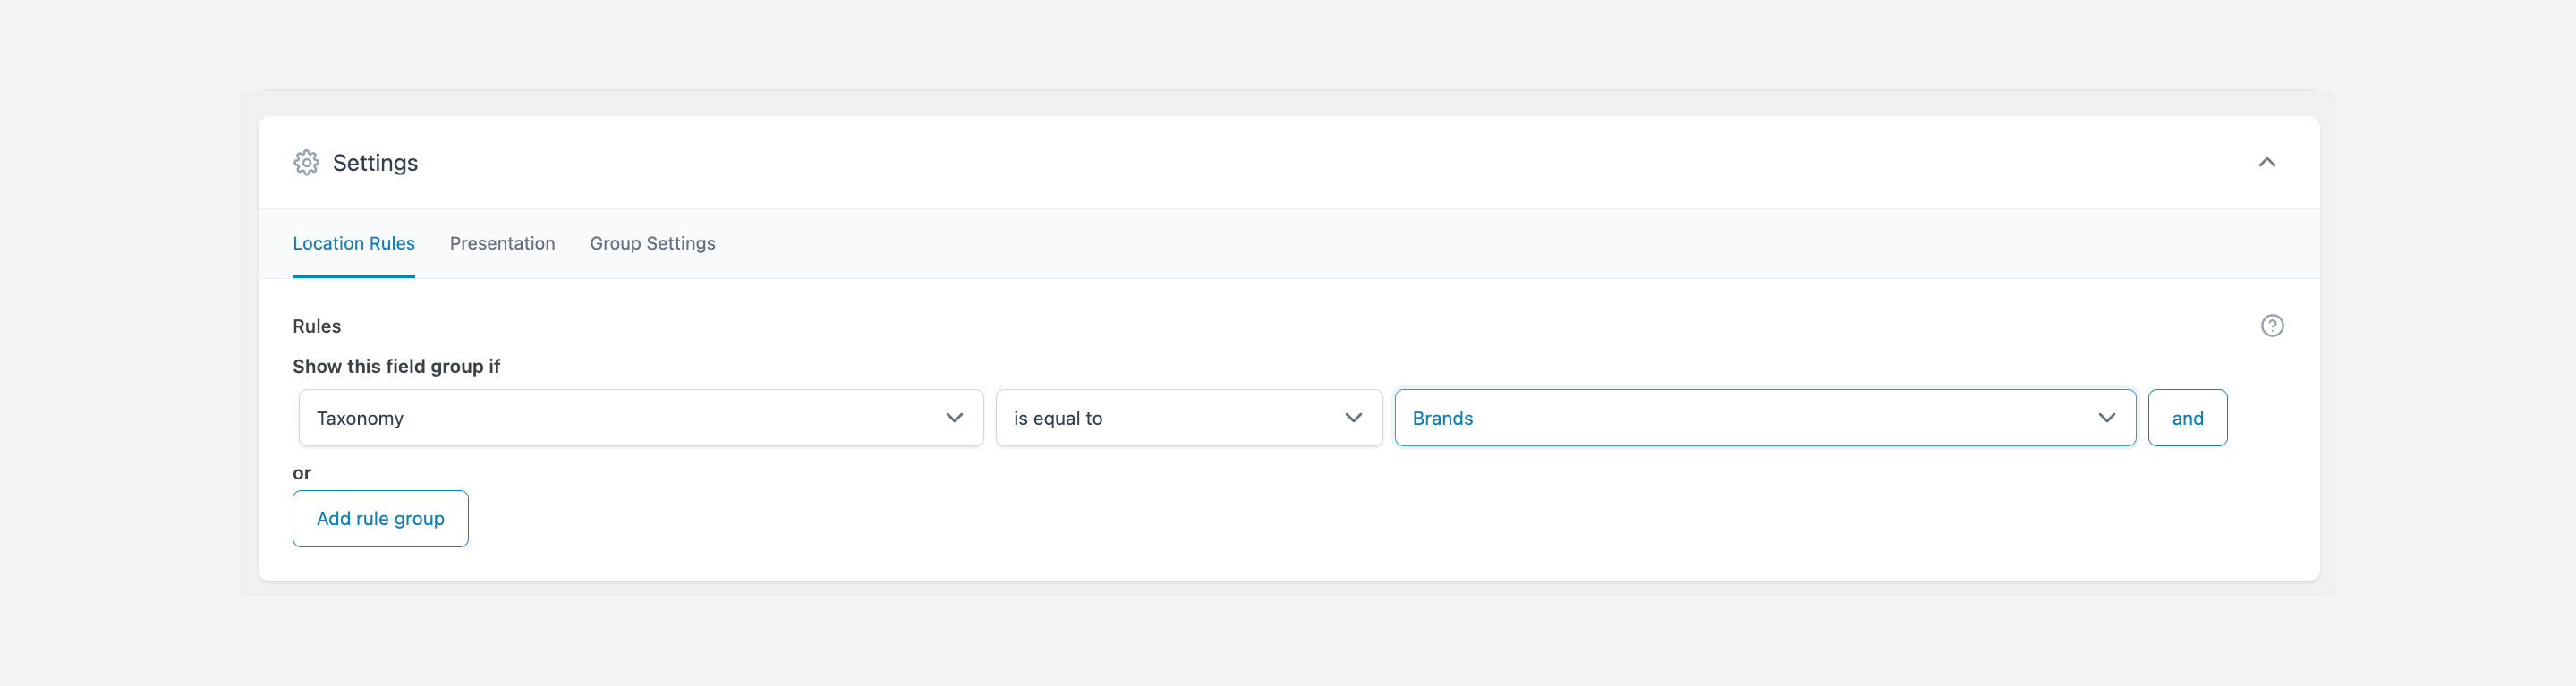
- Under “Location,” set rules to show if Taxonomy is equal to Brand.
- Save your field group.
After setting up your custom fields, they’ll appear when editing taxonomy terms. For example, when editing a brand term, you’ll see fields for the logo, founding year, and headquarters location right in the term editor.
To display this enhanced taxonomy information in your templates, use ACF’s get_field() function with the taxonomy term as the second parameter:
$term = get_queried_object();
$logo = get_field('brand_logo', $term);
if ($logo) {
    echo '<img src="' . $logo['url'] . '" alt="' . $term->name . ' logo">';
}
Troubleshooting custom taxonomies
Even with careful setup, you might encounter some common issues when working with custom taxonomies. Here’s how to diagnose and fix the most frequent problems:
1. Taxonomy terms not appearing with custom post type
This usually happens when the taxonomy and post type aren’t properly connected. Double-check that you’ve specified the correct post type when registering your taxonomy.
If using ACF, return to the taxonomy settings and verify that your post type is selected in the “Post Type Assignment” section.
If you’re using code, ensure your register_taxonomy() function includes your post type in the object type parameter:
register_taxonomy('product-brand', array('product'), $args);2. Permalink structure not working
WordPress needs to rebuild its rewrite rules after you add new taxonomies. The simplest way to do this is to visit Settings > Permalinks and click “Save Changes” (without making any actual changes). This forces WordPress to flush and rebuild the rewrite rules.
If you’re implementing taxonomies programmatically, remember to flush rewrite rules once after registration, but never on every page load, as it can severely impact performance.
3. Taxonomy queries not returning expected results
First, verify that terms are actually assigned to your posts by checking them in the admin interface. The most common mistakes include:
- Using the wrong taxonomy name in your query.
- Misspelling term slugs.
- Using term IDs when the query expects slugs (or vice versa).
Check your WP_Query parameters carefully:
$args = array(
    'post_type' => 'product',
    'tax_query' => array(
        array(
            'taxonomy' => 'product-brand',
            'field'    => 'slug',
            'terms'    => 'apple'
        )
    )
);
4. Taxonomy fields not displaying
Double-check your field group location settings in ACF. Make sure you’ve selected:
- The correct taxonomy in the rule.
- The proper operator (“is equal to” for a specific taxonomy).
- The field group is active.
Sometimes, clearing your browser cache resolves display issues. If using a caching plugin, purge that cache as well.
5. Performance impact concerns
While taxonomies are generally efficient, there are best practices to optimize performance:
- Limit the number of taxonomy terms that appear in dropdown menus or selection interfaces.
- For hierarchical taxonomies, keep the depth reasonable (2-3 levels is usually sufficient).
- Consider using object caching (like Redis or Memcached) if your site has high traffic.
- When querying multiple taxonomies at once, be as specific as possible to reduce query complexity.
Take your WordPress content organization to the next level with ACF
Custom taxonomies transform how your WordPress site organizes content, and ACF takes this power even further. Instead of writing complex code or juggling multiple plugins, ACF provides an intuitive visual interface for creating both custom taxonomies and enhancing them with rich custom fields.
This unified approach means you can build sophisticated content structures without switching between different tools. From creating brand taxonomies with logos to ingredient taxonomies with nutritional information, ACF handles the entire process in one streamlined workflow.
“One of the best plugins I have ever used. ACF has helped me extend WordPress in lots of different ways and helped me build lightning fast websites,” says one developer.
Ready to transform your WordPress content organization? Get started with ACF today and discover how easy professional taxonomy management can be.

For plugin support, please contact our support team directly, as comments aren't actively monitored.