
Overview
This guide will demonstrate how add custom fields to a Taxonomy Term and then modify the term’s template file HTML.
Terms can be items such as WordPress categories, tags or other custom taxonomies that have been added to your site. For example, popular plugins such as WooCommerce add custom taxonomies upon activation.
Check out the WordPress Codex for further information regarding taxonomies.
Adding fields
The Advanced Custom Fields plugin makes it very easy to add custom fields to a Taxonomy Term, please follow the steps below.
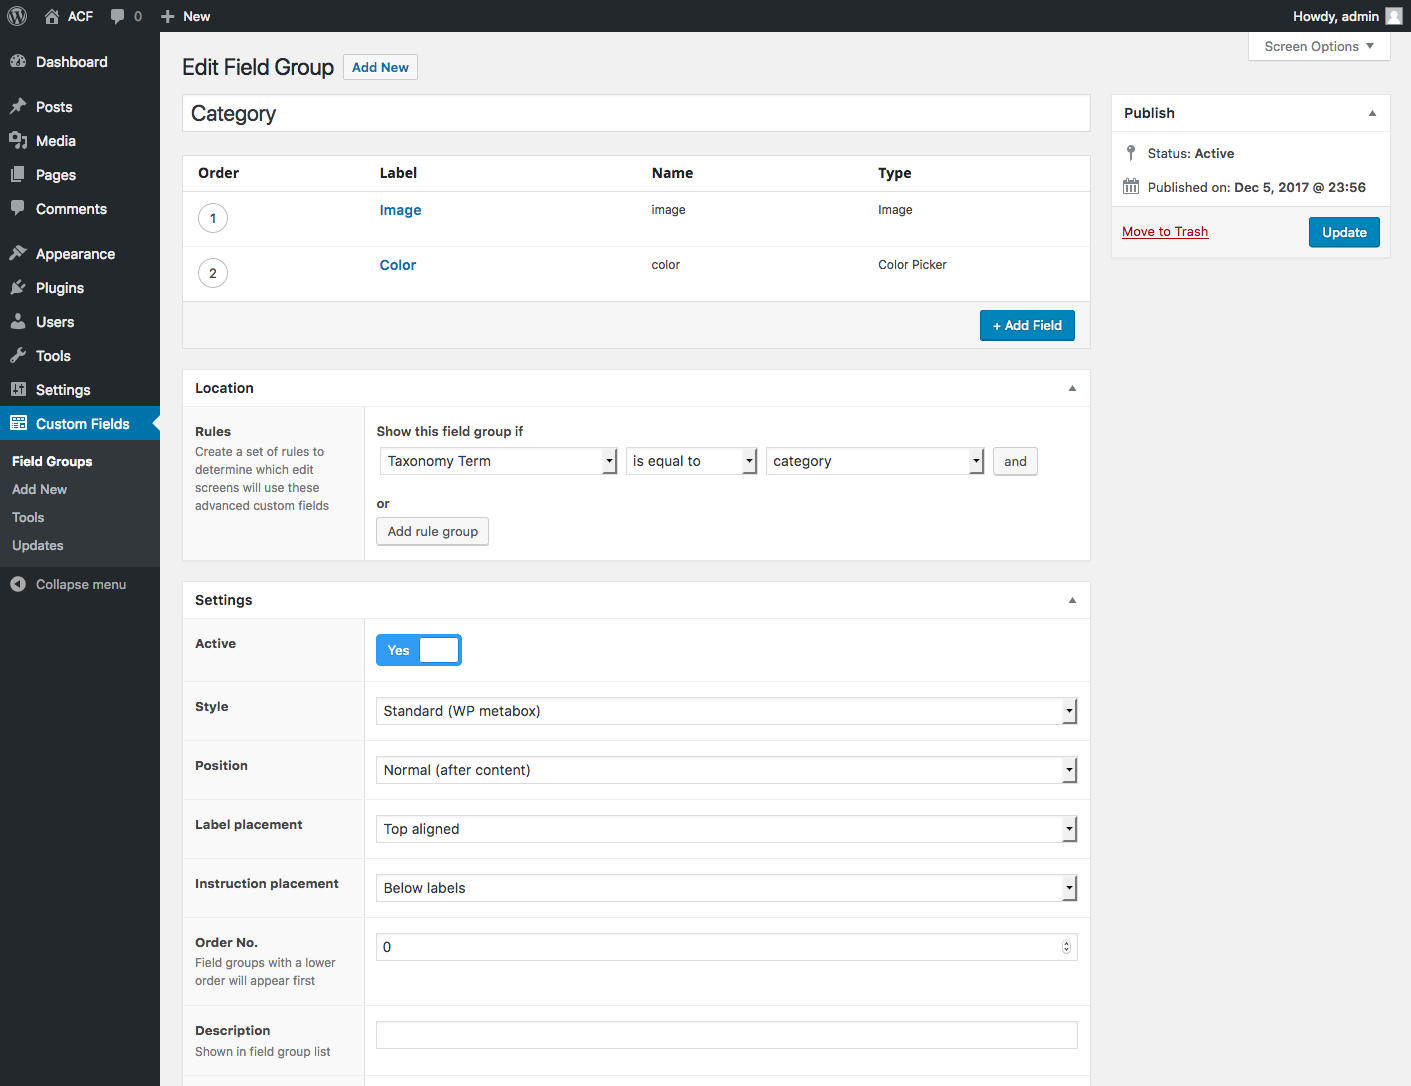
- From the Custom Fields admin screen, click the Add New button to create a new field group
- Add the fields you would like to see when editing a Taxonomy Term
- Under Locations, select the Taxonomy Term rule and choose the corresponding value to show this field group
Editing fields
Once you have created a field group and assigned it to appear for a Taxonomy Term edit screen, editing the field values is done by navigating to the proper taxonomy. For example, if you have assigned your field group to post categories, navigate to Posts > Categories.

Displaying fields
Customizing the HTML for a WordPress Taxonomy Term can be easily done by editing the category.php, tag.php or taxonomy.php file in your theme. Depending on your theme, you may also use template parts or filters to customize the HTML.
This example shows how to modify the category.php template from the twentyseventeen theme and output both the category image and color to a style tag.
category.php

<?php
/**
 * The template for displaying category archive pages
 *
 * @link https://codex.wordpress.org/Template_Hierarchy
 *
 * @package WordPress
 * @subpackage Twenty_Seventeen
 * @since 1.0
 * @version 1.0
 */

get_header();


// get the current taxonomy term
$term = get_queried_object();


// vars
$image = get_field('image', $term);
$color = get_field('color', $term);

?>
<style type="text/css">

    .entry-title a {
        color: <?php echo $color; ?>;
    }

    <?php if( $image ): ?>
    .site-header {
        background-image: url(<?php echo $image['url']; ?>);
    }
    <?php endif; ?>

</style>
<div class="wrap">

    <?php // Remaining template removed from example ?>
Example
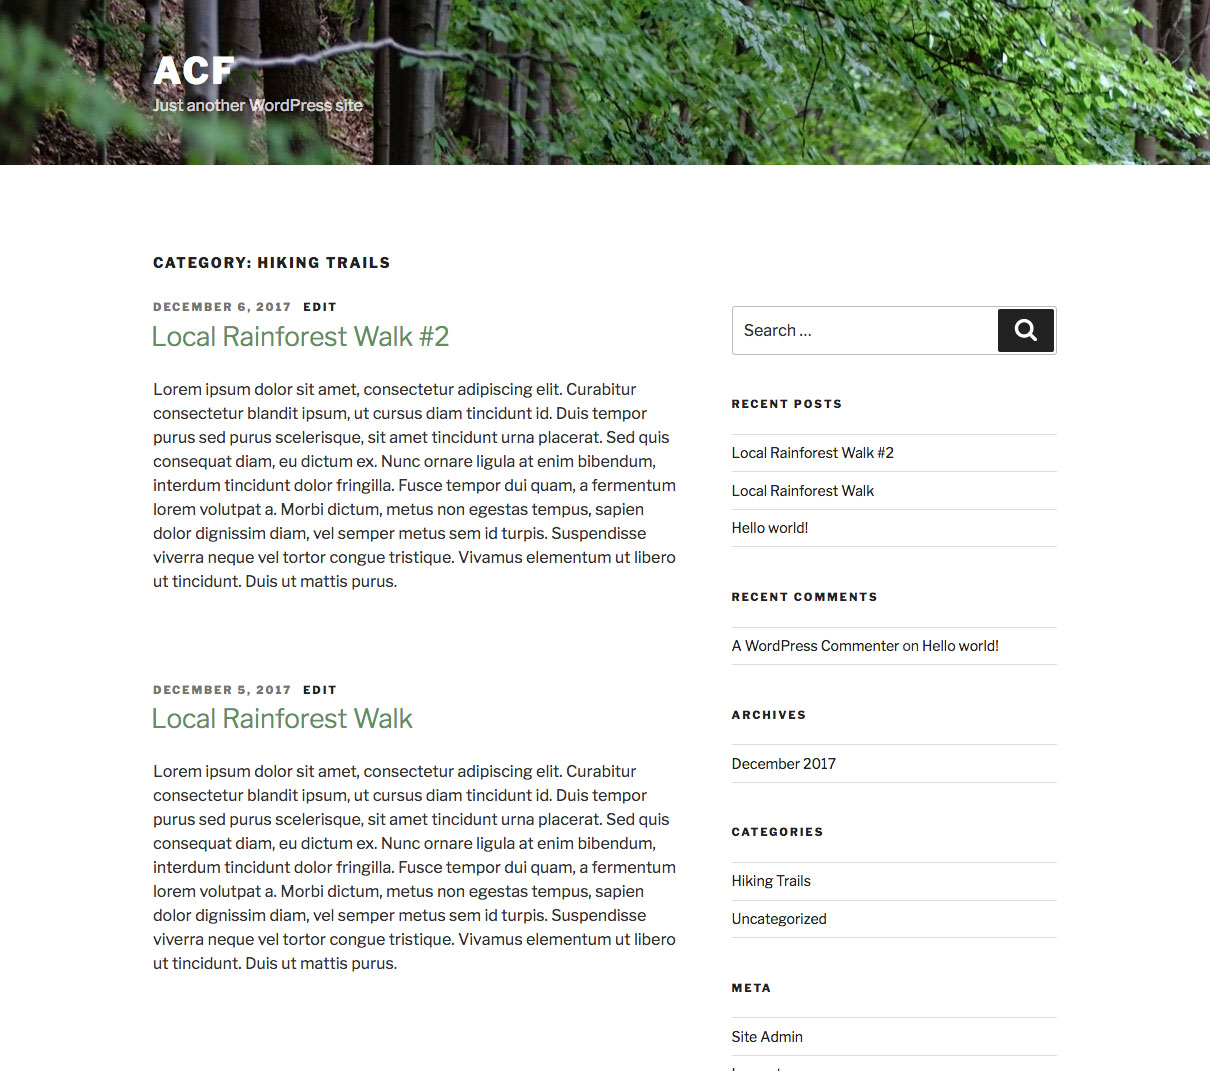
Here is a look at how the above code look in your browser. Note the site header image now reflects the category image and all entry titles are green.
Notes
Loading from a specific term
All the template functions can be used to load values from a taxonomy term, however, a second parameter is required to target the term. This is similar to passing through a $post_id parameter to target a specific post object.
There are 3 different styles of $post_id available and are listed below.
| Example | Format | Description |
|---|---|---|
'category_123' |
$taxonomy . '_' . $term_id |
A string containing the taxonomy name and term ID |
'term_123' |
'term_' . $term_id |
A string containing the word ‘term’ and term ID. Added in version 5.5.0 |
WP_Term |
A term object. You can get a term object via many of WP’s functions such as get_term() |
auto-embed
When editing a WYSIWYG field on a taxonomy term, the auto-embed functionality may not work. This is due to code within the WordPress core which limits the auto-embed functionality to posts only.
This issue carries onto the front end and prevents embed urls (youtube, vimeo, etc) from being converted to play-able embed objects.
As a current workaround for the front end, use this code at the top of your template (most likely category.php or similar). This code will set a custom post_ID and allow WP to load the embed.
category.php
<?php

// vars
$queried_object = get_queried_object();
$taxonomy = $queried_object->taxonomy;
$term_id = $queried_object->term_id;

$GLOBALS['wp_embed']->post_ID = $taxonomy . '_' . $term_id;

?>
Supercharge Your Website With Premium Features Using ACF PRO
Speed up your workflow and unlock features to better develop websites using ACF Blocks and Options Pages, with the Flexible Content, Repeater, Clone, Gallery Fields & More.
Related
- Guides: Adding fields to Posts
- Guides: Adding fields to Menus
- Field Types: Taxonomy
- Guides: Adding fields to Media Attachments
- Videos: Creating a Custom Taxonomy with ACF
