
Overview
Conditional logic allows you to set rules regarding when a custom field should appear, based on the values of other fields in the same field group. The “Conditional Logic” setting tab is available for most ACF field types, giving you a great degree of control in how fields are presented to content editors.
Conditional logic in ACF is typically applied within a field group. It does not control where the field group itself will appear, which is handled by the Location Rules in the field group’s settings.
Screenshots
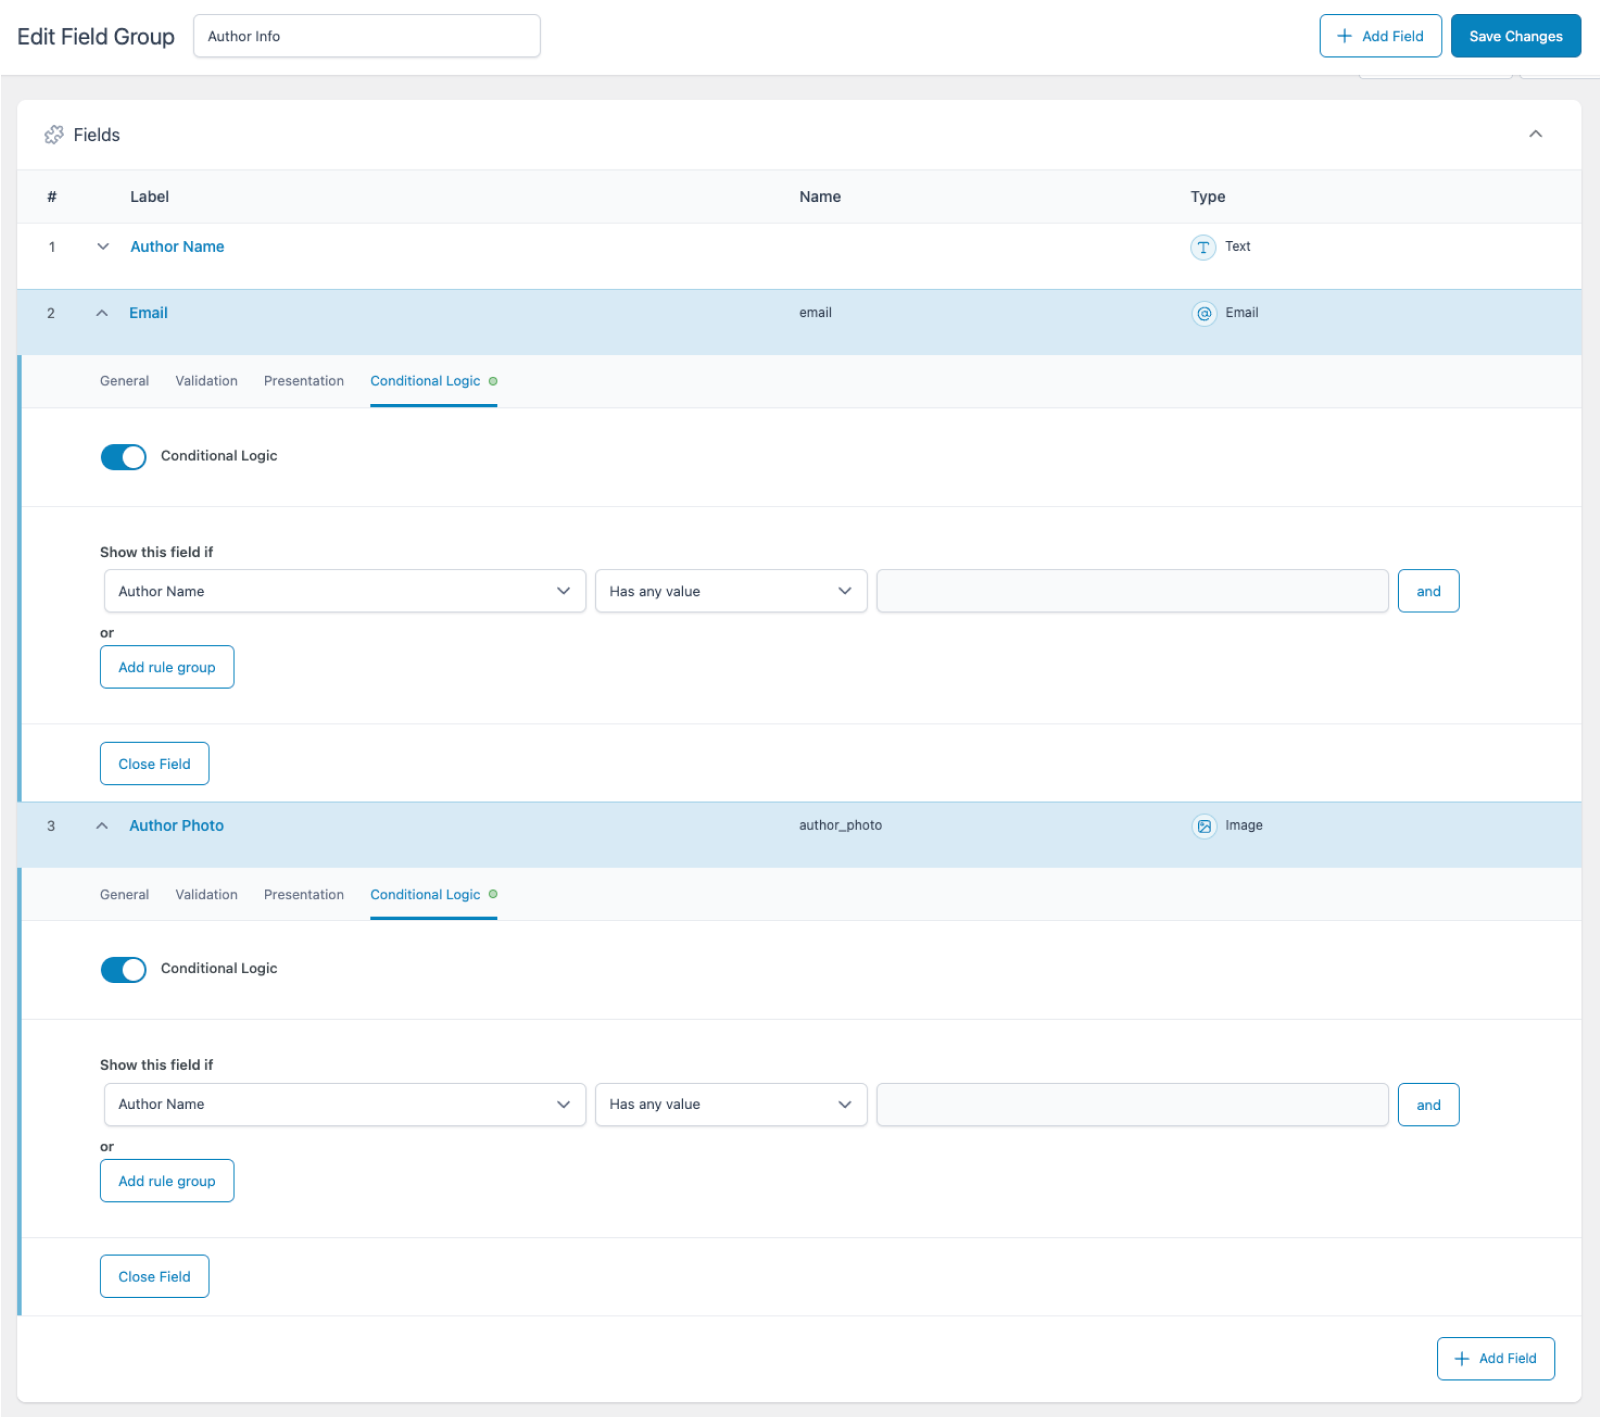
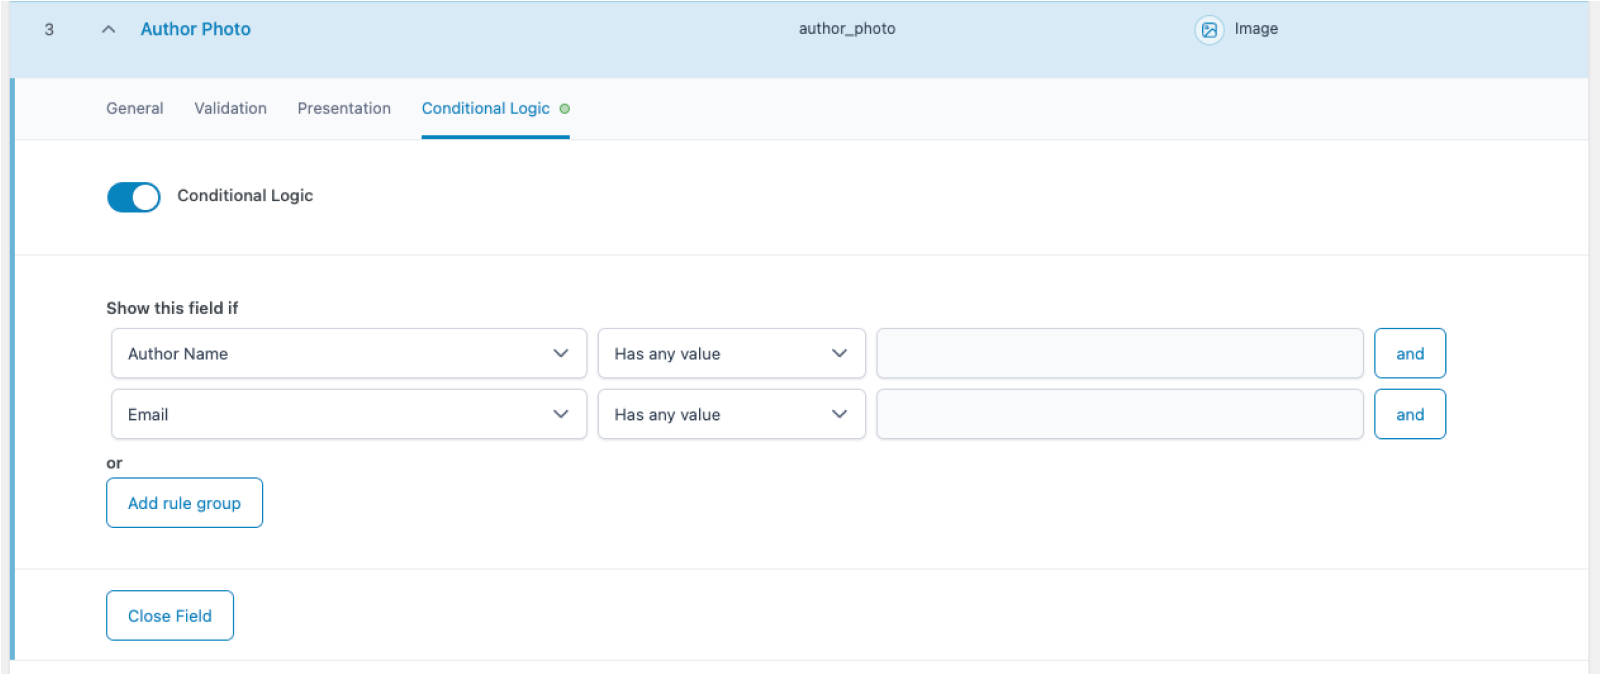
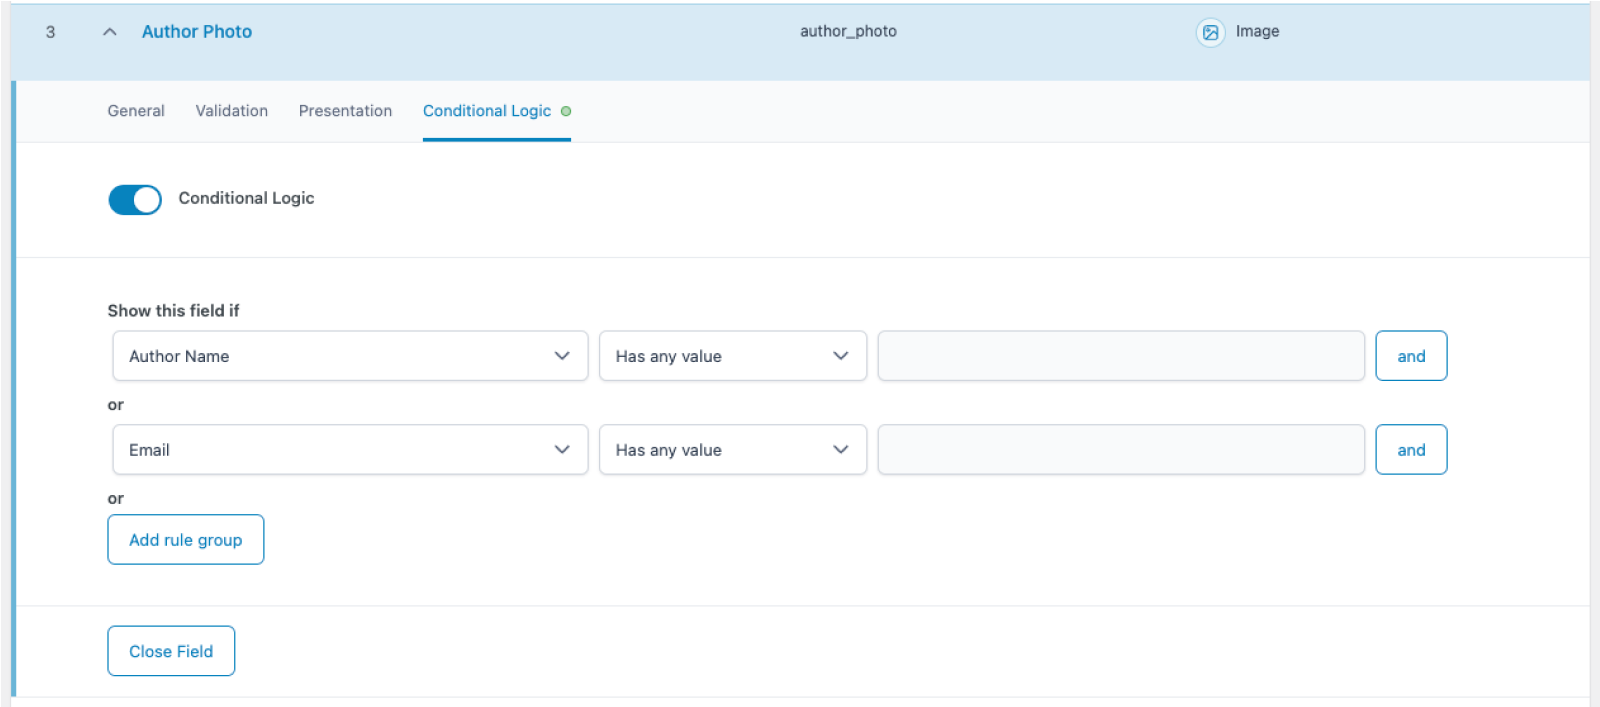
Email and Image fields with conditional logic settings applied so they will only appear when a user enters a value in the “Author Name” field.
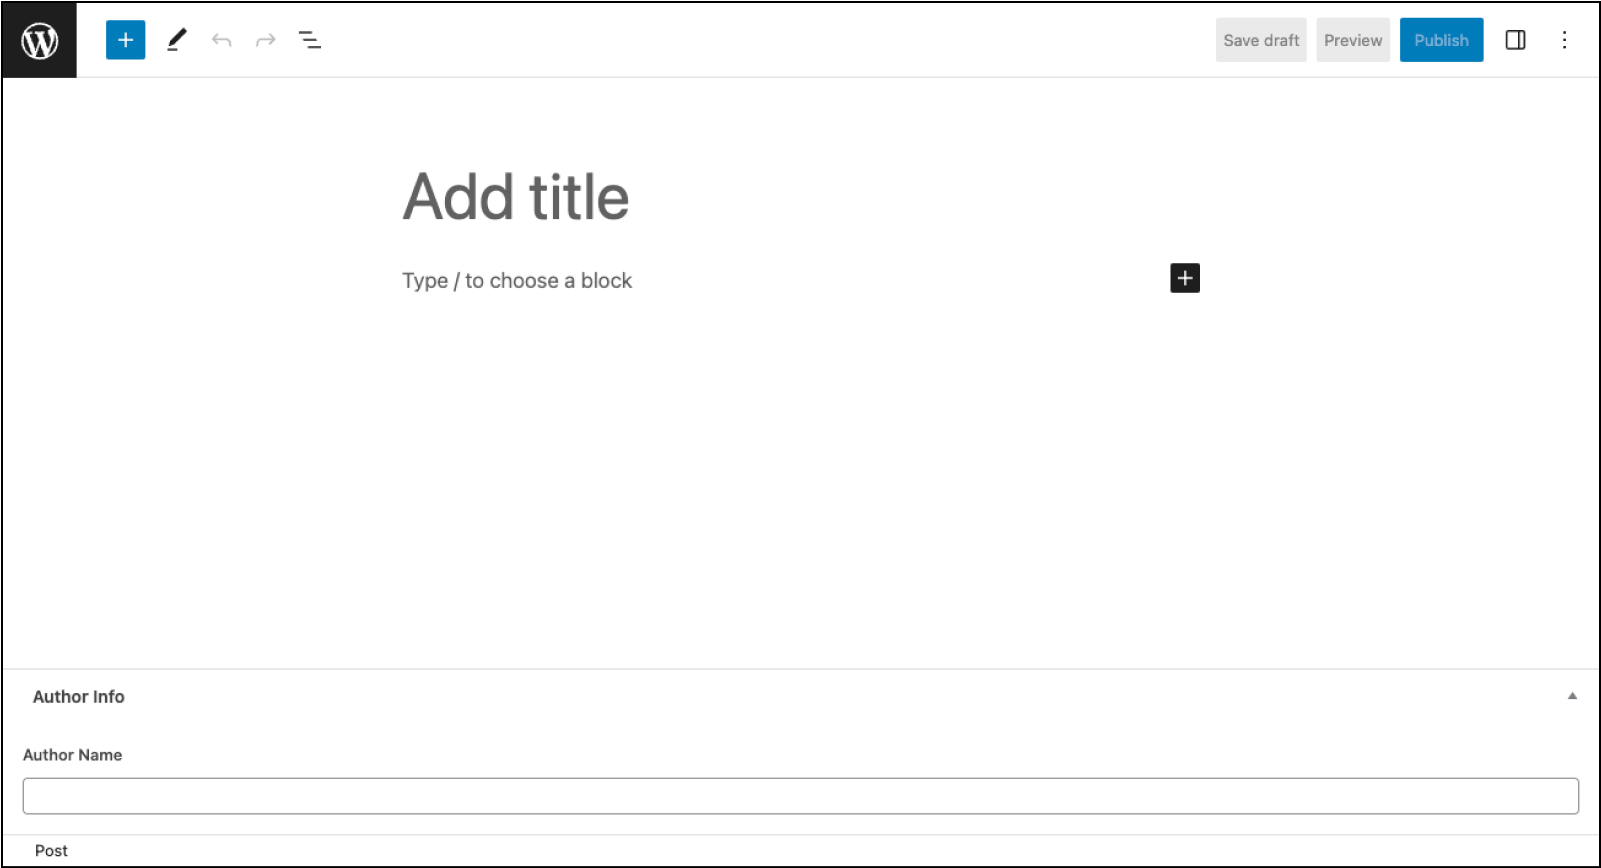
The “Author Name” field as it appears to content editors before entering input.
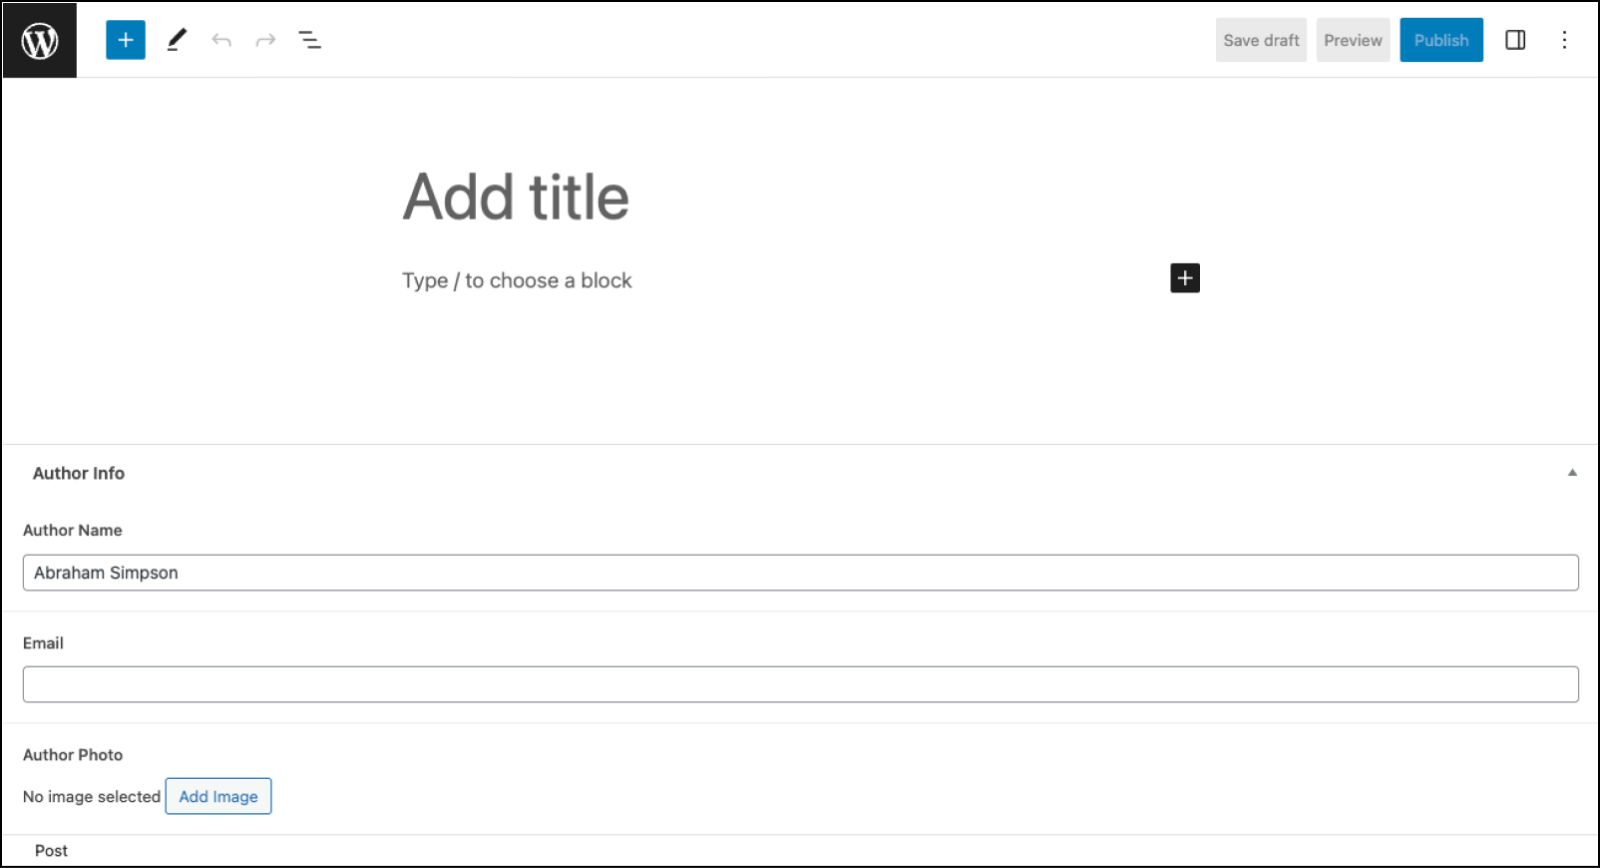
Conditional logic in action. The user has entered a value for “Author Name”, causing the other fields in the group to display.
Basic Usage
The “Conditional Logic” tab initially presents you with a single toggle, allowing you to turn it on. You can do this with any field, even the first field in a newly created field group. However, you would not be able to build rules in this case, as there are no other fields present on which to base them.
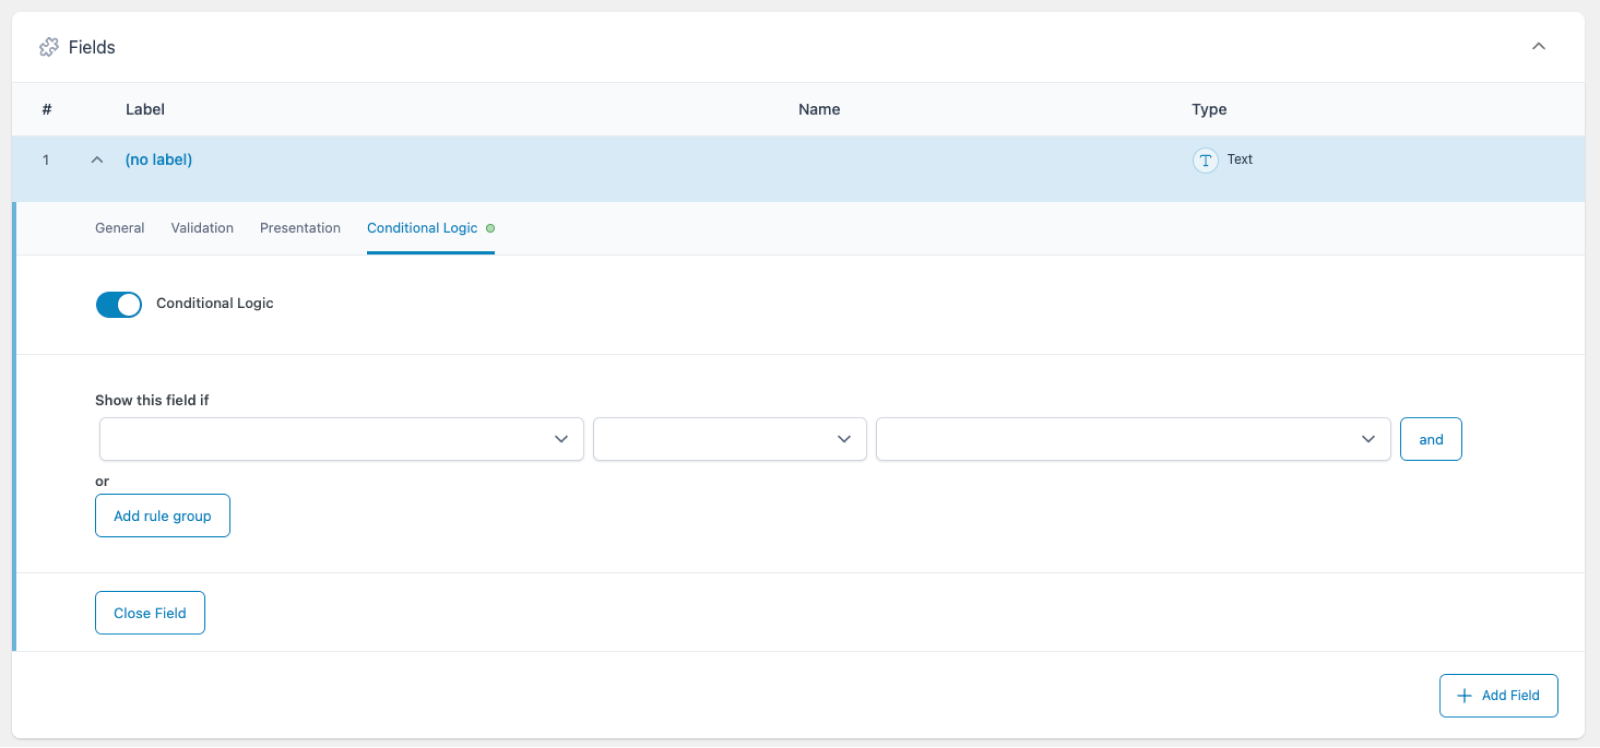
Each conditional logic rule consists of three dropdowns. Clicking the first dropdown menu displays a list of the fields currently in the field group. The second dropdown defines the condition that must be met. The third dropdown further defines these conditions with specific values.
Conditions
There are six possible conditions you can choose from when creating these rules. The conditions that appear are based on the type of field selected in the first dropdown. Some fields cannot possibly meet certain conditions, so those options are not shown when applying logic based on those fields.
- Has any value
- Has no value
- Value is equal to
- Value is not equal to
- Value matches pattern
- Value contains
If you can’t define values or choices when creating the field, you cannot provide specific values or patterns when using conditional logic. The only “value” that can be read in this case is whether or not the field has received input.
For example, choosing Image in the first dropdown will limit you to choosing between Has any value and Has no value in the second. This is because the “value” of an Image field is based on whether or not it has content. The condition is fulfilled as long as an image is present (or not). You can ensure that the image itself meets certain specifications by making adjustments to the Image field’s Validation settings.
Setting Multiple Rules
The precise method you use to add additional rules depends on your objective. Multiple rules for conditional logic in ACF follow the “and/or” principle. If you want two or more conditions to be fulfilled, you would use “and.” You would use “or” for situations where any of the conditions being met is sufficient for your purposes.
Click and at the end of any rule to duplicate it. Modify the new rule as usual via the dropdown menu, and click Save Changes to save it to your field group. This will ensure both rules are followed for the condition to be met.
Click Add rule group below the current rule to add an “or” rule. Make your selections from the dropdown menus, and click Save Changes. In this case, the conditional logic will be applied if either condition is met.
To remove rules, hover over the end of the rule and click the minus sign when it appears.
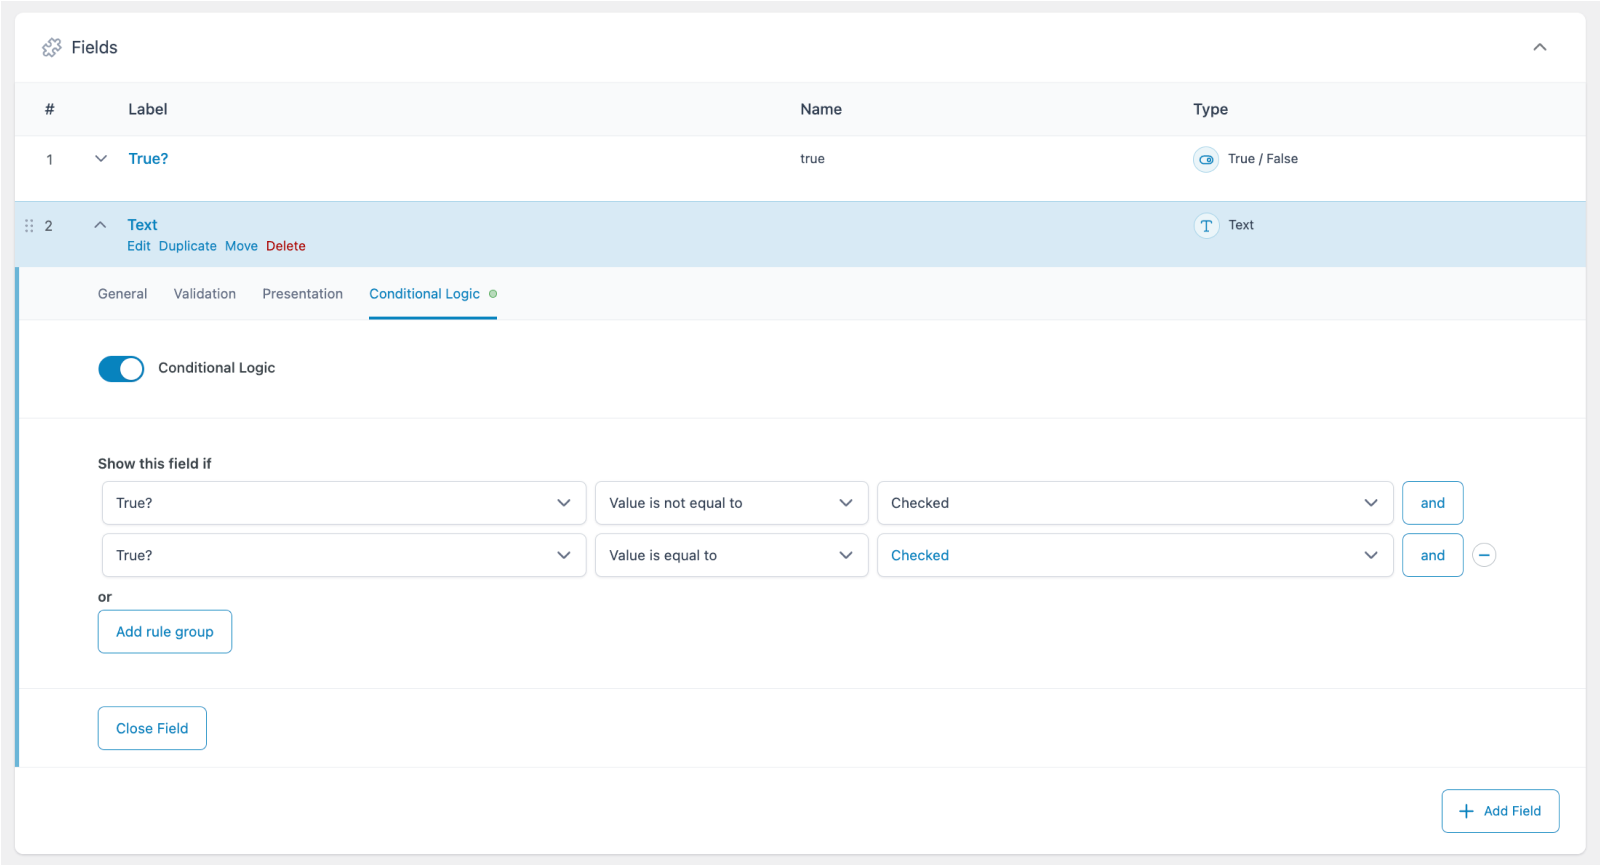
Contradictory Conditional Logic
Care must be taken when using the conditional logic settings, as there are cases where it’s possible to set up rules that contradict each other.
For example, you can configure a rule that says a particular condition is filled only when a True/False field is both checked and not checked. This is clearly impossible to fulfill.
How to Use Conditional Logic
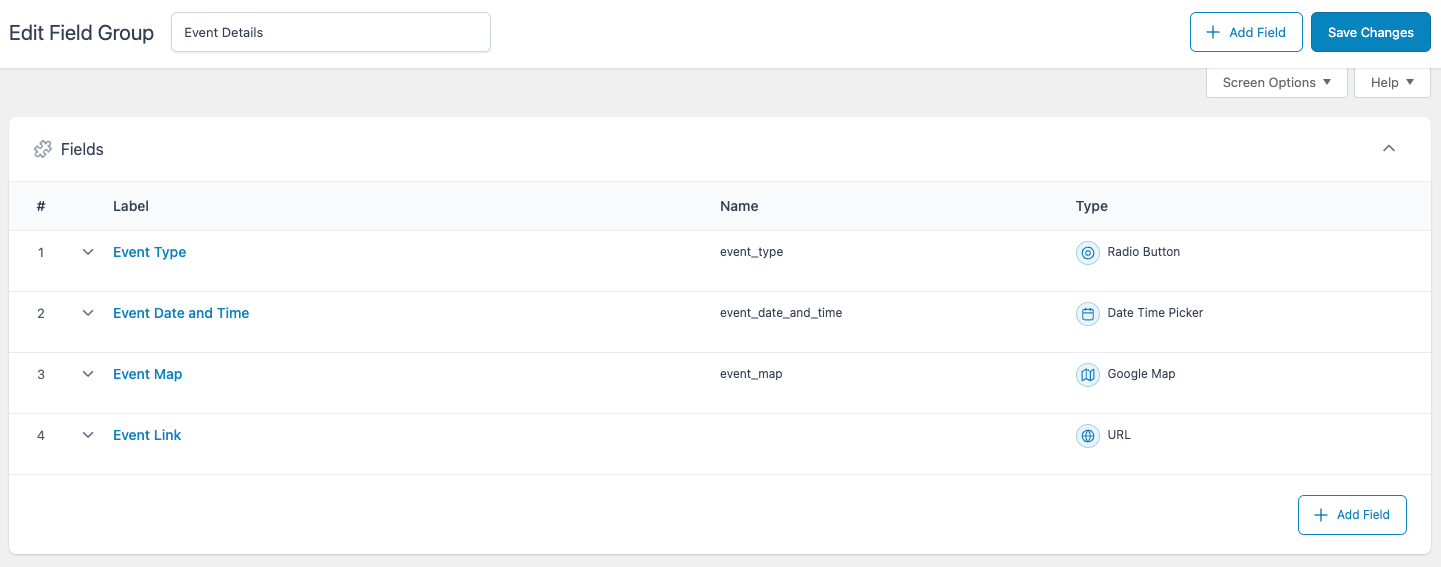
This short tutorial demonstrates how to use conditional logic to give content editors the most suitable field based on a previous selection they have made. The first step is to create a field group called “Event Details” with the following fields:
- A Radio Button field
- A Date Time Picker field
- A Google Map field
- A URL field
Next, click on the Radio Button field and give it a descriptive label like “Event Type.” Fill in two entries in the Choices box: Physical and Virtual. You’ll use these options as the basis for your conditional logic.
The only change you’ll need to make to the Date Time Picker field is to give it a label like “Event Date and Time.” It will appear for both types of events, so there’s no reason to use conditional logic just yet.
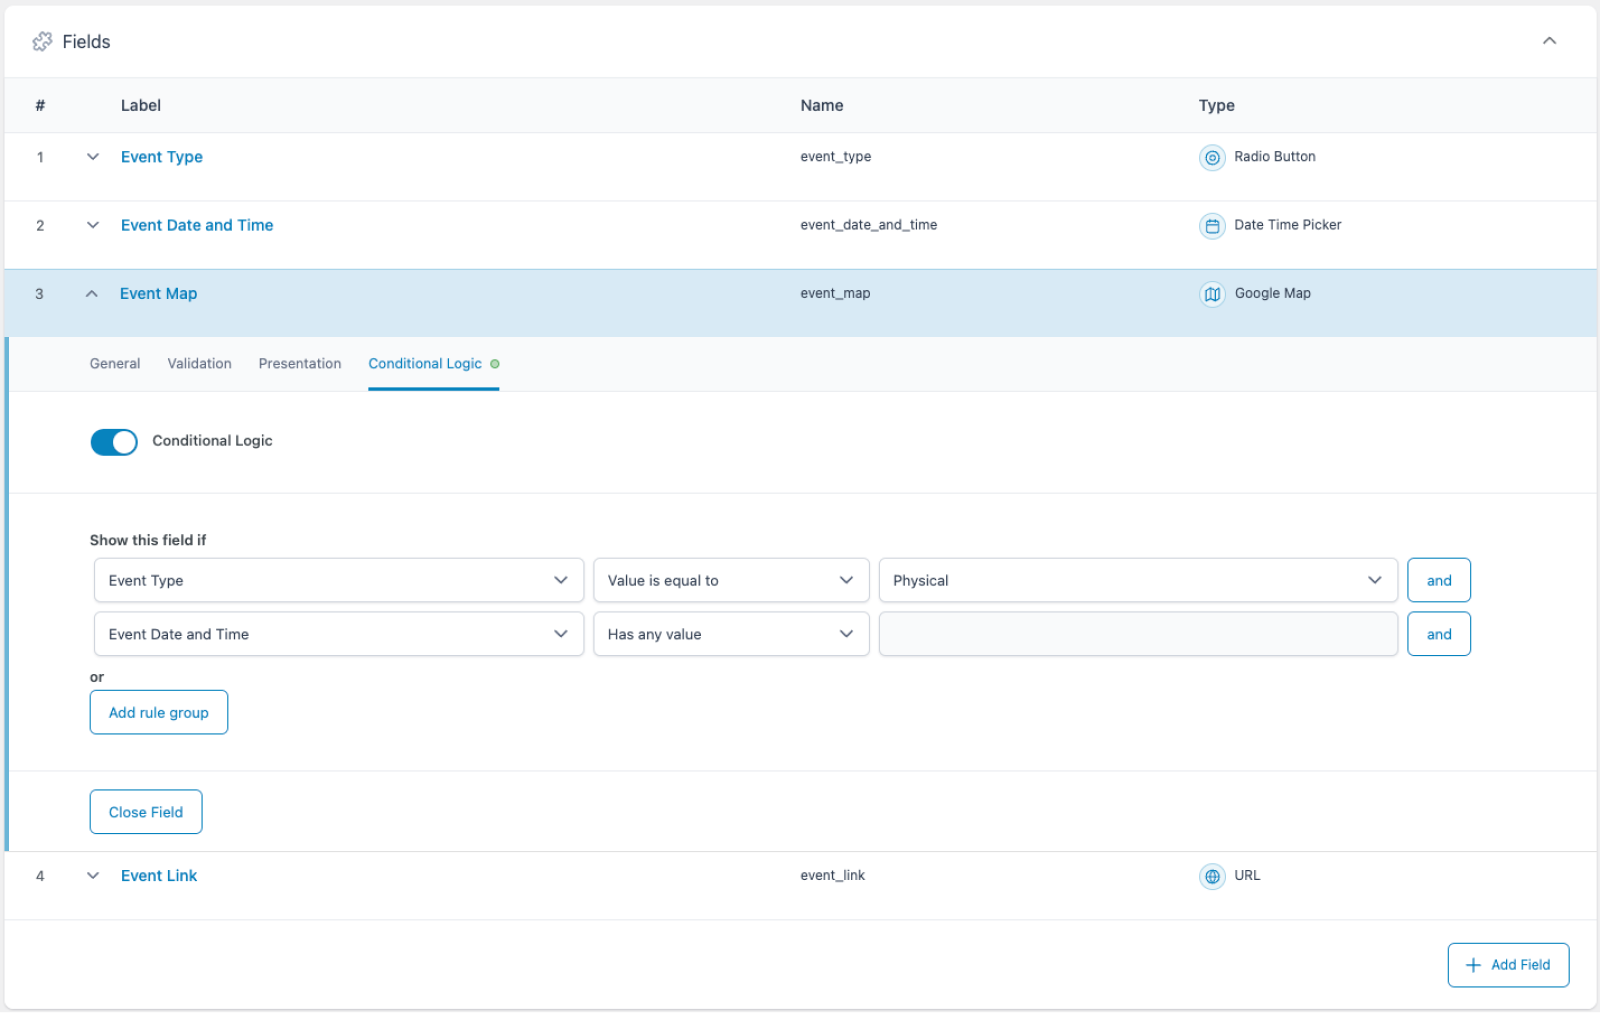
The last two fields, Google Map and URL, are where you’ll define the conditional logic settings. Assign a label like “Event Map” to the Google Map field, and click on the Conditional Logic tab.
Click the Conditional Logic switch to set the first rule. The first dropdown defaults to the first field listed in the group, but you can click on it to change this to a different field. In this case, leave it set to Event Type. Click the second dropdown and select Value is equal to. Finally, click the third dropdown and select Physical.
Next, click the and button at the end of the rule to add a second rule. This time, set the first dropdown to Event Date and Time, and the second to Has any value. This will ensure content editors do not see the Google Map field until they have selected the type of event and indicated the time and date.
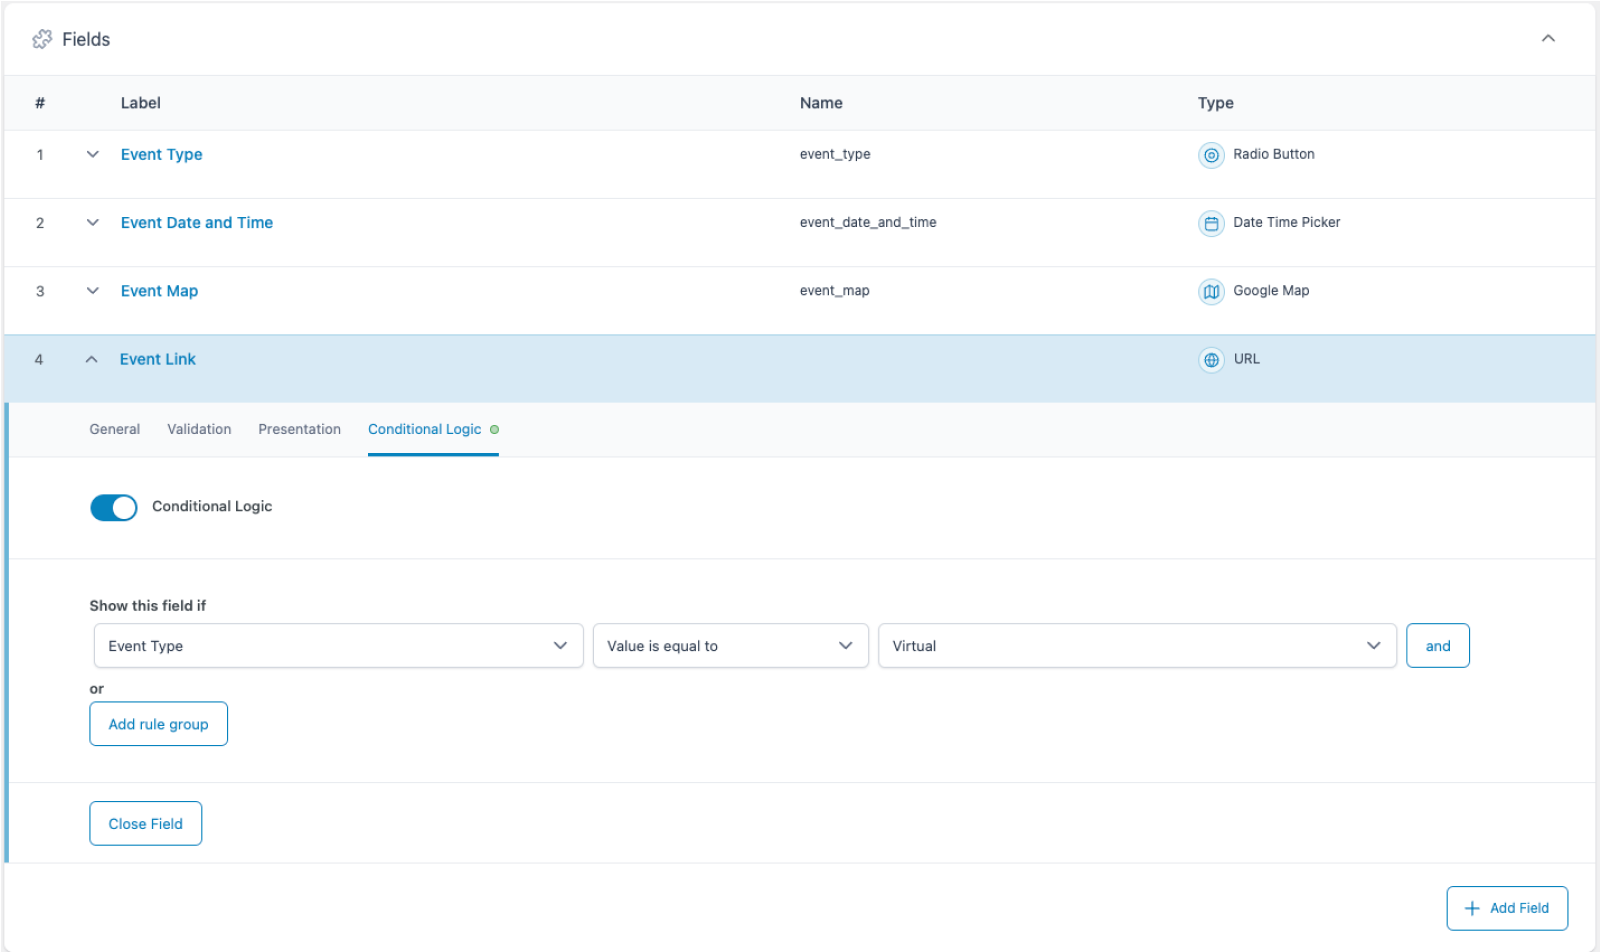
The last step is to set up a similar rule for the URL field. Open the field, and assign a label like “Event Link”. Click on the Conditional Logic tab and repeat the process from above, but this time set the third dropdown to Virtual.
Alternatively, you could set the second dropdown to Value is not equal to, and leave the third set to Physical. This would allow you to create more types of virtual events in the “Event Type” Radio Button, while ensuring that only physical events display the Google Map field and all virtual events display the URL field.
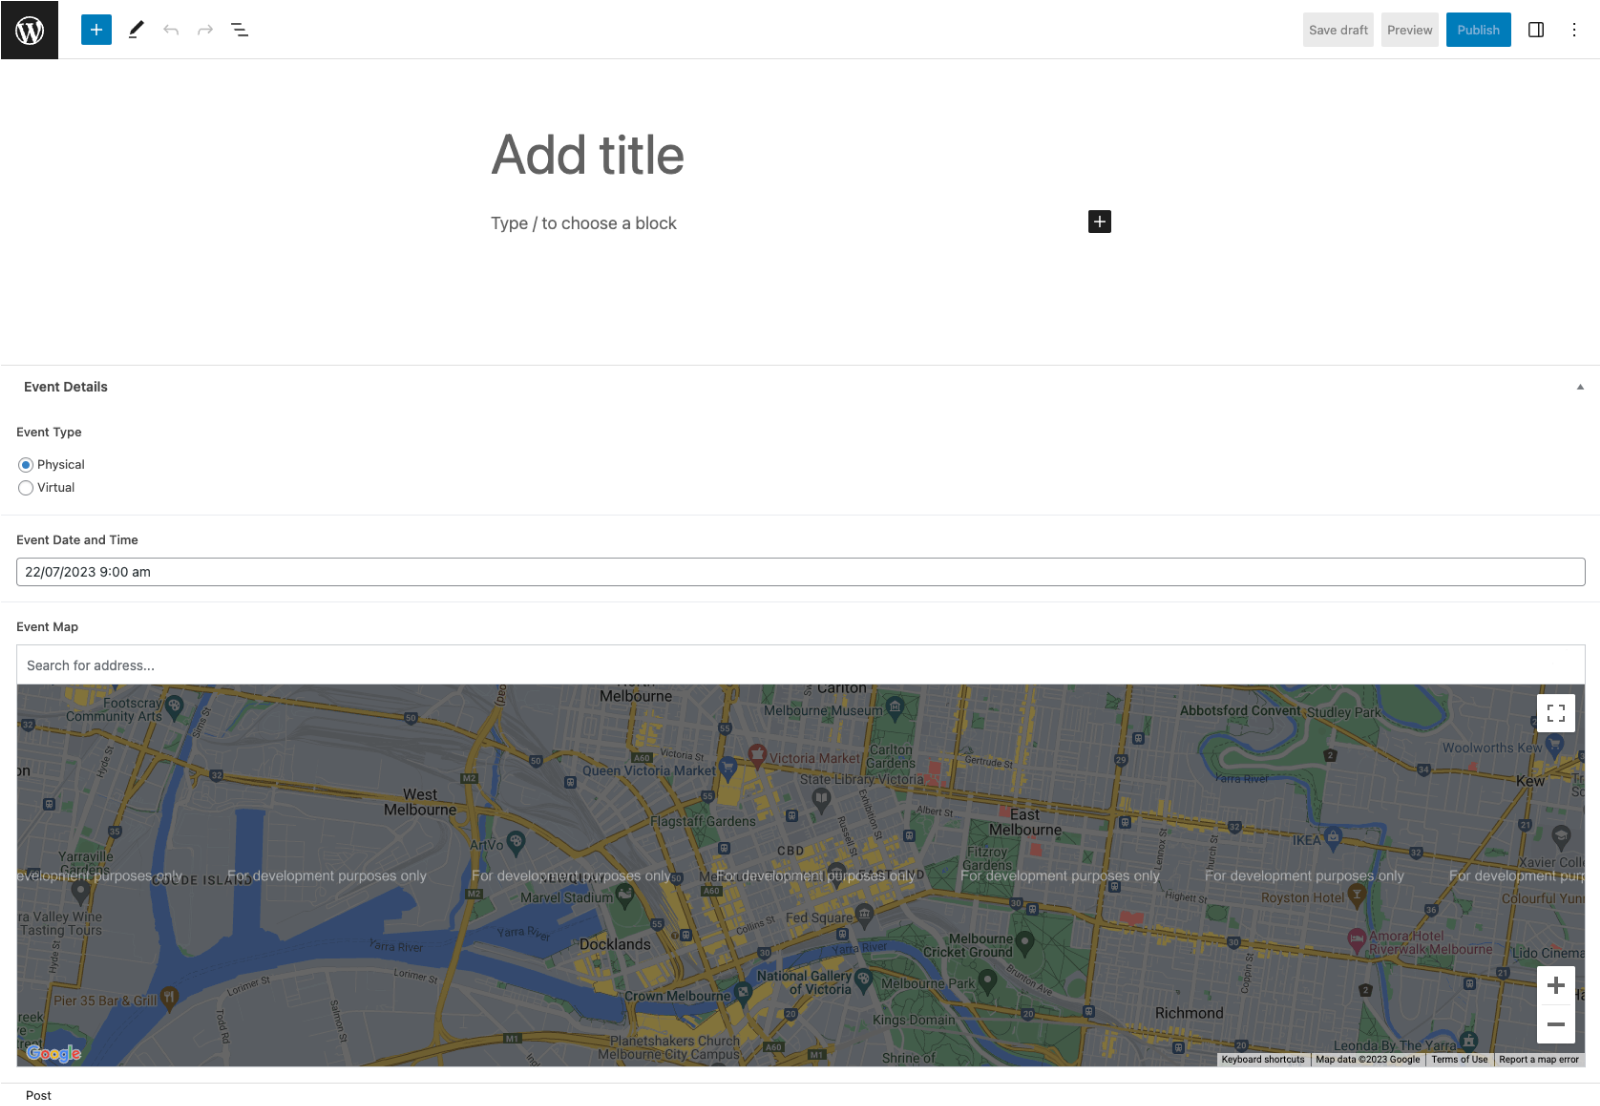
Finally, click Save Changes to save the new conditional logic rules to your field group. You can start a new post to see the conditional logic in action.
Supercharge Your Website With Premium Features Using ACF PRO
Speed up your workflow and unlock features to better develop websites using ACF Blocks and Options Pages, with the Flexible Content, Repeater, Clone, Gallery Fields & More.
Related
- Choice: Select
- Field Types: Relationship
- Basic: Text
- Getting Started: Field Settings
- Basic: Email
