
Overview
The Clone field helps create reusable data structure components that you can pull into other field groups using ACF PRO.
It gives you a way to create smaller composable field groups, and clone them into larger, more complex groups. It’s indispensable for keeping your fields organized and reusable when you’re building complex sites.
In this tutorial, we’ll show you how to use the Clone field to pull in options from an existing field group, in this case one we’ve set up to work as a button.

Buttons are a great example of when you should use the Clone field. Rather than creating a separate button every time one is needed, you create a single field group with all your button options, and use the Clone field in a variety of contexts to pull in those options from the existing field group.
Despite the name, the Clone field doesn’t actually duplicate any fields in the database. Instead, it loads and displays the selected fields at runtime, either replacing itself with the cloned fields, or displaying them as a group of subfields. You can see how the process works in the video below.
Building the First Button
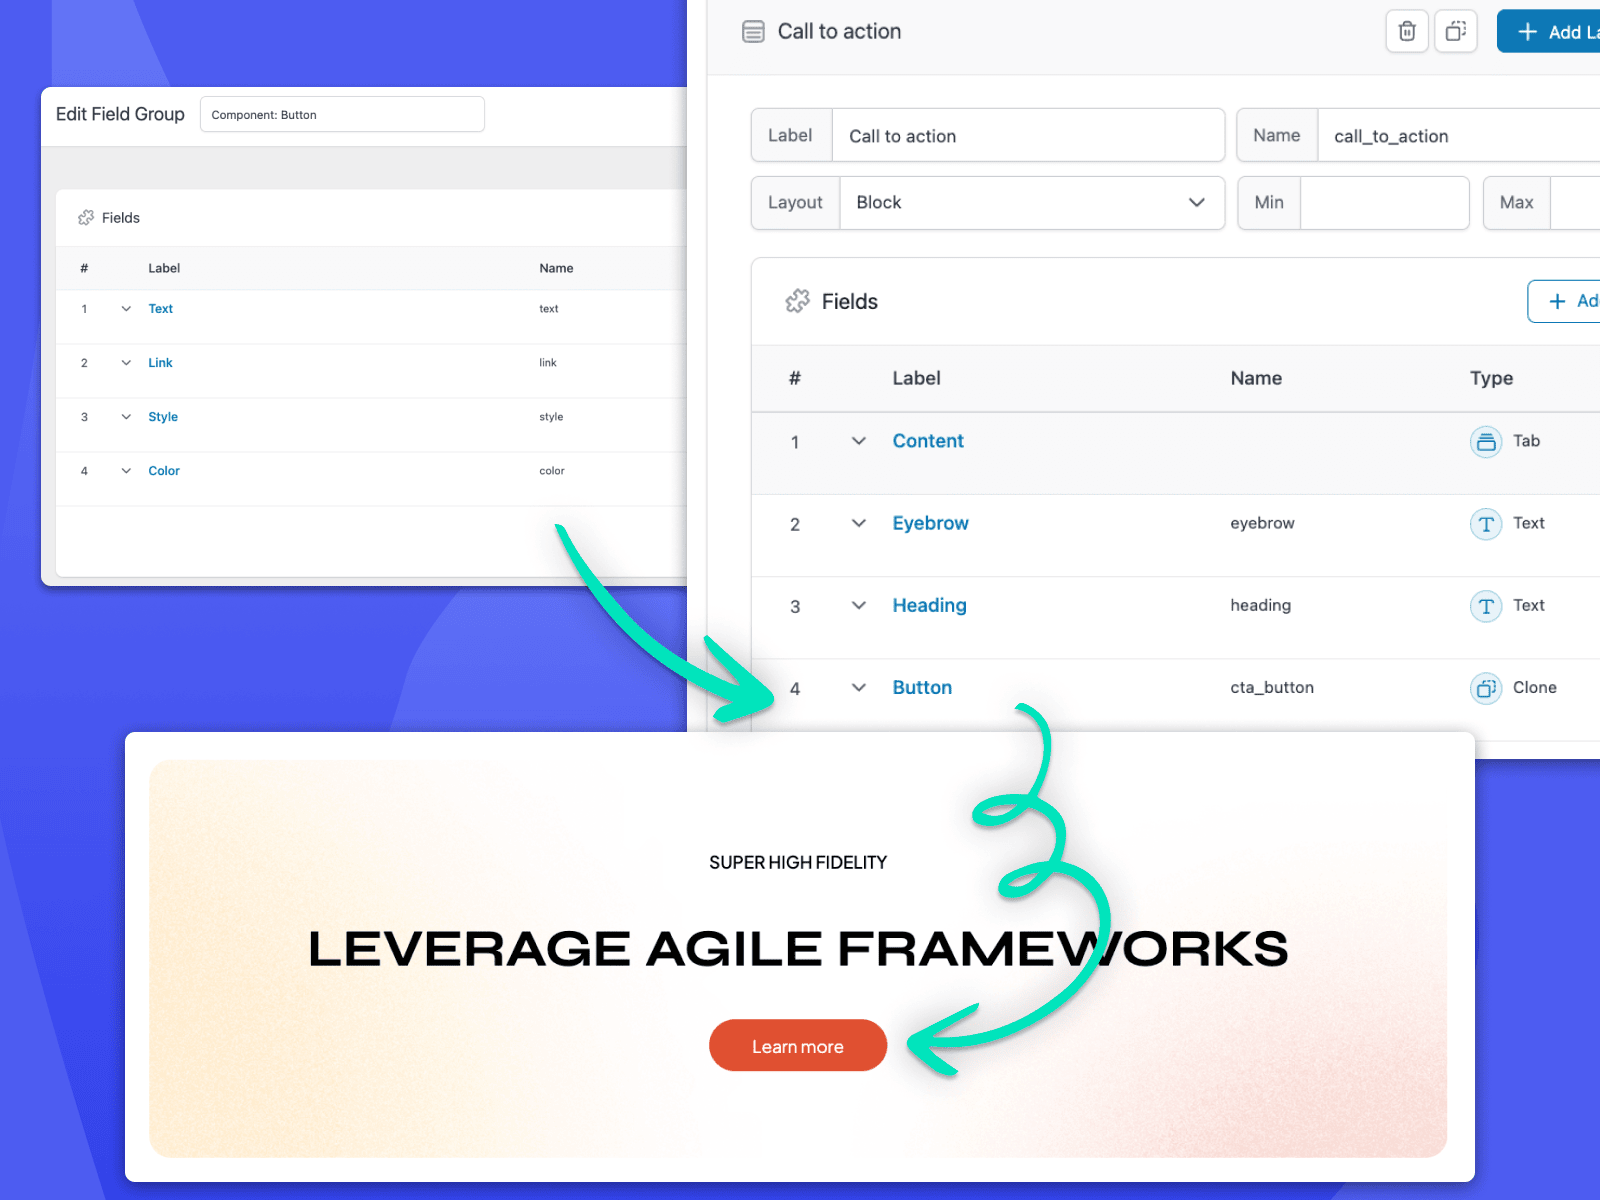
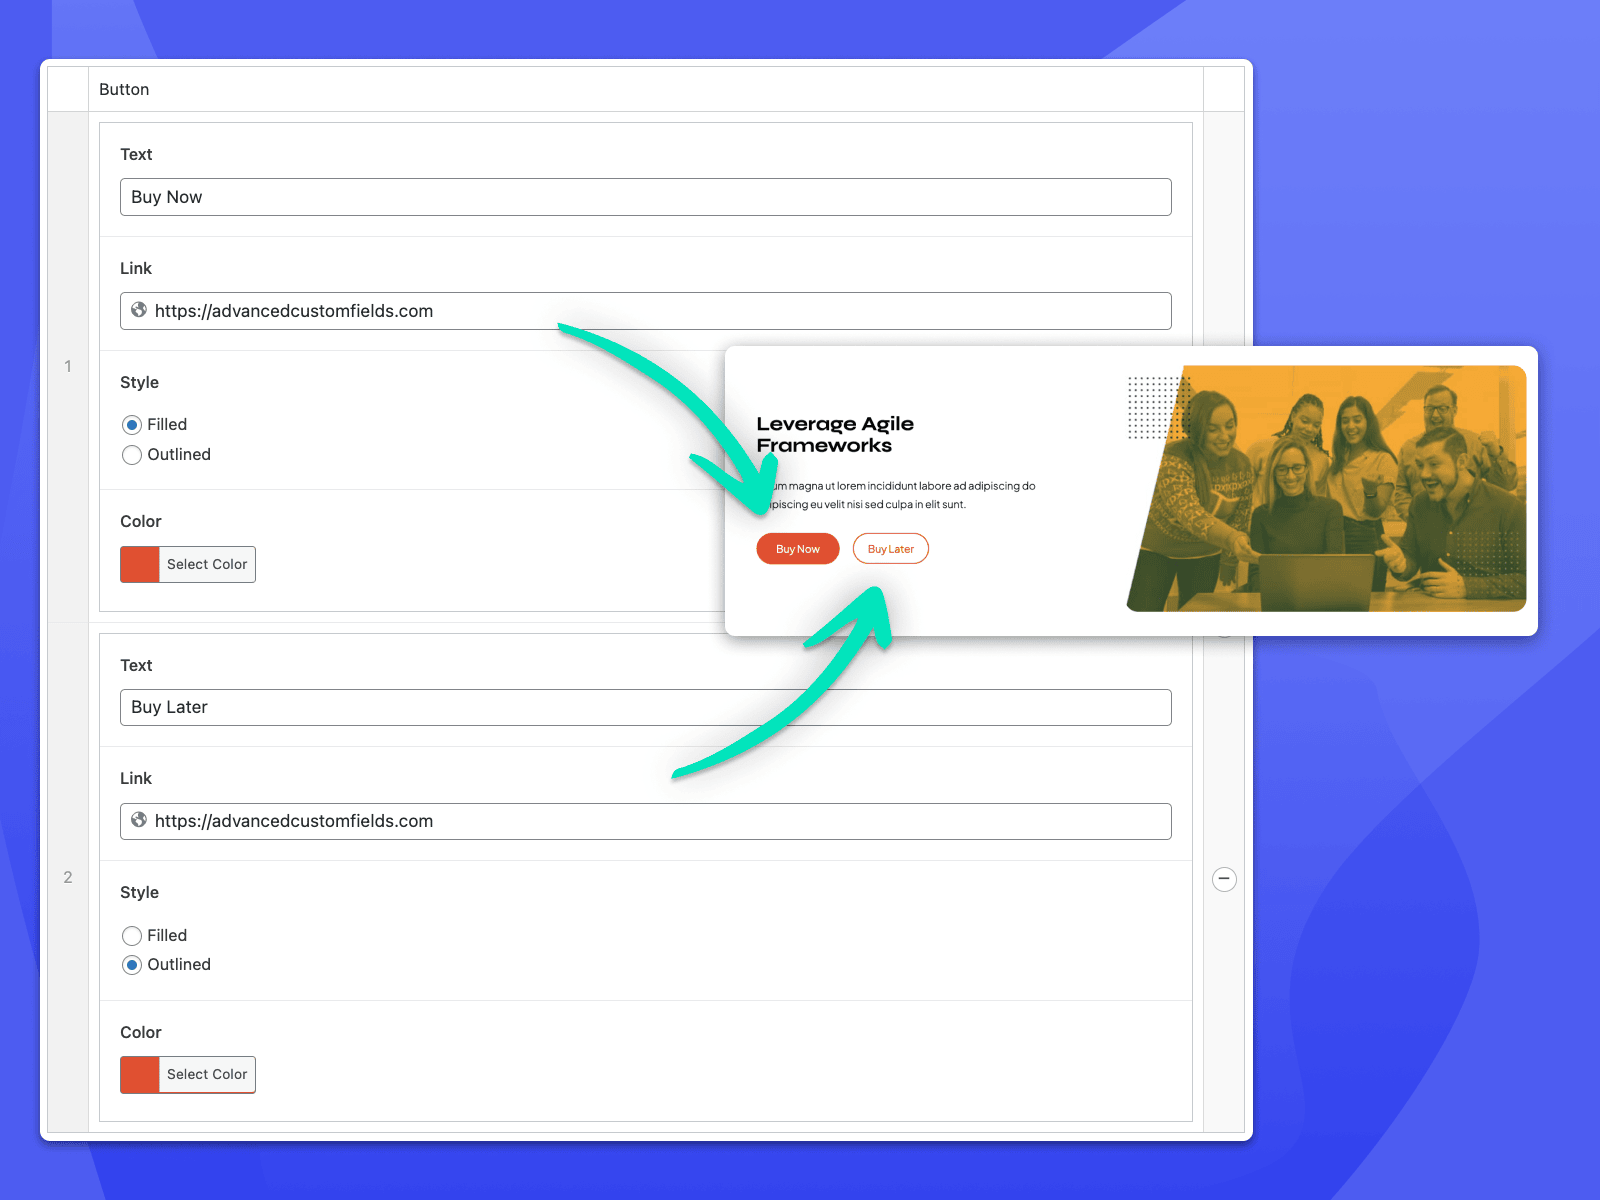
For our simple button, we’ll create a new field group and establish our initial button options:
- A Text field to let site editors know what the button does.
- A URL field so the button does something.
- A Radio Button field to let site editors choose whether the button should appear filled or outlined in appearance.
- A Color Picker field to allow site editors to choose a color from our designated theme palette.
We’ll call this field group “Component: Button”.

Using the Clone Field for Buttons
Now that we’ve created our button component field group, we can start incorporating it into any other field group with the Clone field.
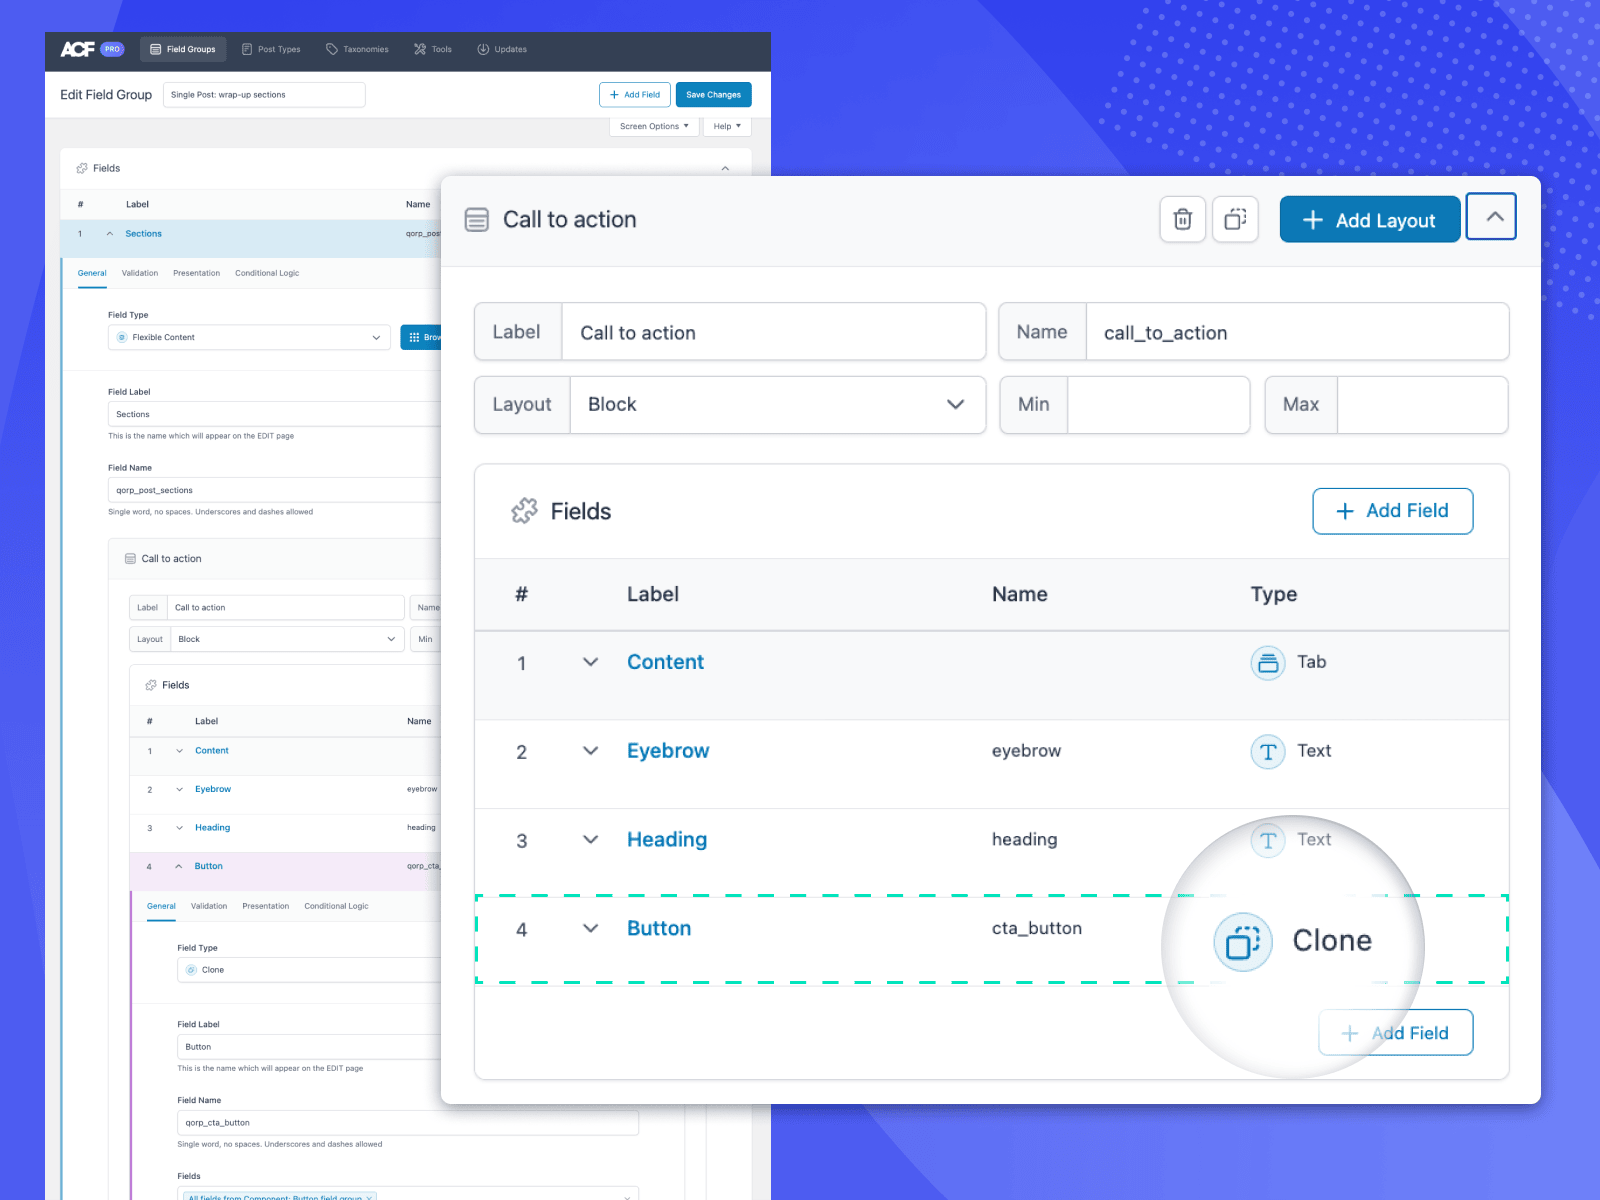
In a previous tutorial we showed you how to use the Flexible Content field to create different sections that editors can add to a post. Buttons were used in some of those sections, but they were all unique and organized differently within each Flexible Content area. Now, we can revisit these sections and replace our individual button fields with our new button component by using the Clone field. This keeps our field groups organized, and gives us a single source of truth for continuously editing and modifying the button component.
If you followed that tutorial, you can open your previously built Flexible Content sections, delete the previous button fields, and then replace them with the Clone field.
Clone Field Settings
Some fields only need a name and label, but the Clone field is a bit different. First, we need to give it something to clone. Once we’ve chosen the Clone field, we can use the “Fields” dropdown to search for our Component: Button field group. Start typing the name of the field you want to clone and it should pop right up. The next step is to choose our other settings, starting with “Display”.
Seamless
Selecting “Seamless” completely replaces the Clone field with the fields it contains. This is most often used to re-use fields within Repeater or Flexible Content fields.
Group
“Group” loads the Clone field itself, pulling in all of the values as an array. The values are not saved as an array, only displayed that way. Each individual field value is saved as normal.
The most typical use case for the “Group” setting is to re-use existing field groups. Switching to this setting opens the “Layout” selector, which defaults to “Block”. This displays fields with their labels top aligned, but it can be changed to “Table” or “Row” to display the selected fields in an alternative format.
Prefixing Field Labels and Names
Turning on “Prefix Field Labels” modifies the labels, prefixing them with the label of the Clone field, i.e., “Button Component: Button Text”, “Button Component: Button URL”, and so on. This is largely about human-readability and identification of the fields used when the Clone field is set to “Seamless”.
“Prefix Field Names” is similar, but actually modifies the field’s name, prefixing the name of the Clone field to the fields it’s pulling in. The field names are what’s actually used to save and load values, so this setting is very handy for avoiding data conflicts when cloning a field with a name that’s already used in the group. This comes up most often when using the “Group” display setting.
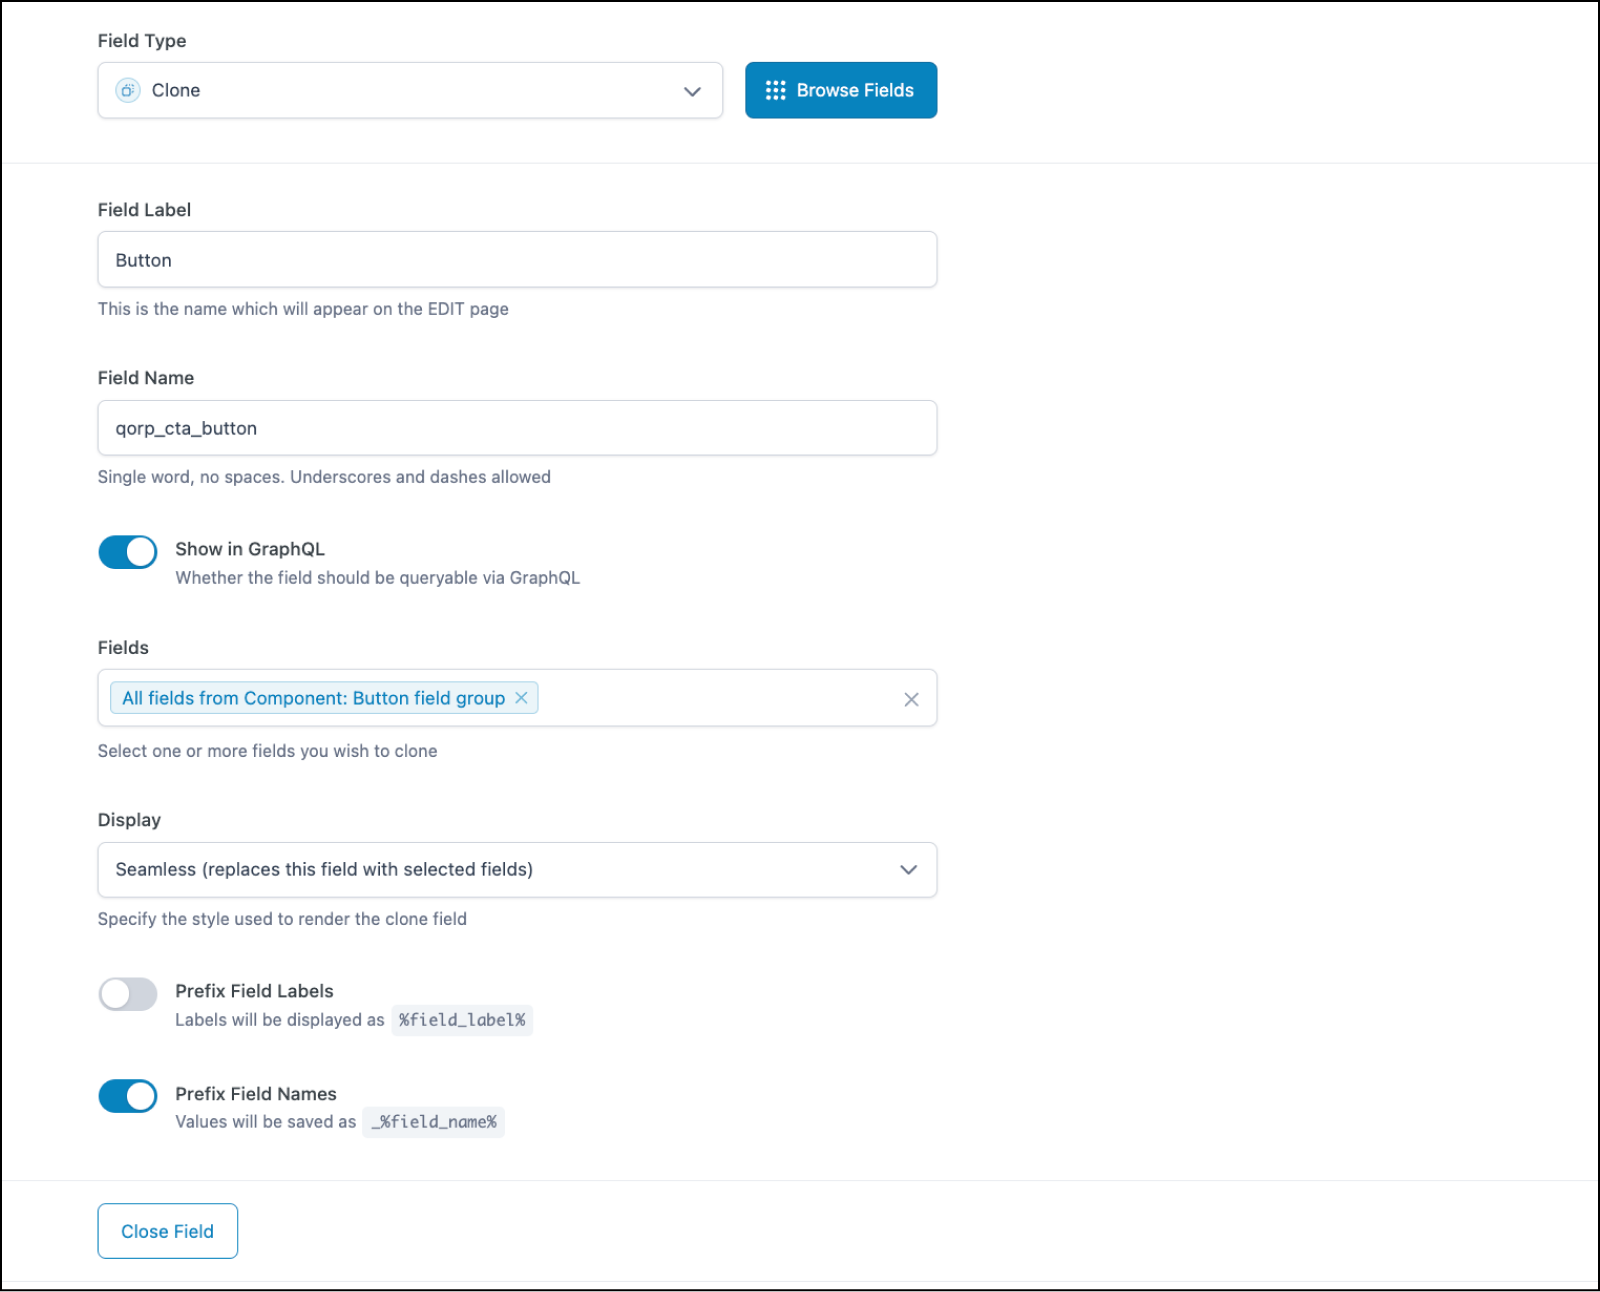
The final goal should inform the choices made when it comes to settings. In general, it’s best to use “Prefix Field Labels” when using a “Seamless” display, and use “Prefix Field Names” when setting the Clone’s field display to “Group”. We’re going to use our new Clone field button in a Repeater field, so we’ve selected “Seamless” and “Prefix Field Names”.
We click Save Changes, and our cloned “Component: Button” field group is ready.
Finally, we can create a Repeater field called Buttons, and then nest a Clone field within that points to our button field group.
This allows us to keep our codebase DRYer (don’t repeat yourself) and makes our field organization nice and tidy.
Adding the Clone Field to Templates
Below are some examples of template helper functions that you could use to output your Repeater buttons with nested button Clone fields.
/**
 * Use ACF Component: Button field to
 * emulate FSE Buttons blocks.
 *
 * @param array $buttons ACF fields.
 * @return void
 */
function qorp_render_buttons( $buttons = array() ) {
    // Make sure we have $args and array.
    if ( empty( $buttons ) ) {
        return;
    }

    ?>

    <div class="wp-block-buttons is-layout-flex">
        <?php
        foreach ( $buttons as $button ) {
            qorp_render_button( $button );
        }
        ?>
    </div><!-- .wp-block-buttons .is-layout-flex -->
    <?php
}

/**
 * Use ACF Component: Button field to
 * emulate FSE Button blocks.
 *
 * @param array $button ACF fields.
 * @return void
 */
function qorp_render_button( $button = array() ) {
    if ( empty( $button ) ) {
        return;
    }

    $button        = $button['button'];
    $button_text   = $button['text'];
    $button_url    = $button['link'];
    $button_class  = $button['style'] ? 'is-style-' . $button['style'] : 'is-style-fill';
    $button_color  = $button['color'];
    $button_styles = '';

    if ( 'is-style-fill' === $button_class ) {
        $button_styles .= 'style="background-color:' . $button_color . '"';
    } else {
        $button_styles .= 'style="color:' . $button_color . '"';
    }
    ?>

    <div class="wp-block-button <?php echo esc_attr( $button_class ); ?>">
        <a class="wp-block-button__link wp-element-button" href="<?php echo esc_url( $button_url ); ?>" <?php echo $button_styles; // phpcs:ignore ?>><?php echo esc_html( $button_text ); ?></a>
    </div>

    <?php
}
Now you can just pass your button’s Clone field data to qorp_render_buttons( $buttons ); in your templates. The full code examples are here:
- Product CTA:
themes/qorp-theme/flexible-content/sections/product-cta.php - Render Buttons:
themes/qorp-theme/functions.php#L68
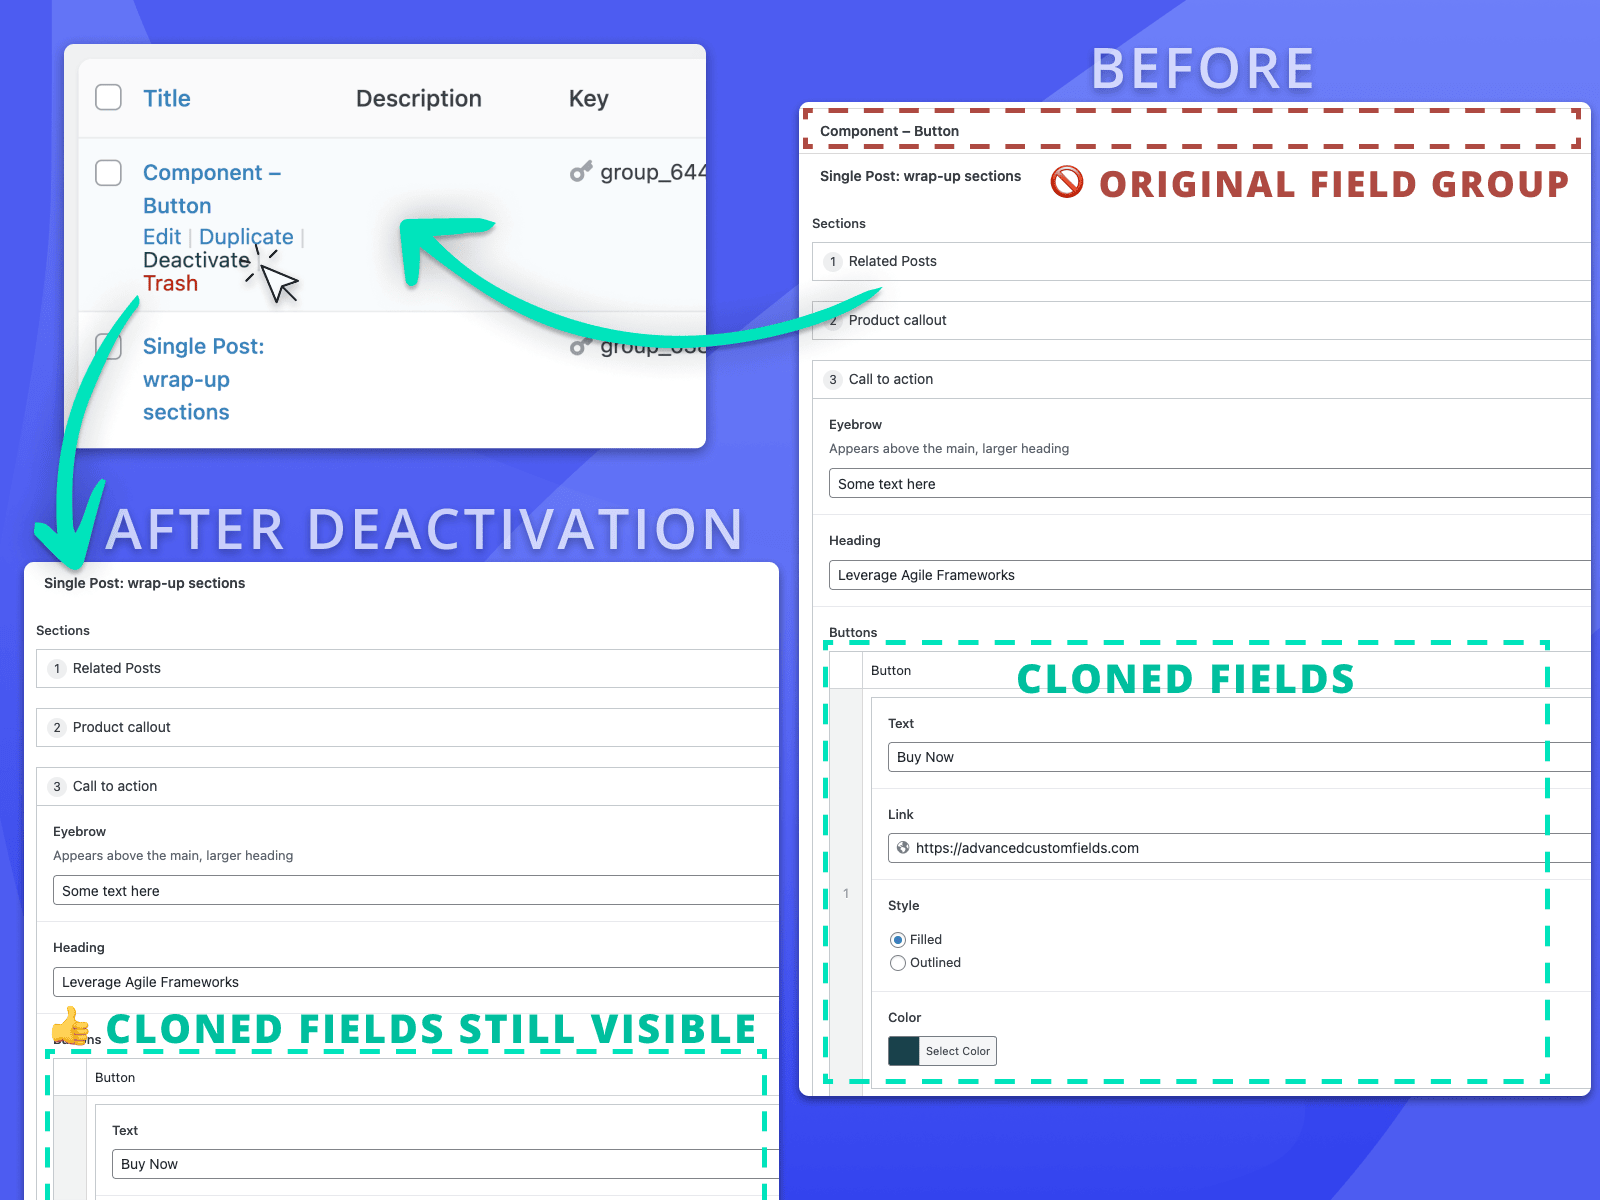
Deactivating Field Groups
Often when you build a field group and clone it into another field group, you’ll want to deactivate the original field group so it doesn’t show when editing a post. The field group will still be shown wherever it is cloned, just not as a unique standalone group.
Conclusion
We focused on buttons for this tutorial, but the Clone field is a great tool for any situation where you need to create reusable components and pull them into multiple field groups. Rather than creating them over and over again, you can create them once and clone them wherever they’re needed. As Joe Lambert of Rareloop noted in our case study, this sort of componentization leads to a smoother, faster workflow and greater satisfaction for both clients and developers.
“For example, a client may want a small alteration to the title field, say to add a smaller line of text above it. That’s not something we want to code every single time,” says Joe. “But because of the ACF Clone field, we can just write some logic in one place and bring that in.”
This tutorial covers the basics of how to use the Clone field, but there’s much more to explore. Make sure to hit us up on Twitter and let us know how you’re using the Clone field in your projects.
For more on how to get the most out of your PRO fields, make sure to read our tutorials on how to use the Repeater field, how to build layouts with the Flexible Content field, and how to use the Gallery field.
Supercharge Your Website With Premium Features Using ACF PRO
Speed up your workflow and unlock features to better develop websites using ACF Blocks and Options Pages, with the Flexible Content, Repeater, Clone, Gallery Fields & More.
Related
- Field Types: Clone
- Guides: Building Layouts With the Flexible Content Field in a Theme
- ACF Blocks: Inline Editing for ACF Blocks
- Getting Started: Creating a Field Group
- Videos: ACF Unlocks the True Power of WordPress
